Have you ever pumped gas or mow the lawn? After you do those activities, the gasoline often spills and leaves fumes or stains on clothes.
You need to take care of the cloth carefully since gasoline is highly flammable. A small stain will be easy to handle, but if the gasoline covers a wide area? You should use not only water and detergent.
Here are some tips to remove the smell from your clothes. Keep reading.
1. Let the Cloth Air Dry
Don’t dry the cloth using dryer because the heat will help set stains. Hanging the cloth outside for 12-24 hours will help dissipate the smell before you wash it with washing machine.
2. Remove the Smell (and Stain)
If you don’t have time to wait for 12-24 hours or if the smell is still too strong, there are some other ways:
Use White Vinegar Splash
Instead of air the cloth out, soak it in distilled white vinegar for more than an hour. Rinse it, and wash the cloth as usual with detergent. Vinegar is well-known for containing natural acid which can freshen difficult odors within clothing.
Use Baby Oil
Unfortunately, the smell of gasoline won’t go away unless you remove the stain. Baby oil helps! Pour baby oil on the stain and wash the cloth.
Use Baking Soda
Baking soda is one of the most famous powder used for its excellent absorption capability. Besides, it is cheap and easy to find.
To absorb the stain and smell, put a half cup of baking soda together with your detergent and the affected cloth in the washing machine.
Another method to use baking powder is by sprinkling the powder onto the stain and leave it for a few minutes. For some types of fabric, this process needs to be repeated.
Use Coffee Grounds
The strong scent of coffee could help neutralize the gasoline smell. Cover the stain with coffee grounds and let them for few hours. This also works on gasoline spills in cars or carpets.
Use Liquid Dish Soap
Rub two tablespoon of dish soap on the stain. Wait for five to ten minutes before soaking the cloth into hot water for 30 minutes.
The formula contained in dish soap is good for removing greasy and oily stains. To maximize the removal, use hot water that is safe for clothes.
3. Wash the Cloth Alone
Washing the stinky cloth with others will only spread the smell. Other clothes will be contaminated. Therefeore, always wash the stained and smelly cloth solo.
Using dryer is not recommended since it can be dangerous since the heat could trigger the gasoline which might be left in the cloth. Hanging it to dry is the best and safest choice. Remember that gasoline is easily burned.
If the smell still lingers, you may repeat the steps to wash again as necessary. After all, be aware of your surroundings and it is better to prevent before those things happen. If it does happen anyway, always take extra care of your clothes.
Even though detergent is advised to avoid in this case, it is proven to be effective if you use Oxiclean.
1. First, prepare a bucket of hot water
You can actually add cold water first and add boiling water until it gets to expected temperature. Make sure the bucket is big enough to contain all of the water and the towels added in it.
2. Second, add 2/3 cup of the Oxiclean into the bucket
Swish the detergent so it mixes well with the water. You can try tilting the bucket back and forth gently or stir using your hands. If you do this, please wear a pair of gloves to protect your skin. Use other tool as well to prevent injury from hot water contacting your skin.
3. After halfway fill the bucket with the mixture, add the towels
Please make sure that all of the towels are fully immersed in the water. Leave the towels and let them soak for around 48 hours or the whole two days.
4. After 48 hours, take the towels out of the bucket and wring them
Transfer the towels to your washing machine. Wash them using hot setting with detergent and cloth softener. Then, immediately dry your towel.
Than, here is the other way you can do to remove mildew smell from your favorite towels.
Using Baking Soda and Vinegar
This is often recommended as the safest solution. If this trick doesn’t work, you can try the previous method.
Put the stinky towels into your washing machine and wash using hot washing setting. Add around a cup of vinegar and a cup of baking soda in it, and wash a bit. If you don’t have both ingredients, you can use one of them with the same total amount to add.
When the vinegar and baking soda are well mixed with the water, turn off the washing machine. Soak the towels in there for a full hour. After an hour, turn the washing machine back on and continue washing as usual.
When the washing cycle is finish, add a cup more of vinegar and your usual detergent. Use the same amount of detergent as you usually use for a load. Wash using the same cycle once again and finish with extra one cycle of spinning.
Last, put the towels to dryer two times. If you need to, hang the towels for a while to completely remove any moisture from them.
It is often recommended to use detergent while removing mildew smell from towels. However, it can be an effective alternative when baking soda and vinegar don’t work well.
Oxiclean is a good alternative to the usual detergent but make sure to use appropriate tools to protect your hands. Happy trying!
Introduction: Embracing the Festive Spirit with Front Porch Christmas Decor
As the holiday season approaches, it’s time to embrace the joy and warmth it brings. One of the best ways to spread this cheer is by decorating your home, and what better place to start than your front porch? Front porch Christmas decor not only adds a festive touch to your home but also welcomes your guests with the spirit of the season. In this blog post, we will explore various ideas and tips to make your porch look merry and bright.
Creating a Welcoming Entryway with Festive Decor
The Importance of a First Impression
🌟 First impressions matter! Your front porch is the first thing people see, so make it count. Transforming your entryway with Christmas decorations can create an inviting and joyful atmosphere.
Key Elements to Consider
Lighting: String lights, lanterns, or even a pre-lit Christmas tree can add a magical touch.
Wreaths and Garlands: These are classic and can be customized to fit any theme.
Color Scheme: Whether you prefer traditional red and green, elegant gold and white, or something more unique, choose a color scheme that reflects your style.
Deck the Halls: Creative Ideas for Front Porch Christmas Decor
Rustic Charm
🌲 Embrace the beauty of nature with a rustic theme. Use natural elements like pine cones, wood, and burlap. Add a touch of greenery with a pine wreath or a garland.
Modern Elegance
💫 For a more contemporary look, opt for minimalist decorations. Think clean lines, geometric shapes, and a monochromatic color palette.
Vintage Holiday
🎄 A vintage-themed porch can create a nostalgic and cozy feel. Use retro ornaments, old-fashioned lanterns, and classic red and green colors.
DIY Decorations: Adding a Personal Touch
Handmade Wreaths
🎨 Crafting your own wreath can be a fun family activity. Use materials like ribbon, ornaments, and artificial flowers to create a unique piece.
Festive Planters
🌿 Convert your regular planters into holiday-themed ones. Use seasonal plants like poinsettias and add festive bows or ornaments.
Custom Door Signs
🚪 Create a welcoming sign with a holiday greeting or your family name. This can be painted or made from wood or metal.
Maximizing Small Spaces: Tips for Smaller Porches
Vertical Decor
📏 Utilize vertical space with hanging decorations or tall, slim trees.
Compact Furniture
🪑 Choose smaller furniture pieces or foldable chairs that can be easily moved or stored.
Simplified Design
🌟 Focus on a few key elements to avoid clutter. A single wreath or a string of lights can be effective.
Ensuring Safety: Tips for Outdoor Christmas Decorations
Important Note: Safety first! Always use outdoor-rated decorations and lights, and ensure that cords are not a tripping hazard.
Weatherproof Decorations
🌧️ Choose decorations that can withstand outdoor conditions like rain, snow, and wind.
Secure Installation
💪 Make sure that all decorations are securely fastened to prevent any accidents.
Conclusion: Spreading Holiday Cheer with Your Front Porch
Decorating your front porch for Christmas is a wonderful way to spread holiday cheer and create a warm welcome for your guests. Whether you prefer a traditional, modern, or rustic theme, there are endless possibilities to express your holiday spirit. So, get creative, have fun, and let your front porch shine this festive season!
Table: Front Porch Christmas Decor Ideas
Theme
Key Elements
Ideal For
Rustic Charm
Natural elements, pine wreath, burlap
Nature lovers
Modern
Minimalist, monochromatic, clean lines
Contemporary homes
Vintage
Retro ornaments, classic colors
Nostalgic touch
DIY
Handmade wreaths, custom signs
Personalized expression
Small Spaces
Vertical decor, compact furniture
Limited space
Safety First
Outdoor-rated, secure installation
Ensuring a safe holiday
Remember, the key is to let your personal style shine through your front porch Christmas decor. Happy decorating! 🎅🎉
Performing yard work and fueling the car often leave us with smelly souvenirs. The spill that contacts our hands will have strong lingering odor that provides challenge to treat and clear.
If you have the same problems, try the following alternatives to remove it. Fresh smelled hands are no longer a dream.
These 4 ingredients work quickly to remove gas odor or smell from hands:
1. Using Baking Soda
You will need to make a paste out of it first. Mix together three parts of water and one part of baking soda in a small mixing bowl, and stir everything together until the mixture reaches paste texture.
Pour the solution to your hands and rub thoroughly for around one minute. Don’t rub too strong. You only need to make sure you are thorough, reaching the hidden parts too.
Then, rinse with flowing water. If the smell still lingers, you can try to repeat the steps two or three more times until the smell vanishes. It won’t cause any side effect.
First, prepare one to two teaspoons of salt in a cup and place them on the side of your kitchen sink. Then, wet your hands, followed by your fingers and palms.
Apply the dish detergent on all parts and add the salt within your hands. Rub the dish detergent and salt between your palm and all parts of your hands until clean.
You can repeat it if the smell still lingers. This method offers similar result to breaking apart the chemical bounds in grease. Depending on the effectiveness of the dish detergent, you may need to repeat it for ultimate result.
3. Using Lemon Juice
Lemon contains citric acid which will be the most affecting agent in this solution. To get rid of the gasoline smell in your hands, mix one part of lemon juice with one part of water in a cup. Stir until it mixes perfectly.
Then, use the mixture as soap on your hands. Rub thoroughly on all parts of your hands, including the hidden parts.
Rub for at least one minute for ultimate remove. You can repeat the procedure, but give it a rest after three times to prevent skin irritation if it is sensitive.
Image: fashionlady.in
4. Using White Vinegar Splash
Vinegar has several properties that actually break the bonds of gasoline chemical properties. You don’t need to mix it with other solutions.
Use a small cup of vinegar and apply it on your hands. Make sure it touches the hidden parts as well. Then, rub your hands thoroughly for around 30 to 45 seconds.
Rinse under flowing water from your faucet. Repeat the procedure to entirely remove the smell. Depending on the condition, you may need to repeat from two to three times.
Those tricks above should help breaking gasoline chemical properties apart and remove the smell. Your hands will feel clean again. They won’t likely cause any side effect unless your skin is very sensitive.
In addition to it, the solutions are available at your house. It is recommended to immediately clean your hands to give bigger effect. Happy trying!
Our house carpet is probably one of the most parts of the house that experience a lot of stains and damages. Among the entire threats, urine is maybe one of the worst.
There are basically two recommended ways to handle this, depending on what urine smell you want to remove.
If you desperately need some helps, check out the following tricks.
You cat can cause an accident as well. When you cat leaves urine stain on it, the stain and smell need to go away right away. Try the following steps to remove the stand and the smell as well at once.
Make a paste out of baking soda and water mixture. You need to add the water slowly until it reaches paste texture. Use a small bowl for mixing.
Wear a pair of rubber gloves and apply the paste on the affected area. Make sure that the entire surface is well covered with the paste. Leave it for a while to remove the stains and smell.
Take some distilled vinegar and pour it on top of the area. Don’t pour too much. Just add by little to make sure all area is well covered.
Press and blot the entire moisture on the carpet surface. You can use clean towels and paper towel. Just press and bolt, and don’t rub it.
If the smell or stain lingers, repeat the entire steps once again.
It is recommended not to repeat the entire procedures more than twice due to the possibility of damaging the carpet more.
You are going to need a slightly different method to remove the smell of your kids’ urine on the carpet.
The following method is a do-it-yourself kind so you don’t need a lot of other products to use and you can do it alone at home.
Instead of using the baking soda, you should use cornstarch this time. Take a generous amount of it and use it to cover the entire affected surface. Please make sure to pour it evenly until it covers the entire surface. Don’t rub it.
Once the cornstarch covers the entire surface, leave it for around 30 minutes. It should help in eliminating stains and remove the smell as well.
After 30 minutes, rinse the area with clean water.
Then, use clean and dry paper towels or cloth towel, and press it on the surface to absorb any moisture in it. Keep doing it it until your carpet is dry enough. Make sure not to rub it or the cornstarch and water spread to the sides.
This method can be applied to remove the smell of dog pee as well. It is also recommended to apply it as soon as you get the stain to provide easier result.
You don’t need to specially dry clean or wash it on professional service. The methods above are proven to be effective and easy to apply. Have a try!.
Mirror is a crucial part of a makeup vanity. Considering how it plays important part on the function, several sets are made to deliver the best help to users.
There are more than enough set available to buy today, and several of them are great ideas to actually adopt.
If you look for enriching your room look and function, these ideas will amuse you.
1. Three-Pages Horizontal Mirror Vanity
This is an elaborated version of the traditional horizontal mirror. It still provides you with enough angle on the sides, which is beneficial when it comes to self makeup session.
The difference lies on its design. Instead of made of a single mirror, it is made of three mirrors, one large in the center and two small at the sides.
You can narrow the side mirrors, so it displays the side of your face closer. It helps a lot while checking if your makeup is fine on those sides in ease. Vintage styles have a lot of this version but modern styles follow now.
This kind of set doesn’t necessarily mean it is made as a single item. The fun fact is its mirror is actually separated from the vanity.
It looks like separately added to the set, but it’s not. Usually, it presents the same style and similar finish to show consistency. Being matching, it makes a wonderful set.
The benefit of buying this kind of set lies on the possibility to replace the mirror one day without any hustle. We only need to get a new mirror with resemblance in concept or finish, and we are good already.
It was first introduced by vintage sets but it becomes something that is commonly offered by modern style as well.
Basically it features three different parts that stand alone while completing each other. The main part is the mirror. It stands alone and it commonly has huge size, enormous maybe.
To complete the set, owner will be provided with a nice looking stool to stand and a small table for your makeup kits. It is often featured in photography projects.
It looks stunning and stylish while being functional at the same time. All items in the set are made of the same materials, designs, and details. You don’t buy them separately.
4. Standard Set with LED Bulbs
This is popularly referred to makeup artist vanity sets. They have standard vanity design and sizes, and a big mirror is attached on top at the center of the vanity. We are allowed with a single seat in front of the mirror, and we get several bulbs framing the mirror.
It is commonly used for professional makeup session as it provides the best display of the makeup. Instead of standard bulbs, people now prefer on LED for it. It gives brighter lighting while it is energy saving and economical as well.
So, instead of using plain vanity mirror set, you should consider using these sets. They offer full functionality while they are gorgeous as interior item. It improves the room as well as helping you with the makeup session. Happy choosing!
The holiday season brings a wave of cheer and a desire to infuse our homes with the spirit of Christmas. The kitchen, being the heart of the home, is a prime candidate for a festive makeover. In this comprehensive guide, we’ll explore various Christmas kitchen decor ideas that will help you create a space brimming with holiday joy. From rustic charm to modern elegance, these ideas cater to every style and help bring the magic of Christmas into your kitchen.
🌟 Setting the Festive Tone: An Introduction to Christmas Kitchen Decor
Christmas kitchen decor isn’t just about hanging a few ornaments or setting up a miniature tree on the countertop. It’s about creating an atmosphere that reflects the warmth, joy, and comfort associated with the holiday season. Whether you’re hosting a grand Christmas dinner or baking cookies with the kids, a festively decorated kitchen sets the perfect backdrop for these cherished moments.
The Heart of Holiday Gatherings
The kitchen is more than just a place to cook. It’s a gathering spot for family and friends, a place for laughter and sharing. Decorating this space for Christmas enhances these experiences, making every moment spent in the kitchen more memorable.
🎄 Essential Elements of Christmas Kitchen Decor
To start your Christmas kitchen transformation, consider these essential elements:
🎅 Color Schemes: Choosing Your Palette
Traditional Red and Green
Nothing screams Christmas more than the classic red and green palette. These colors can be incorporated through table linens, dishware, and small appliances.
Winter Whites and Metallics
For a more sophisticated look, opt for winter whites complemented by gold or silver accents. This palette brings a touch of elegance to your kitchen decor.
🌲 Natural Touches: Incorporating Greenery
Evergreen Garlands and Wreaths
Drape evergreen garlands over your kitchen cabinets or hang a beautiful wreath to bring in the natural beauty of the season.
Potted Poinsettias
These classic Christmas plants can add a splash of color and warmth to any corner of your kitchen.
🌟 Lighting: Creating a Warm Glow
Fairy Lights
String fairy lights along shelves or around windows to create a cozy, magical ambiance.
Candle Displays
Group together festive candles on your kitchen island or dining table for a warm and inviting glow.
🍽️ Table Setting: Festive and Functional
Holiday-Themed Dishware
Use Christmas-themed plates, mugs, and serving dishes to serve up your holiday meals in style.
Decorative Centerpieces
Create a stunning centerpiece with holiday ornaments, candles, and greenery to elevate your Christmas table setting.
Important Note: Always prioritize safety when decorating with lights and candles, especially in a kitchen setting. Ensure all decorations are securely placed and away from heat sources.
Transforming Spaces: Christmas Decor Ideas for Every Part of Your Kitchen
🥣 Countertops and Islands: Utilizing Your Workspace
Festive Jars and Canisters
Fill clear jars with holiday treats like peppermint candies or homemade cookies for both decoration and snacking.
Miniature Christmas Trees
Place a small, decorated Christmas tree on your island or countertop for a festive touch.
🚪 Cabinets and Shelves: Maximizing Vertical Space
Garland and Ribbon Accents
Decorate the tops of your cabinets with garlands and ribbons for a touch of holiday cheer.
Festive Display Shelves
Transform open shelves into display areas for Christmas-themed dishware or holiday figurines.
🖼️ Windows and Walls: Bringing the Outside In
Window Decor
Hang wreaths or snowflake decorations on kitchen windows to create a beautiful view both inside and out.
Wall Art
Replace regular wall art with Christmas-themed pieces or hang homemade holiday crafts for a personal touch.
🪑 Seating Areas: Comfort and Joy
Chair Decorations
Tie ribbons or hang small wreaths on the back of kitchen chairs for an instant festive upgrade.
Cozy Cushions and Throws
Add holiday-themed cushions and throws to your kitchen seating for extra comfort and style.
🍴 The Dining Table: Center of the Festivities
Festive Table Runner
Lay out a Christmas-themed table runner as a foundation for your holiday table setting.
Tabletop Trees and Ornaments
Use miniature trees, ornaments, and candles to create an eye-catching and festive table centerpiece.
📋 A Handy Table of Christmas Kitchen Decor Ideas
Decor Element
Ideas
Color Schemes
Red and Green, Winter Whites and Metallics
Greenery
Evergreen Garlands, Potted Poinsettias
Lighting
Fairy Lights, Candle Displays
Table Setting
Holiday-Themed Dishware, Decorative Centerpieces
Countertops and Islands
Festive Jars, Miniature Trees
Cabinets and Shelves
Garland Accents, Festive Display Shelves
Windows and Walls
Window Wreaths, Christmas Wall Art
Seating Areas
Chair Decorations, Cozy Cushions
Dining Table
Festive Table Runner, Tabletop Trees
Wrapping Up: The Joy of Christmas in Your Kitchen
Decorating your kitchen for Christmas is a wonderful way to spread holiday cheer throughout your home. Whether you prefer a traditional or a modern theme, there are countless ways to incorporate festive elements into your kitchen decor. Remember, the most important aspect of Christmas kitchen decor is creating a space where memories can be made and cherished. So, get creative, have fun with your decorations, and most importantly, enjoy the magic of the season in your beautifully adorned kitchen.
Dining Room play big roll to alter the atmosphere in the house. Moreover, dining room is the perfect place for gathering family while enjoying delicious meal. Aside from the food served, dining room also play big role in entertaining guest who visit the house.
Simply saying, with all those function and benefit that dining room have, it is important to make your dining room look attractive, bright the mood up, and also bring the appetite of the family or guest.
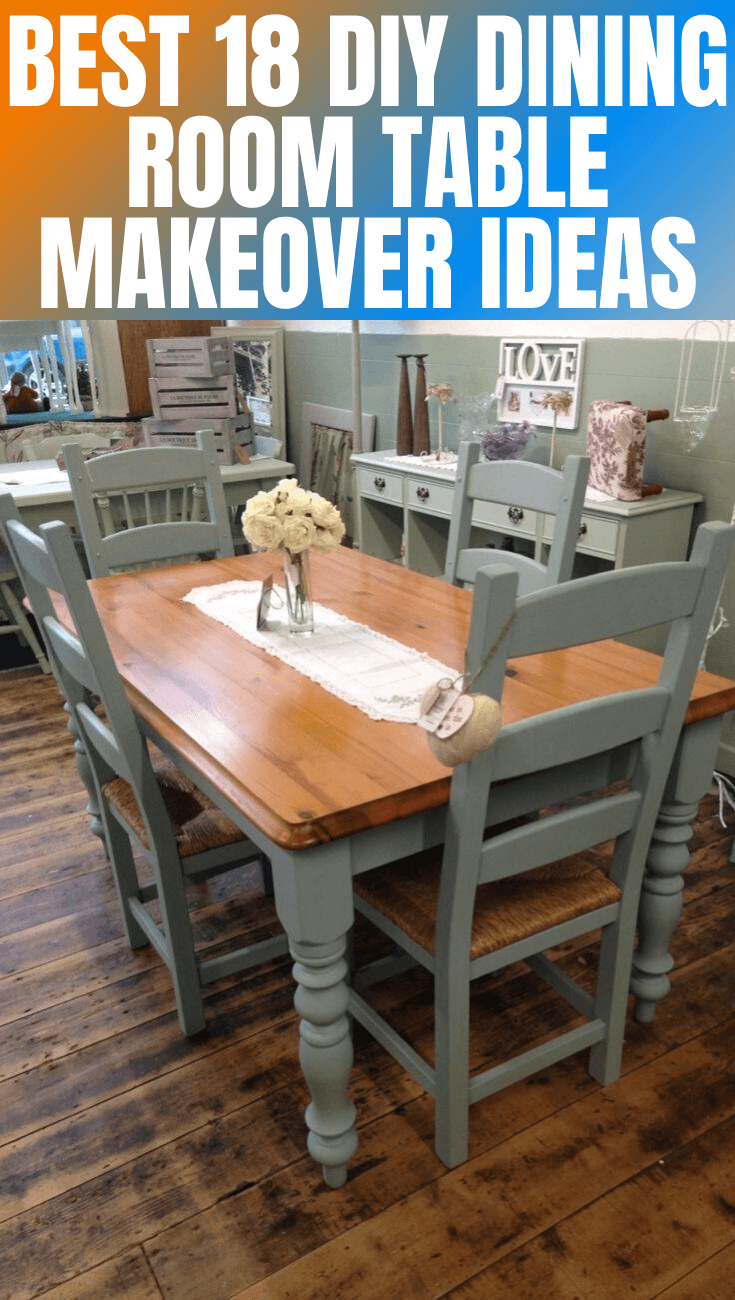
Many people believe that in order to decorate dining room to be very luxury and classy needs high budget. Even so, there are some simple, easy and cheap way for you to realize DIY Dining Room Table Makeover Ideas.
And also, here is the best choice to DIY dining table makeover ideas that I’ve collected for you. Hope it’s help you.
1. Dining table makeover ideas for small family
Most often, family which had few member which consist of father, mother and two children, prefer to decorate their house in simple. Even so, it is not a sin to try something different to the house, especially in dining room area.
You do not need to throw all your dining equipment and change with the new one. What you need to do is upgrading those what you had into finer look. Therefore, it is called as Easy and Cheap DIY Dining Room Table Makeover Ideas.
Image: homedit.com
Repainting old dining table
First step, you can begin with re-painting your old dining table, in order to change the atmosphere. You can also re-painting your dining room wall with the brighter color, if your previous dining room have dark colored wall.
Then, for your dining table, paint it adjusting to the room color. White dining table is currently very fancy, as make the table looks clean and large. You can also draw something on the table, like by making spoon and fork drawing, or other drawing which will match with dining room concept. Do not forget to apply driftwood finish, after painting the table.
Recover dining seat
Second step, recover your dining seat. Chose the best fabric which you will use for the seat cover. You can use recycle t-shirt or curtain fabric, and then cut it into seat size, then glue and staple in the bottom part of the seat. Let it dry for a day, and then put it back on the chair.
Decorate dining table
Third step, in order to make new atmosphere in your dining room, one of Easy and Cheap DIY Dining Room Table Makeover Ideas, is by decorating items on the dining table. If the previous dining table you hadn’t any vases or decoration on it, then try to put a small fake flower vase on it, or other kind of plants. Enough with placing one with the simple look, and make sure that the decoration will not cover your family and guest’s face, when you have a talk with them.
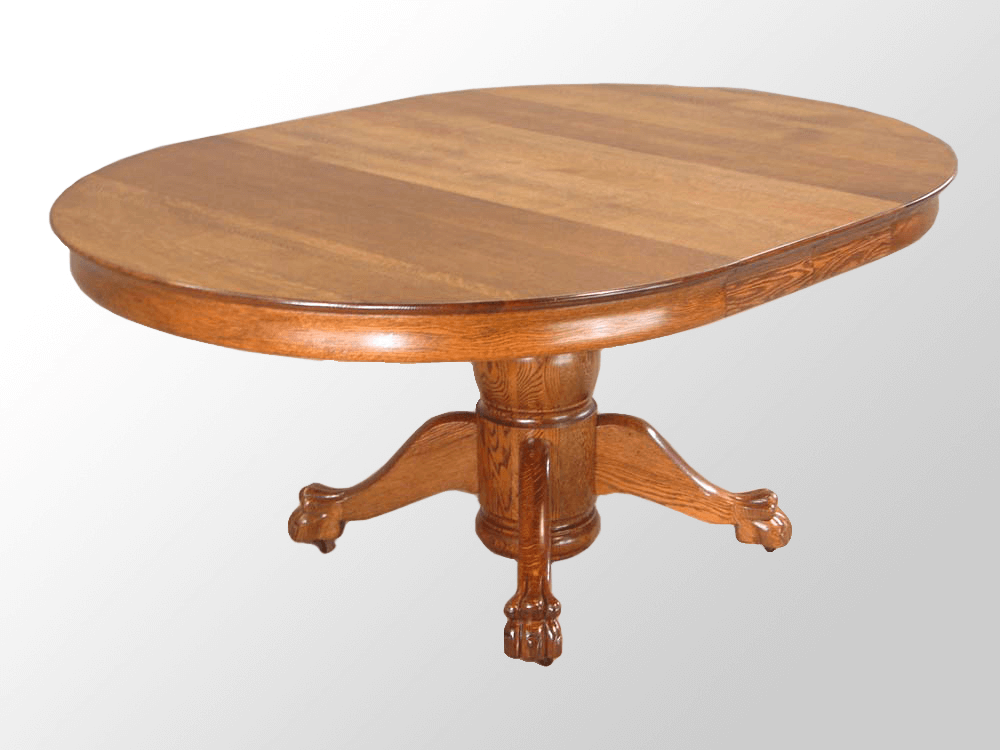
2. Round Wooden Dining Room Table makeover
Wooden dining table with round shape usually have single oak dark color, which make it look classic but also old. If you had this type of dining table, you can follow this simple DIY Dining Room Table Makeover Ideas in order to redecorate the dining table, and make the dining room atmosphere finer and also bring up the appetite.
First, sand the tiny layer on the surface of the table. Do not sand it too hard, as it will make the wooden patter break and become thinner. Then, apply weathered oak stain on the table surface, in order to enhance the natural wooden pattern on it. You can choose the dark stain to make the natural pattern look more stand out.
If the natural color of your table isn’t that dark, you can also adjust the stain to its basic color, as long as it can show off the natural pattern on it. In the way painting it, you need to make tiny layer first and then continue layer by layer until it look glassy. Then leave it for 24 hours until it really dry.
Afterward, then paint the table feet with different color. White color is better to create the clean and bright look on the dining table. White also color which can adjust to any color, without making the table look odd or unbalance. Then, leave it until dry. Afterward, do not forget to apply polycrylic protective finish, to make the paint last longer and look glossy. This DIY Dining Room Table Makeover Ideas can adjust to classic, vintage, and even modern concept of dining room.
After the repainting of dining table settled, then you can decorate your dining table by placing item on it, like vase for example. In choosing on-table decoration, make sure the item is adjusted well with the concept of your dining room. In example, if you want to create unusual concept, you can put small plant pot inside squared glass jars. You can also search some decorations which will fit to your DIY Dining Room Table Makeover Ideas in some online stores.
3. Repainting to stronger color
This is well exemplified by Emmie, at her blog blue 11 interiors. By buying a set of dining tables and chairs used, she had a very beautiful makeover as she wished. This is the look of dining room table and chairs makeover before and after.
4. Repaint with combination colors
If you get bored with one color, you can makeover the color of the dining table with two or more coordinated colors. Jennifer has done well. Inside her site, celebratingeverydaylife.com, she explained that it could be an exemplary option.
5. Add a stencil layer
Not only stenciled, you can do chalk painted to diy dining table makeover as ideas. Brittany, at the prettyhandygirl.com will show you step by step to do that. Than finally, you will see the ending, dining table makeover before and after like this:
Before:
After:
6. White base and stain top
Making the top of the dining table look artistic and old, it was charming. Stain the top of table, the lightly whitewash to get more beautifully aged look. White base and old top. This paintmewhite.com will show you step by step to do this.
7. Create look like zinc covered top table
This makeover ideas DIY for dining room table. Michelle in her blog, thatmommyblog, will tell you for the way, step by step. I think it’s incredible. That’s not really zinc, but the paint formula make it happen.
8. Cover top table with real zinc
And now, it’s using real zinc. You also can using others material as cover table, like stainless steel, copper, or others sheet metal. You must be careful to do it. Angela at unexpectedelegance.com has shown you how. Than, it is the result to give you some big ideas to doing yours.
9. Repaint from black or dark to brighter
The color black or dark is nice, it’s just sometimes look less fun. So you can make a makeover. You can choose a lighter color. The project on this site, Everyday Lovely, seems an interesting example. See the result below.
10. Weathered look dining table makeover ideas
You can re-stain the table, all of part and strip it. The clear step by steps have been shown in this site, simpledetailsblog. Finally, I show you the point for get ideas for you to do makeover.
Before:
After:
11. Replace the dining table top with glass
In addition to using glass, you can also using nailhead trim, etc. This way DIY dining table makeover ideas to make unique design of room. It’s also suitable for small family. Bethany at her site, dwellingsbydevore.com, will show you how. This is very interesting.
After:
12. Replace wooden top with concrete
Especially if you have wooden damaged or outdated top dining table top. How to do it? Kara on her site, karapaslaydesigns.com, shows you well.
13. Repainted, white
Buying used furniture, often get the color that has faded. Sometimes, the color is not as you wish. Dark colors are not fun for some people. In this case, white can be an option. This is a simple way to makeover your dining table. Hemmm… and cheap also. 11magnolialane.com will show you some result and reason why you can choose this way. The simple step also you can do.
14. Get back rustic design
The rustic look is reminiscent of the past. You can use this as an idea for your table makeover.
Image: thebudgetdecorator.com
15. Farmhouse dining table and chairs makeover ideas
It accentuates the wood so it gives a natural impression. Not because previously not good, but a makeover to show a stronger impression. Thanks for TARYN WHITEAKER, you show us well.
16. Creative painting art
It is good example as makeover ideas. Creative painting eliminates the boring impression on your dining table appearance. Thanks allthingsthrifty.com for this ideas.
17. Different color of chairs
Family with lots of funny little kids is fun. The look of the dining room will be very emotional. Giving different colors to the dining room chairs is a great idea. How do you do it? mcdonaldfam very well shows you.
18. Simple, Change your chairs
Sometimes, a chair that does not fit the dining table makes the display less good. This idea I got from Brandi at brandisawyer.com. Simple things that are very easy to do for makeover dining room.
But, if you totally get your own design like you want, you can do this… Make your own dining table.
Make your own Dining Table
The best way to realize DIY Dining Room Table Makeover Ideas is by making dining table by yourself. You can get help from your father, husband, or men in the family, to cut the wood in size.
First thing is, make the concept of your dining table. If you want dining table for vintage and classic dining room, then make wooden cut which had ornament curvature on the backrest of chair, and on the table and chair feet.
Image: wikimedia.org
If you want to have simple concept, then you can cut the table surface and the feet in regular cut to fit the concept. Measure the size of the table surface, and the similar feet size, and do not forget to sand the outer wooden layer.
In this DIY Dining Room Table Makeover Ideas, you can use different material for table surface and for the feet. In example, for table surface using oak wood, which had natural dark patter and color. While for the feet, you can use other wooden material which can be painted in any color. Then, paint the surface of the table and the feet with different color.
Apply oak stain on the table surface, in order to make the natural table pattern stand out. Then, leave it dry and continue with painting protective finish on it, to make the table last longer. Your own table creation is now ready to place in the dining room. Place some decoration on it like vases, to make the dining table look more attractive.
In decorating dining room, besides doing makeover for the dining table, you can also redecorate in other way. It is like repainting dining room wall, to create new atmosphere there, or installing chandelier above the dining table to show off the classic concept. After redecorating your dining room, do not forget to keep the cleanliness of it, in order to make the room looks more attractive, and all the decoration last for long time.
Considering your tiles setting for your tub surround will be important for the whole bathroom look. Sometimes, wrong selection and setting really ruin the entire look in an instant.
Meanwhile, choosing the right tile setting for the area isn’t hard either.
Check out the following ideas for easy yet sophisticated setting to improve your tub area atmosphere.
If your bathroom has bright floors and walls, covering the tub surround with natural stone tiles will make the entire room elegant.
Choose earth tones for the tiles and cover the tub wall and the wall behind it up to the ceiling. Cover the sides of the tub with the same tiles if you have it.
2. Wooden Looking Tiles for Limestone Floor
Limestone floor works magically with wooden looking tiles. To make real sophisticated touch on the tub surround, cover the entire tub area wall with the tiles but leave the tub and its wall covered with the limestone floors. Posh!
3. Marble Looking Tiles for Spa Look
Your drop-in tub will look even more inviting when you use marble looking tiles for the surrounding area. Cover the wall up to the ceiling and don’t forget the tub outside wall. Add some candles on the sides and you won’t want to leave the tub.
4. Mosaic Glass Tiles
Glass tiles are very popular today as it offers glamour touch and interesting accent. For bolder accent, cover your tub surround with glass tiles.
Choose contrasting color to your bathroom wall and floor. It doesn’t only improve your tub surround look. It also adds value and sophistication in the entire room.
5. Contrasting Tiles with Consistent Grout
Many designers suggest you to add surprising touch by using contrasting colored tiles on your tub surround. It makes the area pops up, and your tub looks more inviting. You can use small tiles for the area. For consistency, use the entire bathroom color for the tiles grout.
6. Same Tiles Different Pattern
If you like to use as minimal color variation as possible, you should consider using the same tiles for the tub surrounding as you use for the floor.
This time, set it up on different pattern. If you use herringbone pattern for the floor, use simple horizontal setting for the tub surround, or vice versa.
7. Pebble Tiles for Cheerful Touch
Peeble tiles are often forgotten while it actually gives amazing accent on a plain bathroom. In a bathroom with light and earthly finish, pebble tiles covering the tub surround will pop up the area nicely. It changes the area into a focal point in an instant. Simply cover the tub outside wall and not more.
Basically, you can change your tub surrounding area into a focal point using new tiles. With careful selection, it allows you to create a new sanctuary with very inviting tub as well. The ideas above are simple to do and it is easy to get the tiles. Try one and see how it makes your bathroom a totally different space.
Originally posted 2020-03-07 08:58:57.
Manage Cookie Consent
To provide the best experiences, we use technologies like cookies to store and/or access device information. Consenting to these technologies will allow us to process data such as browsing behavior or unique IDs on this site. Not consenting or withdrawing consent, may adversely affect certain features and functions.
Functional
Always active
The technical storage or access is strictly necessary for the legitimate purpose of enabling the use of a specific service explicitly requested by the subscriber or user, or for the sole purpose of carrying out the transmission of a communication over an electronic communications network.
Preferences
The technical storage or access is necessary for the legitimate purpose of storing preferences that are not requested by the subscriber or user.
Statistics
The technical storage or access that is used exclusively for statistical purposes.The technical storage or access that is used exclusively for anonymous statistical purposes. Without a subpoena, voluntary compliance on the part of your Internet Service Provider, or additional records from a third party, information stored or retrieved for this purpose alone cannot usually be used to identify you.
Marketing
The technical storage or access is required to create user profiles to send advertising, or to track the user on a website or across several websites for similar marketing purposes.