

If you want to apply an extraordinary idea to your house, having a kitchen island hood can be the one.
This type of kitchen island will not only give you brilliant look, but also give you some new fresh atmosphere.
Before starting to install the hood, it will be better for you to follow these simple steps.
Read also: How to Build 2 Tier Kitchen Island?
1. Tools You Need
Since creating the hood in your kitchen island will requires some complicated steps, it is understandable if you are forced to get these tools to support the process.
Before you start, make sure you have a drill, wood screws, clamp, safety glasses, tape measure, level, hammer, drywall sandpaper, drywall knife, putty knife, cat’s claw and duct sealant tape with you. Those things are going to be needed during the process.
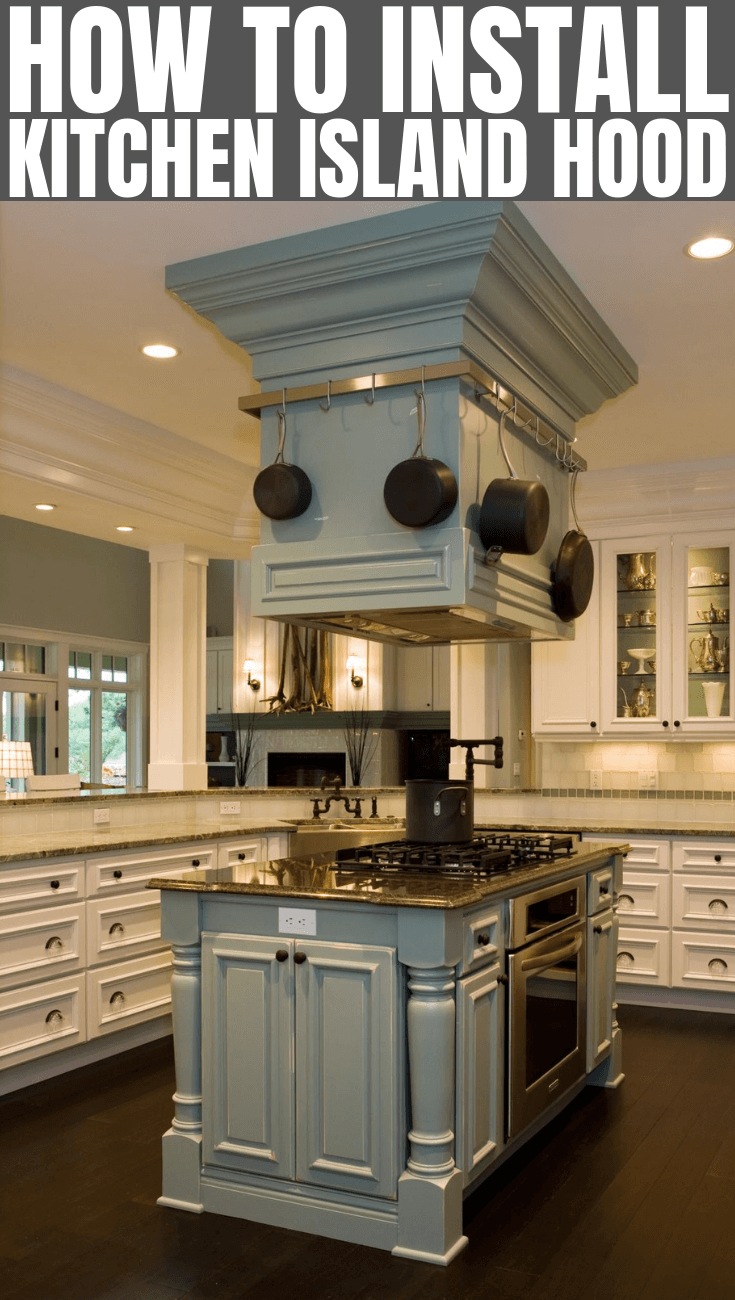
Some pictures as ideas for kitchen island hood design:


2. Removing Unnecessary Things
To begin the process, make a mark at the opening duct in the ceiling where you want to install the hood. To maximize the air flow, make sure that the marking is aligned with the cooking surface.
To prevent dust from entering your home, put plastic drop cloths over the doorways and put it also on the floor. Avoid any tripping accidents by taping the plastic drop cloths on the floor correctly.
With your drywall knife, cut the opened ceiling that is connected directly with ductwork. This is why you need safety glasses to keep your eyes safe from drywall dust.
Remove the sheathing and house bind from the exterior of your house which connects directly to the vent hole with hammer and cat’s claw.
It is because the island hood ductwork and the vent hole are connected. Make sure that you remove exterior wall and all insulation on the ceiling where you locate the holes.

3. Start the Installation
The first thing you need to do is to screw the vent hangers with a drill. It will be good if you invite a professional to accompany you in measuring and calculating every step you take.
You can also ask their help to connect the electrical wiring and do the electrical work in case you are not able to handle the electrical installations.
When the electrical installation is done, connect the ductwork from the outside of the vent to the vent in the ceiling.
Make sure that they slip into each other easily, and then tape all seams using duct sealant tape to close that connection. Use screws to lock the frame of the island that is connected to the vent hangers.
While you are straightening the frame with the vent hangers, ask someone or the professional you call to hold up the island hood. There will be no gaps needed between drywall compound and the island hood.
Use putty knife to spread the drywall compound until it is smooth and flat. Put sand into the compound using drywall sandpaper when it is dry. To make it complete, paint the surfaces of the adhered areas with any color you want.
Installing a kitchen island hood is not that hard when you really understand how to apply the materials and tools correctly. It is also better to ask some professional workers to help you in installing the hood to avoid any unexpected things.

Originally posted 2019-09-04 01:25:21.


