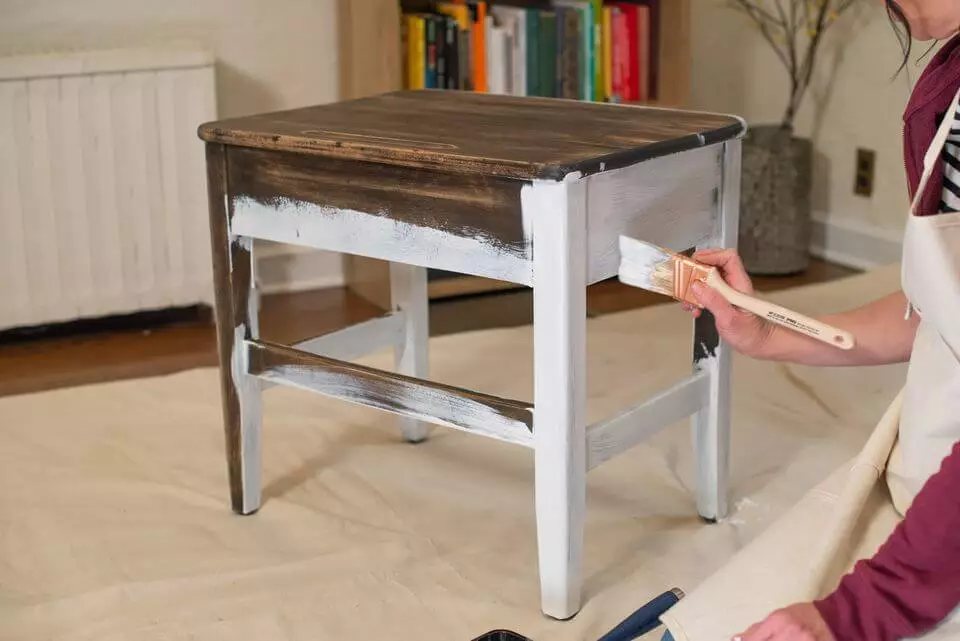
Painting is not an easy job, at least for those who care about the long-lasting results instead of instant pretty look. Unless you have done DIY painting project before, you might not understand how frustrating it is to have your paint peeled in only weeks or days. To prevent this condition, you need to learn how to do it right, also we show you about how to paint wood furniture black and white.

1. PREPARE THE FURNITURE
How many wood furniture do you have in the house? Which one you are going to paint? Take a look at your furniture. Is there any handles, hinges or other attached accessories? Before you start the painting, you need to remove these items first. Otherwise, your paint may stain the accessories.
Now that the handles, hinges and other accessories had been removed, you should inspect any damaged area. It could be a cracks or holes. Put wood filler to cover them, so you have even surface to work with. Don’t worry, this filler won’t be seen after you paint the furniture.
2. MOVE TO WELL-VENTILATED AREA
Working with paint means you could be messy. No matter how careful you are, there is still chance of getting paint splattered to any direction. You don’t want wood paint to stick on your sofa, rug or carpet. It will be difficult to clean. Moreover, paint usually have strong odour. Thus, working in well ventilated area is clearly better option.
3. LAY DROP CLOTH
You have moved to different area for painting. Does it mean you need no drop cloth? The answer is no. This cloth is still needed to cover the floor. If you don’t have drop cloth, you could replace it with used newspaper.
In some cases, you cannot move the wood furniture. It might happen when you paint door or windows. Since you need to protect other items in the room, lay drop cloth on top of them.
4. SAND THE SURFACE
One big mistake any beginner makes while painting wood furniture is skipping the sanding process. They argue that certain primer and paint brand promises that the result will be great. This magic doesn’t always work. Many paint jobs are not covering the surface well because it is not sanded before.
To sand wood furniture, you need 150 or 220 grit sandpaper. If you choose sandpaper, you will do the entire job by hand. You could also use orbital sander. Don’t forget to scoot closer to power outlet or bring cable extension to your work area. Using either tool, your goal is peeling the old paint layer. Should you see any knots, sand it until the surface is even with the grain.
5. WIPE IT OUT
How do you plan to wipe the sanded surface? There are plenty options; linen cloth, paper towel, tack cloth, clean cloth, vacuum, and many more. Surprisingly, not all of them could clean thoroughly. Linen cloth and paper towel only work for visible residue. You need to double check for the fine dust. In short, best cleaning tool for wiping is tack cloth or vacuum.
6. APPLY PRIME LAYER
Before the real painting, you need to apply prime layer first. It gives the furniture a base for paint to stick well. To do this job, you need two tools; foam roller and foam brush. Use foam roller to cover wide surface. For the tricky corners, you could use foam brush. Let the prime to dry. It takes more or less one hour. Use sand paper to remove any dripping prime on the furniture.
When you buy prime for wood furniture, you might find two finish options; shiny or flat. Unless you know how each of them will look on your furniture, it is safer to go with flat prime first. Later if you change your mind, you could apply second layer of shiny prime. Doing the other way is quite difficult.
One more thing; you should match the prime and paint type. If you want to use oil-based paint, then buy oil-based primer. Similar rule goes for latex paint; it should be paired with latex primer. Probably you ever heard about mixing the prime and paint type. To be specific, people often use oil-based prime and latex paint.
Oil-based prime is favoured for its perfect stain cover and adhesion. It helps the colour to stand out. There is also one disadvantage; it has strong odor.
7. PAINT IT
Finally, it is time for painting. Depending on your paint type, you might have different painting timeline. In order to get best result, you should do multiple layers. With latex painting, you usually need at least three layers. You should allow each layer to dry for about six to eight hours. It takes less layer if you work with oil-based paint.
Generally, latex and oil-based are great for wood furniture. However, one is superior for indoor purpose, while the other is doing better for outdoor furniture. Latex paint is sold in different sheens; semi-gloss, enamel and sheen. Each option gives different look and suits indoor concept well. On the other hand, oil-based paint presents glossy finishing and could handle weather change outside the room.
Lately, many people fall for unique painting technique. It is called shabby chic. The concept is letting small parts of the furniture bared, showing the natural wood grain. If you are interested, you could try this trick as well. Purchase two tones of Chalky Finish for furniture. Apply them on the wood and wait until dry. Grab fine grade sandpaper and rub on several spots.
8. PROTECT THE PAINT
After the paint is dried, you still have one last job; applying finishing wax. This final layer will serve as outer protector. Dust and stain won’t directly stick on the paint. To apply the finishing wax, you need mini roller. You could also use linen cloth. Keep in mind that you only need thin layer. There is no need to double coat the surface. Apply the finishing wax on all surfaces.
Just like the paint, finishing wax should be dried. It is probably the longest time compared to the other process. Finishing wax will dry within 72 hours or 3 days. If you try to use it before finishing wax completely dries, then you will sit on sticky surface. Be patient and give it enough time to dry. Later, you could clean it easily.
Read also: How to Paint Wood Cabinet Like A Pro
How to Paint Wood Furniture Black
If you find the tips about how to paint wood furniture black, here are some important things that you should remember.
Black wood furniture can give your home a modern and sophisticated look. It can also be very stylish and elegant. If you are thinking about painting your wood furniture black, there are a few things that you need to keep in mind.
First, you need to make sure that the furniture is made of real wood. If it is not, then you may want to consider painting it a different color.
Second, you need to make sure that the furniture is not too old. If it is, then the paint may not stick to the wood very well.
Finally, you need to make sure that the furniture is in good condition. If it is not, then you may want to consider refinishing it before you paint it.
Step by step on how to paint wood furniture black:
1. Choose the right type of paint. You will want to use latex or oil-based paint for your wood furniture.
2. Prepare the surface of the furniture. You will want to sand down the furniture so that the paint will have something to adhere to.
3. Apply a primer to the furniture. This will help the paint to stick to the furniture better.
4. Paint the furniture with black paint. You will want to use several coats of paint so that the color is even.
5. Allow the paint to dry completely before you use the furniture.

How to Paint Wood Furniture White
After you know about how to paint wood furniture black, next, if you want your wood furniture painting with white, here are some steps to do that:
1. Decide what color white you want to use. You can use either a primer or paint that is already white. If you use a primer, it will be easier to achieve a consistent white coat on your furniture.
2. Apply the primer or paint to the furniture using a brush or roller. Make sure to evenly cover all sides of the furniture.
3. Allow the primer or paint to dry completely before proceeding to the next step.
4. Once the primer or paint is dry, you can start painting the furniture with your chosen color white. Again, make sure to evenly cover all sides of the furniture.
5. Allow the paint to dry completely before using or placing anything on top of the furniture.
With these steps, you can easily paint your wood furniture white. Just make sure to take your time and be patient while doing so. Good luck!

Originally posted 2022-10-07 00:26:30.


