

Porch swing needs a frame so that the porch swing can hang properly.
In order to have the porch swing frame, you can ask the professional installer to build it.
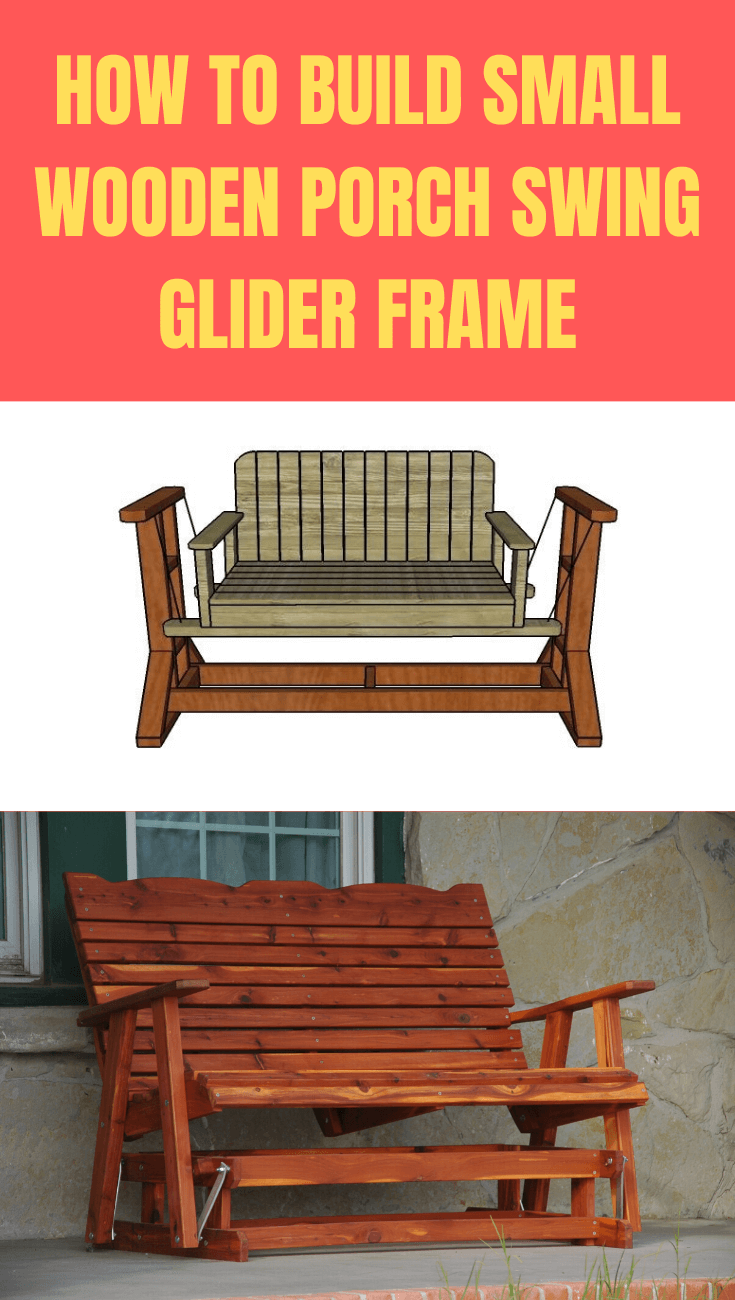
Otherwise, you can build it by yourself. Here is all about DIY project in building the porch swing glider frame.
Read also: Simple tips to build DIY wood porch swing frame plans.
1. Preparation
Before building the glider frame, there are some materials that you need to prepare. They are:
- 4 pieces of 3×4 lumber with 32 ¼” long for the legs.
- 2 pieces of 2×4 lumber with 22 ¼” long and 2 pieces with 30 ¼” log for the frame.
- 4 pieces of 2×4 lumber with 14 1/4” long and 2 pieces with 5 ¾” long for the braces.
- 2 pieces of 2×4 lumber with 70” long for the supports.
- 100 pieces of 2 ½” screws.
After preparing the materials, you need some tools to work with. The tools are sledgehammer, measuring tape, post hole miner, level, four-sided framing, drill machinery, screwdriver, sander, miter saw, concrete mixer, safety glasses and gloves. In making this porch swing glider frame, you will need a day to finish it.

2. Steps on Building the Porch Swing Glider Frame
After preparing the materials and the tools. You are now ready to start the building process. Here are the steps on building the porch sing glider frame.
- The first step is to build the top and bottom components for the side of the frames. You may round both of the side frames with jigsaw if you want to develop the look of the components. Then, smooth the edges of the frame with sandpaper. After that, use the damp cloth to remove the residues.
- For the second step, build the vertical support for the frame with 2×4 lumbers. Then, drill the holes through the bottom and top supports. Next, insert the 2 ½” screw to the vertical component. Bring into line the edges or you can try to drill the holes at the vertical components both ends, and then insert the 2 ½” screws to the supports.
- Then, build braces use the 2×4 lumber. After that, cut the end of the brace at the 45 degrees.
- The next step is to fit the braces to the both of frame sides. Then, align the edges and drill the pilot holes. Insert the 2 1/1” screws so that the braces lock into the proper place.
- After that, you have to fit the bottom braces to assemble the stand. Cut the components with the proper dimension (based on your swing bench) and then lock it to the vertical components by using 2 ½” screws. Then, drill the pilot holes so that the wood will not be split.
- The next procedure is you have to make sure that both of the frame sides are plumb. You also need to check whether the corners are square or not.
- The last step is to take care the finishing touch. Thus, fill the pilot holes with the wood putty and then make it smooth with 120-150 grit sandpaper.
So, you can build your own porch swing glider frame if you do not want to ask the professional to do it. However, make sure that you really work on it because it needs a whole day to spend and many materials to prepare.
Porch swing gallery:


Originally posted 2019-11-20 00:13:19.


