Blog

  • Unleashing Creativity with Thrift Store Upcycle: Transform Ordinary Items into Extraordinary Treasures

    Unleashing Creativity with Thrift Store Upcycle: Transform Ordinary Items into Extraordinary Treasures

    Welcome to the world of thrift store upcycle, a realm where your creativity knows no bounds and every item holds a world of possibilities! Upcycling is not just about saving money; it’s a sustainable approach to redefining the lifecycle of products. In this comprehensive guide, we’ll dive into the art of transforming thrift store finds into unique and personalized treasures. 🌟

    Unleashing Creativity with Thrift Store Upcycle

    The Magic of Upcycling: A Sustainable Fashion Statement

    Upcycling, especially from thrift stores, is a magical process. It’s about taking something that’s seen as no longer useful and transforming it into something of greater value and appeal. This isn’t just beneficial for your wallet but also for the planet. 🌍 By upcycling, you’re contributing to a more sustainable world, reducing waste, and minimizing your carbon footprint.

    Why Upcycling Matters

    In an era where fast fashion dominates, upcycling stands as a beacon of sustainability. It encourages a slower, more conscious approach to consumerism. You’re not just buying; you’re reimagining and reinventing. It’s a creative challenge that rewards you with something unique and reduces the strain on our planet’s resources.

    The Thrill of the Hunt

    The journey begins with the hunt. Thrift stores are treasure troves of potential. Every visit offers a new adventure, with an array of items waiting to be discovered and transformed. The unpredictability and diversity of thrift store inventories make each trip an exciting endeavor.

    Crafting Your Unique Style with Upcycled Fashion

    One of the most thrilling aspects of thrift store upcycle is the ability to create a fashion statement that’s uniquely yours. From vintage clothing to outdated accessories, the possibilities are endless.

    Reinventing Wardrobe Staples

    Take a simple, outdated dress, for instance. With a few cuts, stitches, and perhaps some added embellishments, you can turn it into a trendy piece that reflects your personal style. The key is to see beyond the current form and envision what it could become.

    Accessorizing with a Twist

    Accessories are the easiest starting point for beginners. A dull belt can be reborn with new fabric or paint, and old jewelry can be disassembled and reassembled into a modern masterpiece.

    🔔 Important Note: Remember, the best upcycled fashion pieces don’t just look good; they tell a story. Each item carries its history, and by upcycling, you’re adding your chapter to it.

    Revamping Home Decor with Upcycled Finds

    Thrift store upcycling isn’t limited to fashion. It extends into the realm of home decor, where everyday items can be transformed into unique decorative pieces.

    Giving Furniture a Second Life

    An old wooden chair or table can become the centerpiece of a room with some sanding, painting, and creativity. Even small changes, like new knobs on a dresser, can make a significant impact.

    Decorative Accents with a Personal Touch

    From picture frames to vases, these small items can be easily revamped to add a personal touch to your home. Simple techniques like decoupage, painting, or adding new textures can completely transform these items.

    The Art of Upcycling: Techniques and Tips

    Upcycling is an art, and like any art, it requires some knowledge and skills. Here are some basic techniques and tips to get you started.

    Basic Techniques for Beginners

    • Painting: Perhaps the easiest and most impactful technique. It can breathe new life into almost any item.
    • Sewing: Essential for clothing upcycles. Even basic hand-sewing can significantly alter a garment.
    • Decoupage: A fantastic way to add visual interest to furniture and decor items.

    Advanced Techniques for the Experienced Upcycler

    • Woodworking: For those ready to delve into furniture upcycling, basic woodworking skills can open a new world of possibilities.
    • Metalworking: Ideal for transforming old jewelry or creating unique home decor pieces.
    TechniqueDescriptionIdeal For
    PaintingApplying color to revamp the appearanceAll items
    SewingAltering or creating textilesClothing, fabrics
    DecoupageDecorating surfaces with paper cutoutsFurniture, decor
    WoodworkingCutting, shaping, and joining woodFurniture
    MetalworkingBending, cutting, and joining metalsJewelry, decor

    Navigating Challenges and Solutions in Upcycling

    While upcycling is rewarding, it also comes with its challenges. Here are some common issues and solutions to help you navigate your upcycling journey.

    Overcoming Common Obstacles

    • Lack of inspiration: Sometimes, you might struggle to envision the potential in an item. Overcoming this requires patience and a bit of research. Look for inspiration online or in upcycling communities.
    • Skill limitations: If a project seems beyond your current skill set, consider taking a class or starting with simpler projects to build your skills gradually.

    Finding the Right Materials

    • Quality of thrift store finds: Not everything in a thrift store is worth upcycling. Learn to identify items with potential and those that are beyond saving.
    • Access to tools and materials: Some projects require specific tools or materials. Plan ahead and ensure you have what you need before starting.

    Connecting with the Upcycling Community

    Upcycling is not just about the projects; it’s about the community. Connecting with fellow upcyclers can be incredibly inspiring and helpful.

    Joining Online Forums and Social Media Groups

    There are numerous online platforms where upcyclers share their projects, tips, and challenges. Joining these communities can provide a wealth of knowledge and support.

    Participating in Local Workshops and Events

    Many communities have local workshops or events focused on upcycling and crafting. These are great opportunities to learn new skills and meet like-minded individuals.

    The Environmental Impact of Thrift Store Upcycling

    Finally, let’s not forget the significant environmental impact of thrift store upcycling.

    Reducing Waste and Supporting Sustainability

    By upcycling, you’re directly contributing to reducing waste and promoting sustainable living. It’s a small but significant step towards a greener future.

    Encouraging a Shift in Consumer Habits

    Thrift store upcycling also plays a role in changing how we view consumerism. It promotes a culture of reusing and repurposing, which is essential in our journey towards sustainability.


    Thrift store upcycling is more than just a hobby; it’s a lifestyle. It’s about seeing the potential in the overlooked, about creativity and sustainability. Whether you’re a fashion enthusiast, a home decor aficionado, or someone looking to make a positive environmental impact, thrift store upcycling offers a fulfilling and enjoyable path. So, grab that old item, unleash your creativity, and transform it into something extraordinary! 💫🌿

    Originally posted 2024-01-15 06:18:01.

  • How to Choose the Right Toe Kick Vent Cover

    How to Choose the Right Toe Kick Vent Cover

    It is no longer a new thing to use your toe kick as additional vent.

    However, choosing the cover yourself is probably a new thing. There are more than enough options actually yet selecting one can be tough sometimes.

    If you need some help, the following steps should help you to get the right one.

    HOW TO CHOOSE THE RIGHT TOE KICK VENT COVER

    1. Get the Measurement First

    Even though most of this item comes as standard, it is still important to know your space. Sometimes, it can be a little tricky on the bolts positions.

    It can be unfit too sometimes. Knowing the measurement first will help you to get the right design and size for your toe kick vent.

    First, measure the vent hole and measure the entire space around it on your toe kick face. This will define the needed size and the possible coverage for it.

    Jumping on assumption without actually measuring it often causes disappointment as you get the wrong size.

    Read also: Pros and Cons Using Toe Kick Grille

    2. Choose Your Material

    The next thing is to decide on the material. Like many other house hardwares, this toe kick vent cover is available on so many different materials.

    You’ll be able to find wood to steel vent covers out there. So which one is the best? It depends on your situation.

    The type of wood your cabinet uses will define what the best material for the vent cover is. It affects on how strong the cabinet can hold the cover.

    Brass is often a good alternative for being lighter than steel but tougher than wood. In addition to it, the color gives natural style on its own.

    Metal Toe Kick Vent Cover

    3. Quality Check

    This is probably one of the most important steps to make and this is pretty simple. You want good quality vent cover and only good brands can deliver it.

    Searching based on the brands is the quickest way to make sure the design, material, and the details are precise and correct.

    On the other hand, you should give new brands a shot too. Some of them are really good while the price is much lower.

    You need sturdy cover with appropriate venting and easy to use bolts holes. The rest could follow from there but quality is what gives you the function and life span.

    Read also: Toe Kick Bracket and How it Helps your Kitchens

    4. Consider Styling

    While this shouldn’t be the first to think about, it plays crucial role in how it looks in the end. Surprisingly, toe kick vent cover is available on many styles as well.

    Of course, most houses use standard vent cover with usual look. While it remains effective on its core function, it can ruin your kitchen cabinet look.

    Many people give final layer of color finish to match the cabinet. Meanwhile, you should consider using cover that features attractive patterns on it.

    The stylish ones cost more but it is worth it if you take interior look seriously.

    So it is pretty simple to choose the right way. This is a small item and if you fail on this too, you are hopeless.

    Make sure you pick the right vent cover for your toe kick vent and enjoy how it helps your daily life.

    Wood Toe Kick Vent Cover

    Originally posted 2020-05-29 03:16:53.

  • Pros and Cons Using Toe Kick Grille

    Pros and Cons Using Toe Kick Grille

    Toe kick grille is actually quite popular but many people are still foreign with this.

    While it offers the same function as other grille, there are more factors to consider if you are thinking about installing it.

    Before we settle on any decision, it will be wise to know more on this grille first.

    PROS AND CONS USING TOE KICK GRILLE

    What is Toe Kick Grille?

    This is basically air vent that is perfect to install under the kitchen cabinet, right on your toe kick. As we know it, toe kick often offers available space behind the face.

    People like to use it for so many additional functions from additional storage to folding stool keep. The same space is ideal for grille as well. It allows us to have additional vent without changing anything on the above.

    Of course, it isn’t as simple as that. We will need to make sure the installation is built perfect and organized.

    First, we need to provide the tunnel so the air can get in and out. If you use this for your oven, you need an expert to make the right installation.

    Toe kick grille comes in many designs. Most of them are made of steel even though there are more than enough color options as well.

    The most important thing while choosing this grille is on the material. You want a nice lifespan for this vent so you need good quality steel for it.

    Kitchen toe kick vent under cabinet

    The gap between each bar is also crucial while you also need to pay attention for the bolts places. Even though it mostly comes in standard size, it is extremely important to get the right measurement based on your toe kick dimension.

    It is also important to check if you cabinet material is sturdy enough for it. Even though most cabinets should be fine, old cabinet is maybe no longer strong enough.

    It is always wise to check on the place where you want the grille to be before settling down on installing.

    Read also: Choose your kitchen cabinets Toe Kick Idea

    Pros and Cons of the Toe Kick Grille

    Pros

    As has been mentioned before, it is always an advantage to have additional vent. If it is connected to one of your kitchen amenities, it makes sure it works ultimately and properly while it keeps the kitchen air healthy.

    It doesn’t take too complicated installation given to using the toe kick space so you don’t need to modify a lot in your kitchen.

    In addition to it, the location is convenient as it doesn’t take any other space in the kitchen.

    Cons

    However, it can be dangerous as well especially as your feet spend times in front of the toe kick while cooking.

    The risk should include small injury as you accidentally kick the bars and heating issue if you are cooking, especially when it is connected to your kitchen amenity like oven.

    It explains why many recommendations tend to forbid you to use it as oven vent.

    In sum, this grille is a great addition to the kitchen. However, it takes careful consideration and installation to make sure it works properly as well. Make sure to contact an expert or pro for this.

    Toe Kick Grille Natural wooden old

    Originally posted 2020-05-27 04:29:28.

  • Little Apartment Aesthetic: Transform Your Small Space into a Cozy Haven

    Little Apartment Aesthetic: Transform Your Small Space into a Cozy Haven

    Welcome to the world of little apartment aesthetics, where size doesn’t limit style and creativity. In this comprehensive guide, we’ll dive into the art of transforming a small living space into a cozy, functional, and stylish haven. Small apartments offer unique challenges but also present a fantastic opportunity to express your personal style and create a comfortable living space that feels like home.

    Little Apartment Aesthetic

    Embracing the Little Apartment Lifestyle

    Living in a little apartment can be a delightful experience if approached with the right mindset. 🏡

    The Charm of Small Spaces

    Small spaces often exude a unique charm and coziness that large houses can’t replicate. They encourage simplicity and mindfulness in living, urging residents to think carefully about what they bring into their space. This minimalistic approach can lead to a more organized and peaceful living environment.

    Creative Solutions for Limited Space

    Living in a little apartment requires creativity, especially when it comes to storage and layout. Wall-mounted shelves, under-bed storage, and multi-functional furniture are just a few solutions that can help maximize space.

    🔑 Important Note: Remember, the key to a successful small space is not just about fitting everything in, but also creating a flow that makes the space easy and enjoyable to live in.

    Design Principles for Little Apartments

    To create a harmonious and aesthetically pleasing small space, certain design principles should be followed.

    Maximizing Natural Light

    Natural light can make a small space feel larger and more open. Use light-colored curtains or blinds to allow as much light in as possible. Position mirrors strategically to reflect light and create the illusion of more space.

    Choosing the Right Color Palette

    The color palette of your apartment can significantly affect how big or small it feels. Light, neutral colors like whites, beiges, and light grays can make a room feel larger and airier. However, don’t shy away from using bold colors; a feature wall in a deeper shade can add depth and interest to a room.

    Furniture Selection and Arrangement

    Choosing the right furniture is crucial in a little apartment.

    Multi-Functional and Space-Saving Furniture

    Look for furniture that serves multiple purposes, like a sofa bed or a coffee table with storage. Opt for pieces that are proportionate to the size of your apartment to avoid overcrowding.

    Arrangement for Functionality and Flow

    Arrange your furniture to maximize space and create clear pathways. In small living areas, each piece of furniture should be both functional and contribute to the overall aesthetic.

    Decor and Personal Touches

    Decorating your apartment is where your personal style can shine. 🎨

    Incorporating Plants and Greenery

    Plants not only purify the air but also add a pop of color and life to small spaces. Even if you don’t have a green thumb, low-maintenance plants like succulents can thrive indoors.

    Artwork and Personal Items

    Choose artwork and personal items that reflect your style. Wall art is a great way to add personality without taking up floor space.

    Organizing and Storage Solutions

    In a little apartment, organization is key. 🗝️

    Creative Storage Ideas

    Think vertically when it comes to storage. Use the walls for shelves and hooks. Furniture with built-in storage can also be a game-changer.

    Decluttering Regularly

    Regular decluttering can keep your space open and inviting. Adopt the habit of evaluating your possessions periodically and keeping only what you need and love.

    Making the Most of Your Little Apartment

    Living in a little apartment doesn’t mean sacrificing style or comfort. It’s about making smart choices and being creative with the space you have.

    Embracing Minimalism

    Minimalism isn’t just an aesthetic; it’s a lifestyle that encourages living with less. In a small apartment, this philosophy can help you focus on what’s essential and create a more spacious and serene environment.

    Enjoying Your Personal Haven

    Your apartment should be your personal haven, a place where you feel relaxed and happy. Take the time to make it a reflection of you and your unique style.

    Living in a small space has its challenges, but with the right approach, a little apartment can be transformed into a cozy, stylish, and functional home.

    The Art of Space Optimization

    Getting creative with your layout is an art in a little apartment.

    Balancing Function and Aesthetics

    It’s important to balance function and aesthetics. A well-thought-out space not only looks good but also works efficiently for your daily needs.

    Utilizing Vertical Space

    Don’t forget to look up! Vertical space is often underutilized in small apartments. Tall bookshelves, hanging plants, or high-mounted shelves can add storage and style without taking up floor space.

    Lighting: The Mood Setter

    The right lighting can completely transform a room. 💡

    Layering Different Light Sources

    Use a combination of overhead lights, floor lamps, and table lamps to create a warm and inviting atmosphere. This layering of light can make a small space feel larger and more welcoming.

    Smart Lighting Solutions

    Consider smart lighting solutions that allow you to adjust the brightness and color of your lights. This can help set the mood for different times of the day and activities.

    Integrating Technology Seamlessly

    Incorporating technology into your little apartment can enhance both functionality and aesthetics.

    Compact and Multi-Use Tech

    Choose compact and multi-use tech items that save space. A smart speaker, for example, can serve as a music player, a news source, and a voice assistant.

    Concealing and Organizing Wires

    Keep your space clutter-free by organizing and concealing wires. Cable organizers and cord covers can help maintain a neat and tidy look.

    The Importance of Personal Space

    Even in a little apartment, having a personal space where you can relax and rejuvenate is crucial. 🌿

    Creating a Cozy Corner

    Designate a corner of your apartment as a personal retreat. This could be a reading nook, a meditation space, or simply a place with your favorite chair and a soft blanket.

    Incorporating Elements of Nature

    Bringing elements of nature into your space can have a calming effect. Apart from plants, consider natural materials like wood and stone, or nature-inspired decor.

    Table: Maximizing Space in Key Areas

    AreaTips for Maximization
    KitchenUse magnetic strips for utensils, collapsible furniture, and over-the-sink cutting boards.
    BedroomChoose a bed with storage underneath, use wall-mounted nightstands, and mirrors to expand the space visually.
    Living RoomOpt for a sofa bed or modular furniture, use ottomans with storage, and mount your TV on the wall.
    BathroomUse over-the-toilet storage, adhesive hooks for towels, and a shower caddy to keep essentials organized.

    Conclusion: Celebrating Your Little Apartment

    Your little apartment is more than just a place to live; it’s a canvas for your creativity and a reflection of your personality. By embracing the unique challenges and opportunities of small-space living, you can create a home that is not only functional and stylish but also uniquely yours.

    Remember, it’s not the size of the space that matters, but how you make it your own. Enjoy the journey of turning your little apartment into your dream home! 🌟

    Originally posted 2024-01-14 16:23:56.

  • Toe Kick Bracket and How It Helps Your Kitchen

    Toe Kick Bracket and How It Helps Your Kitchen

    This is basically one of the ways in which you can maximize the function of your kitchen.

    This bracket is getting more common now for many people, and it can deliver nice functions and benefits you should consider.

    Let’s start by understanding what it is and what the benefits are.

    HOW CAN WE USE TOE KICK BRACKET

    What is Toe Kick Bracket?

    Toe kick is basically a space under the cabinet that is commonly 3 inches deeper than the other cabinet face. It allows you feet to have some space so you can stand closely to the counters.

    Today, this toe kick is enhanced for many reasons, from better look to more function. People like it decorative while other people like to add drawers too for more storage.

    The additional functions here will require some help and this is when the bracket comes in handy.

    It is basically attached to the toe kick face. It explains why there will be no change on your cabinet and toe kick face. It remains the same and no one know you add something underneath.

    You will need to add a kind of handle on the toe kick face so you can pull it out. Once you pull it out, you recognize the bracket is delivering new functions, depending on what you add on it.

    Read also: Kitchen Cabinet Toe Kick Idea

    White cabinet Toe Kick Base

    How Can We Use Toe Kick Bracket?

    Even though this bracket enables you to have many kinds of addition under the cabinet, people use it mainly for two main functions.

    1. As Folding Stool Bracket

    As explained before, this bracket will be attached to your toe kick face. It can slide out and in so you can store your folding stool in there.

    Every time you need to use the stool, you only need to pull over the toe kick face. It will slide open and you can use the stool. When you are done, fold the stool and push it into the toe kick.

    It will be stored nicely and your toe kick face remains the same. You may need additional plate for the stool and handle on the toe kick face to pull it over.

    This is a convenient solution for your little kids and yourself especially when you need to reach above the counter. Make sure to get the right measurement for the bracket and consider hiring a pro to install it for smooth result.

    1. As Additional Drawers

    Of course, it is a valuable space in which you can store some more without compromising your comfort while standing in front of the counter.

    Instead of leaving the space blank, you can install a new drawer with this bracket without changing the toe kick look. This is even simpler to make than the previous function.

    In conclusion, the toe kick bracket comes in handy when you want to utilize the toe kick space for more function. It takes careful installation of course, but it supports your productivity and comfort in the kitchen, not to mention more storage you can use. Want to buy one?.

    Cabinet Toe Kick Kohler

    Originally posted 2020-05-26 00:55:05.

  • What to Pair with Unfinished Maple Kitchen Island

    What to Pair with Unfinished Maple Kitchen Island

    Among many wood used for kitchen island, maple is one of the most usual. While rustic style is in trend, they often leave it without finishing for raw look.

    Whether you will finish it or leave it unfinished, maple is always good to pair with several colors and materials.

    If you plan to buy one, you should consider using one of these combinations.

    Read also: Kitchen Island Countertop Ideas on a Budget. 

    WHAT TO PAIR WITH UNFINISHED MAPLE KITCHEN ISLAND

    1. White Tone Marble

    White marble is a popular option for kitchen countertop and it makes a great match for the maple wood color.

    Its natural color is neutral and light, and combining it with white tone marble will create chic and modern look in an instant.

    You don’t need to stay with pure white. Instead, you should consider not-so-white marble with a little pattern in other color like grey or black to match.

    It has accent and depth while it prevents your kitchen island from being boring. Maple is maybe light, but it is sturdy enough to handle marble countertop.

    White tone marble kitchen island countertop
    Image: Stonemart.com

    2. Glossy Black Marble

    This is another alternative when you want to use marble. Black marble is a popular option when you want to reach the modern look.

    It simply adds elegance and class in an instant. Glossy black marble is probably one of the best to reach more expensive look as well for being dazzling naturally.

    While this marble requires the same simple maintenance in routine, the glossy look makes sure you get sophisticated touch and clean impression all the time.

    The contrasting tone is perfect to keep the kitchen balance. If you like your kitchen young and impressive, this is your answer.

    Glossy Black Marble kitchen island countertop
    Image: Decorpad.com

    3. Concrete

    The combination of concrete and maple is no longer a new thing but the look is still surprising. It is always pleasing to see two contrastive natural material combined together.

    The maple wood will make a perfect platform for the concrete countertop. Don’t worry, if you get the right measurement, maple is sturdy enough for it.

    As for the color, concrete goes well in almost any color, from white to black, grey to royal blue, or any color you like to use.

    Grey will make it more industrial looking while white is totally modern. Match it with your kitchen interior color palette.

    Concrete combination ideas for unfinished kitchen island countertop
    Image: concreteexchange.com

    4. Any Material in Warm Brown Tone

    Maple is still good to combine with any material if you get the right color for it. Maple tends to be light in color and it makes it only logical to combine it with warmer tone.

    For example, light maple will go great with deep brown wood for the countertop. It prevents the pale look and create depth in the final finish.

    Warm Brown Tone kitchen island countertops
    Image: Chonehome.com

    The best thing about this alternative is you have limitless options. As long as you choose warmer tone than the maple tone, you can’t be wrong.

    It allows you to be more flexible in choosing. In short, there are more than enough options to match the maple kitchen island with the unfinished condition.

    Instead of being hard to set, it is actually very flexible and stylish at the same time. If you plan to buy this kitchen island, don’t worry about matching it.

    What to Pair with Unfinished Maple Kitchen Island for countertop

    Originally posted 2020-05-23 05:22:52.

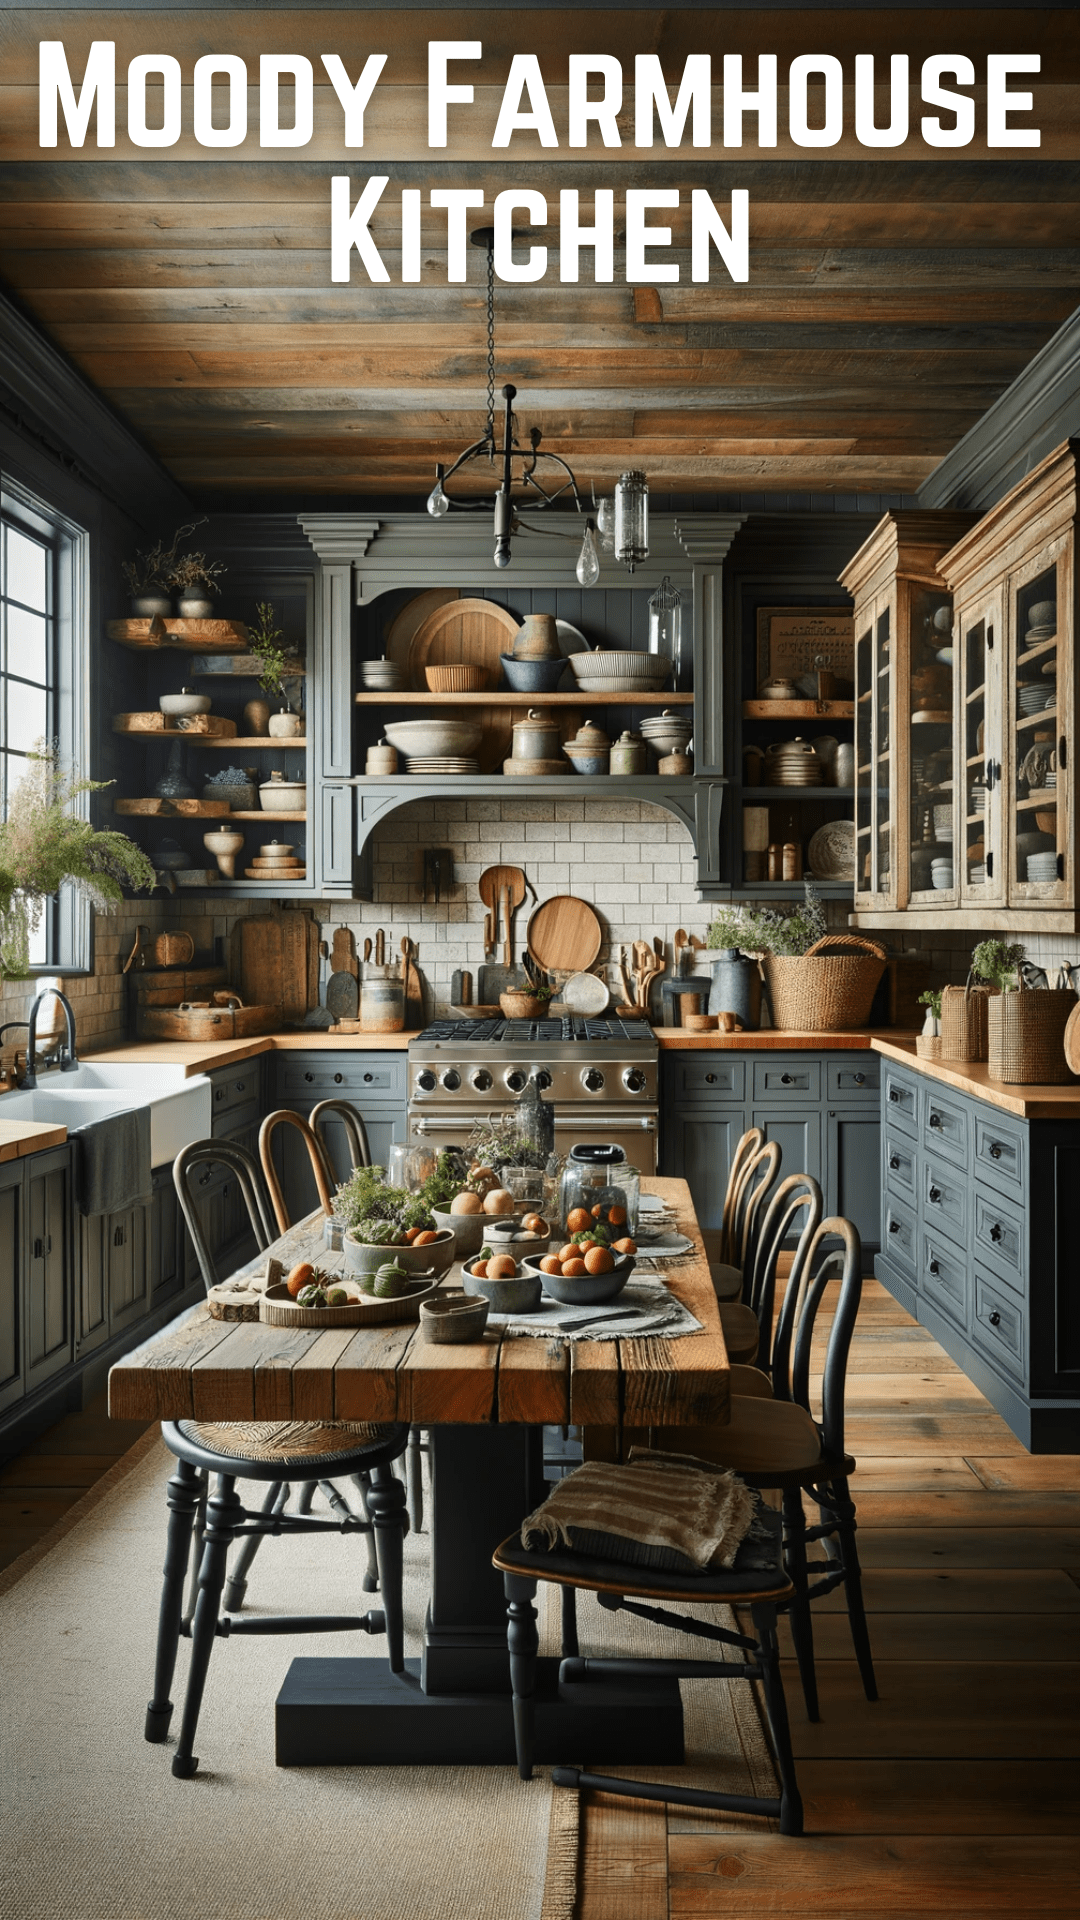
  • Transform Your Kitchen into a Cozy Retreat: Discover the Enchantment of a Moody Farmhouse Kitchen

    Transform Your Kitchen into a Cozy Retreat: Discover the Enchantment of a Moody Farmhouse Kitchen

    Embrace the allure of rustic charm combined with modern elegance as we delve into the captivating world of the moody farmhouse kitchen. This blog post will guide you through the essential elements that make up this unique style, offering practical advice, design tips, and inspirational ideas to transform your kitchen into a warm and inviting space.

    Moody Farmhouse Kitchen

    🌟 The Essence of Moody Farmhouse Style

    Understanding the Basics

    A moody farmhouse kitchen blends the rustic, comforting feel of traditional farmhouse design with a contemporary twist. It’s characterized by a palette of dark, rich colors, natural materials, and layers of texture. This style evokes a sense of warmth and nostalgia while maintaining a chic, modern edge.

    Key Elements

    • Color Scheme: Predominantly dark hues like deep blues, greens, and grays, contrasted with lighter accents.
    • Materials: Use of natural materials like wood and stone to add warmth and texture.
    • Lighting: Soft, ambient lighting to create a cozy atmosphere.

    🍽️ Designing Your Moody Farmhouse Kitchen

    Layout and Space Planning

    A well-thought-out layout is crucial. Prioritize functionality while maintaining an open and airy feel. Consider an island or a peninsula for additional counter space and seating.

    Selecting the Right Furniture

    Opt for furniture that complements the rustic charm. Think reclaimed wood tables, vintage chairs, and antique hutches.

    Incorporating Modern Appliances

    Blend modern appliances seamlessly into your design. Choose finishes that complement the moody color scheme, such as matte black or stainless steel.

    🎨 Color Palette: Setting the Mood

    Choosing the Perfect Hues

    Select a dominant color for your cabinets and walls. Popular choices include navy blue, charcoal gray, and forest green. Add lighter tones like cream or beige for balance.

    Accent Colors and Decor

    Use accent colors to add depth and interest. Consider earthy tones like terracotta or mustard yellow for accessories and textiles.

    🛠️ Materials and Textures: A Symphony of Elements

    Natural Wood and Stone

    Incorporate elements like butcher block countertops and stone backsplashes. Reclaimed wood shelves or beams add character and warmth.

    Mixing Metals

    Combine different metal finishes such as brass, copper, and iron for hardware and fixtures, adding a touch of sophistication.

    💡 Lighting: Creating Ambiance

    Main Lighting Sources

    Choose fixtures that make a statement yet provide ample light. Consider pendant lights over the island and under-cabinet lighting for task areas.

    Accent and Mood Lighting

    Table lamps and wall sconces can add layers of light, enhancing the moody atmosphere.

    🖼️ Accessorizing Your Kitchen

    Decorative Elements

    Accessorize with items that reflect farmhouse charm. Think vintage signs, woven baskets, and rustic pottery.

    Functional yet Stylish Storage

    Use open shelving to display decorative items and everyday dishes. Add a freestanding hutch or pantry for extra storage.

    🍲 The Heart of the Home: Entertaining in a Moody Farmhouse Kitchen

    Hosting and Dining

    Create a welcoming space for gatherings. A large farmhouse table can be the centerpiece for family meals and social events.

    Creating a Cozy Atmosphere

    Add soft textiles like throw pillows and table linens to enhance comfort and warmth.

    🌿 Incorporating Greenery and Natural Elements

    Plants and Flowers

    Bring life to your kitchen with potted herbs, fresh flowers, or a small indoor garden.

    Natural Accents

    Incorporate natural elements like wooden bowls, stone vases, or linen curtains to complement the earthy tones.

    📐 Practical Considerations: Functionality Meets Style

    Efficient Storage Solutions

    Implement clever storage solutions to keep your kitchen organized and clutter-free.

    Ergonomics and Comfort

    Ensure that your kitchen layout is ergonomic. Consider the height of countertops and the placement of appliances for ease of use.

    Table: Comparing Traditional and Moody Farmhouse Kitchens

    FeatureTraditional Farmhouse KitchenMoody Farmhouse Kitchen
    Color SchemeLight, neutral tonesDark, rich hues
    MaterialsWood, ceramicWood, stone, metals
    LightingBright, naturalSoft, ambient
    DecorVintage, countryRustic, chic

    Important Note: Remember, the key to a successful moody farmhouse kitchen lies in balancing rustic elements with modern touches to create a space that’s both inviting and stylish.

    🔄 The Evolution of Farmhouse Style

    Historical Roots

    Explore the origins of farmhouse style, tracing its evolution from simple, functional spaces to the modern interpretations we see today.

    Modern Interpretations

    Understand how contemporary design has influenced the farmhouse aesthetic, leading to the rise of the moody farmhouse kitchen.

    🖌️ DIY Tips and Tricks

    Painting and Refinishing

    Learn how to select the right paint and techniques for refinishing cabinets and furniture to fit the moody farmhouse theme.

    Customization Ideas

    Get creative with DIY projects like building open shelves or creating a unique backsplash.

    🌍 Sustainability and Eco-Friendly Choices

    Choosing Sustainable Materials

    Opt for eco-friendly materials like bamboo flooring or recycled glass countertops.

    Energy-Efficient Appliances

    Invest in appliances that not only look good but also save energy and reduce your carbon footprint.


    Embrace the trend of the moody farmhouse kitchen and create a space that’s not only stylish but also full of character and warmth. Whether you’re planning a full remodel or looking for ways to incorporate elements of this style into your existing kitchen, these tips and ideas will guide you in creating a space that’s both functional and enchantingly beautiful.

    Originally posted 2024-01-13 02:57:27.

  • Why Choosing Unfinished Kitchen Island with Optional Finishing Kit

    Why Choosing Unfinished Kitchen Island with Optional Finishing Kit

    While rustic style seems to be the hot item today, unfinished kitchen island popularity rises significantly.

    However, many interior designers often recommend house owner to take one with optional finishing kit.

    There are good reasons why you should consider this option though. Check out the following points.

    WHY CHOOSING UNFINISHED KITCHEN ISLAND WITH OPTIONAL FINISHING KIT

    1. Flexibility

    If you get optional finishing kit like alternatives for finish color, it offers you flexibility in the future.

    First, you can change the warmth natural shade of the kitchen island to match it with other kitchen amenities.

    Second, it is totally possible for you to refinish the kitchen island to other vibrant colors if you want to.

    It allows you to remake the look of your kitchen without the need to buy a new island just because you need other specific color so badly.

    Read also: Before Buying Unfinished Kitchen Island

    2. Kitchen Island with Longer Lifespan

    The idea of unfinished is arguable today. People like the look but they hate how it is harsh and it causes scratch on the skin. It will be best to finish this kitchen island anyway, but in the most neutral way you can find.

    The optional finishing kit can be transparent layer for the kitchen island, in which the real texture and patterns of the island is still exposed.

    Meanwhile, the entire surface is made safe for human skin especially children.

    You should also consider adding layer to protect the wood from any exterior factors that can damage it. It gives the kitchen island longer life span instantly.

    Simple unfinished kitchen island with seating
    Image: fortikur.com

    3. Room for Creativity

    Here is the best reason many talented hands like to get. Optional finishing kit means there is still room for your own customized final look for the kitchen island.

    It allows you to make the kitchen island as unique as possible, finishing in vibrant color, adding stones or other ornaments, improvising with small details to enrich the look, etc.

    Without you knowing it, many interior designers use this kind of kitchen island for their client in order to get customized look for the kitchen amenities.

    Why don’t you use it too? You can do it yourself and it becomes a result of your creativity.

    Unfinished kitchen island with storage unit underneath
    Image: customdecor.pro

    4. Cheaper Deal

    The best thing of buying this kind of kitchen island lies on the price. It is rustic and it can use a finishing touch but it is available in most budget friendly price.

    You can leave it that way for real rustic look but you don’t need to pay for rustic item price.

    On the other side, they cut the price as they don’t provide the finishing process. You can do it yourself and save some more pennies for other things too.

    It is a great solution for those who need affordable rustic furniture and those who are willing to finish it themselves.

    As you can see, there are more than enough reasons why this kitchen island is a great deal.

    Wooden unfinished kitchen island base with optional top finishing kit
    Image: Fortikur.com

    Originally posted 2020-05-22 02:13:04.

  • List of Most Creative Way How to Reuse Kitchen Waste

    List of Most Creative Way How to Reuse Kitchen Waste

    Recycling is one of the best way to save the planet from pollution, at least the housing ones.

    Some people give “kitchen hack” label for these tricks, even though it cannot represent the proper process of recycling.

    In addition, the waste you think has no use might still have several advantages.

    1. Cord Organizer

    As the monthly supply, paper towel is the one of the must have item. Then in a month, you could have the several empty rolls.

    Before throwing them away, you could take the ones with perfect shapes to keep the cables. Grabbing the rolls would be more efficient than pulling out the tangled cables.

    2. Healthy Stock

    Some recipes call a bunch of garlic and onions. Take the clove and make a delicious cuisine, but don’t throw away the skin. Just a quick fact: the skin of garlic and onions contains more nutrients than the cloves.

    Boiling them in a pan of hot water for several minutes will give you healthy stock to cook the next day.

    Kitchen waste recycling

    Read also: How to Clean Shower Curtain Liner without Washing Machine

    3. Broccoli Stalks Snack

    When you cook broccoli and garlic, the family’s favorite part would be the green leaves part. Most of the time, the stalks are thrown away.

    It is the biggest mistake you could ever made, because it is full of nutrients. Save the stalk to make a healthy snack or chopped it thinly and cook the pieces.

    4. Low Budget Scrubber

    When you buy a kilogram of fruits in the supermarket, the package often includes mesh bag. It is made from plastic, with a tiny price tag near the tie.

    After you eat all the fruits, don’t throw away the mesh. Transform it to scrubbers. Scrap the bottom of the pot with this low budget scrubber.

    5. Acne Reducer

    It is refreshing to have a big bite of watermelon in the burning summer day. Many of you would leave the white part on the table.

    Then someone clears the table and the skin part ends up in the waste bin. Do you know that the white part is a great acne-fighting agent? The skin could even transform to delicious pickle.

    6. Itch Reliever

    Outdoor picnic exposes your skin to every kind of pests or insects flying around the area. Sooner or later, the bugs will land on your skin, causing disturbing itch.

    Use banana peel to rub the itchy skin or area with rashes. Even when you have problems with pests, chopped banana peels could keep the bugs away from your plant.

    7. Tea-mix

    After enjoying peeled apple in the morning, what do you do with the skin? It shouldn’t throw away in the first place. Dry it under the blazing sun, and later on you could mix it in your tea. You will get a cup of apple tea.

    Getting creative is not always about crafting. Recycling could be one must-try option for you. The materials are taken from your kitchen waste.

    It might be surprising to learn that the waste you never care about could turn into a lot of beneficial things. You can have tea-mix, itching reliever, acne reducer, and even scrubbers!

    CREATIVE WAY HOW TO REUSE KITCHEN WASTE

    Originally posted 2020-05-20 04:17:52.