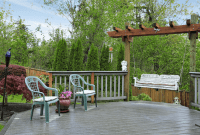
To make their house looks more essential, most of house owners like to have their own décor of ceiling panels, especially in the porch.
From all of panel types, beadboard is one material that most of house owners use to complete their ceiling panels.
Installing beadboard panels is not difficult once you know the steps.
Read also: How to Install Your Own Porch Ceiling Lights .

1. Measure the Porch Ceiling
Just like all project, the first thing that you need to do is measuring. This time you need to measure your porch ceiling.
You can start by measuring the area that you will decorate. Use some common measurement stuff like tape measure, pen or pencil and something you can write on.
A step ladder is also necessary, since it won’t be possible for you to directly reach your porch ceiling. Place the ceiling joists above your porch then measure the distance between the joists.
For example, if the joists were going east to west, you would go north to south. Note all the measurements carefully and make sure that you remember where each particular measurement came from.
2. Cut the Beadboard
If you are finish with the porch ceiling, it’s time to deal with the beadboard. Measure the lengths from the porch ceiling to the beadboard planks using your tape measure.
Use pen or pencil to mark them then cut them down to size using a miter saw.
For this particular cutting, you need to prepare a miter saw blade at a 90 degree angle. It will really help you to produce straight and long cuts.
Repeat this step until you have enough cuts to cover the porch ceiling. Make sure that you produce the same size for all cuts.

3. Install the Beadboard
After making sure that you already produce the cuts for the same size, it’s time to install the beadboard.
Take the first piece of beadboard then push it up to the ceiling. Start with one side first so it’s going to across the joists that you already measured.
Place the grooved side and make it face the wall, so there will be a small gap along the line. By driving the flooring nails into the board, nail the board in place where the ceiling joists and the beadboard line up.
4. Cut Off the Ceiling Trim
Then the last step you need to do after installing the beadboard is cutting off the ceiling trim. Take the ceiling trim that is a thin edge of the board to hide the joint around at the edge of the ceiling.
Take the first piece and make it 245 degree angle at the end of the piece. Install it into the end of the beadboard then slide the second piece of the trim against it. Mark the angle that will need to be cut then trim it down until it fits together with the first piece.
Those steps are recommended to be applied if you plan to decorate your porch ceiling beadboard panels. Understand every step first before you start doing the instructions. Correct measurement is really needed in this kind of work.

Originally posted 2019-12-23 01:30:16.


