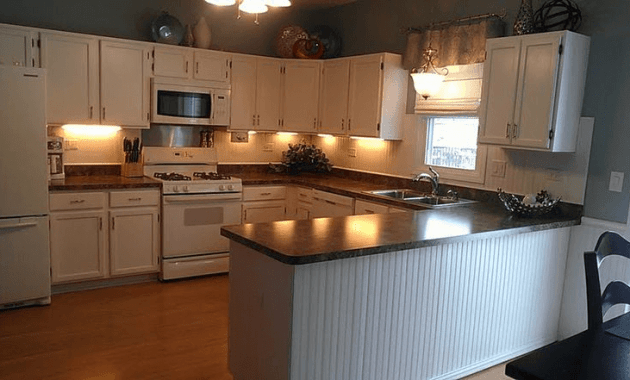
Do you have the thought to change the look of your kitchen cabinets? If you do, then you should try Rust-Oleum Refinishing Kits.
Buying these kits would save you a lot of money because you can do the refinish yourself.
Without further ado, these are the kits and how to apply them:
Read also: Kitchen Cabinet Door Design Ideas.

Rust-Oleum Refinishing Kits
Many people tend to replace the whole kitchen cabinets than refinish them by themselves. This can cost a lot of money.
For one project, people may have to spend about $6,000 including professional help. But, buying these kits will only cost you $70 up to $90 for each kit.
Basically, these kits consist of ingredients to repaint your kitchen cabinets. There are two kinds of Rust-Oleum Kits that you can choose; Cabinet Transformation Light Kit (to lighten up your cabinets) and Cabinet Transformation Dark Kit (to darken your cabinets).
In each box of Cabinet Transformation Light and Dark Kits, you get two bottles of deglosser, a can of bond coat, two small cans of protective top coat, a small can of decorative glass, some scrub pads, some stir sticks, decorative glazing cloth, and manual disc.
Read also: How to paint kitchen cabinets.
How to Apply
Before applying the kits, there are things you should do beforehand. First, you must measure your cabinets’ length. Exceeded length may cause you to buy additional kit due to insufficient paint.
Second, you need to prepare two paintbrushes, three containers, a dry cloth, rubber gloves, and painter tape.
Third, empty your cabinets, then remove the cabinets’ doors and shelves. Then, remove hinges from the cabinet doors and keep them somewhere else. Next, cover your kitchen countertops with paper or plastic so the paint won’t drop.
After that, apply painter’s tape on the side of countertops, on the front edge inside the cabinet, and on the edge behind the cabinet.
Finally, clean your cabinet doors and carcasses with dry cloth so there won’t be any debris or dust.
When you are about to use the Cabinet Transformation Light or Dark Kits, then what you should do after cleaning the doors and carcasses is to apply deglosser on them; make sure the surface is entirely covered.
After that, pour the bond coat inside a container and start painting your cabinet door and carcasses. Do not use a roller and use paint brush instead for perfect result.
When you’re done, let the paint dry for three hours, then apply second coat layer. After that, pour the glaze in a container and apply the glaze on the cabinet doors and carcasses.
Then, use the glaze cloth to wipe off the excessive glaze and let it dry for eight hours. Finally, pour the top coat into a container and apply it on the cabinet doors and carcasses.
Read also: Kitchen Cabinet Toe Kick Ideas.
Rust-Oleum offers two great kits that will make your kitchen cabinets look more beautiful. The paint coming from this kit is different with normal paints; it is more durable and it won’t peel. Rust-Oleum is simply one of the best brands when it comes to refinishing kits.

Originally posted 2019-09-27 01:47:33.


