Tag: Furniture

  • How to Build Small Wooden Porch Swing Glider Frame

    How to Build Small Wooden Porch Swing Glider Frame

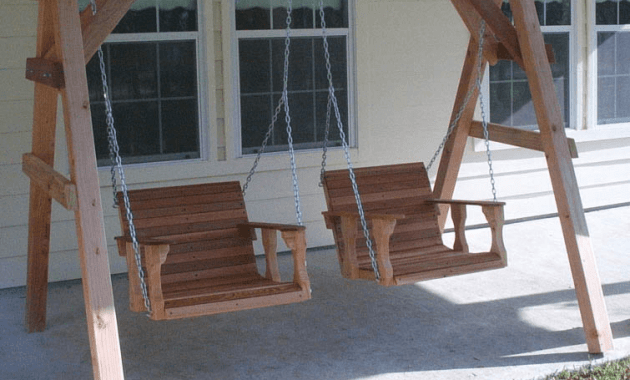
    Porch swing needs a frame so that the porch swing can hang properly.

    In order to have the porch swing frame, you can ask the professional installer to build it.

    Otherwise, you can build it by yourself. Here is all about DIY project in building the porch swing glider frame.

    Read also: Simple tips to build DIY wood porch swing frame plans.
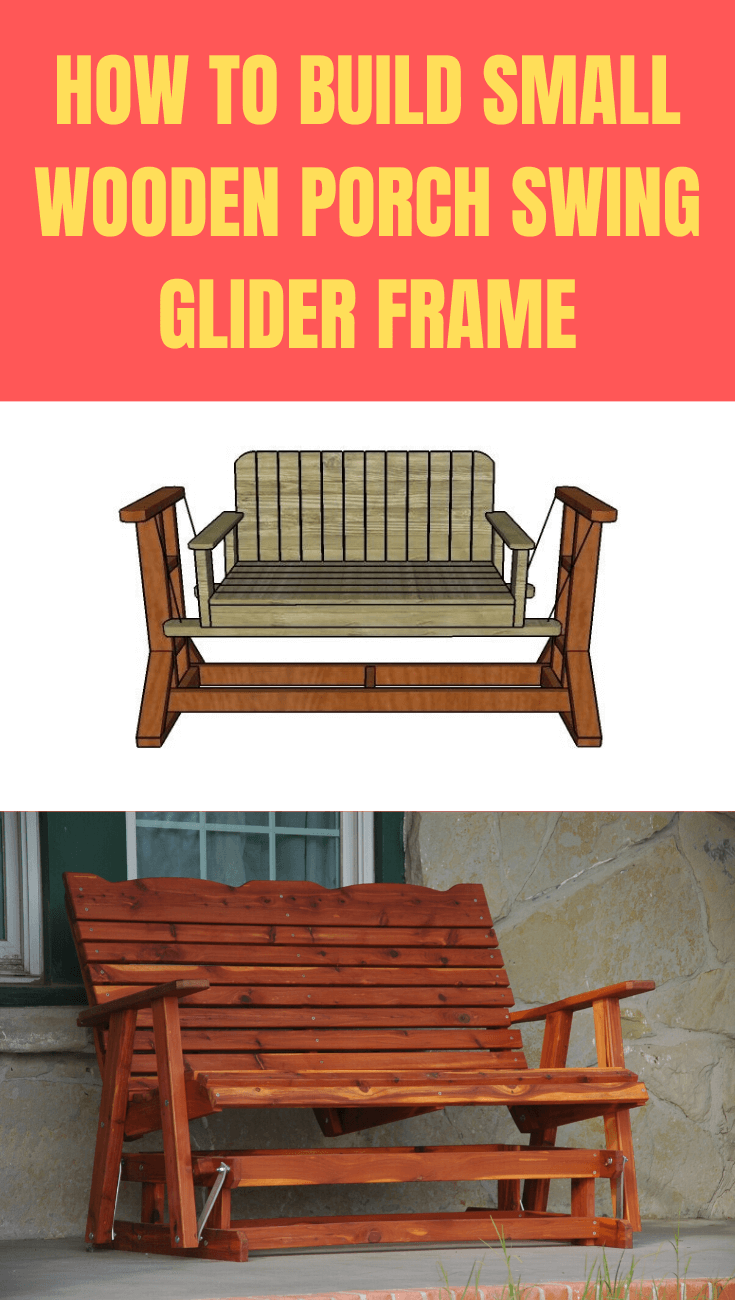
    How to Build Small Wooden Porch Swing Glider Frame step by step

    1. Preparation

    Before building the glider frame, there are some materials that you need to prepare. They are:

    • 4 pieces of 3×4 lumber with 32 ¼” long for the legs.
    • 2 pieces of 2×4 lumber with 22 ¼” long and 2 pieces with 30 ¼” log for the frame.
    • 4 pieces of 2×4 lumber with 14 1/4” long and 2 pieces with 5 ¾” long for the braces.
    • 2 pieces of 2×4 lumber with 70” long for the supports.
    • 100 pieces of 2 ½” screws.

    After preparing the materials, you need some tools to work with. The tools are sledgehammer, measuring tape, post hole miner, level, four-sided framing, drill machinery, screwdriver, sander, miter saw, concrete mixer, safety glasses and gloves. In making this porch swing glider frame, you will need a day to finish it.

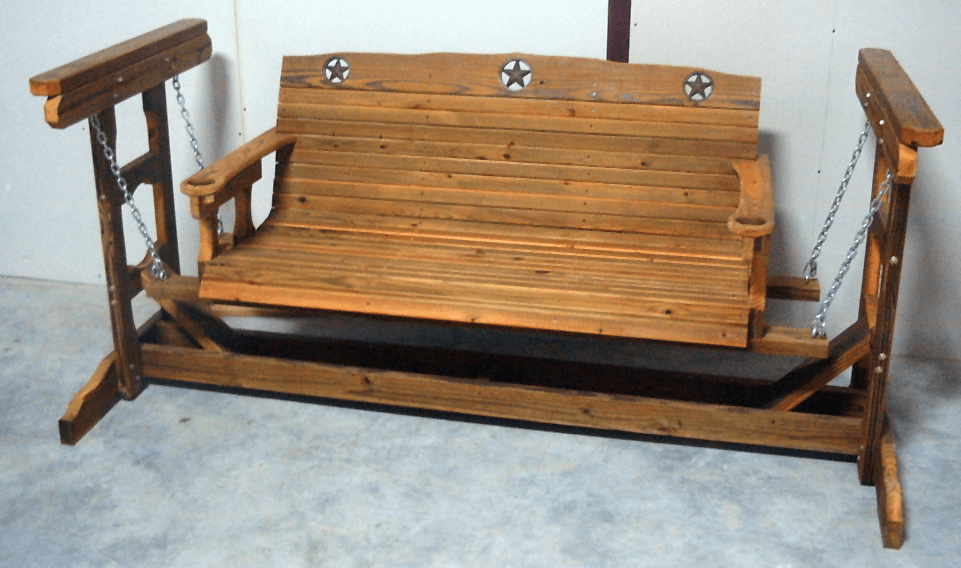
    Natural Wooden Porch Swing Glider Frame design ideas

    2. Steps on Building the Porch Swing Glider Frame

    After preparing the materials and the tools. You are now ready to start the building process. Here are the steps on building the porch sing glider frame.

    1. The first step is to build the top and bottom components for the side of the frames. You may round both of the side frames with jigsaw if you want to develop the look of the components. Then, smooth the edges of the frame with sandpaper. After that, use the damp cloth to remove the residues.
    2. For the second step, build the vertical support for the frame with 2×4 lumbers. Then, drill the holes through the bottom and top supports. Next, insert the 2 ½” screw to the vertical component. Bring into line the edges or you can try to drill the holes at the vertical components both ends, and then insert the 2 ½” screws to the supports.
    3. Then, build braces use the 2×4 lumber. After that, cut the end of the brace at the 45 degrees.
    4. The next step is to fit the braces to the both of frame sides. Then, align the edges and drill the pilot holes. Insert the 2 1/1” screws so that the braces lock into the proper place.
    5. After that, you have to fit the bottom braces to assemble the stand. Cut the components with the proper dimension (based on your swing bench) and then lock it to the vertical components by using 2 ½” screws. Then, drill the pilot holes so that the wood will not be split.
    6. The next procedure is you have to make sure that both of the frame sides are plumb. You also need to check whether the corners are square or not.
    7. The last step is to take care the finishing touch. Thus, fill the pilot holes with the wood putty and then make it smooth with 120-150 grit sandpaper.

    So, you can build your own porch swing glider frame if you do not want to ask the professional to do it. However, make sure that you really work on it because it needs a whole day to spend and many materials to prepare.

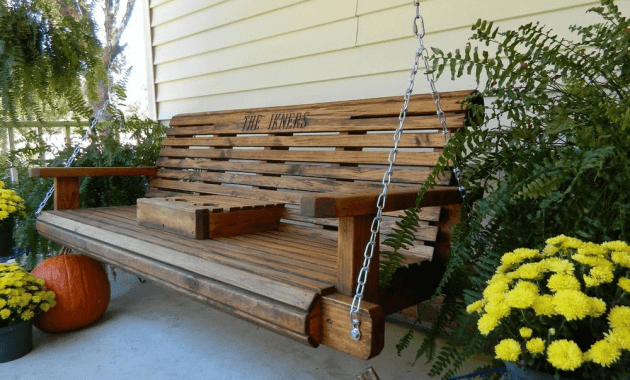
    Porch swing gallery:
    Originally posted 2019-11-20 00:13:19.

  • Things to Consider in Porch Swing Hanging Kit Buying Guide

    Things to Consider in Porch Swing Hanging Kit Buying Guide

    Nothing will make you more relax than your own porch. As a place that most people use to relax, porch can be described or can be designed with so many stuffs in it, including a porch swing.

    Choosing a porch swing also need some consideration to make it works maximally, so here are those consideration.

    PORCH SWING HANGING KIT BUYING GUIDE

    1. Material

    The very first thing you need to consider is about from what materials your porch swing is made of. Porches swings can be made of various materials like wrought iron, plastic, wicker and of course wood.

    For example, durable recycled plastic can produce a brown or white patio swing that will bring and old fashion brick home or the modern one which features an opened patio.

    A wooden porch that is made of wood is more recommended if you want to bring classic touch to your front house. Wooden swings made of ash or oak produces contrast view against a house with dark siding or bricks.

    If the swings are made of cherry wood, maple or teak will add the dept to a pastel or classic white colored home.

    Read also: Simple front porch designs tips

    2. Climate

    The next thing that you have to consider in choosing porches swings is the climate in your area. This factor becomes important since each type of porch swing is designed for different situation.

    For example, plastic swings are the best choice if you live in an area that receives too much snow and rain, since this type of swing is easy to withstand and clean a lot of wear.

    Another type of swings that is sturdy and heavy enough to withstand snow is an iron swing.

    If you live in wet climate but you really want to apply wooden swings, you can always cover them with any waterproof sealants to make the wooden swings become more water-resistant.

    Then if you live in warm climate, a classic white wicker is the best option since this type of swings will stretch and become deformed if it gets too wet.

    3. Style

    Then if you already deal with the previous factors, you can think about the style or type of the porches swing. Designed for two or more seats, porches swings come in various sizes and styles nowadays.

    It can be made for individual artisans or the mass crafted or market. The one thing that most people consider in looking for swings is the size of the porch or the area where the swing will be placed. You can also consider about having a DIY porch swing projects.

    Surely it will save the cost since you can recycle ant materials, depend on the style you want to have. DIY porch swing will also allow you to express yourself since you really make it from nothing.

    Read also: What types of porch swing is right for you?

    Since porches swings provide any additional coziness, people can have different reason for having porches swings in their house. It can be for having fond memories, having interest in vintage appeal, or simply looking for enjoyable outdoor seating. Whatever the reasons, there are always things that need to be considered.

    Porch Swing Hanging Kit Gallery:

    Originally posted 2019-11-19 01:04:35.

  • Simple Tips to Build DIY Wood Porch Swing Frame Plans

    Simple Tips to Build DIY Wood Porch Swing Frame Plans

    Plants and natural stones usually dominate the decoration in the backyard. What about a swing? Just like how fun it is to make the planting plants, you can try your lumber skill by making it by yourself.

    Take wood as the basic material (Read also Types of porch swing), as it is one of the easiest and safest items to work with. Prevent any errors by learning the simple trick.

    SIMPLE TIPS HOW TO BUILD DIY WOOD PORCH SWING FRAME

    1. Ensure Enough Space

    Usually this problem won’t be noticed until you have done half of the process. The empty space for the swing is not enough for swaying back and forth.

    It only accommodates the swing to stand still. Even though this kind of mistake is normal for any first-timer, restarting the process from the beginning is not favored at all.

    So, before starting the building project, make sure the space is at least 6 feet or more from any fixed exteriors.

    To make it easier, mark the measured territory with a stake and string. Take a few steps back and run the demonstration in your mind. When you already set the position, begin the process.

    2. Choose Ground Level

    In the end, you want to install the swing on the ground. Could you imagine how awkward it is when the swing is bouncing?

    Stay away from this possibility by setting the swing on a level ground. Invest several minutes to check the level and dig reinforcement holes.

    If you got nothing but a sloping area, cover it with concrete. Later on, the swing’s legs will be buried with cement to the concrete.

    The area for a great swing is ideally placed below the shades of a tree. Remember, all day exposure to sunlight may burn the iron or wooden seating.

    Porch swing frame brackets


    3. Store The Parts Separately

    When you buy a full set of swing to assembly or even cutting boards to build the swing yourself, you must have realized that this simple entertaining item has a lot of parts.

    To make sure you will not lost them in the middle of the process, you will need a lot of boxes to store them. Put the boards for frame in a box and the boards for the seat in another box.

    It also applies for the screws. This tiny item could make you go crazy if lost. Therefore, it is better to put them inside a labeled small container, sorted by the size. Lastly, read the instruction carefully and assemble your very own swing!

    Read also: Front porch design tips

    4. Divide The Jobs

    Every DIY instruction will say that the steps provided are the simplest and easiest one. While it is part of the truth, you cannot deny that there are tons of simple instruction. Doing it by yourself will take at least two days, without any rest! Getting a hand would be better.

    While building the swing, put one person in command. This person should be able to read the instructions well and prepare the materials needed.

    The rest of the team will do the cutting and assembling. By dividing the jobs, you would be able to finish the job within a day.

    A swing in a chilly afternoon would be the best place for you to have a “me time”. But before you could actually sway on the swing, invest your time to build one by your own.

    During the process, you don’t need special skills of a lumber. Having experience with cutting and following the tips above would be enough. Now grab your materials and start working on the project!.

    Porch swing frame plans

    Originally posted 2019-11-17 00:42:39.

  • The Most Popular Types Kitchen Chairs with Wheels

    The Most Popular Types Kitchen Chairs with Wheels

    Considering that a kitchen sometimes serves as the dining room as well, you might want to furnish it with style.

    Then it could be quite a problem if you don’t know much about type of furniture that you want. A simple wish like “purchasing a kitchen chair with wheels” is not enough.

    Start your further investigation with the most popular items. Keep Reading.

    See also: How to decorate kitchen chairs seat cover

    1. The Best Design

    Side chair still preserves its first seat in terms of design. Standing elegantly without padding, this chair could have decorative pattern on the tall or arched back rest.

    The wheels or casters make it easier for you to push this chair under the table. There is no place to put your arms.

    Another favorite design is Parsons Chair, which first released in 1930. It has clean lines, skipping all the frilly decorations.

    The strong point is its padded seating and back rest. You could literally put Parson Chair in any room or corner in the house.

    If you like to have place to rest your arm, then the arm chair is the right choice. It has padded seating for your comfort, tall back seat, and arm rest.

    The resting bar could be attached from the chair or connected to the back seat. In short, it looks like the fusion of side chair and Parson chair.

    Rustic wooden leather kitchen chairs on wheels for 6 with large rectangular table

    2. The Most Favorite Seat Materials

    When discussing about comfort, none of its competitor could beat the upholstered seat. It offers comfort through the soft padded material.

    The manufacturer usually pair lighter color to dark color in order to create elegance. Leather also comes to the top spot because of its luxurious look.

    Moreover, leather doesn’t need too much coating: it still looks fancy as it is. Also, the comfort is not declining at all, since the seating is padded.

    Going for country side look? Then pick wicker seating, the manufactured fabric material. It resembles bamboo or rattan and gives similar comfort in cheaper prize.

    Kitchen table chairs with wheels

    3. The Most Voted Chair Style

    There are three styles that is more likely to get chosen by the costumers. Maybe you will love these style.

    The first one is the traditional style. It has timeless frame, delivered through the carved wood without any padding. Since the interior might be changed, the traditional style could fit to almost all themes.

    Another style you could choose is the coastal style. Utilizing wicker to wrap chair frame, the manufacturer wants to bring the relaxing atmosphere in the kitchen.

    Caster or wheel is the practical finishing look that helps with moving or rearranging.

    If you are a fan of asymmetrical shape, then pick the contemporary chair. It usually adapts wide variety of shapes, but most of them incorporate curves. In addition, you will have a lot of popping colors to choose.

    Read also: How to Choose Modern Kitchen Island Chairs.

    Out of the rooms in the house, most people would agree that one room that fits as personal space is kitchen. This is the main reason why people, and probably you, try to furnish the kitchen with the most comfortable and practical chair. Now that you already have further information about the caster chair, you can pick the best one suitable for you.

    MOST POPULAR KITCHEN CHAIRS WITH WHEELS

    Originally posted 2019-10-22 02:51:44.

  • How to Make Amazing Decoration Using Kitchen Chairs Seat Cover

    How to Make Amazing Decoration Using Kitchen Chairs Seat Cover

    Have you ever thought that your kitchen can be upgraded by its appearance?

    If you are looking for the way to enhance your kitchen’s look, so that it has fresh and fancy look, you can try this tips on how to make amazing decoration using kitchen chairs seat cover.

    Once you follow these tips below, you will be amazed by the result. So, check these tips below!

    Read also: Tips to choose modern kitchen island chairs

    Planning Your Project

    Whether it is a small project or a big one, you should always plan it first. You can start by counting how many chairs that will be covered using chairs seat cover.

    This is important thing to do if you are planning to afford some chairs seat covers, so that you don’t spend too much money. Then, you can start selecting the material of chairs seat covers that suit your need.

    Planning the Patterns and Colors

    The next thing to do is planning the patterns and colors of chairs seat covers. You will take longer time to decide the perfect patterns and colors of the seat covers that suit the environment of your kitchen.

    For example, you can choose the patterns that match with the tabletop and other kitchen appliances and choose the most matching colors with your kitchen walls.

    Measure Your Chairs

    You have to make sure you know the size of your chairs, including the space between the outer spindles, the width and length of both the seat and the back of it.

    This will require the skill of measuring, so you will have to make sure you have the right tools to do that.

    The purpose of measuring the chairs itself is to get the exact size of chairs seat covers, so that they will appropriately match with the size of the chairs.

    Select Seat Cover Material that is Easy to Maintain

    It is also important to select the most suitable seat cover material. In this case, the material that is easy to take care of will be preferable. This will be crucial if you have children or pets in your house.

    For example, if there is an accident, when your kid unintentionally spill his soup on the seat cover, you will have no difficulty on removing the stains.

    Nice decoration using vinyl kitchen chair seat covers

    Additional Information

    For those who still don’t know what types of chair seat covers they should pick, here are some descriptions of three most common options.

    1. Microfiber

    Microfiber materials provide durability and softness for kitchen chairs. Besides, it also offers visual appeal. The materials are designed to be resistant to stains and spill and they can be spot-cleaned.

    2. Vinyl

    Vinyl offers high durability and easy-to-maintain fabric for kitchen seat chairs. The material can be cleaned just right away as needed without any aids, such as water or vinegar. It is available in a variety of colors.

    3. Cotton

    Cotton is durable and resistant to fading because it is a natural upholstery material. It is best used in a house with no children or pets. Cotton offers limitless pattern options as it can be dyed.

    Making awesome decoration using chairs seat covers in your kitchen is actually a fun thing to do. If you follow up the tips mentioned above, you will do so great with your decoration project. All you need to do is to be creative and innovative, so you can make amazing decoration using kitchen chairs seat cover.


    HOW TO DECORATE KITCHEN CHAIRS SEAT COVER

    Originally posted 2019-10-21 01:18:20.

  • Most Popular Kitchen Hutch Design for Best Display

    Most Popular Kitchen Hutch Design for Best Display

    Kitchen hutch is a focal point in your kitchen. You can display food and kitchen utility in your hutch.

    Therefore, a perfect hutch is needed. Here are the popular designs of a kitchen hutch. Take a look and get ready to pick.

    Read also: Kitchen hutch decoration ideas.

    MOST POPULAR KITCHEN HUTCH DESIGN

    1. Freestanding Hutch

    This design is popular to reflect the heirs in China. Yes, you can use a black China hutch in this design. It won’t be old cabinets anymore because it has a new design.

    You will find it with open storage in upper level and the close cabinetry below it. It can also give the best contrast, if you put this cabinet in a crimson wall.

    2. Cottage Style Hutch

    If you like small hutch, this design is the one. Although small, it still provides a good space for displaying stuffs. It has solid doors below the hutch and makes it perfect for storage place.

    Meanwhile on the top hutch, there is glass door which makes it attractive to see. It also has another benefit which is easily to move.

    This cottage style hutch comes with blue colors. No matter how you put it, it will match beautifully with its surrounding.

    Cottage Style Hutch

    3. Built-in Hutch

    This design is perfect if you want to show your glasses and dishes collection. It has a glass-front as upper sideboard and closed cabinetry below it.

    It is the best choice for an extra storage in this big hutch. It looks elegant in white while it also gives you a perfect storage.

    Built-in Hutch design
    Image: houzz.com

    4. Furniture-Style Cabinetry

    This design comes with warm accent of wood which should be perfectly fit to your kitchen. This hutch is designed as your cabinets with three levels storage.

    The top one is designed in the glass paneled type door. You can display your dishes collection in this level.

    The second level is the hide clutter with paneled door. The bottom one is the cabinetry made of solid wooden. The three level storage in this hutch will not only good as a storage but also a good display to add in your kitchen.

    Furniture-Style Cabinetry

    5. Open Shelving Design

    This design uses the beveled-glass door cabinetry. It is great to display your collection there. It can also reflect the sunlight when it comes to your kitchen. It makes the atmosphere warm and lively. This hutch has open shelving between the two glass cabinetry.

    You can use this open shelving to display other things beside your dishes and kitchen stuffs. You can put photos or other works of yours as well. Make it shines in your own kitchen.

    Besides that, this hutch also has a closed cabinetry as storage below the display place. This hutch is quite elegant and it is a useful piece to put in the kitchen.

    Read also: Kitchen Hutch Buffet Decoration Ideas.

    Remember that the hutch will affect your display. Choose the best hutch design to make your display brighter. You can design your hutch as you like as long as it is suitable with the entire concept of your kitchen.

    It is also important to consider on function as well instead of implying only on display setting. So, which one looks like a perfect match for your kitchen?

    Open Shelving Kitchen Hutch design

    Originally posted 2019-10-13 10:20:34.

  • Why Using Kitchen Countertops without Backsplash

    Why Using Kitchen Countertops without Backsplash

    When you go to all details of your kitchen, it is assured that you will also think about the wall.

    It is true when you apply backsplash to your kitchen wall, you will have so many options and ideas in your mind to make your kitchen look more gorgeous.

    But the fact is some people do not like using backsplash in their kitchen. Here are some of the reasons.

    Read also: How to decorate a bare kitchen wall with these five items.

    THE REASON WHY USING KITCHEN COUNTERTOPS WITHOUT BACKSPLASH

    1. Consider the Placement and the Function

    The main function of backsplash is of course to avoid any water or splash coming to the back of your wall, but misplacing backsplash in your kitchen will make it looks awkward.

    Awkward here means when you apply any backsplash but it is clearly seen that there is no sink or washbasin in front of the backsplash.

    Even though you use the most beautiful backsplash, it will still look awkward when there is no sink or washbasin in front of it.

    People who put the main countertop at the center of the kitchen tend to avoid using any backsplash.

    2. Lack of Backsplash Materials

    The next reason is about the backsplash materials. Even though we know that backsplash can be made of so many materials, most of them are not really easy to clean.

    Amongst of all materials, glossy paint materials are the only materials that is easy to clean. You definitely need more time just to clean your kitchen if you apply backsplash that is not made of glossy paint materials.

    Kitchen countertop without backsplash
    Image: kitchen-restylers.com

    3. Thinking About Upgrading in the Future

    This reason is acceptable when you plan to remodel or upgrade your kitchen countertop. When you decide to upgrade your kitchen countertop with backsplash on it, you will need more time again just to remove the old backsplash.

    Even in some cases, removing the backsplash needs more time than upgrading the kitchen countertop itself.

    You will save much time when you do not apply any backsplash, since you only need to repaint the wall without damaging it to remove the backsplash.

    4. Lack of Decoration

    Another weakness of applying backsplash is its flexibility. When you have backsplash in your kitchen countertop, it is almost 100% sure that you will not be able to attach any decoration on it.

    You will also not be able to hang all of your kitchen equipment, which makes your wall look plain without any decoration or hanged elements on it.

    5. Need More Budget

    The last but not least reason is always the budget. Basically budget will not be a really big deal when you commit to spend much money for your kitchen. But it will be better if you allocate the budget for more important parts of your kitchen. You can save your money when you do not apply any backsplash since you only need to buy any pant.

    Read also: DIY Kitchen Cabinet Drawer Replacement.

    Basically applying backsplash in your kitchen countertop will not be that horror when you can deal with those reasons. You can avoid the reasons by really calculating and considering the right function, placement and the materials of the backsplash. At the end it is up to the house owner.

    Kitchen countertop and wall image idea gallery:

    Originally posted 2019-10-09 01:18:51.

  • Consideration Choosing Kitchen Countertop Materials

    Consideration Choosing Kitchen Countertop Materials

    When you are about to start designing your kitchen, you will think about all materials you are going to need in your kitchen.

    From all parts of the kitchen, you can start with your countertop. There are a lot of materials you can apply, but make sure you choose it with right consideration.

    Here are some things you can consider in choosing kitchen countertop materials.

    Read also: How to match kitchen cabinet countertops and flooring combinations.

    HOW TO CHOOSE KITCHEN COUNTERTOPS WITH THE BEST MATERIALS

    1. Budget

    The first and the most important factor you need to consider is of course about the budget. Since all materials are priced differently, count on the money you can spend first before you deciding the material because some materials will cost you much money and probably take up your entire budget.

    It will not be really wise if you force your kitchen design when your budget is limited. If you go with minimum budget, a butcher block countertop is the best option. You can also go for tile or laminate countertop. It will cost less money if you can install it by yourself too.

    2. Cost

    Do not get it wrong, but this factor is different with the first one. The first factor tends to make you count on the money you can afford or provide. While this factor will make you think about some specific materials and its price.

    Even if you can provide large budget, you still need to spend it wisely since the focus in your kitchen is not only on the countertops. While budget can be relative to some people, the cost of the materials is usually the same in every place.

    For an example, materials like marble and concrete are categorized as expensive material. It is okay to pick them as long as your budget meets the requirements.

    3. Appearance

    When budget is not a problem for you, you can think about the appearance of your countertop. Different materials have a different look.

    If the countertop is the last thing you are dealing with, choose the material that will match with the interior of your kitchen.

    Black countertops

    For example, if you have kitchen cabinets with light colors like white or yellow, it is suggested to apply materials with contrast color to your countertop.

    Dark colors like black or brown are recommended. In the opposite way, apply materials with light colors to your countertop if you already have kitchen cabinet with dark colors. If you are not really sure in combining colors, it is better to apply neutral colors to create a clean look.

    4. Durability

    The last thing you need to consider about the materials you are going to choose is its durability. A good-looking countertop will be useless if it has poor quality. Materials with good quality don’t have to be expensive.

    Choose a material that wears and has heat resistant layer. For this case, granite is the best material because it is made of hard stone.

    Designing your kitchen countertop will not take much time once you know what the things to consider are. When you already know the things, you will find difficulty in choosing the materials you want for your kitchen.

    Here 15 Types of kitchen countertop materials:

    Originally posted 2019-10-08 05:45:18.

  • Unusual Tips Get Kitchen Countertops with Good Prices

    Unusual Tips Get Kitchen Countertops with Good Prices

    One of many things that determine a kitchen countertop quality is its price. The higher the price is, the better quality you will get of a kitchen countertop.

    However, for those who like to do money saving, these unusual tips get kitchen countertops with good prices can be followed.

    What are they? Check the following explanations below.

    See also: Kitchen island countertop ideas on a budget.

    UNUSUAL TIPS HOW TO GET BEST KITCHEN COUNTERTOP WITH GOOD PRICES

    1. What’s Your Type?

    First of all, you should know what type your kitchen countertop is. Is it quartz, granite, or recycled glass? If you have decided the type of your preferred countertop, list the pros and cons of your chosen countertop.

    For example, if you choose granite countertop, the pros are it has durability of spills, knives, hot pots and the cons are granite countertop needs periodic sealing for stain protection and it may chip easily if you aren’t careful with it. Don’t forget to take note for its price.

    2. Select the Right Fabricator

    After that, select some proper fabricators or installers. However before you start visiting them one by one, do a little research about those places.

    Check that they provide your preferred countertop material and compare the prices from one fabricator to another.

    If you want to be more selective, compare other countertop materials prices in case the others have good prices. If you have done it all, it is time to visit them.

    Kitchen counter cabinet corner shelf

    3. Stay Away from Expensive Towns or Areas

    One thing you should always remember when you make a visit to a fabricator is to stay away from expensive areas or towns.

    It is because the fabricators at expensive towns or areas will sell the countertop materials with very high price where you can barely afford them at all. Consider to visit only fabricators that offer budget price for countertop materials.

    4. Negotiate and Get Pricing

    Once you have found the right fabricator, ask about your preferred countertop material. Make sure to take a look at the real material, so you don’t only ask with only pictures in your mind.

    Make sure you ask the price when you have asked all questions in your list.

    After that, do negotiation with the fabricator. Do not hesitate to do this because it will decide the output of your effort.

    If you cannot negotiate at all, ask about other countertop materials prices in case your preferred countertop material is too expensive.

    5. Find Other Alternatives

    This is the last effort you can do, which is finding other alternatives in order to afford quality kitchen countertop.

    If your preferred countertop material is way too expensive, you should look for other alternatives. One of them is to select other countertop material that matches with your budget.

    In conclusion, affording quality kitchen countertop with lower budget is not easy to do, but it is worth the effort if you do those tips mentioned above.

    However, it will be probably better if you can save your money to get the affordable one. Hopefully, these unusual tips get kitchen countertops with good prices are helpful enough to take one quality kitchen countertop home.

    Kitchen island marble top decoration ideas with flower pot and sink
    Image: trabahomes.com

    Originally posted 2019-10-08 01:03:00.