Category: Porch

  • How to Maintain Front Porch Gate

    How to Maintain Front Porch Gate

    Do you want to know how to maintain the gate on your front porch? Every gate will need maintain at least once in 6 months to ensure that it is holding up just fine.

    To help you to do this job, these are the tricks and simple ways to maintain your gate on your front porch:

    1. Routine Checkup

    It seems simple, but do you know that routine checkup can help you to prevent bad things happened to your gate? So what are the bad things anyway?

    Well, if your gate is made of wood then the main problem can be termites. To prevent this you need to check your gate at least once a week to make sure that your gate is termite-free.

    Even if there are termites, the population won’t be too many so it’s still easy to get rid of them. Also, wooden gate means that whenever there is rain then there will be a chance mold and mildew to grow on it.

    Gate for porch steps

    Sagging gate is also a problem that is usually happened if the gate doesn’t gate routine checkup. Sagging gate can be happened to any gate including wooden and metal gate.

    Both can be fixed by tightening the hinges on each end of the gate. The hinges are made of steel; this is why some hinges may rust.

    This can’t be prevented but to maintain your gate so it will still look new, you need to replace the hinges with the new ones. As for metal gate, it can rust.

    Read also: Different Types of Porch Railings.

    2. Refinish the Gate

    Like what has mentioned before, if you have wooden gate then it may get mold and mildew. This condition is surely annoying because the look is terrible.

    To prevent it, it’s better if you refinish the wood with wood stain or you can always coat it with waterproof spray. This way it is safe from the fungus.

    But before doing it, you need to clean the gate first so there won’t be any debris or dirt on it. If you do the refinishing while the gate is dirty, then your paint job won’t be neat.

    Front porch dog gate

    To refinish your gate, you can repaint them. First of all you need to remove all of the old finishing though.

    Also, when you are about use paint, make sure you are not using water-based paint or the timbers can be wrapped and twisted.

    If this is happened then you have to rebuild your gate from the start and it is more annoying than having the mold and mildew, is that right? As for the metal gate, you can refinish it by giving it new paint. But first, scrub the rust off then clean the metal gate so there won’t be any dirt left.

    Read also: DIY Stone Porch Posts Wraps.

    A gate is important not only it is about safety but it is also a great outdoor decoration. Having a gate on your porch is great, but having it not checked then that’s a disaster. If you want your gate to have great look all the time, then you should apply the things above to do the job.

    HOW TO MAINTAIN FRONT PORCH GATE

    Originally posted 2019-12-17 10:06:19.

  • How to Choose the Best Front Porch Chairs and Benches

    How to Choose the Best Front Porch Chairs and Benches

    In your front porch, there are some chairs and benches needed. Why is it? It is because you can enjoy your afternoon not only inside the house but also outside.

    Without further ado, these are the ways to choose the best chairs and benches for your front porch:

    Read also: How to Choose Great Front Porch Rocking Chairs.

    How to Choose the Best Front Porch Chairs and Benches

    Prioritize the Features

    To find the best chairs and benches for your porch, first of all you need to have the thought of their features.  Outdoor chairs and benches can be tricky to be chosen, that’s why you need to prioritize on the features so you will have more choices yet the list can be made simpler.

    For example, you are looking for a chair that can be stored easily. Then, you might need to find out whether the chairs and benches can make you feel comfortable or not; because that’s the one keeping the furniture to stay, right?

    Blue front porch chairs and table sets

    The other example is when you need your chairs or benches to be easily cleaned. As we know, putting your furniture outside the house may cause it to be dusted or watered (by rain).

    Thus, if you let this problem then it is just a matter of time until your furniture becomes useless. If you have chairs and benches that are easily cleaned then you don’t have to be worried about the dust and water because it can be cleaned easily.

    The one that makes easy cleaning is the materials of the chairs and benches. Therefore, be careful in choosing the materials.

    Go for Quality and Design

    No one would like to buy defective product, that’s why it is better to spend more on chairs and benches with great quality. Quality includes the durability of the furniture; will it break after some uses?

    If you want chairs and benches with great durability then you should find the ones made of varnished wood or metal. Plastic is fine but it breaks easier than the other materials.

    Varnished wood and metal doesn’t let water to get absorbed on it so it will have longer durability but it may be more expensive. But you don’t have to store it and it can be cleaned easily.

    Nice front porch with rocking chairs double

    Also, don’t forget about the design. Design also has an important role in your front porch; it can bring new atmosphere to your front porch.

    Start finding out what accent the front porch gives and decide whether you want to complete or enhance it. For completing the design, you need to find chairs and benches that give more color, accent, and atmosphere so the accent will be various.

    As for enhancing it, just buy chairs and benches with the same accent of the porch but you can still choose the colors you want. Put some decorations like throw pillows would also be great.

    Front porch is a great place to spend your time in, but to do that you need great chairs and benches so it doesn’t have to be you alone sitting and enjoying the time. So to find the best chairs and benches for your porch then you need to rethink about the features, quality, and also the design.

    Best Front Porch Chairs and Benches Gallery:

    Originally posted 2019-12-17 09:03:54.

  • How to Choose Great Front Porch Rocking Chairs

    How to Choose Great Front Porch Rocking Chairs

    Do you want to know how to choose great rocking chairs for your front porch?

    Well, rocking chair is a very comfortable chair and it will be more comfortable if you put it on the front porch.

    To find the best one, you will need to ask these questions to yourself:

    Read also: Why using Front Porch with Rocking Chairs.

    HOW TO CHOOSE BEST FRONT PORCH ROCKING CHAIRS

    Is It Comfortable?

    The main point of a rocking chair is the comfort that you will feel whenever you sit on it. There are many aspects that you should think about; the seat, back seat, armrests, motion, durability and price.

    As for the seat, make sure it makes you feel really comfortable whenever you sit there because you will spend a lot of time on this chair.

    Then, you should make sure whether you can rest your arms comfortably on the armrests or not. Good armrests would make not only your elbows but your sit position become comfortable so you don’t have to change your position.

    White artistic chairs for front porch comfortable with table set

    Next, you need to check the motion of the rocking chair. Not every chair can move like what you want it to be; some might make you feel like falling.

    The point is; make sure the rocking motion makes you feel comfortable so you can even sleep on it without having the feeling of falling. Then, durability is the thing you surely want to know.

    How long can it be? How many years? Well, it’s all based on quality of the wood and the building progress so make sure you buy it at a well-known store.

    As for the price, don’t go for the cheapest; it may be defective. Sometimes paying more is better than getting defective products.

    How Do You Want It?

    Design is also important in choosing great rocking chair for your front porch. There are many designs that can be chosen, but also don’t forget to give some accents to your front porch.

    You might have seen a lot of furniture and decorations to add accent to the inside of the house, but the front porch needs the accent as well. Also, choose more than one so you will have some specific choices later.

    Make sure the design fits the design of your porch as well. You can choose among many designs; rustic, exotic, casual, contemporary, vintage, and many more.

    Outdoor front porch with rocking chairs

    Each will give different accent to the porch. But, don’t be hasty and think it through because each chair also has finishing you need to choose.

    The finishing can be painted, stained, varnished, or natural. If you have an opened porch where dust or rain water may get onto, then it is recommended for you to rethink about the material of the rocking chair.

    Most of these chairs are made of wood, so if you want the one which made of this material then take the one with varnished finishing. This way it will be safe from water.

    Rocking chairs are great whenever they are being put on the porch; you can relax there and enjoy your day. To gain more comfort you need to think about the aspects and also the design so it can be the best rocking chair you ever purchased.

    Front Porch Rocking Chairs Gallery:

    Originally posted 2019-12-17 00:09:43.

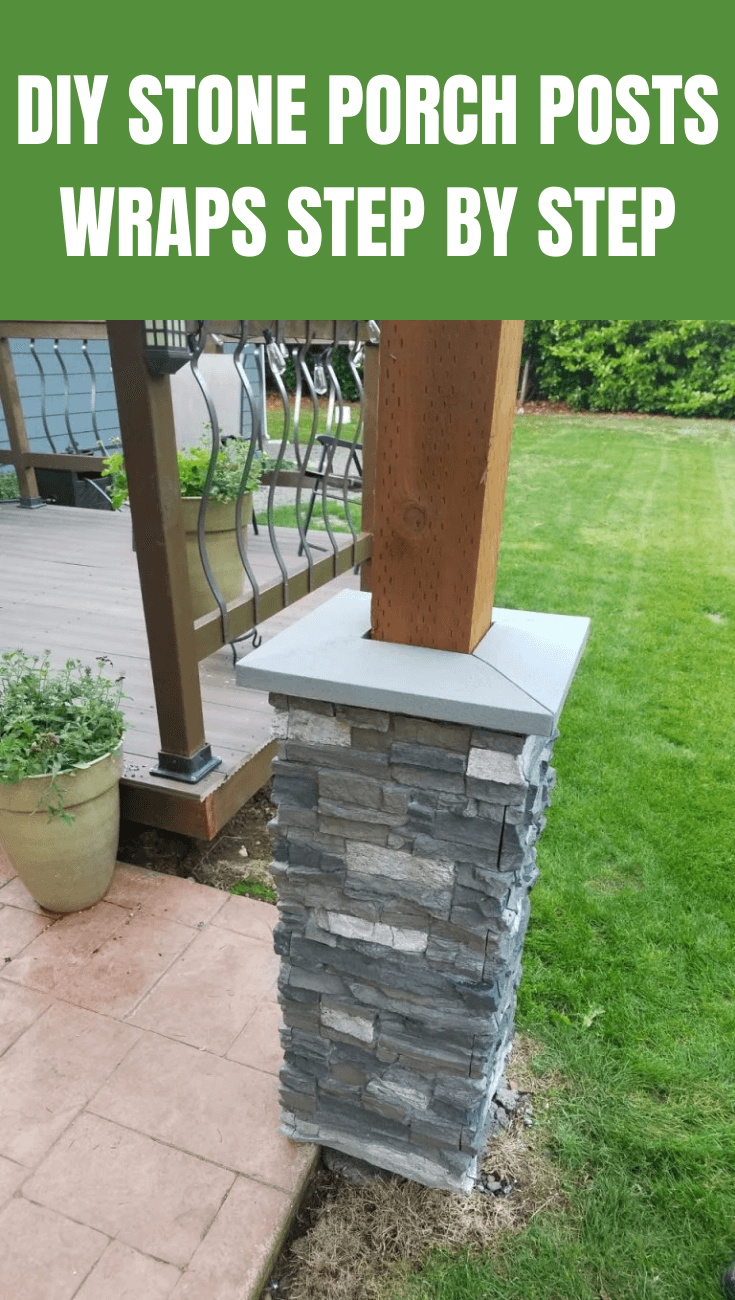
  • DIY Stone Porch Posts Wraps

    DIY Stone Porch Posts Wraps

    How do you like the look of your porch? Plain PVC will show its boring view sooner or later.

    Plan your new project to decorate your porch without replacing the whole posts.

    It could be done by creating a faux stone base on your installed posts. Learn the steps to do it.

    See also: Small Front Porch Decorating Ideas.

    DIY STONE PORCH POSTS WRAPS STEP BY STEP

    1. Preparing the Base

    The first thing to do is to cover the base with plywood, setting the shape of the stone base. Add two layers of ply tar paper around the plywood.

    The mortar could not attach well on the ply wood, because it could expand and shrink due to the changing temperature. You will also need a sheet of metal lathe.

    It helps the stone to stick tightly to the frame. The ridges side should face to the tar paper and overlap around 4 inches on the horizontal beam. Nail it to the plywood so it will stay on position.

    2. Coating with Mortar

    The next awaiting job is applying the mortar. While preparing the mortar, it is better to add minimum water, since you can always add more later.

    Cake up the base with mortar and tidy up the surface with whisk broom. The wavy and rough surface helps the stone to stick better.

    If you have problem with frosting mortar, use finishing trowel and mason trowel to break the frost. Defrost from the inside, then go with circular motion to the outer side. It needs at least two hours to dry again.

    Contemporary cedar porch post wraps
    Image: houzz.com

    3. Placing the Stones

    Here it comes the fun part: arranging the stones. You need to start with the corner. Fill up the back of the stone with mortar and set it on its place immediately.

    Hold it while fixing its place for around five to ten seconds to get proper adhesion. Repeat the same process for each corner.

    Then, you move to the center stone. Set some stones on their places and fill the gap with mortar. If needed, you could use hammer to cut the stones to get the proper size.

    Step back and see the final result. Scrape down the excessive mortar with sharp object. If you need to do more trimming on the corner stone, do it with a saw. Remember, you need flat surface on the top.

    4. Setting the Top Beam

    The last step is to create the top beam of the stone base. You need to cut the stone to 45 degree angle by using a cut-off saw.

    Lay a thick mortar bed on the top and place the capstones. Make sure to slightly bend the stone, so water can run off. Bring together the corner with mortar, starting from the bottom to the top.

    Proceed by filling the gap with mortar. Leave no space between the capstone and the pillar. Otherwise, the water could slip in and break the bond. Get ready to change the face of your standard porch. Call for help and mark a day in your calendar to finish this project.

    With cut stones and mortar, you will do the projects. Follow the instruction above carefully and minimize the errors. Get a fancier style with minimum cost!.

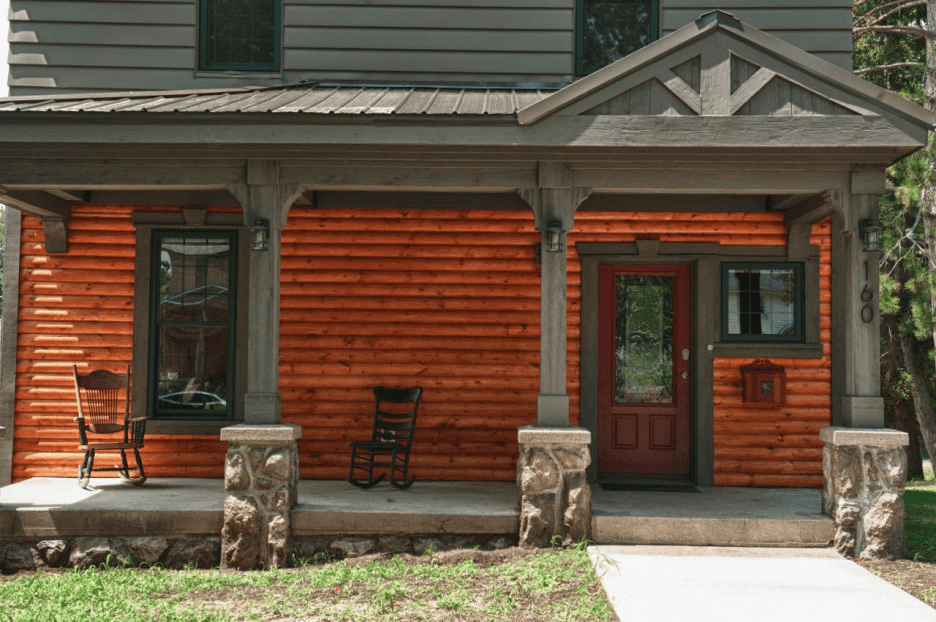
    Rustic wooden brown front porch column wraps

    Originally posted 2019-12-15 05:18:32.

  • Front Porch Column Brackets

    Front Porch Column Brackets

    Looking for something that can spice up your porch column? Stop yourself from total renovation; small decoration like a bracket could make things different.

    It is obviously far more affordable than conducting a renovation. Hands up if you like the idea! Now it is time to learn a little bit more about this item.

    Read also: How to Build Front Porch Columns using Wooden Material.

    WHY USING FRONT PORCH COLUMN BRACKETS

    Bracket vs Corbel

    Both items may come up together when you type their name on search engine. However, these two are not similar in and appearance. Its function, on the other hand, is similar. Both are made for decoration inside the room, outdoor and under the furniture.

    Corbel is usually made from stone, wood, or brick. It looks like supporting the cornice with its thick appearance. You usually find this on a large building or under the kitchen table.

    Bracket has slight different material base: wood, timber, or polyurethane. It could be found almost anywhere: window, porch, under the shelf, etc. Some creative people could even make a simple book end by using this bracket.

    Standard Types of Bracket

    Typically, the function of a bracket is to decorate the structure of a building. There are several decorative options to fill the space between the support and roof, creating an enchanting visual of the porch.

    1. Post Face

    This style fits to the house with flat and protruding top. After the installation, you will see a part of the bracket is holding the top.

    Some styles of the post face are Kirby, Cupid Key, Ruffled Swan, Meredith, Bailey and Jasmine. If you prefer customized size, discuss it with the staff.

    2. Victorian Style

    As mentioned in its name, the Victorian bracket is copying the style of its era. Some give it a nickname Gingerbread due to the habit of using gingerbread as decoration at that period.

    Thus, it created the beauty of scroll look on Victorian bracket. Some owners could even slip their name between the scrolls.

    3. Fan Bracket

    Just like how you read it, you will know it when you see it. The shape resembles a fan, with variations on the inner frame only.

    Three most popular variations are Ball, Spool and Spindle fan brackets. People add it in the corner or the porch column, or sometimes in the middle of the porch, creating half circle.

    Wooden Victorian Style Front Porch Column Brackets
    Image: hgtv.com

    Combined Brackets

    A bracket in the corner of the porch is not enough for you? Then you could take a look at the other options. They combine the bracket with something charming.

    1. Porch Spandrels

    It has the look of a railing, but up hanging on the ceiling. Some prefer to install Spandrels in the center without fretwork.

    If you have tall column, the bracket is installed under the Spandrels to shorten the gap from the floor. For those houses with narrow top, the Spandrels is installed next to the bracket.

    2. Running Trim

    The running trim connects columns. It has three basic shapes: rounded, edgy, and wavy. Two materials are available for this style: wood PVC and Polyurethane.

    Bracket is the cheap option to decorate your front porch. Even if it is quite affordable, the final result is not shabby at all. Moreover, you have more than a dozen of bracket choices in the list. If you want, you could also switch your pattern each year. Go and find your style!.

    White Artistic Victorian porch spandrels

    Front Porch Image Gallery:

    Originally posted 2019-12-14 00:04:39.

  • Porch Column Base Replacement: Replacing Rotted Wooden Column Base

    Porch Column Base Replacement: Replacing Rotted Wooden Column Base

    It is important to know that replacement on porch column base should be done as soon as you identify that one of the old porch column bases is rotted.

    Fear not, you actually can do this project by yourself even though you have less knowledge about this stuff. Wood is the perfect choice for the replacement as it is durable, cheap, and can look decorative.

    Now, it is time to follow the instructions below.

    Read also: Replacing Rotten Porch Columns Base.

    PORCH COLUMN BASE REPLACEMENT GUIDES

    1. Jack the Structure

    Normally, when replacing porch column base you need to use a hydraulic jack to provide temporary support. Besides, using a hydraulic jack is necessary in order to keep the roof steady and safe while you are removing the old or rotted porch column base. You should be careful to do this because it is a risky task to do.

    2. Build a Wall or Post Support

    If you are unsure about how the ceiling beam was constructed, then you need to install two temporary wall or post support on either side of the column. By installing these two temporary post supports, they can distribute the porch weight on the deck frame.

    3. Make Tiered Column Base Design

    What you need to prepare some tools, which are 2×6 wooden boards, a measuring tape, a circular saw, and rafter. Measure the column base then transfer the measurements to a piece of wood you have prepared. Then, trim off the piece of wood according to the measurement. Use the rafter to help the cut to be straight.

    Repeat the step to make another two column bases design, however, this time you need to make one smaller and the other one even smaller than the second. Make tiered column base design as needed.

    4. Remove the Old Column Base

    After you have done making the new column base design, the next step you should do is to remove the old or rotted column base. Tear down the existing wood columns using hammer and pry bar.

    Tear out as much of the existing or old column as you can. However, try to minimize the damage to nearby ceiling, floor, and walls.

    5. Install the New Column Base

    Now, you can install the new column base you have created. Installing the new column base can be tricky as you cannot hit the column with a hammer. Instead of doing that risky thing, you can shave off some of the columns.

    Or, you can jack the porch up higher so you can install the new column base easily. After that, don’t forget to pre-drill everything to fasten the column base with the column.

    6. Remove the Supporting Posts then Move to the Next Objective

    The last thing to do is to remove the supporting posts carefully. Then, move to the next column if you have another column base replacement.

    Replacing and old or rotted column base should be done immediately in order to preserve the life of the porch column and the base. Moreover, it is known that replacing the column base will ensure the safety of the building. These steps above are essential to follow in order to keep your house safe and steady.

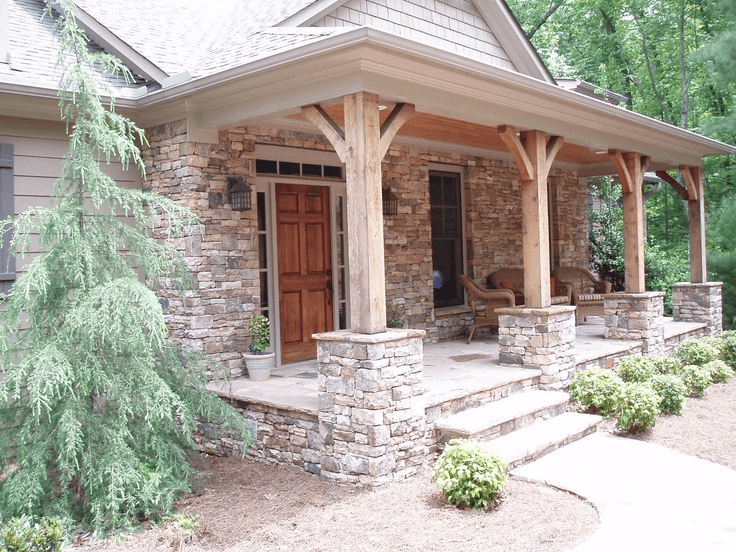
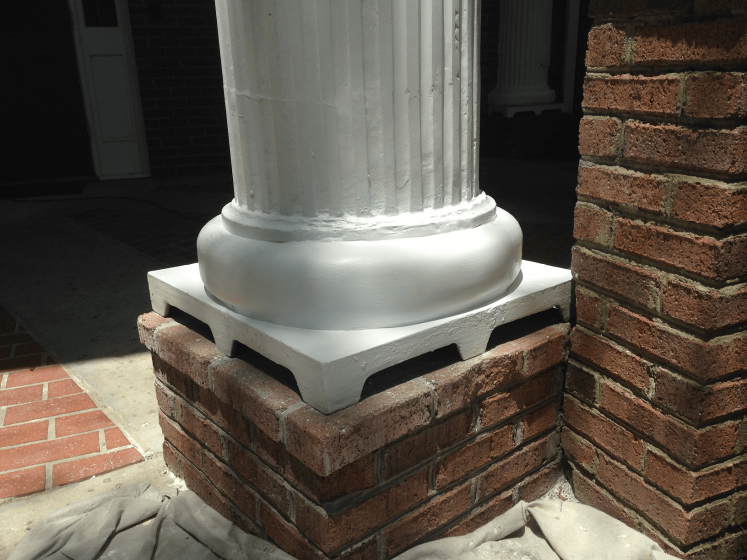
    Porch Column Base Replacement Faux stone

    Originally posted 2019-12-12 05:19:41.

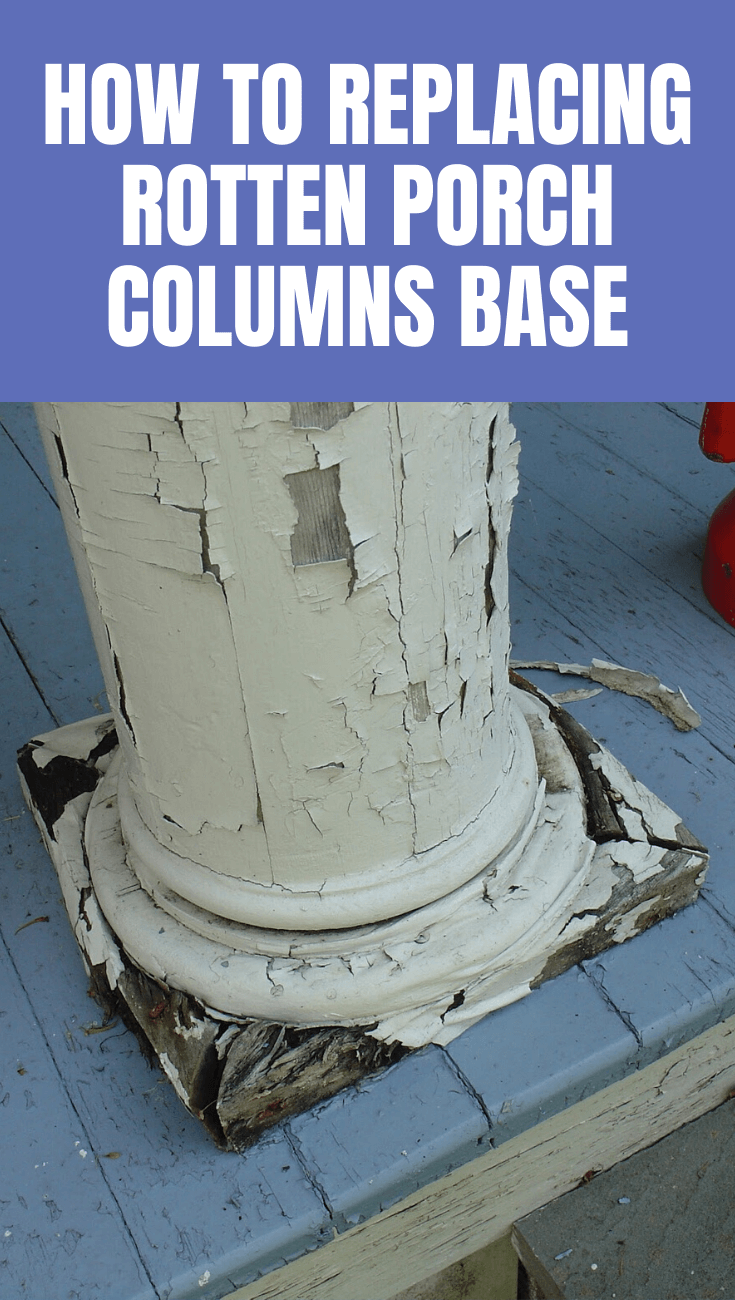
  • Replacing Rotten Porch Columns Base

    Replacing Rotten Porch Columns Base

    Having problems with your wood column base? After years exposing it to various weather, the wood will start weathering and breaking into pieces.

    This problem, of course, need immediate action from you: repairing. As long as the column still stands gloriously, this project should not take more than a day to finish.

    See also: Front Door Awning Kit and Design Ideas.

    HOW TO REPLACING ROTTEN PORCH COLUMNS BASE

    1. Remove the Rotten Base

    By using a hammer, slowly tap on the wood until all the broken pieces are cleared. In some cases, you can even use your hands to remove it.

    If you notice any termite, ants, or bees, spray proper commercial product to kill them. Don’t forget to wipe clean the base after that.

    2. Picking the Best Material

    The staff in a material shop will tend to recommend these two materials to you: PVC and pressed wood. For sure, PVC could stand any storm and thunder.

    However, it could expand and minimize its size in short period. Therefore, pressed wood is better than PVC, if used as the base material.

    Take a look at the pressed wood offered by the staff. You need to avoid any splinter and knots. They will be the way for moisture to enter and shortening the base lifetime. The best pressed wood should be clean and smooth.

    3. Preparing the New Base

    After measuring the size of the empty rotten base, you need to cut it to the size. For decoration purpose, you need to make it smaller as you prepare for the middle and top wood. Use miter saw to cut the exact 45 degree. Put the pieces together and test whether they fit tightly.

    You could do this step faster if you use the first board as the guide to cut the second and third board. It works especially when you have to replace the base of more than one column. Under fifteen minutes, you already have your new wood base.

    The final step to do is hitting the anti corrosion nail to all the woods. You could purchase the stainless steel or galvanized one. Before that, make sure you make it symmetrical, leaving equal inches on the sides. Take two woods first, nail them, add the top board and nail them again.

    4. Finishing

    Before you insert the new wood base under the column, think about the decoration. If you prefer to attach cove molding, then go on with the process.

    Molding could be easily stuck even after the wood has been installed under the column. However, if you want to carve the woods, it should be done before inserting the base into its place.

    In fact, the crafting should take place after board cutting. You could use the machine for this purpose. Then, apply latex caulk to fill the gap between the wood and column. Last but not least, you have to do the painting.

    If you have wood as your column base, you need to prepare yourself for the reparation. Sooner or later, you will have to do it. Before starting this one-man project, make sure the column or post is strong enough to stand still without the base support. Then, grab your tools and start working…

    Replacing Rotten Porch Columns Base Image gallery

    Originally posted 2019-12-12 01:46:11.

  • Screen Porch Weather Curtains Types and Consideration

    Screen Porch Weather Curtains Types and Consideration

    What to do next after you have finished the porch project? While enjoying the pleasure of breeze in the autumn, you might also realize that soon, the seasons will change.

    You will need curtain to help you enjoy all seasons from your porch. Learn more about the options available for you.

    See also: Three types of outdoors shower curtains.

    SCREEN PORCH WEATHER CURTAINS TYPES

    1. Fabric

    In selecting this curtain type, you need to consider the breathing ability, UV resistance, water resistance, and colorfastness. For summer, you might need a curtain that could let the air pass freely.

    In this case, you need fabric with high breathing ability. Those with low breathing ability will block the air, make the curtain damp, and later allow mold and mildew to grow.

    On the other hand, your screen porch needs a pairing with high water resistant in rainy season. This will be back side of breathing ability.

    High breathing ability means low water resistant, and vice versa. Outdoor also automatically calls for sunlight and heat. Therefore, you may consider to have curtain with UV resistance, which will stand longer under sun light.

    Since people love fabric curtain because of its color and pattern, check again its colorfastness. It defines how long a fabric could keep its bright color under the snow, rain and sun. The higher the rating, the better.

    Screen Porch Weather fabric Curtains

    2. Vinyl

    If you appreciate the view from your screen porch, then keep it that way. Vinyl curtain might be the best choice for you. Don’t worry about the custom size of your porch.

    Many curtain services would be happy to cut the vinyl based on the size of your porch. In fact, you could also install the vinyl curtain by yourself just within five to six hours.

    No special skill needed: you are ready to go with the bravery to climb a ladder and the experience with drills. Keep your style on with the various choice of apron colors. You can blend it to the porch furniture and interior.

    When it is time to install the curtain, the staff might offer you two kind of mounting: velcro mount (fixed) and track mount (retractable). The velcro mount will make use of marine snap and L screws. Most costumers choose this mounting over the track mount.

    Vinyl Screen Porch Weather Curtains

    3. Mosquito Net

    Aside from the season, another thing that may bother your cozy afternoon is the tiny bloodsuckers. Block their way to your skin by using the mosquito net.

    There are two types of it: the curtain type or the screen one. The curtain works like standard curtain.

    So whenever you need to install it, you just take the net to the sides. The screen, however, is more elegant. It could be installed with overhead tracking system or a Velcro.

    Every time you need the protection, pull it down. Press the button to fold it up when the weather is nice. No need to worry about the quality: it can hold up an adult, so the durability is guaranteed.

    Choosing the right curtain is simple, as long as you know what to expect out of your patio. Make your priority first; whether you want the beauty, practicality or durability.

    Then plan the final picture in your mind; what color or pattern that would blend to your porch interior. Happy planning and decorating!.

    Mosquito Screen Porch Weather Curtains

    Originally posted 2019-12-10 10:19:02.

  • How to Choose Bamboo Porch Curtains

    How to Choose Bamboo Porch Curtains

    Among all type of curtains, bamboo is one of the types that mostly used. There are many reasons why people like to use bamboo as their curtains. The reasons are also different from one family to another.

    However, from all those reasons, there are some things you need to consider before you choose bamboo curtains for your porch. Here are the things:

    Read also: Porch Outdoors Shower Curtains.

    SIMPLE TIPS HOW TO CHOOSE BAMBOO PORCH CURTAINS

    1. Privacy

    The first and maybe the most important reason why people like to use curtain is about the privacy. Especially with bamboo, you will get more privacy. Applying roll up bamboo curtains in your porch will offer you the next level of privacy.

    It will lie flat on each side of your porch and you can easily fold it up if you want to add more light to your porch. Besides its privacy, applying roll up bamboo curtains is also a good way to add tropical style to your porch.

    2. Perfect Placement

    The design or concept of your porch will absolutely influence the placing of the curtains. Different design will require different way of installation.

    Therefore, look for some similar things among all designs. The things that will always appear in all porches are windows. Place any bamboo curtains that will work well on the small paned windows.

    Roll up bamboo curtains is also a great option especially for small paned windows. Make sure you already measure your windows before you go to buy any bamboo curtains and get the right size.

    Bamboo outdoor curtains

    3. The Amount of Light

    One of advantages of using bamboo curtains is that you can control the light portion on your porch. Most of all bamboo curtains allow you to control the light.

    If you want to control more amount of the light that is filtered, use bamboo blinds. This kind of curtain will offer you ant treatments that feature slatted bamboo panels. Apply any bamboo blinds if you want to have more control of the amount of light on your porch.

    4. Match with Your Décor

    The next thing that you need to consider before choosing the bamboo curtains is the color. Try to pick the color that will work with your décor.

    There are many styles of bamboo curtains that you can choose like natural color of dry bamboo, honey-colored hues, parchment, mahogany, traditional light brown and many others. Don’t forget to look at your décor first before you decide to choose any styles of them.

    5. Considering Outdoor

    The last thing that you may consider is the outdoor. Apply any outdoor bamboo blinds to spruce up your porch. Make sure that you choose any curtains that are non-rusting metal parts, because it will be durable when installed outside.

    Before hanging the bamboo curtains, you also need to consider your climate since it’s a natural fiber that won’t hold up well on exposed rain.

    Read also: How to install roll up porch curtains vinyl.

    Even people like to use bamboo as the main material of their curtains, now you know that you just can’t choose or buy any bamboo curtains without any consideration. Make sure you already think about those things above before deciding to choose your bamboo curtain for porch.

    Bamboo patio door curtains

    Originally posted 2019-12-10 07:03:47.