Blog

  • Make Your Own Outdoor Glider Cushions

    Make Your Own Outdoor Glider Cushions

    For those who love to relaxing should love to spend their time sitting on their porch glider.

    The glider will be more comfortable if it has glider cushions add-on. Cushions will provide comfort and style as well to your glider.

    While they are can be quite expensive to buy, you can actually make them by yourself.

    Read also: Maintaining Porch Glider Swings.

    HOW TO MAKE YOUR OWN OUTDOOR GLIDER CUSHIONS

    1. Measure the Area of Your Glider

    First of all, you need to measure the area of your glider, so that you can know the exact size of fabric and how much foam to purchase.

    Moreover, you should do this by measuring separate seat area as well as the back of the glider if you need to make cushions up to the back of the chair. Measure the width by length to get exact measurements.

    2. Select the Fabric You Want to Use

    After that, head to fabric supplier to purchase the fabric that you want to use. Select the fabric according to your preference and don’t forget about the thickness of the foam.

    The thicker the foam, the more comfortable the cushions will be. Thick cushions take longer to dry than thinner ones as well. So, decide wisely!

    3. Measure and Cut the Fabric

    After you get all the materials you need, you need to measure and cut the fabric. To do this, lay down the fabric over the foam and add a half inch to one inch clearance for the seams on each side of the fabric.

    You have to make sure to keep in mind about the thickness of the sides of the foam as well.
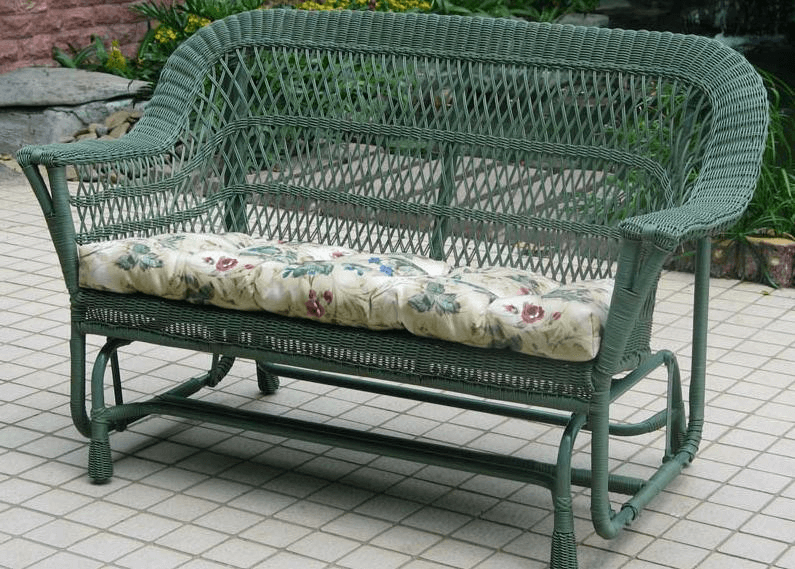
    Porch glider with cushions

    4. Sewing Time!

    Then, it comes to sewing time. The two sides for the back and front of the cushion need to be sewn together.

    Make sure to sew them inside out on three sides and leave a seam allowance of a half inch to one inch, just like you sew a pillow. To complete the cushions, you also need to sew the zipper.

    The zipper gives benefit from double stitching the seams and to add durability because the cushions often take a lot of tear and wear.

    5. Stuff the Foam into the Cover

    Finally, it comes to the final step which is stuffing the foam into the cover. To do this, you need to turn the fabric right-side out, then fill it with the foam.

    You may need to use a long object as well in order to make sure the corners of the covers are pushed, so that the foam can fill each side of the covers.

    Moreover, you may need to make clean edges on the corners by cutting off some of the seam allowance. Then, zip up the open side.

    Making your own glider cushions can actually be the most fun and rewarding experience. Besides, you can choose your own materials according to your likeness, such as the fabric style, the thickness or thinness of the foam, and etc. Moreover, by following this tutorial you don’t have to look somewhere else to make your own porch glider cushions.
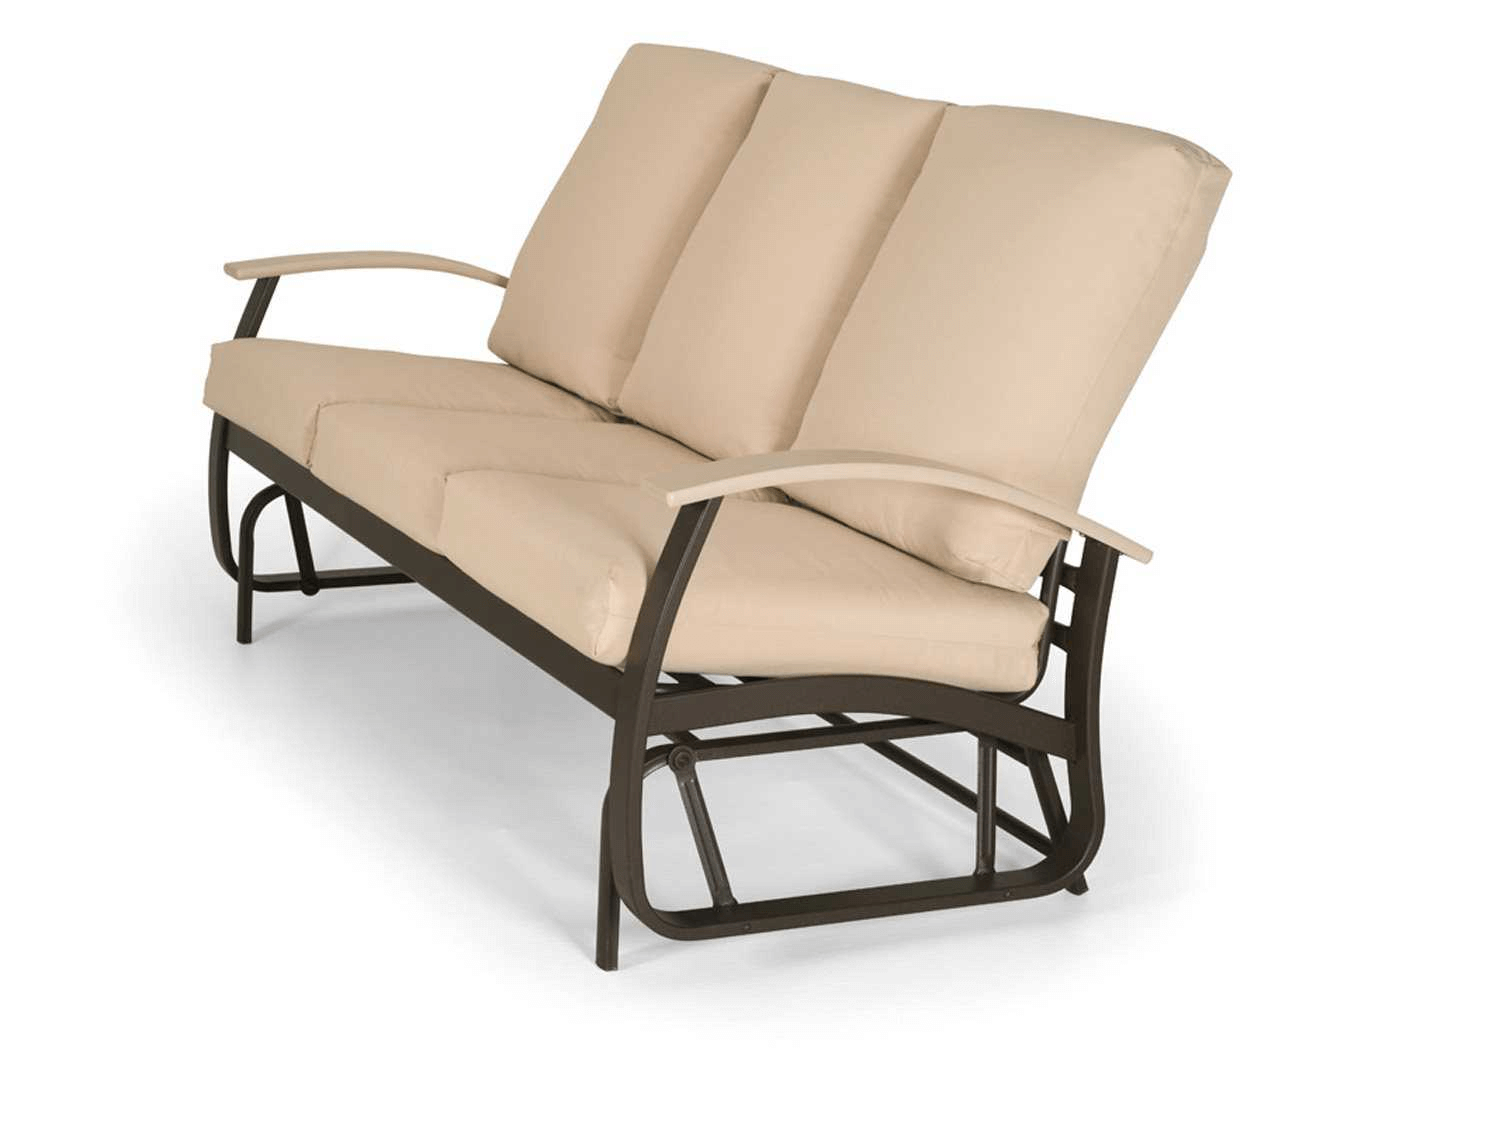
    Outdoor metal glider cushions

    Originally posted 2019-12-27 01:43:10.

  • Maintaining Porch Glider Swings

    Maintaining Porch Glider Swings

    Porch glider is one of the outdoor furniture that can be used to relaxing. You can either build it by yourself or afford porch glider in the furniture shop.

    However, if you ever happen to do some maintenance to your old porch glider, then you have to look for the instructions to do proper maintenance.

    Therefore, here is an easy way to do that. Just keep reading!

    Read also: The Types of Porch Swings.

    SIMPLE TIPS BEFORE MAINTAINING PORCH GLIDER SWINGS

    Restoring Old Porch Glider

    If you have an old porch glider and it needs to be inspected and re-finished, here are things you should do.

    1. Identify the Kind of Glider

    The first step you should do is to identify the kind of glider you have. Most of porch gliders are made of some weather-resistant wood, such as mahogany or cedar.

    However, some older wooden gliders were made of quality balsa wood. The reason why you have to identify the kind of glider you have is to make sure you do proper maintenance to it.

    2. Re-finish the Old Glider

    If you have identified the glider, such as it is made of quality balsa wood, then your glider is still durable enough to be refinished.

    Refinishing the glider can be done by stripping or sanding to remove old stain and paint. After that, you just need to refinish the weather-resistant stain, colored varnish, or paint of your preference.

    3. Advanced Repair to Be Used Safely

    If your glider needs to be repaired because there are several damages on it, then you can easily rebuild the main elements to repair the glider.

    Cut new slats for arms and back, the seat, replace damaged or cracked legs, and make sure to strengthen the gliding joints. However, you may want to consider to match the wood type as well.

    Front porch glider swing decoration with table and flower pots

    Additional Tips: Replacing Porch Glider Hardware

    There are some additional tips regarding to replacing porch glider hardware. Here are things you should know.

    1. Removing the Old Hardware

    First, turn the glider upside down. Then, in order to remove the old hardware, you need to use a ratchet to remove all of the nuts that connect the chair to the base. Remove the long bolts followed by the arms. Finally, lift the glider’s base from the chair.

    2. Replace the Hardware

    Make sure that the screws and bolts fit correctly to the gliding mechanism. Attach the hardware and the new arms in the same way to the original place. You will need a second person to help you when installing the new hardware.

    3. Finish the New Glider

    With your screwdriver, screw the bearings into place. Make sure to check the tightness of the screws. Also, tighten the nuts and finally you can turn the chair back over.

    Maintaining your porch glider is quite easy task to do. You don’t have to own specific skill to do that because most of porch gliders were made of quality wood materials.

    Moreover, these instructions on how to maintain your porch gliders will make your day easier and you can relax on your beloved glider in no time.

    Wooden porch glider swings suitable for outdoor or garden

    Originally posted 2019-12-26 07:20:43.

  • How to Install Porch Ceiling Panels

    How to Install Porch Ceiling Panels

    To make their house looks more essential, most of house owners like to have their own décor of ceiling panels, especially in the porch.

    From all of panel types, beadboard is one material that most of house owners use to complete their ceiling panels.

    Installing beadboard panels is not difficult once you know the steps.

    Read also: How to Install Your Own Porch Ceiling Lights .

    HOW TO INSTALL PORCH CEILING PANELS SIMPLE TIPS

    1. Measure the Porch Ceiling

    Just like all project, the first thing that you need to do is measuring. This time you need to measure your porch ceiling.

    You can start by measuring the area that you will decorate. Use some common measurement stuff like tape measure, pen or pencil and something you can write on.

    A step ladder is also necessary, since it won’t be possible for you to directly reach your porch ceiling. Place the ceiling joists above your porch then measure the distance between the joists.

    For example, if the joists were going east to west, you would go north to south. Note all the measurements carefully and make sure that you remember where each particular measurement came from.

    2. Cut the Beadboard

    If you are finish with the porch ceiling, it’s time to deal with the beadboard. Measure the lengths from the porch ceiling to the beadboard planks using your tape measure.

    Use pen or pencil to mark them then cut them down to size using a miter saw.

    For this particular cutting, you need to prepare a miter saw blade at a 90 degree angle. It will really help you to produce straight and long cuts.

    Repeat this step until you have enough cuts to cover the porch ceiling. Make sure that you produce the same size for all cuts.

    Porch vinyl ceiling panels

    3. Install the Beadboard

    After making sure that you already produce the cuts for the same size, it’s time to install the beadboard.

    Take the first piece of beadboard then push it up to the ceiling. Start with one side first so it’s going to across the joists that you already measured.

    Place the grooved side and make it face the wall, so there will be a small gap along the line. By driving the flooring nails into the board, nail the board in place where the ceiling joists and the beadboard line up.

    4. Cut Off the Ceiling Trim

    Then the last step you need to do after installing the beadboard is cutting off the ceiling trim. Take the ceiling trim that is a thin edge of the board to hide the joint around at the edge of the ceiling.

    Take the first piece and make it 245 degree angle at the end of the piece. Install it into the end of the beadboard then slide the second piece of the trim against it. Mark the angle that will need to be cut then trim it down until it fits together with the first piece.

    Those steps are recommended to be applied if you plan to decorate your porch ceiling beadboard panels. Understand every step first before you start doing the instructions. Correct measurement is really needed in this kind of work.

    Aluminum porch ceiling panels

    Originally posted 2019-12-23 01:30:16.

  • How to Install Outdoor Porch Ceiling Fans

    How to Install Outdoor Porch Ceiling Fans

    Although it is not really blowing wind, most of house owners like to attach any ceiling fans to their outdoor porch.

    It’s simply because fans are not only installed to give any additional wind but also to add more esthetic touch.

    Here are some steps that you may follow to install your own ceiling fans.

    Read also: How to install your Porch Ceiling Lights.

    HOW TO INSTALL OUTDOOR PORCH CEILING FANS

    1. Select the Right Fan

    The first and the important thing of all steps is of course deciding the fan that you are going to install. If you still find any difficulties in deciding the right fan.

    Consider the place where you are going to hang it. If you are about to install a fan on a low ceiling, a flush mount model is the right choice. If you are going to install a ceiling fan in a space with very high ceiling, go for a model with a pole extender.

    Choose the fan blade length based on the size of the space you want to be cooled. Larger room will definitely need longer blade size.

    Measure the blade length size from the tip of one blade to the tip of other blade. If you plan to buy an outdoor ceiling fan with light on it, give more attention to the light. It has to be made for outdoor use.

    Front porch ceiling fans

    2. Install A Support Brace

    Try to choose a fan that use weather-resistant materials and specifically designed to keep moisture out of electrical parts and critical motor. Attach a support brace to the electrical junction box once the electricity is turned off and the existing light stuff is already removed.

    Replace the brace with sturdier supply for your fan which ensures that it provides proper support. Take the best time to install the blades before you connect the fan onto the bracket.

    Make sure to tighten up all the screws when you attach the fan blades to the motor. You may be prompted to do this step earlier, depends on the brand of your ceiling fan. Consider about the time saving and the aggravation when considering to install the fan blades.

    Porch ceiling fans with light

    3. Reconnect the Wires

    Use any weight strips to balance the fan blades. It will also help you in reducing wobbling and improving efficiency.  Connect the ceiling fan to your switch-housing.

    If you have any light kit, install and assemble it onto the switch-housing, just like a glass light cover and its appropriate light bulb. Before turning the electricity back and testing all connections, make sure that the fan is completely assembled.

    Also make sure that it will be functioning properly and work as you expect. Some of ceiling fans units come with remotes that allow you to freely adjust the blades speed when you are not possible to reach the fan.

    Attaching any ceiling fans to our porch is a not a difficult work to do once we understand the step and how it works. Make sure you understand every step to avoid any unwanted things caused by the wrong installation of your ceiling fan.

    Front Porch Ceiling Fans Gallery:

    Originally posted 2019-12-22 00:01:12.

  • How to Install Your Own Porch Ceiling Lights

    How to Install Your Own Porch Ceiling Lights

    There are over than 100 choices of porch ceiling lights that you can apply in your porch.

    From all of those choices, you can choose the style that you may think is the easiest style to be installed.

    However, installing porch ceiling lights needs some specific steps, and here are some of the steps.

    1. Mark the Area where You Will Put the Light

    The first and maybe the most important thing to do is marking the specific area where you need the light to be placed. Use any pencils or pens to mark the particular place.

    Add a junction box for the light and place it as close as you can to the light. It will cost you less wire to make another new light.

    2. Test the Wires

    After marking the specific area, you have to make sure the wires work well. Use any circuit tester to establish that the wires in the junction box work.

    Always remember to always shut the power off from the main circuit breaker box after testing the wires or before replacing any bad wires.

    Consider to shut the entire circuit breaker off from the main power to prevent any occurring shock or electrocution.

    Front porch ceiling lights fan

    3. Connect the Junction Box

    If the wires already work well, the next thing to do is connecting the junction box. Disconnect any wires in the old junction that probably will be needed to connect to the new one like this order: black, white, green or ground wire.

    Add the new junction box in marked position where you will place the light. Use a ¾-inch screw to attach the new box. Be careful not to poke the junction box into the roof tiles if you are going to attach the box to the ceiling.

    4. Connect the Old and New Junction Boxes

    The next thing you have to do after that is connecting the old and the new junction boxes. Use a piece of electrical cable to make the all wires connected from the old junction box to the new one.

    This step is done to continue the circuit and to provide power to the new light stuff. Remove the installation from all wires using any wire stripper then insert it through the junction box.

    Outdoor ceiling lights for porch

    5. Install the Bracket and the Light Stuff

    The last step you need to do is installing the bracket and the light stuff. After securing all cables to the roof or wall of your house then placing the new junction box, use any mounting plate to secure the junction box.

    Put the light stuff on the mounting plate after the wires are already connected you then cover them with any plastic wire covers. Secure the light stuff with any screws and push the wiring to the junction box in place behind the mount.

    It’s always easier and more economical if you have done your ceiling lights by yourself rather than hiring some professionals. As long as you know the steps and the orders, installing your own porch ceiling light won’t be that difficult.

    Porch lighting ideas gallery:

    HOW TO INSTALL PORCH CEILING LIGHTS

    Originally posted 2019-12-21 01:31:28.

  • 3 Recommended Porch Gate Ideas

    3 Recommended Porch Gate Ideas

    Adding gate to porch always becomes a challenge for all house owners. It will cost you some money but once you get the right design or idea, it will really worth it.

    Some house owners like to add gate to their porch for some reasons. Different reasons can lead you to different ideas.

    Hence, here are some gate ideas that you may try in your porch.

    Read also: How to Build Porch Gate for Dogs.

    DO YOU WANT TO BUILD PORCH GATE. YOU SHOULD KNOW THESE PORCH GATE TYPES

    1. Babies Gate Porch

    The first gate ideas that you may try is a babies’ gate porch. This kind of gate will really useful for all house owners who have babies.

    Wood is the best material you can use in building the gate. Build the gate at the spot where your babies like the most. Keep your baby safe by building special gate for them.

    Outdoor baby gate for porch

    The specific size of the gate will absolutely up to you since it will depend on the placement and how much baby you have. Don’t forget to add any latches to your gate to keep it safer.

    Adding the latches will minimize the possibilities for your babies to jump out from your porch without your control and permission. Always lock your gate whenever your babies are playing in the porch.

    See also: How to Maintain Front Porch Gate.

    2. Pets Gate Porch

    This next porch idea actually has the same concept with the previous one. The difference is this time you are going to build the gate for your pets.

    Building gate for your pets will be more flexible then building the gate for your babies. Start from the size, it will normally smaller than babies gate since you probably own any cats or dogs in your house. This kind of gate will also help you train your pets.

    Pet gate for porch

    You can teach or command them to always go in and go out through the gate. Make them get used to the gate which is specially built for them.

    Giving them routine such command will inure them to good and controlled habit. Since every pet may have different type of gate, make sure you really understand how active and how big your pets are.

    3. Sliding Gate Porch

    Another recommended idea sliding gate porch. This kind of porch offers you a different way in operating and maintaining your porch. Using sliding gate will give you flexibility since it can be useful for both your babies and pets.

    Sliding gate for porch

    Build the gate with proper size which will guarantee you safety for your babies. Make sure that the gate is higher than them to keep them safe in your porch.

    So does with the pets the sliding gate must be higher than them. Don’t create too many space or cavity on the gate to prevent your pets from easily getting out and getting in.

    Read also: How to Build Porch Gate for Dogs.

    There are actually so many designs of porch gate ideas that you can use. But if you are looking for ideas that will functionally work as gate, then those three ideas will be the top of the list. Then if you are done applying those ideas, you can freely add any decor you like on the gate.

    Originally posted 2019-12-20 01:09:05.

  • How to Build Porch Gate for Dogs

    How to Build Porch Gate for Dogs

    Making porch gate for dogs can help you to restrain your dogs’ movement. So whenever the front door is opened then the dog won’t go out that easily.

    To build this gate may seem difficult at first but if you follow these steps below then you can build it in no time.

    Read also: How to Maintain Front Porch Gate.

    1. What You Need

    The first thing you need to have is the tool and the ingredients needed to make this gate. Unlike porch gate for human, you can make this one a little bit shorter than the regular one.

    The tools that you need are hammer, drill, saw, hinges, nails, clamps and a rail. The door can be 2 sided but it can also be just 1, depends on your need.

    If you want 2 sided gates then you must have 4 hinges. If you only want a gate then you just need 2 hinges.

    Make sure that all of your tools work just fine. Also, you might want to add tools like liquid nail so you don’t have to use nails at some parts.

    Front porch gates for dogs

    As for the ingredients, you can use pallet wood if you have some. Using pallet wood is much easier than using a regular wood sheet. A regular wood sheet needs to be cut into some pieces but using pallet wood will surely save your time and money.

    If you have the thought to use wood stain so you can refinish it later then so be it. But, doing a paintjob means that you need to have additional tool which is sand paper.

    So what’s the use of sand paper and all of the things above anyway? Well, check out the information below.

    2. How to Build

    First of all, whatever kind of wood you are using; cut them into L shape with height taller than the dogs and width as wide as where you put it.

    After that, combine these L words to make a frame of the gate by hammering the nails into each edge. When you are done with the frame, check whether it is strong or not.

    If it does, start installing the hinges on the end of the frame (2 hinges are enough). Also, install the hinges on the platform you planned. Make sure the hinges are strong enough so it won’t break so easily.

    Front porch dog gate

    If you are using pallet wood, then you don’t need to do anything else. Simply take off the pallet wood from its frame and put them on the gate frame.

    Make sure each gap has the same width or your dog cannot see outside. To glue the pallets and the frame you need liquid nail and clamps.

    So why clamps? Because it helps the pallet and frame gets together. If you are not sure with the gaps, use a rail to determine the gaps. This way you can make perfect gaps for your gate.

    Dog gate is pretty easy to be made and you can always use pallet wood to keep it cheap. As for refinishing it, you can use wood stain to make the color darker. But before refinishing, make sure there is no dirt and debris that can make the paintjob turn bad.

    HOW TO BUILD PORCH GATE FOR DOGS

    Originally posted 2019-12-19 01:17:25.

  • How to Maintain Front Porch Gate

    How to Maintain Front Porch Gate

    Do you want to know how to maintain the gate on your front porch? Every gate will need maintain at least once in 6 months to ensure that it is holding up just fine.

    To help you to do this job, these are the tricks and simple ways to maintain your gate on your front porch:

    1. Routine Checkup

    It seems simple, but do you know that routine checkup can help you to prevent bad things happened to your gate? So what are the bad things anyway?

    Well, if your gate is made of wood then the main problem can be termites. To prevent this you need to check your gate at least once a week to make sure that your gate is termite-free.

    Even if there are termites, the population won’t be too many so it’s still easy to get rid of them. Also, wooden gate means that whenever there is rain then there will be a chance mold and mildew to grow on it.

    Gate for porch steps

    Sagging gate is also a problem that is usually happened if the gate doesn’t gate routine checkup. Sagging gate can be happened to any gate including wooden and metal gate.

    Both can be fixed by tightening the hinges on each end of the gate. The hinges are made of steel; this is why some hinges may rust.

    This can’t be prevented but to maintain your gate so it will still look new, you need to replace the hinges with the new ones. As for metal gate, it can rust.

    Read also: Different Types of Porch Railings.

    2. Refinish the Gate

    Like what has mentioned before, if you have wooden gate then it may get mold and mildew. This condition is surely annoying because the look is terrible.

    To prevent it, it’s better if you refinish the wood with wood stain or you can always coat it with waterproof spray. This way it is safe from the fungus.

    But before doing it, you need to clean the gate first so there won’t be any debris or dirt on it. If you do the refinishing while the gate is dirty, then your paint job won’t be neat.

    Front porch dog gate

    To refinish your gate, you can repaint them. First of all you need to remove all of the old finishing though.

    Also, when you are about use paint, make sure you are not using water-based paint or the timbers can be wrapped and twisted.

    If this is happened then you have to rebuild your gate from the start and it is more annoying than having the mold and mildew, is that right? As for the metal gate, you can refinish it by giving it new paint. But first, scrub the rust off then clean the metal gate so there won’t be any dirt left.

    Read also: DIY Stone Porch Posts Wraps.

    A gate is important not only it is about safety but it is also a great outdoor decoration. Having a gate on your porch is great, but having it not checked then that’s a disaster. If you want your gate to have great look all the time, then you should apply the things above to do the job.

    HOW TO MAINTAIN FRONT PORCH GATE

    Originally posted 2019-12-17 10:06:19.

  • How to Choose the Best Front Porch Chairs and Benches

    How to Choose the Best Front Porch Chairs and Benches

    In your front porch, there are some chairs and benches needed. Why is it? It is because you can enjoy your afternoon not only inside the house but also outside.

    Without further ado, these are the ways to choose the best chairs and benches for your front porch:

    Read also: How to Choose Great Front Porch Rocking Chairs.

    How to Choose the Best Front Porch Chairs and Benches

    Prioritize the Features

    To find the best chairs and benches for your porch, first of all you need to have the thought of their features.  Outdoor chairs and benches can be tricky to be chosen, that’s why you need to prioritize on the features so you will have more choices yet the list can be made simpler.

    For example, you are looking for a chair that can be stored easily. Then, you might need to find out whether the chairs and benches can make you feel comfortable or not; because that’s the one keeping the furniture to stay, right?

    Blue front porch chairs and table sets

    The other example is when you need your chairs or benches to be easily cleaned. As we know, putting your furniture outside the house may cause it to be dusted or watered (by rain).

    Thus, if you let this problem then it is just a matter of time until your furniture becomes useless. If you have chairs and benches that are easily cleaned then you don’t have to be worried about the dust and water because it can be cleaned easily.

    The one that makes easy cleaning is the materials of the chairs and benches. Therefore, be careful in choosing the materials.

    Go for Quality and Design

    No one would like to buy defective product, that’s why it is better to spend more on chairs and benches with great quality. Quality includes the durability of the furniture; will it break after some uses?

    If you want chairs and benches with great durability then you should find the ones made of varnished wood or metal. Plastic is fine but it breaks easier than the other materials.

    Varnished wood and metal doesn’t let water to get absorbed on it so it will have longer durability but it may be more expensive. But you don’t have to store it and it can be cleaned easily.

    Nice front porch with rocking chairs double

    Also, don’t forget about the design. Design also has an important role in your front porch; it can bring new atmosphere to your front porch.

    Start finding out what accent the front porch gives and decide whether you want to complete or enhance it. For completing the design, you need to find chairs and benches that give more color, accent, and atmosphere so the accent will be various.

    As for enhancing it, just buy chairs and benches with the same accent of the porch but you can still choose the colors you want. Put some decorations like throw pillows would also be great.

    Front porch is a great place to spend your time in, but to do that you need great chairs and benches so it doesn’t have to be you alone sitting and enjoying the time. So to find the best chairs and benches for your porch then you need to rethink about the features, quality, and also the design.

    Best Front Porch Chairs and Benches Gallery:

    Originally posted 2019-12-17 09:03:54.