Blog

  • How to Install Roll Up Porch Curtains Vinyl

    How to Install Roll Up Porch Curtains Vinyl

    For the sake of enjoying the view around their house, people like to use vinyl curtains for their porch compared with other curtains materials.

    Especially for the roll up model, it gives flexibility whenever you want to use it or not.

    Hence, these are some steps you can do to install roll up porch vinyl curtains in case you are interested.

    Read also: Front Porch Enclosure Ideas.

    HOW TO INSTALL ROLL UP PORCH CURTAINS VINYL

    1. Choose the Hanging Spot

    It’s the one thing you need to decide before doing the whole project. Chose the spot that ease you to install it or the spot that makes the curtains works well.

    It is recommended to hang the curtain on the roof between support pillars. Hang it outside your windows to keep your home interior protected.

    2. Have Correct Measurement

    After deciding where to hang the curtain, do the correct measurement to stuff. Vinyl curtains come in different sizes from 4 feet, 6 feet or 8 feet long.

    Before you buy it, it will be better if you do the measurement to your porch first to ease you choose the correct size. You can also ask the manufacturers to cut down the size you want if you are not really sure about the measurement.

    3. Use Necessary Hardware

    The most important thing to note when you will have a DIY project is to make sure that you have the proper hardware. Prepare the proper hardware to help you install the curtains.

    Use kit with mounting hardware when you will purchase the roll up curtains. Mark the hanging location first if the curtains include any aluminum head rail, and then place it at the distance between the ends of the head rail.

    Mark and measure that hanging location at the ends of head rail distance. Level it before you secure at the second end and attach the rail with any supplied screws.

    Test the retraction and the unrolling of the roll up curtains by releasing the pull cords.

    Vinyl curtains for porch

    4. Install Support Hooks

    Before installing the support hooks, measure each outer bracket from all edges and then measure each bracket from the center. Use any pencil or pen to mark the measurements on the horizontal support.

    Check whether the three location spots are in perfect in horizontal row or not using carpenter’s level. Screw in and insert the support hooks at the location of each bracket.

    5. Hang the Roll Up Curtains

    Finally the last step is of course hanging your vinyl curtains. Some curtains do not directly work when the first time installed.

    Therefore, you need to find the pull cords of the roll up curtains. Straighten the pull cords to make them able to run vertically and across the curtains.

    Pull the correct string down of the vertical cord to watch the curtain unroll. Do it again to check the correct rewind.

    Installing vinyl curtains is not that complicated once you understand the steps and have the proper hardware. Protect your porch and all home interior from any UV radiation by installing proper vinyl curtains.

    Clear vinyl porch curtains
    Image: houzz.com

    Originally posted 2019-12-09 20:37:43.
  • Three Types of Outdoors Shower Curtains

    Three Types of Outdoors Shower Curtains

    Summer provides the most sunlight as well as heat. Playing outside is a must, and you will need a quick shower right after that.

    Since it is shower, why don’t you take a splash outside? It will be more refreshing and efficient.

    Installing outdoor shower curtain is fun and easy, as long as you know enough about the material.

    Read also: How to Decorate a Country Bathroom.

    Three Types of Outdoors Shower Curtains
    Three Types of Outdoors Shower Curtains

    1. Hemp

    This is the organic material with long history of its own. It is made from the dried stalk of hemp plant. The finishing product has not only warmth and softness, but also great durability. This quality cannot be found in the other natural fabric.

    The natural color is brown, but you can easily find the colorful one these days. In addition, this fabric has natural protection against mildew and mold.

    It means the cleaning could be done monthly, not daily or weekly. While the other natural fabric should be washed by hands, hemp has no problem going inside the washing machine.

    Even dried inside the drying machine will not tear the fabric apart. It also takes shorter time to dry under the sun. Unfortunately, you have to spend more to purchase this organic curtain.

    2. Fabric Showers

    There are a lot of fabric shower types available. People love this product because it has a lot of colors and pattern. Compared to plastic material, fabric is more elastic and softer. If you look closely at the material, fabric showers usually made from 100% cotton lined with vinyl or PVC and 100% polyester.

    When you prefer style over durability, then you can pick the cotton material. It has numerous choice of patterns and colors.

    However, it cannot stand weather changes, and it will break in short time. The polyester, in the other side, has only solid colors in the list. The good thing is it is the most resistant to mold and mildew.

    You can also choose plastic curtain over the polyester one. However, it should be washed by hands and might break after several seasons. In the end, you might end up buying a new one every month.

    DIY outdoor shower curtain rod

    3. Vinyl

    Another popular option is vinyl. It is the most durable and weather resistant material. Possessing these two factors would make a perfect outdoor curtain. The maintenance is also easy: You just need to scrub the surface with bleaching product and rinse with water.

    It is obvious that this option is not a green choice. Despite of its pattern variants, vinyl raises concern about its air pollution and the dangerous materials used in the process.

    No wonder, a newly bought vinyl curtain has odd smell on it. Several experts claim that this bad odor comes from the toxic material in vinyl.

    You can say that the smell will disappear within days, but the dangerous chemical could stick to the furniture, wall, or in the air for months. It may trigger breathing and the other health problems. For this reasons, you need to think twice before buying vinyl curtain.

    Read also: How to Decorate a Bathroom Wall.

    Whether it is indoor or outdoor, you need a curtain to cover your bathing area. However, the material for each curtain is not similar. Outdoor environment has several conditions that won’t be found in indoor bathroom. Therefore, you need to choose the suitable material for the shower curtain installed outdoor.

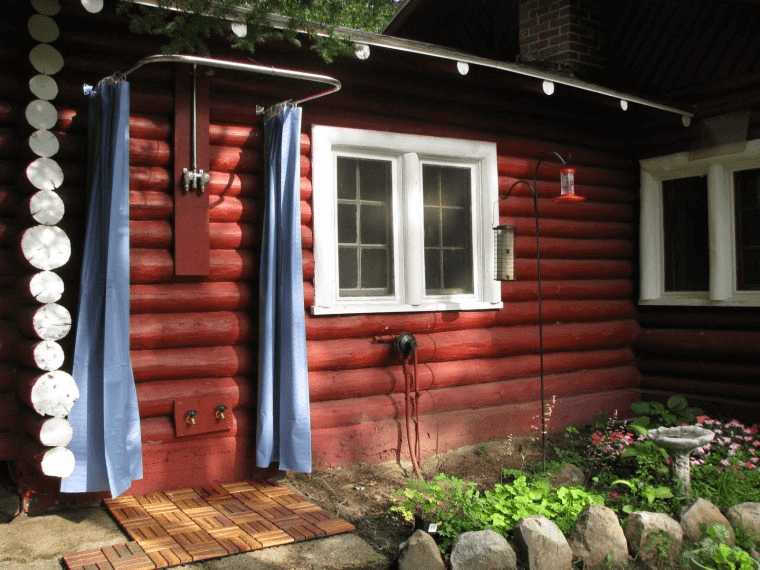
    Outdoor shower curtain rod u shaped

    Originally posted 2019-12-09 09:19:24.

  • How To Decorate A Bedroom Dresser

    How To Decorate A Bedroom Dresser

    A dresser or vanity is a must have item in most houses. People use it to store bathroom needs like towel, soap, etc.

    But nowadays thins cannot just be practical, but also fashionable as well. Some choose to call the interior designer to do the job for you.

    Well, for those who cannot afford this luxury, you could borrow the tips from expert below.

    Read also: How to Decorate Shelves in Bedroom.

    HOW TO DECORATE BEDROOM DRESSER EASILY

    1. Clean And Tag

    Start your project with something basic and simple: cleaning. You need to move all things above the dresser and wipe off all the dust. You might have some stains which cannot be cleaned by wet towel only. Depending on your dresser top: wood or granite, you might want to purchase a different kind of cleaner instead of the all purpose one.

    The next step is to sort all the things inside the drawers and those you put on the top of the drawer. Find new storage to thing that doesn’t belong to the bathroom. If possible, use one drawer to store one kind of things only. Add cute tags if needed.

    2. Point The Center

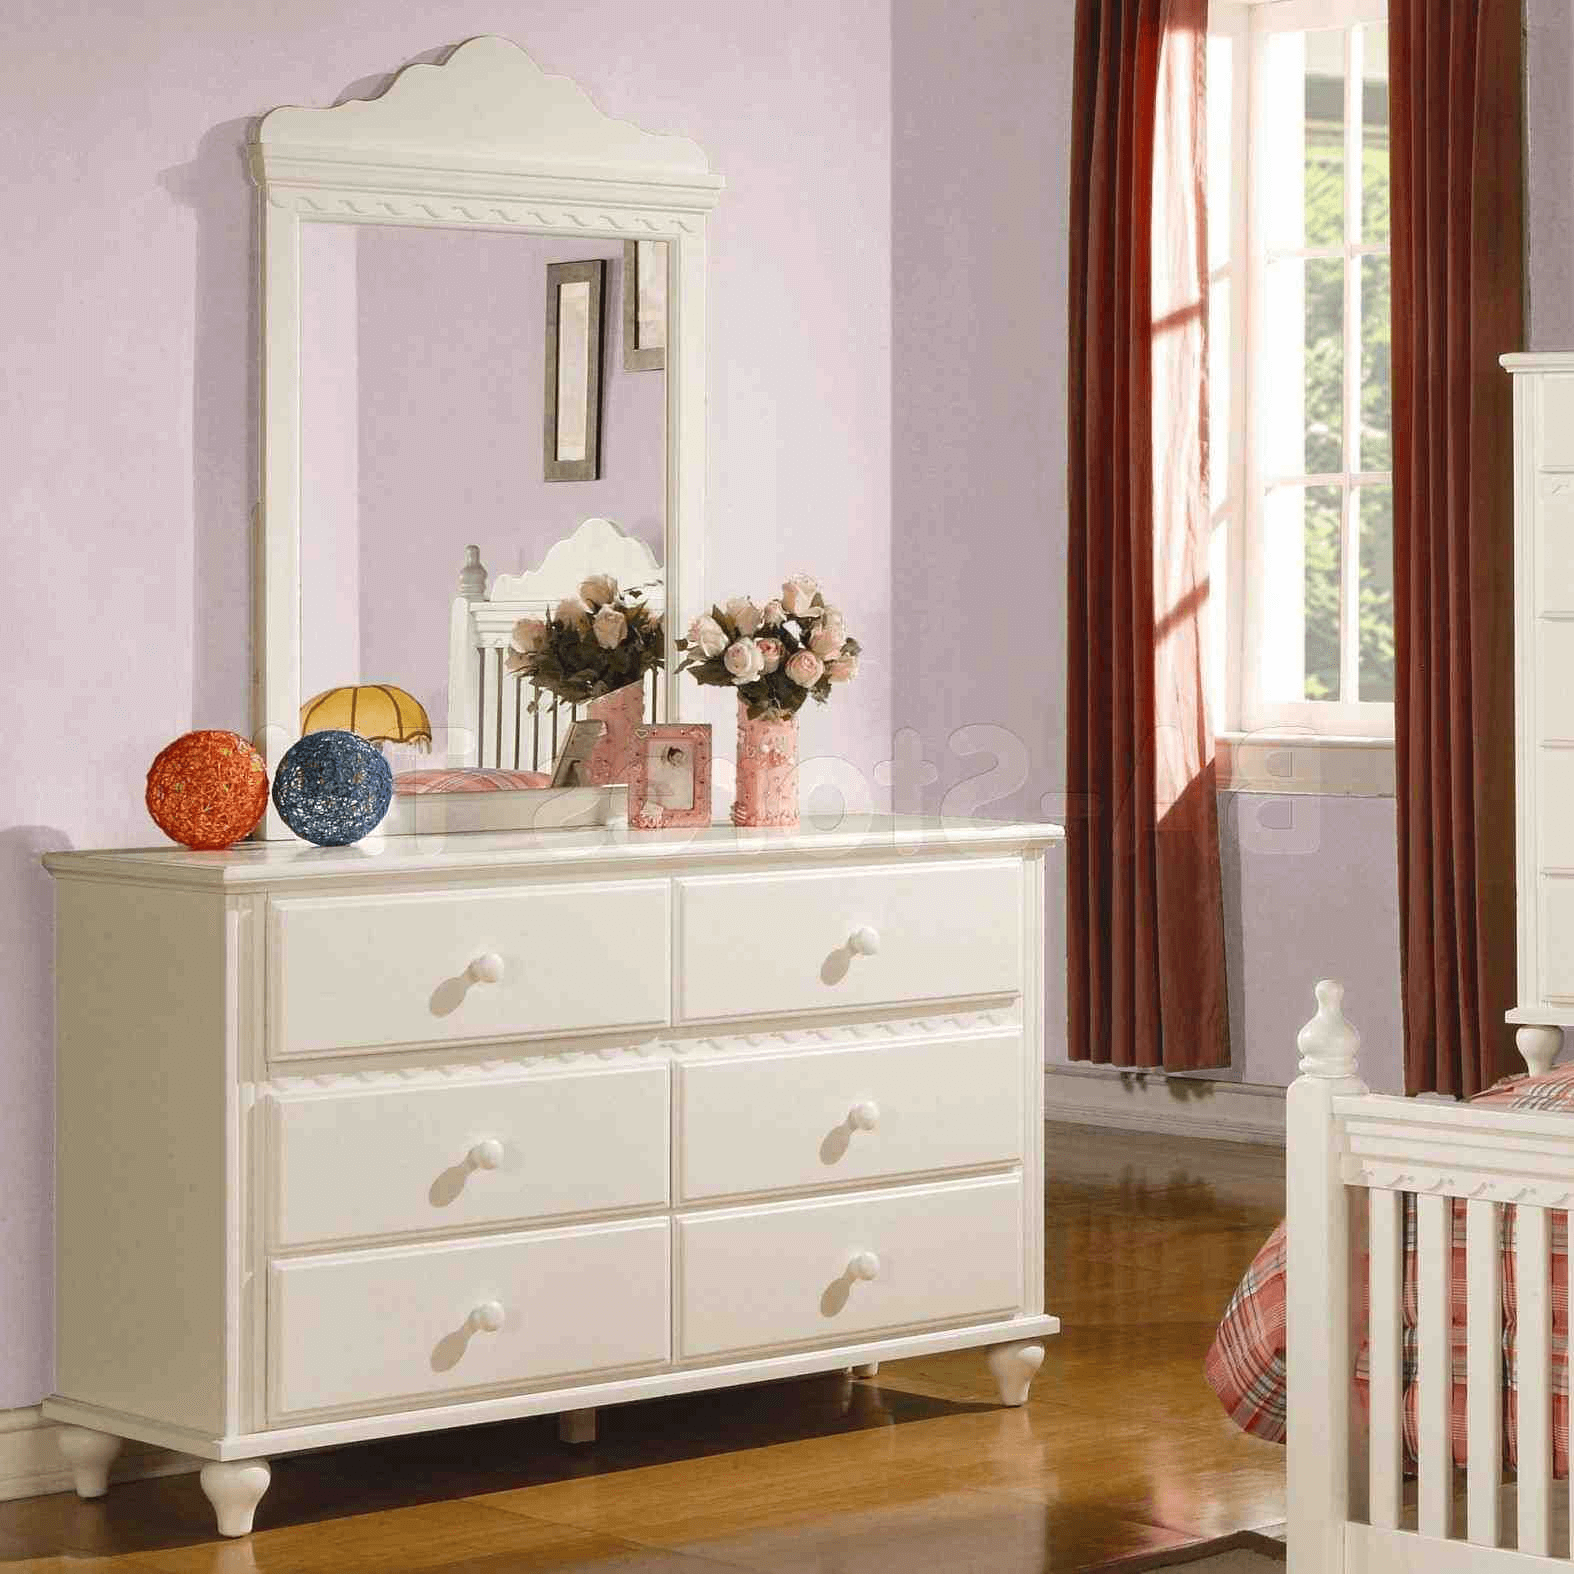
    You need to divide the top area into three sections. On the center part, you need something as focal point, drawing the attention to that point. People usually pick mirror as the best suited center piece of this corner. You could pick the standard rectangle or the elegant oval mirror.

    One trick for the mirror size: It should be half width of the top drawer at the least, but never exceed the length of the drawer. If you love simplicity, then put beige tone to the frame. For those who love exotic ideas, you could try a lot of things: decorative, abstract, or oversized frame.

    Nice idea to decorate bedroom dresser tops

    3. Put Tall Pairing

    What’s your idea on this? The easiest thing to think of is a flower vase or a table lamp; one of these could fit any kind of focal point you choose. The other ideas include statues, figurines, towel basket, tall candles, jewelry boxes, etc. Again, you could consider the function of this mirror pairing.

    Don’t focus on choosing the most adorable pairing only. You need to consider the whole picture of your dresser as well as your bathroom. When you already have conch lamps on both sides of the mirror, cross table lamp and candle can be removed from the list. Choose something like towel basket or jewelry box instead.

    4. Provide Balance

    Now that you already pick the tall-look, it is time to choose the low and medium look. For instance, a decorative tray will suit best for bathroom. It could provide convenient space to put tiny this such as earrings and prevent them to fall to the floor.

    The medium pieces, on the other hand, could be your daily treatment lotion, powder, perfume, etc. Put them on the tray as the practical decoration. Put this next to the tall pieces. Now that you provide all the balance, the small decoration project has done.

    Each furniture in the bathroom should be able to fulfill at least two function: storage and decoration. Otherwise, one corner will look dull and awkward, especially when the furniture is quite big, like a dresser. The guides above could provide you enough knowledge to start your mini upgrade project. Happy decorating!.

    How to decorate a bedroom dresser top

    Originally posted 2019-12-09 01:28:36.

  • How to Clean Rubber Floor Mats

    How to Clean Rubber Floor Mats

    Rubber floor mats are usually used in buildings or cars. Cleaning up the rubber floor mats is very easy.

    By using a simple way and tools that are easily to be obtained in your house or nearest store, your rubber floor mats will return as it was when purchased.

    Here is the following list on how to clean rubber floor mats in simple way.

    Read also: How to clean flooring laminate?

    HOW TO CLEAN RUBBER FLOOR MATS STEP BY STEP

    Cleaning Rubber Floor Mats

    As mentioned earlier, rubber floor mats can be used in buildings (commercial rubber floor mat) and cars (automobile rubber floor mat).

    The difference between these two rubber floor mats is only the size used, in which commercial rubber floor mat is usually larger than the automobile one.

    The way to clean between them is not much different. Here are the steps to clean it.

    1. Shake off dirt and debris from rubber floor mats. You must beat them outside the house or car for a few times. If they have large size, you can sweep or vacuum them to make it clean.
    2. Hose the mat in moderate to high pressure. Do not use pressure washers to spray it because it will make the rubber mat broken.
    3. Scrub the whole of the mat by using a brush and soap. If there are stains that are difficult to clean, give more pressure to clean it until the stains are removed. However, do not go too harsh while brushing it to minimize the occurrence of damage to the mat. You shouldn’t use cleaners that are made from solvent-based too because it can weaken the rubber material.
    4. Rinse the mat by water. You can use the hose to rinse it or just splash it by the water. Use the broom to clean the excess soapsuds, water, and debris from the mat.
    5. The last thing to do is letting the mat dry. Hang the mat at the outside of the house up to dry. Make sure that the mat is dry enough so it will not start to mold.

    Read also: How to clean marble floor stains.

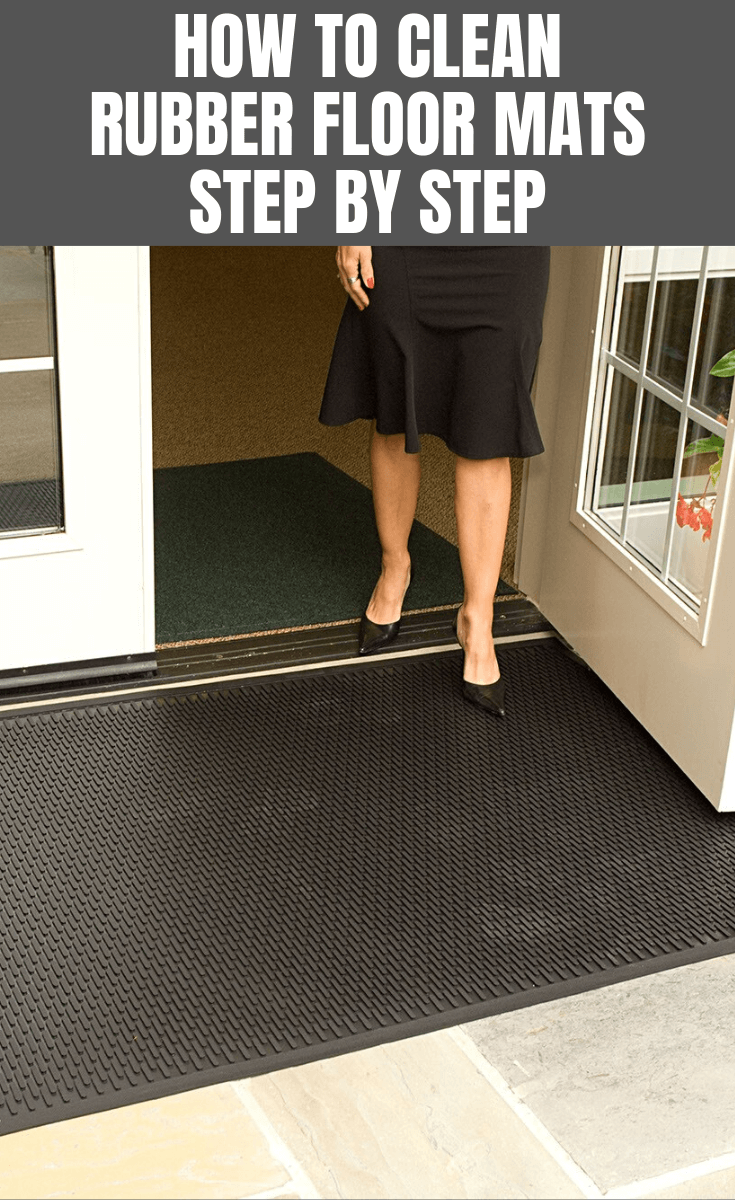
    Rubber floor mats for kitchen

    Maintaining Rubber Floor Mats

    In addition to cleaning it properly, maintaining rubber floor mats is also important to consider. This is important to do, so that the mat stays durable and always looks clean.

    Here are the steps to maintain the rubber floor mats correctly.

    1. Clean the floor beneath the rubber mats. Rubber is known to be easily broken if the room humidity is high. Remove the mats and sweep the floor to make it clean from any stains or debris. Mopping is also important to keep the floor clean.
    2. If there is any spill, clean it immediately. Use soft cloth or towel to wipe up the spills so it can be cleaned easily. Cleaning the mats often, such as every few days, is also important to make the mats clean and durable.

    In conclusion, cleaning and maintaining this kind of mat is quite easy. You need to clean it immediately when it get some spills on it. Those steps above should be easy to do to keep your rubber mat clean all the time.

    Brown rubber floor mats with holes

    Originally posted 2019-12-08 11:57:47.

  • How to Clean Epoxy Floor

    How to Clean Epoxy Floor

    Epoxy is a kind of floor that is known for its smooth finish and resilience. It is usually used in the garages or industrial settings.

    Because of its usefulness, epoxy floor gets dirty very easily. Fortunately, maintaining epoxy floor is quite simple.

    Here is the following list of methods in cleaning the epoxy floor.

    Read also: How to Clean Flagstone Floor.

    STEP BY STEP HOW TO CLEAN EPOXY FLOOR EASILY

    1. Cleaning Up Spills

    This method is useful to clean up spills in some spots in the epoxy floor. You can use paper towels or soft cloth to clean up.

    It can suffice for all stains except the greasiest ones. Clean up the stains as soon as possible to make it easy to remove. If stains are difficult to remove, you may use another way.

    Mix two gallons of hot water with one cup (237 ml) of vinegar in the bucket. Then, use brush or kitchen sponge to rub the stains. The floor will be clean and shiny as usual.

    Epoxy floor materials

    2. Cleaning the Whole Floor

    Cleaning the whole floor from any tenacious stains is not difficult as thought. By following these instructions, you may clean the epoxy floor with ease.

    1. Remove any obstructions, such as furniture, tools, vehicles, and other objects on the floor that you want to clean.
    2. Sweep the whole floor by a dust mop. Make sure that the floor is ust mop. and other objectsnstructions, you may clean the epoxy floor easily. as possible to make itclean from any dirt, dust, etc.
    3. Mix a gallon of hot water with four ounces (118 ml) of ammonia in the bucket. If it has already mixed properly, pour it into the spray bottle.
    4. Spray the whole floor with the ammonia mixture and mop it by using hard foam mop (do not use string mops because it is not effective to clean up the stains).
    5. After several minutes, rinse the floor by using water. You can hose down the floor or use a bucket of water to splash the floor. Mop once more to make sure the stains on the floor are gone.

    3. Keeping the Floors Pristine

    The final step in maintaining the epoxy floor is keeping the floors pristine. This is important to prevent tenacious stains that are difficult to clean back in soiling the floor in the house.

    The common thing to do is keeping a walk-off mat near the entrance. It will allow people to scrub off shoes and boots before entering the house.

    If it happens on the floors in your garage, you can place a cardboard under each tire of your vehicles or put a mouse pad under the motorcycle’s kickstand.

    These two things will help you in protecting floors from stains that are attached to tires or the motorcycle’s kickstand. Moreover, it will also keep the floor from any damage that is caused by them.

    Read also: How to Clean Granite Table Top Easily.

    Cleaning up the epoxy floor is simple and easy to do. By using the common stuffs that are available at your house or that can be obtained easily at nearest store, epoxy floors will be clean and shiny again. Follow these steps above correctly to attain the best results.

    Platinum metallic Epoxy Floor colors

    Originally posted 2019-12-07 08:12:02.

  • Screened In Porch Decorating Ideas on a Budget

    Screened In Porch Decorating Ideas on a Budget

    Houses with screened in porch is a classic, since most house owners prefer to have direct door instead. But still, you cannot simply remodel your house to fit the latest trend.

    The porch holds the valuable function and adds a beautiful flare to your house.

    Put some affordable effort to make it even more admirable.

    Read also: Simple Screened in Porch decorating ideas.

    AWESOME SCREENED IN PORCH DECORATING IDEAS ON A BUDGET

    1. The Sheen of Reclaimed Products

    If you observe closely, there are two main focuses in the porch room: the railing or balusters and the floor. As your house gets older, these two are slowly breaking.

    Having a shabby floor and railing will automatically turn down the mood. Replacing them will set up different light and vibe.

    Find some reclaimed woods and brick near your area. Don’t squint your eyes on them: reclaimed woods are often far more durable than the new product.

    As for the brick, it has similar price to the new one, but different shine and color depth. Use them for your screened in porch and enjoy your new snug room.

    Reclaimed wood porch swing
    Image: vintageporchswings.com

    2. Glowing And Highlighting

    If you have sturdy wood material for the porch, then all you need to do is varnishing it. The cost for varnishing is cheaper than painting, since varnishing does not require double or triple layering.

    In addition, giving this layer to your wooden floor will also protect it from the harsh weather, protecting the natural color.

    Another option is to highlighting the floor and balusters. Take dark paint and apply it in between the woods, stating the lines boldly.

    For the balusters, you can apply the paint on the sharp edges, creating the illusion of a cartoon house. You could also use sandpaper and rub the middle part of the wood instead.

    3. Adorable Seating

    Nowadays, there is unlimited number or seating design available in the store. The materials are also varied, allowing you to consider the maintenance for each.

    For affordable price, go to the secondhand shop. Pick the one that is either lighter or darker than your floor and ceiling.

    To make the seating adorable, you could also set vibrant cushions. You can purchase the cushion cover, since they are not that expensive.

    Put funny cartoon characters or bright pattern to lighten up the porch room. If you are creative enough, you can design your own pattern and put it to real by using transfer paper.

    4. Hanging Beauty

    Porch always have ceiling, which just be the suitable place to hang the beautiful decoration. First option is flower bearing plants: geranium, petunia, etc.

    By hanging them on the porch, you adds colors and display refreshing atmosphere on it. Find the one with abundant flowers that covers the whole pot.

    Hanging flower pots from ceiling porch

    If most of your guests pay a visit after the sun set, then install tiny lighting on your porch. They will look super adorable, especially when you put different shapes together. Let them hang from the ceiling, or simply creep from one pillar to another. Make sure the fixture won’t be twisted under your feet.

    Read also: How to Choose the Best Screened in Porch Materials.

    Similar setting in the porch area gets you bored faster and thus, leaving you no choice but to move to another room. Therefore, you need to redecorate this corner occasionally. To be able to do this, you don’t have to spend a lot of money. Simply copy the ideas above and get ready to lost in the second hand shop!.

    Screened in porch decorating ideas gallery:

    Originally posted 2019-12-07 00:26:27.

  • Small Front Porch Decorating Ideas

    Small Front Porch Decorating Ideas

    Many people complaint about the small porch in front of their house. In fact, some are too shy to call it a porch, so they refer it as a “stoop” instead.

    For any description that you mention, small front porch is still a part of the house. If you could transform it into something pretty, why not?

    Read also: Screened in porch decorating ideas.

    1. Park Themed

    The basic thing that could be added to your tiny porch right away is the potted plants. It stands as the representative of nature, while adding pretty shadow to your house.

    Since you should effectively use the available space, a simple wooden bench between two potted plants could do the trick.

    To create high ceiling impression, you should choose short pot with lush plant. Putting the tall and lush plant will block the lights.

    As the result, your house will look dimmer than it should be. Moreover, sitting on the bench would not be comfortable, because the tall plants attract more mosquito’s.

    PARK THEMED SMALL FRONT PORCH DECOR IDEAS

    2. Flower Bed Theme

    You can bring spring everyday to the porch by setting four potted plants on both sides of the door. Two of them that are closer to the door should be taller.

    It is better when they have no flower, just lush green leaves. The other two smaller pots should have flowers which cover almost the whole pot.

    Front porch decorating ideas for spring

    To finish, you could hang a flower garland on the door. Pick autumn color or something in contrast with the potted flower. If you have some bare steps, put fake pumpkins on it. Paint them with gray or bright orange color.

    3. Contrasting Railing

    Probably because you don’t know yet how to decorate the small porch, you focus on decorating the wall and entrance door instead.

    This makes the porch looks gloomy and lonely. Bring it back to life with railing of contrasting color. Make sure you pick the decorative one.

    If you have brick colored wall, paint the railing black. Let the concrete as it is: too much bright color will ruin the focus.

    Set bonsai plants on the sides, close to the door and a single chair on one side. Hang a pretty rattan basket next to the door to put the letters or bills.

    4. Easter Spring

    In some houses, the hosts believe that welcoming the guests should be done inside the house only. Therefore, there is no chair available outside.

    Keep the festive and warm greetings in front of the door by arranging several plants in the pot. This time, you could pick any of your favorite plants.

    Just remember that the tallest should be pushed back to the walls, letting the smaller one to be seen. Spice up things with vintage lantern on the floor and decorative door mat. Instead of hanging wrath on the door, you could put up a basket of flower.

    Read also: WALL DECOR IDEAS WITH RECYCLED WOOD.

    There are a lot of ideas to decorate your small porch. Surprisingly, you could pick simple to complicated ornaments without being messy. The key is to add the things as needed, and stay in the concept. Otherwise, your limited space will be even more cramped. Get your inspiration from one of the ideas above!.

    Small front porch decorating ideas for summer
    Image: feadj.com

    Originally posted 2019-12-06 02:17:47.

  • How to Decorate a Stairway Wall passionately

    How to Decorate a Stairway Wall passionately

    Stairs is the bridge to connect one room to another. The Stairway wall becomes the perfect way to place and show off the displays.

    People will see what you want to express while they hit the stairs. Deliver the massage and do the decor like never before.

    Read also: How to Decorate Stairs and Landing for Upgraded Look.

    HOW TO DECORATE A STAIRWAY WALL PASSIONATELY

    1. Arrange the Art

    You have to choose what your interest is before going further to design the stairway wall. The first step is making a list, what do you want to show first.

    What are the most important things to put in the wall. If you have the ideas of put the first things first, your guest will impress on how the art orderly place.

    Read also: Most Popular Rustic Italian Decor Ideas.

    2. Backdrop First

    The second step is beginning with the backdrop. The background color of your wall is the things that can emphasize the art.

    Choose the concept and paint the wall base on it. If you like simple things just paint it white, monochrome ideas is the best.

    If you like cheerful concepts for your kids, use some bright colors to enlighten the day. Blue is the right colors convey the meaning of trust and piece.

    You can use orange if you want to spread the optimism signal. Contrasting the color will be great too, therefore you can paint the stairway wall different from the other wall.

    3. Use Ornaments to the Fullest

    After paint the backdrop, the next step is setting up an ornament. It is the matter of the style, you have to choose what kinds of ornaments that you want to put there.

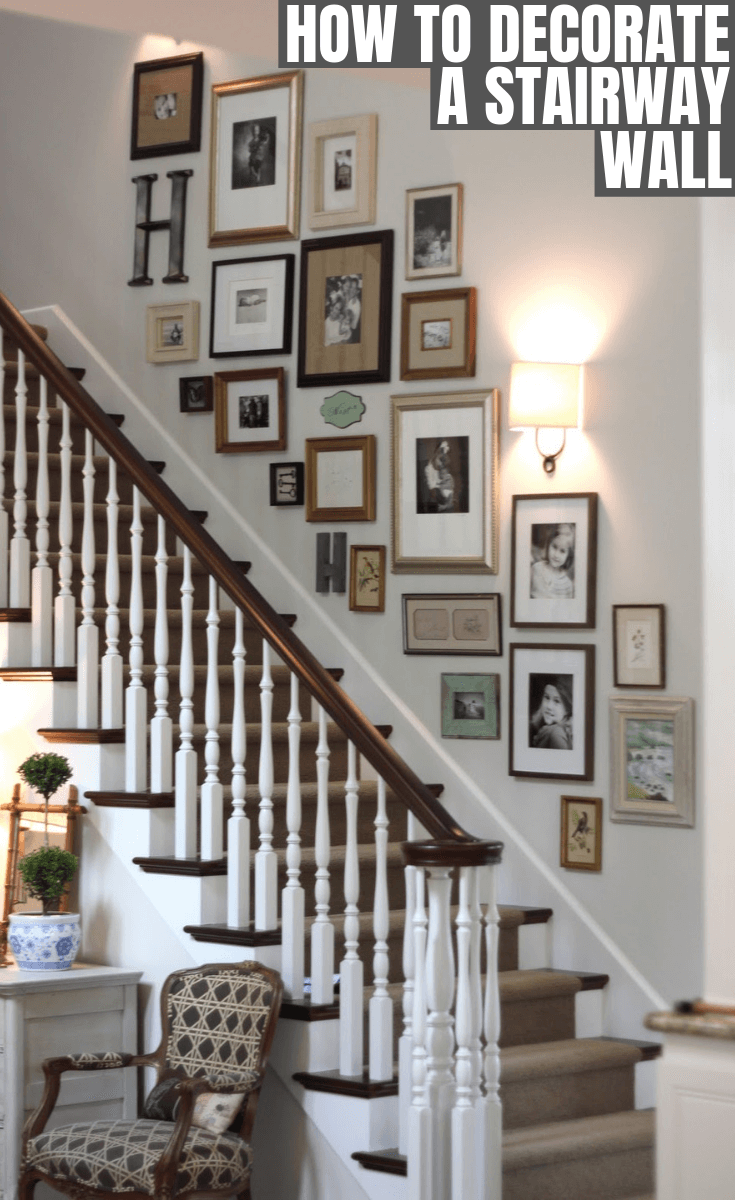
    If you want to tell the story about your life, you can use photos. Photos are not a new display to put in the wall, but you can make it taste more passionately by arranging the pattern.

    Begin with the vertical concepts; put the beginning of your family. You can arrange it in order from the childhood.

    Make sure that your memory and make the wall as a witness of your life. In other hand, if you like nature. Grasp the power of the nature and bring it home.

    Add something organic in the walls. You can add homemade wood frames with the wild barriers inside. Try something artistically like flower garland and organza butterflies from the papers. Those pretty stuff will bring the spring inside your home

    Stairway wall decor for christmas
    Image: homedit.com

    4. Usable Space

    The last step is to use the free space. If you have a free space, put some furniture in it. This approach blends with the stairs well.

    Try to make the bookshelves as displays. Build the storage on your wall, if you like to read, the stairs will be the new place to spend the time.

    Use your passion to decorate the small things like stairway wall. If it tastes good it will be the long-term way to bring the light inside your house. Balancing everything start from the simplest things right next to you. Begin with the place that you through all day and feel the sensation of the new inspiration.

    Staircase wall decorating ideas
    Image: plushemisphere.com

    HOW TO DECORATE A STAIRWAY WALL PASSIONATELY

    Originally posted 2019-12-05 01:03:39.

  • Porch Floor Paint Color Ideas

    Porch Floor Paint Color Ideas

    Planning a makeover for the front porch floor is not a simple decision. Things that make you stop writing the list is probably the cost.

    Sometimes, the condition of the porch urges you to do the remodeling project. Why don’t you pick something simple and affordable for this project: like a paint?

    See also: Front Porch Flooring Ideas.

    NICE PORCH FLOOR PAINT COLOR IDEAS

    1. Highlighting The Pattern

    Wood is one of the popular materials for porch floor. A dusty, shabby floor doesn’t always call for a total remodeling.

    First step to do is to clean it thoroughly; make sure the least amount of dust left. Then take the clear coating stain and apply it evenly to highlight the wood pattern.

    This trick looks great on a deck front patio, with vivid colored door as the focal point. Also, the wood element makes it easier for the floor to blend with nature.

    Avoid giving the glossy finishing, as it could create double focal point and slippery effect. If you don’t like the color of natural wood, then you could pick soft gray tone as an option.

    Gray porch floor paint ideas or deck with white chair table sets and screen
    Image: houzz.com

    2. Heaven and Earth Combination

    Make your high and wide patio resemble the picture of heaven and earth. The floor, in this case, plays its part as earth. Therefore, pick soil element to paint it: grayish, light brown, or dark brown.

    You could add accent by applying paper sand to some parts, creating the effect of shadows. Don’t forget to give double coat in high traffic area.

    To complete the look, you could paint the pillars white and put tall pots in between. This will be the representative of living things on earth.

    Now for the heaven, you could paint the ceiling with sky blue paint. Make sure each color slowly directs the guests to look upward.

    Brown floor, blue ceiling porch, and yellow wall painting

    3. Seaside Feeling

    Installing screened front porch is totally in nowadays; it protects from freezing snow, falling rain and burning sunshine. Despite of the weather, you could bring your guests to have a conversation outside.

    To make things a little bit cheerful, blow the seaside atmosphere to the floor. Purchase blue and white paint, a can for each color.

    Draw the blueprint of oversized diamonds pattern, while imagining that the blue colored diamond should dominate the space.

    Carefully, stick duct tape to the sketched area. Apply the blue paint first, then you can proceed with the white one.

    Blue porch floor paint color ideas
    Image: houzz.com

    4. Country House

    When you live in countryside, bright color is more favorable than plain brown and neutral color. It is also the rule for front porch floor.

    The color of this space matters for the other furniture. It is such a basic knowledge that the color of pillars and ceiling should coordinate with the floor, too.

    Want to try something bold with green and orange? Both colors represent plants and harvesting products. Now you could bring the color, in the form of a long, alternated, medium sized diamonds.

    To make it look more natural, apply one or two coating only, to show the lumber pattern.

    Give a lot of surprising splash and colors with a can of paint. It is affordable and practical, allowing you to explore more than ten ideas with only one item.

    Get double benefits of savings and creativity with paint. Now the only thing left is to decide which style to apply and when to start. Happy painting!.

    Country House porch flooring paint

    Originally posted 2019-12-04 13:15:02.