Blog

  • How to Build a Kitchen Island with Sink and Dishwasher

    How to Build a Kitchen Island with Sink and Dishwasher

    There are a lot of benefits kitchen island can bring to your kitchen and activities. Not only to store the foodstuff, but also to prepare the food itself.

    Moreover, there are many kitchen islands that have sink and dishwasher on it.

    Building your own kitchen island with sink and dishwasher is cheap and it is better than to buy it at the store.

    Here are the steps to build it by yourself. Check it out.

    Read also: Kitchen Island Cart with Stools.

    HOW TO BUILD A KITCHEN ISLAND WITH SINK AND DISHWASHER

    1. Materials and Tools

    Before you start to build your ideal kitchen island, you should prepare the materials and tools. Don’t forget about your skill because the process needs it to make it awesome. Here is the list that you should prepare.

    • Base cabinets with back panel
    • 2 x 4 wooden blocks
    • Wooden board or fiberboard
    • Stone base countertop, such as quartz, marble, etc.
    • Screws
    • Paint
    • Saw
    • Power drill
    • Industrial adhesive
    • Level
    • Tape and pencil
    • Staining or painting supplies
    • Sanding equipment and supplies
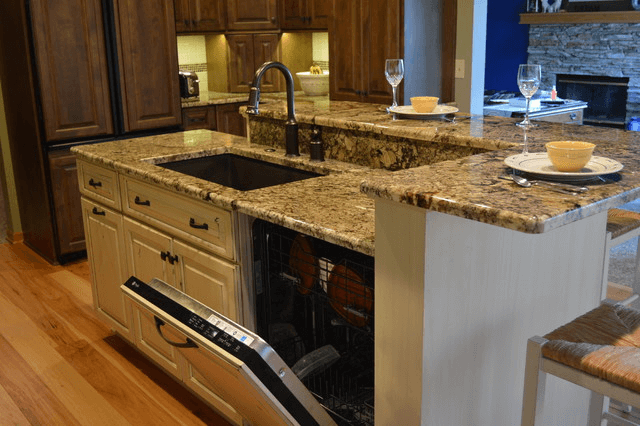
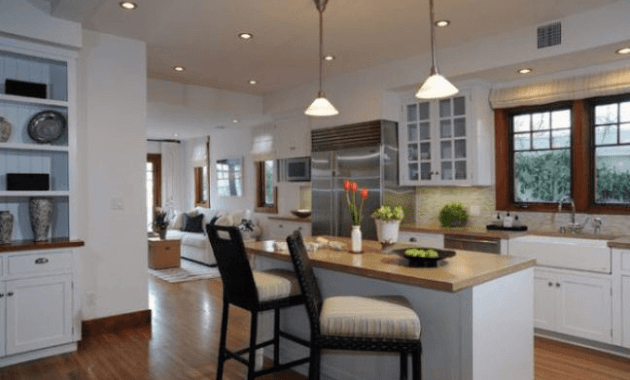
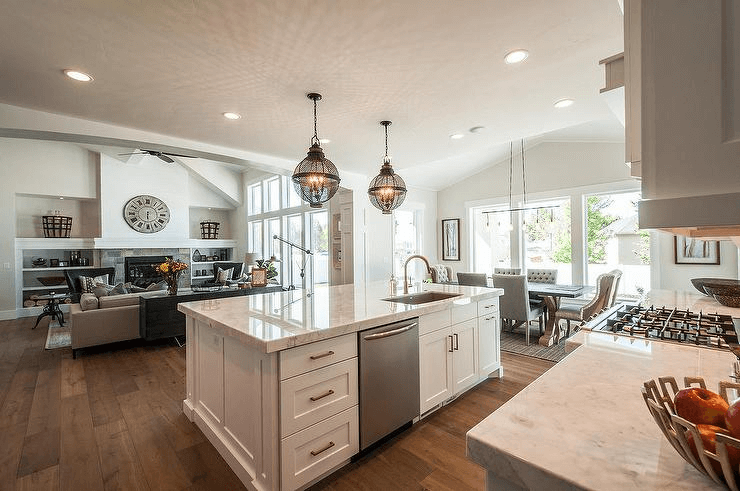
    Kitchen island with sink and dishwasher and seating

    2. Assemble the Cabinets

    The first thing you need to work on is the shape of the cabinets. Assemble the cabinets in accordance to the manufacturer’s instructions. Arrange all the parts of the cabinets, except the doors. It shouldn’t be done because you will find difficulty when you paint inside.

    Then, make the toe-kick in separate container. Stick it with the industrial adhesive to the kitchen floor with the L-brackets. After the attachment is strong enough, place the cabinets inside the toe-kick and screw them to secure it.

    Read also: Portable Kitchen Island with Seating for 4.

    3. Paint or Stain the Cabinets

    Before the cabinets are painted, sand the rough area thoroughly. If the surface of the cabinets has already fine, continue with painting and staining the all parts of the cabinets and the toe-kick.

    You can give some ornaments or gradation to make the appearance more interesting. After the paint or stain is dried, you can polish it to make it more durable and shiny.

    4. Place the Countertop over the Cabinets

    The next step is preparing the countertop. Before you place the countertop over the cabinets, you should perforate the countertop according to the sink size in one side of it.

    After that, continue the process by placing the countertop over the cabinets. Make sure that the side for the sink of the countertop is overhang on the side of the island.

    Then, stick it to the cabinets with industrial adhesive and also screw it to each corner to make sure it is strong enough.

    5. Install the Water Installation

    Place the sink and dishwasher over the pattern that has been perforated before in the countertop. Install them with the pipe that is connected to the water sources. You need to point it to the pipe below the water disposal. Make sure that it works out well by testing it first.
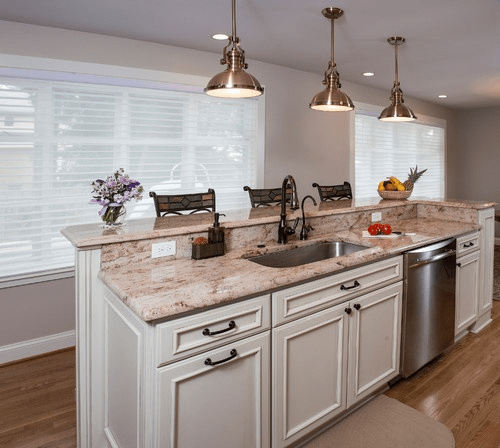
    Two tier small kitchen island with sink and dishwasher

    6. Finish Touch of the Kitchen Island

    Before the cabinets doors are installed, paint or stain it first. Clean the surfaces of the island carefully before it is used.

    Building the kitchen island with sink and dishwasher by yourself is better than buying it at the store. Besides, it has lower cost. Building your own island can be adjusted to the design of the kitchen as desired. Good luck.

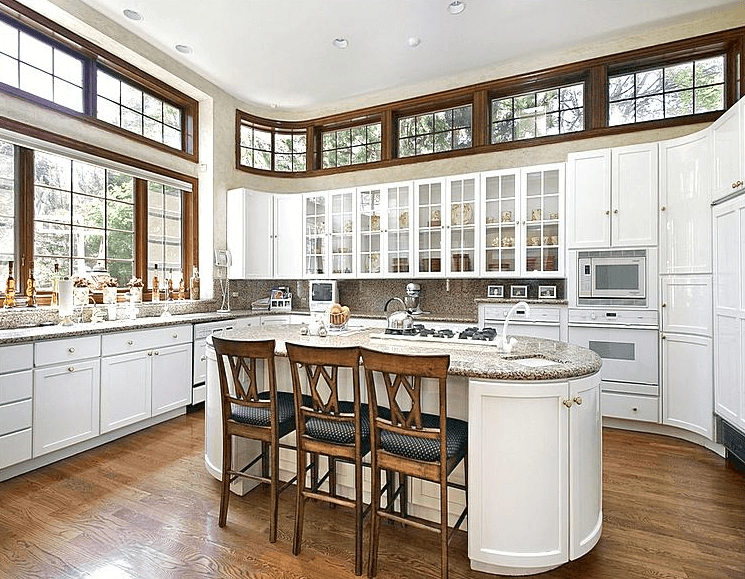
    Kitchen island design idea gallery:
    Originally posted 2019-08-06 15:31:08.

  • Balancing Aesthetics and Functionality in Home Decor 🏡

    Balancing Aesthetics and Functionality in Home Decor 🏡

    In the journey of crafting our perfect living spaces, we often find ourselves suspended between two parallel universes – the aesthetic universe and the functional universe. How do we create an equilibrium that appreciates beauty and style while embracing the comfort, convenience, and practicality that our homes deserve? Let’s find the answers together. 👣

    Balancing Aesthetics and Functionality in Home Decor

    Understanding Aesthetics and Functionality in Home Decor 🤔

    Aesthetics refers to the beauty or the pleasing appearance of your home decor – how everything looks, feels, and evokes emotional responses. Functionality, on the other hand, is all about how your space works – how comfortable, convenient, and practical it is for your daily activities.

    Note: “Aesthetics and functionality are like two sides of the same coin in home decor. One cannot exist without the other for a truly successful design.”

    Finding the Balance: Key Principles ⚖️

    1. Embrace Unity in Diversity 🔄

    Diverse elements can coexist harmoniously in a space. Mixing styles, periods, textures, and colors can create a rich tapestry that is both pleasing to the eye and functional. Just remember to maintain some common elements to create a sense of unity.

    2. Prioritize Space Efficiency 🏗️

    When planning your space, think about how you live and move in it. Make sure furniture placements and room layouts support your daily activities and allow for efficient traffic flow.

    3. Choose Multi-functional Furniture 🪑

    Opt for furniture that serves more than one purpose – a coffee table with storage, a sofa bed for guests, or a wall-mounted desk for saving space.

    4. Keep It Simple 🎯

    A cluttered space is neither aesthetically pleasing nor functional. Keep your decor simple and avoid unnecessary items.

    Important: “Simplicity is the ultimate sophistication.” – Leonardo da Vinci

    5. Use Light Wisely 💡

    Proper lighting can enhance both the aesthetics and functionality of your space. Use a combination of natural and artificial light sources for different moods and tasks.

    Creating Balance: Room-by-Room Guide 🗺️

    Here is a quick guide on balancing aesthetics and functionality in various parts of your home:

    RoomAesthetic ConsiderationsFunctional Considerations
    Living RoomUse a focal point, maintain symmetryEnsure comfortable seating, good traffic flow
    KitchenMaintain clean lines, use attractive storageOptimize workspace, consider appliance placement
    BedroomUse calming colors, personalize your spaceEnsure ample storage, maintain privacy
    BathroomUse stylish fixtures, maintain consistencyEnsure safety, optimize space

    Conclusion: Creating Harmonious Homes 🌟

    When you balance aesthetics and functionality, your home becomes more than just a living space. It transforms into a sanctuary that delights your senses and serves your needs, reflecting your unique style and lifestyle. Remember, there’s no one-size-fits-all solution – it’s all about finding your perfect balance. Happy decorating! 🎈

    Key Takeaway: “Balancing aesthetics and functionality in home decor is not about sacrificing one for the other, but about creating a space that is both beautiful to look at and comfortable to live in.”

    Originally posted 2023-07-08 08:27:48.

  • How to Build a Kitchen Island with Breakfast Bar

    How to Build a Kitchen Island with Breakfast Bar

    Does your kitchen island only have a small space of countertops for you to eat on it? The additional level of countertops, such as a breakfast bar, is the best solution for it.

    You don’t need to buy it in the store because you can build it by yourself.

    This is the following list of what you need to build a kitchen island with extra breakfast bar.

    Read also: Kitchen Island with Wine Storage.

    1. Gather the Materials and Tools

    Before you start working on the kitchen island, you should pay attention for the materials and tools preparation. Here is the list of them.

    • Base kitchen island with one flat side (without any panels in this side)
    • 2 x 4 wooden blocks
    • Wooden board
    • Countertops (the stone or wooden material that is adjusted as your desire)
    • Paint
    • Saw
    • Power drill
    • Screws
    • Industrial adhesive

    Movable kitchen island with breakfast bar

    2. Cut the Excess Countertops Parallel to the Island

    The next step is to cut the excess countertops in one island side that will be redesigned. Usually, the size (length and width) of the countertops is larger than the island. Cut that excess parallel to the island side with saw.

    If the countertop is made of stone material, leave it alone. Later on, the frame will be adjusted to the length of the rest of the countertop.

    HOW TO BUILD A KITCHEN ISLAND WITH BREAKFAST BAR

    3. Make the Frame for Sustaining the Breakfast Bar

    Make the skeleton frame from the wooden blocks to sustain the breakfast bar. Adjust the width so it is the same as the island, but more in height.

    Make it about 5-10 inches higher than the other level. Make also three parts of the frame that will be placed below the countertop to sustain it.

    Screw each part as much as the frame strongly enough to hold the countertop over it. Insert two other blocks in the middle to make it stronger.

    After that, screw the frame to the island. To make the appearance better, cover the frame with the wooden board alongside the frame.

    4. Paint the Island

    Because the appearance is still less interesting, you should paint on all sides of the island. Choose the best color that will be suitable to the design of the kitchen.

    Give some ornaments or gradation to make it better and awesome. To make the island more durable and shiny, don’t forget to polish it after the paint is dry.

    5. Final Touch of the Island

    For the final touch of the kitchen island, place the countertop on the frame that has been made before. You can use the stone or wooden base material as the countertop.

    If you are confused to choose which one is better, you can choose the same material of the countertop on the other level. Stick it with the industrial adhesive for the good result.

    Read also: Kitchen Cabinet Long Island for Wonderful Display.

    Here is the list how to build the kitchen island with the breakfast bar for the other level of countertop. You don’t need to buy it at the store. Use things that you already own and materials that are not too expensive. Share your imagination to your island and the kitchen to make them look interesting and fantastic.

    Small home styles kitchen island with breakfast bar

    Kitchen island with chairs gallery:

    Originally posted 2019-08-06 03:11:23.

  • How to Build a Kitchen Island with Base Cabinets

    How to Build a Kitchen Island with Base Cabinets

    The idea of a kitchen island which is completed with base cabinets is brilliant to improve productivity, to save some more space, and to improve the kitchen and kitchen island value.

    If you buy it, it may cost a fortune. Building it yourself is a great alternative for saving more money.

    If you need a guide on the project, check out the instruction below.

    Read also: Kitchen Island Cart with Trash Bin.

    HOW TO BUILD A KITCHEN ISLAND WITH BASE CABINETS

    1. Gather the Materials and Tools

    The first thing you need to consider is the preparation of the materials and tools. Here are the things that you need to build it:

    • Base cabinets with back panels
    • 2 x 4 wooden blocks
    • Countertops (you can choose the wood, glass, or stone base material as desire)
    • Power drill
    • Wood nails or screws
    • Industrial adhesive.

    White kitchen island with cabinets on both sides

    2. Start with the Base and Back

    Before you start building the kitchen island, plan the suitable base for the kitchen. Follow these steps:

    • Adjust the size of the cabinets with the empty space of the kitchen
    • Measure the length and width of the cabinets
    • Gather the wooden blocks to serve for the outside, the shape is adjusted to the base
    • Screw the join so it will be strong enough
    • Place a bottom piece and also the back to the island

    3. Add End Panels

    The end panels are the two sides that are smaller than the others. You can make the creative design at these sections. You can add the special racks, such as wines or drinks storage, bookshelf, or towel bar.

    Use the wooden blocks to build it. If the panels are ready, screw or nail it to the cabinet. Don’t forget to make sure that the join is strong enough to hold the load.

    4. Attach Trim and End Plasters

    Place trim to the front and the bottom of the kitchen island to make it looks professional and suitable to be placed in the kitchen.

    After that, add the adjusted shape of columns or plasters to the corner of the kitchen island. It is hiding and creating a space for seats under the island.

    5. Place the Stock Cabinets

    After the cabinets are ready, place it into the kitchen. Adjust its position to the empty space inside the kitchen. The center of the cooking area is often the perfect spot.

    Don’t forget to consider and provide enough space for the traffic. You will use the island for cooking and people may need to move around it as well.

    6. Final Touch of the Island

    Place the center panels for all sides of the island. Then, for the final touch, add the countertops that the material has been chosen before. Stick it with the industrial adhesive.

    If you want to add the glass material for the countertops, add the small bases (about 3 inches in diameter) for each side. Then, stick it between the first countertops and the glass countertops. You are done.

    Read also: Kitchen Island Cart Stainless Steel Top.

    You can maximize the use of cabinetry with this way. It can also improve your productivity while the kitchen island has a real good value.

    Moreover, this kind of kitchen island is easy to build and this doesn’t require too much money. In addition to it, you are free to customize the design. So, what are you waiting for?

    Unfinished kitchen island base cabinets

    Originally posted 2019-08-05 05:01:39.

  • Kitchen Island with Wine Storage

    Kitchen Island with Wine Storage

    Creating a wonderful kitchen is a must to make your house more interesting. It will be perfect if your kitchen has the island. It has many functions from the countertops up to its racks.

    In addition to storing the foodstuff, the island can also be used to store wine on its racks.

    Here are the ideas about it that you can choose for your kitchen.

    Read also: Kitchen island with trash storage.

    IMPORTANT THING TO CHOOSE KITCHEN ISLAND WITH WINE STORAGE

    1. The Material of the Kitchen Island

    There are many kinds of material that can be used for a kitchen island. Generally, an island uses two main kinds of material for the countertop and the island itself.

    The best material for the countertops is the stone base, such as quartz, ceramic, marble, etc. It will be more durable and easily to be cleaned than using wooden material.

    For the island, you can use either wooden or metal material. Each of them has different characteristics depend of the use for.

    Usually, it uses wooden material for the wine storage on its racks. It is because the wooden material is great in keeping the stabile temperature and keeping the quality of the wine.

    Metal rack is also welcome if you prefer for something more practical and easier to maintain.

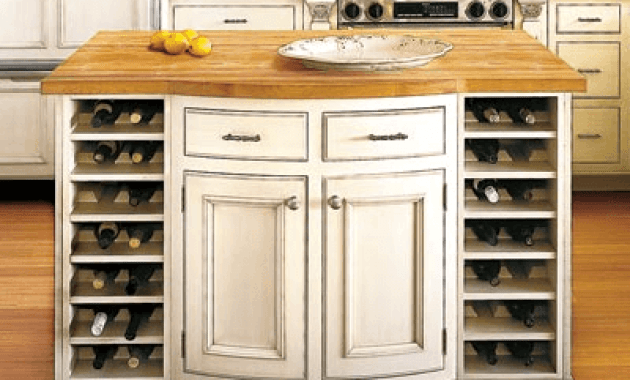
    Small Kitchen Island with Wine Storage wooden top

    2. The Design of Kitchen Island

    To get the wine storage on the kitchen island, make sure to spare a space for it. Anywhere is actually fine.

    However, many people like to place it on one end of the kitchen island if it happens to be in mainstream shape. It allows easier and faster access to the wine.

    For the wine storage, you can get a door for it, but an open storage is far preferable. To keep the bottles safely, the storage should be deep enough, leaving only the tips of the bottles to be seen.

    The racks can be shaped in mainstream rectangular, in many circles adjusting the bottle sizes, or in metal racks that represent modern taste.

    How tall? Well, it depends on the fact if you like to keep many bottles or you are an occasional wine drinker. Don’t build it to tall if you don’t plan to store many. It will felt empty.

    On the contrary, don’t build it to short if you collect many. You don’t want to keep those bottles in a high piles.

    Kitchen island design gallery:

    3. Top Features

    This kind of island has top features and special characteristics that make it different than other kitchen island. First, it is the storage itself.

    Usually, the island has wine storage in horizontal position in which the wine bottle is lying down. This is important to make the wine taste and smell mingled with the bottle lid that is made by oak.

    Besides that, it will make the bottle lid safe from crack and porous that may be contaminated.

    Portable Kitchen Island with Wine Storage black wooden and granite top

    The next feature in this island is the cooling rack. Sometimes, there is a cooling rack in its cabinet or placed below the island. It will make the wine fresh and the quality is maintained. The red wines should be stored between 62° – 68° F, while the white wines probably between 49° – 55° F.

    So, are you interesting to have a kitchen island with the extra wine racks in it? Choose the best design for it that has been adjusted to your kitchen design. Maximize the use of your island in your kitchen and bring the happiness to your family member or your guests with it.

    Originally posted 2019-08-05 03:37:46.

  • Best Ideas of Round Kitchen Island with Storage

    Best Ideas of Round Kitchen Island with Storage

    A round kitchen island is simply brilliant while it is effective as well. If you want great function, additional storage on it will be awesome.

    The round shape may confuse you but the following ideas are perfect to adapt.

    If you need suggestion, check out the following ideas.

    Read also: Rust-Oleum Kitchen Cabinets Refinishing Kits.

    BEST IDEAS OF ROUND KITCHEN ISLAND WITH STORAGE

    1. Mainstream Cabinet

    Why not? A cabinet makes a perfect storage. It allows you to have several layers of shelves inside so you can store more dining wares you like on it. It gives you fast access to grab it every time you need it.

    Of course, the shape should adjust the round kitchen island design. You can divide each half of the kitchen island up to three cabinets.

    If it is tall enough, add a drawer on top of each cabinet. It doesn’t only improve the kitchen island look. It also add spaces in your room while it is being helpful as well.

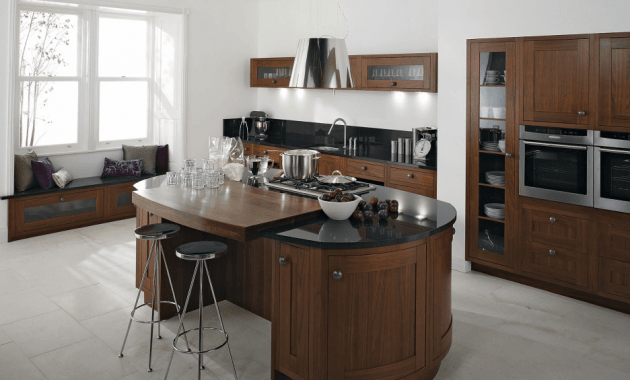
    Round Kitchen Island with Storage and cabinet

    2. Wine or Spices Rack

    Instead of using the entire side of the round kitchen island for cabinet, you should consider a small space for a wine rack or spices rack. A wine rack makes it easier for you to serve the right wine for dinner.

    Meanwhile, spices rack is perfect for fully functional kitchen island. It improves your productivity. The height should be as tall as the kitchen island goes, and don’t forget to add several lawyers on the rack to put more stuffs in it.

    You don’t necessarily need a door for this storage, especially when the other island wall is covered with cabinet doors.

    3. Open-Shelves Display

    This one is like a cabinet without door. Instead of dividing the round kitchen island into four to six tall parts for the shelves, you can have three levels of shelve at the whole half-round part.

    Store your favorite dining ware in a random stack on each level of the shelves. It enables you to grab a bowl or a cup fast while the kitchen island looks so fun, alive, and artful.

    You may need to consider storing the plastic ones if you have little kids or playful dogs inside the house.

    Modern wooden Round Kitchen Island with Storage granite top

    4. Half-Round Space

    Let’s stop being boring and build the cabinet only on half part of the round kitchen island. The other half can be left with only a base and poles to support the kitchen island top.

    The surface of the base can be made consistent to the kitchen island counter top, for example. Then, put a basket of fruit and veggies on it, a huge bin of crackers, or a stack of cooking and recipes books.

    It just instantly becomes storage and a decorative display all at once. Now, you round kitchen island isn’t boring at all.

    Read also: Mainstays Kitchen Island Cart.

    So there are many designs of storage that should be appropriate for the round kitchen island. The unique shape shouldn’t stop you from being alive and creative.

    Adjust the design to your needs, and make sure to ultimately use the entire storage for best function. Choose a perfect finish and position, and you just improve your kitchen value.

    Originally posted 2019-07-31 03:17:06.

  • Kitchen Island with Trash Storage: Things to Consider

    Kitchen Island with Trash Storage: Things to Consider

    The idea of using a kitchen island which is equipped with trash storage has been a popular idea for years now.

    Many people find it practical and it improves the overall kitchen look when it is well used.

    So, if we want one in the kitchen, what things we should consider about it? Check out this update below.

    The Importance of Trash Storage on Kitchen Island

    Trash storage is a brilliant idea actually. It allows you to throw trash immediately while you continue cooking or preparing the meal. With the storage being near you, the access will be fast and practical.

    In addition to it, it hides the trash perfectly, preventing spills and bad smells in the kitchen. If you look for a new idea to make a safe trash storage, kitchen island is your partner.

    Work on the Space

    There are several tips that you can use to find the right space for the trash storage, and how to use it the best way.

    1. The Right Spot

    The right spot for trash storage on a kitchen island depends on personal need. However, people choose to use the right or left lower cabinet on the kitchen island.

    It offers several benefits including convenient gesture to throw the trash while cooking, and providing more spaces for more kitchen storage.

    2. Storage Door

    Because the idea of adding the trash storage is mainly for practicality, it is essential to have an excellent door for the storage.

    First, you will need one that opens and closes nicely and easily. It prevents too many problems while throwing trash.

    Second, you need a door that shuts perfectly so it won’t let the smells out.

    3. Trash Container

    Yes, you will still need a customized trash bin or container on the inside. This is where you put the trash bag.

    You will need the bin to prevent any spilling or clusters of the trash. Trash spills can damage the kitchen island while it is totally filthy thing to have in a kitchen.

    4. Storage Interior Details

    The interior part of the kitchen island needs to be good as well. Prefer to solid interior with extra layer that is easy to clean whenever you get the trash spills.

    It is also recommended that the base storage on the kitchen island doesn’t have gaps while it is easy to take out the trash bag as well.

    Wooden Kitchen island with trash bins on wheels

    Maximize the Space

    The other things to do in applying the trash storage is balance the space next to the drawers. If you have the trash storage below the kitchen islands, do not leave the next part below the kitchen islands empty.

    If you plan to create the drawer which fit into one trash bin, you will get the enough space left in the next drawer. Remember; make those places useful for you.

    Creating the wooden counter is highly recommended. This farmhouse style will enlighten the kitchen islands and it can combine well with the trash storage.

    Put the kitchen stuffs and the jars in there to make it more alive. You can put the kitchen supplies as well in the counter; it will be easier for you when you are cooking.

    Read also: Kitchen Island Cart Stainless Steel Top.

    Combine the trash storage in the kitchen islands will come out beautifully if you can find the best design for it. Maximize the performance by adding a good combination into the kitchen islands and the trash storage.

    The clean kitchen displays perfectly in the best trash storage design along with others stuffs around it.

    White small Kitchen island with trash can storage and wooden top

    SIMPLE TIPS FOR KITCHEN ISLAND WITH TRASH STORAGE

    Originally posted 2019-07-30 00:58:11.

  • Kitchen Cabinets Long Island for Wonderful Display

    Kitchen Cabinets Long Island for Wonderful Display

    What makes the kitchen looks good? Of course, the cabinets play important point in the kitchen.

    Pay attention to the cabinets if you like the long island style.

    If you need a little guide and tips for the cabinet, check out the update below.

    Read also: Kitchen Cabinet Toe Kick Ideas.

    GUIDES FOR KITCHEN CABINET LONG ISLAND FOR WONDERFUL DISPLAY

    Material, Finish, and Accessory

    The most perfect material for the long island kitchen is wood. There are many varieties of woods that you can choose, for example the maple woods, cherry woods, and the oak woods. Apply one of the wood materials on your cabinet and it will taste classy.

    The second option to choose is cabinets made of the thermo foil or the painted ones. Those cabinets still match with the long island design.

    For you who like the painted cabinets, there are many color variations to show the Long Island style. You can choose from the classy monochrome colors, the natural brown wood colors, up to the colorful cabinet.

    Purple and blue kitchen cabinet will make a fresher looking kitchen. It is suitable for a family with little kids or for young people. Enjoy the coastal atmosphere and fun look of your cabinets.

    In addition to the color, adding the moldings will be nice too to get the Long Island look. You can use a unique accent like the rope or dentil to the cabinet. You can arrange the cabinets shelves as good as possible to ultimate its function.

    Another way to make the cabinet displays better is by adding the lighting. The lighting is not only enlightening your way when you want to take something from the cabinets, but also making a wonderful display out of the Long Island cabinet.

    The well fluorescent tube lighting is highly recommended in addition to allowing the big window that spreads the light in a bright day.

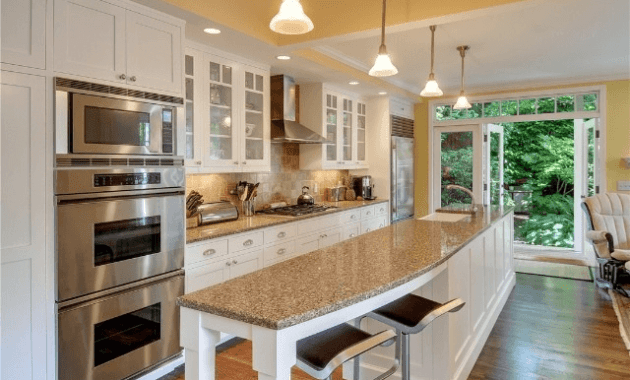
    Kitchen cabinets on long island with white chairs and granite top
    Image: decorpad.com

    Kitchen Cabinet Design to Consider

    The kitchen cabinet can make a dramatic display for the kitchen. Beside perfect shelves designs, you will also want to consider the placement and the right design to choose.

    As mentioned before, wood is the best material for an ultimate looking and fully functional Long Island kitchen cabinet. However, the wooden cabinets are available on various designs that you can choose. The popular kitchen cabinets in Long Islands include:

    1. The Stock Cabinet

    This cabinet is the most affordable one. It is usually used in the local home and the cabinets are easy to find in the rental property too. It has mainstream shelves. It accommodates nicely yet it has rather plain look. You need to work more on the finish for more appealing look.

    2. Semi-Custom Cabinet

    This cabinet comes with adjustable height and width. It is easy to move as well so it will be the best option for you who like to change the design from time to time. The best part of this cabinet is you can customize the shelves as you need it while you can have a unique look.

    3. Custom Cabinet

    The permanent and the most expensive cabinet among the Long Island options is the custom cabinet. It requires careful design and outlining yet it is the most satisfying option to have. It commonly is more expensive but it fits well on sizes and style.

    In sum, there are many things you can add and consider when it comes to add the Long Island cabinets on your kitchen. Consider your budget and try to use the guide above to get the best option there is.

    Custom kitchen cabinets long island

    Originally posted 2019-07-29 10:46:36.

  • Kitchen Island Cart Granite Top

    Kitchen Island Cart Granite Top

    Some of you may choose the granite material as the top of your kitchen island cart. Granite top gives an elegant feel in your kitchen.

    As we know, granite has its own appeal that can make your kitchen look like a high-quality kitchen.

    Let’s learn more on kitchen island cart that uses granite top on it.

    See also: Kitchen island cart with seating.

    Why Granite Material

    Granite material is recommended for kitchen top including for kitchen island cart top. If you need to know the reasons, check out the following list.

    • Granite material is hard substances that resist to any scratches. You can be a rough cook, but this top won’t fail you.
    • It resists heat. It is completely finding to put hot pans on it and it won’t cause a damage. It is also safe to put the kitchen island cart near to any heat source in the kitchen. It will not affect the granite texture.
    • It is also resistant to stains so it will be easy to clean it. Food spills and any other possible drips will not get absorbed and change the top finish.
    • It is a very durable material. It can handle hard duty which explains why it is ideal for a kitchen island cart top.

    Read also: Kitchen Island Cart with Trash Bin.

    Why Kitchen Island Cart with Granite Top is an Ideal

    The kitchen island cart with granite top can be a good choice for you. Why? As stated previously, granite material is durable.

    In addition, it is also easy to install and maintain. Then, if you want to have something elegant in your kitchen, this product is very appropriate. The granite material has its own elegant feel and atmosphere.

    However, granite material is quite heavy. However, with a few wheels on the cart, this won’t be a problem. Instead, it will be a solid pair for the kitchen island cart.

    Read also: Movable Kitchen Island with Seating.

    BEST TIPS ABOUT KITCHEN ISLAND CART GRANITE TOP

    Best color combination

    You can choose the best color combination of your granite and cart depending on your kitchen theme. Here are several recommendations that you can consider.

    • Agatha black granite with white cart.
    • Alaska white granite with dark cart such as grey or black.
    • Arabian black granite with white cart or black cart.
    • Astoria granite with brown cart.

    Why you should consider the color combinations above? Besides delivering the ultimate elegant, those color combinations are in trend right now and it represents everlasting beauty.

    With careful selection, it will improve the overall value of your kitchen. Make sure to combine warm and light color to get a balance.

    White kitchen island cart granite top

    Tips to Choose

    If you want a perfect kitchen island cart with granite top on it, use the following tips.

    1. Choose quality granite

    You should choose real granite and make sure it is properly installed. Make sure it is finished smoothly too, and it has perfect dimension matching your need.

    2. Prefer on strong and durable kitchen island cart

    As granite top is heavier than other top alternatives, it is important to have a strong and durable kitchen island cart. Thick wood is a good call. You need a cart that can carry the top easily while it remains totally functional too.

    3. Consider the heavy duty wheels

    With granite top requires more strength on the other kitchen island cart elements, it is recommended to have a heavy duty casters with locking rubber. It is safe while it offers great mobility too.

    A kitchen island cart with a granite top is an excellent choice. It delivers function and beauty at once. Choose carefully so you can get the best use of it too.

    Black kitchen island cart with granite top

    Originally posted 2019-07-29 01:59:56.