Blog

  • Best Grout Cleaner Machine for Tile Floor

    Best Grout Cleaner Machine for Tile Floor

    Do you spend lots of time scrubbing the dirt away of the grout at your home using your old toothbrush? Yes, it must be very tiring and time consuming.

    Don’t worry about it anymore! You now can clean the grout from your tile floor by using new machine called a grout cleaner machine.

    Read also: How to Clean Grout in Shower Easily.

    HOW TO CHOOSE BEST GROUT CLEANER MACHINE FOR TILE FLOOR

    1. The Best Grout Steamer Cleaner

    If you are able to choose the perfect grout steamer cleaner, you will be able to get rid of the stubborn grime and dirt from your tile floor.

    In general, this machine operates with the water base stored on its wheels and connected with the steam hose. This steam hose is the one that you hold to clean the dirt and to direct the grout cleaner anywhere you want to.

    There are also some small handheld grout cleaners which have the power of the cleaning in your hand directly. If you start to buy the grout cleaner, you will see that there are various sizes, shapes and models as well as price tags in the shops.

    If you just want to buy the grout floor cleaners, there are some brands and options that you can choose as they have already shown such a great work in cleaning your tile floor from dirt and grout.

    Nevertheless, it is best if you spend your money to buy such multipurpose grout cleaners which let you clean more than just stubborn grouts. These machines will allow you to clean the AC unit, bike, floors and even the upholstery. There are some options and brands that you can choose later on below.

    2. The Best Brands of Grout Cleaners

    What is the best grout cleaner for the tile floor? This question is oftentimes being asked by people as they find that their tile floors are something matters to determine the cleanliness of their house.

    In general, people pay attention to their house floors. They have the tendencies to choose such materials like glass, marble chips, ceramics and even some ornamental stones. The floor surface which is associated and compared with tile is grout. It is a mixture which has the functions to stabilize the soil and sand.

    The tile floors are considered to be waterproof and quite strong. For being waterproof, the tile floors are being used on showers, restrooms, and also bathrooms. To be considered as strong, you can see that these kinds of floors are being used in public places for people’s walk like malls, business centers, dormitories, hospitals, and so on.

    Most of cleaning machines tend to leave any streaks that can damage the designs of the tile floors. The best choice of the cleaning machine will become more essential if it deals with ceramic floors as they are very delicate and vulnerable of any spontaneous strikes on top of their surface.

    Therefore, it is very reasonable to buy the perfect cleaning machines for the tile floors. As mentioned previously, in the market, you will find that these devices are varied based on their dimensions, speed, and power. They are also based on the coverage diameter as well as the materials that they can safely clean.

    Each product may come with some pros and cons. Therefore, it is your job to determine which cleaning machine that is suitable for your floors.

    If you are looking for multipurpose grout cleaners, such brands like Hoover, Bissell, Steamfast, and McCulloch have already shown their great job in the grout cleaning.

    3. What to Consider When Buying the Grout Cleaners?

    As mentioned previously, each unit has its own pros and cons. Moreover, it is better to look for some multipurpose grout cleaners. If you want to buy the grout cleaners, there are things that you need to consider.

    Temperature and Power

    As you want to clean or remove the grime and dirt from any parts of your house, you also need to find the machine which can kill the bacteria and germs. Therefore, if the grout cleaners are not able to reach high leveled temperature to sanitize and disinfect your house, then it will be impossible to get rid of the dirt from the grout.

    So, to start with, you need to choose the grout cleaner machine which is able to reach the temperatures around 158 up to 212 degrees of Fahrenheit. When the machine is able to reach such temperatures, it is able to sanitize and disinfect your floor tiles.

    Although the cleaner manufactures state that their grout cleaning machines are able to reach such temperatures, you need to remember that they can become cool in instant from the tank as the heat flows throughout the hoses.

    So, to deal with it, you need to make sure that the cleaning machines have smaller nozzles and hoses or you can double check if the tanks are able to heat the water in much higher level to compensate the temperature loss.

    The use of water as the steam is considered to be one part that needs to fulfill by the grout cleaning machines. Besides, they also need to be able to use the combination of both pressure and steam. This combination is very important if you want to get your grout and tiles clean.

    Some devices will use specialized hoses to create such pressure. There are also some devices that have highest wattage. If you want to choose, it is better to look for the highest wattage devices as the more power they have, the more cleaning they will do,

    Always Come with Multiple Attachments

    If you buy any multipurpose grout cleaning machines, you will get many advantages. You will be able to clean lots of areas in your house like cleaning your carpet, disinfecting your upholstery, removing wrinkles from your clothes, and even cleaning your bike or car.

    Most of best cleaners come up with a complete set of hoses and attachments to make the work easier. They will be completed with detail nozzles, scrubbing brushes, and also extension rods which enable you to reach the highest gaps of your tiled bathroom wall or shower enclosure.

    So, have you got any ideas of which grout cleaning machine that is suitable for your house? if you have found one, it’s time to go shopping and get it for you now! Happy shopping!

    Grout and Tile Cleaner Machine Tool
    Image: www.edic-usa.com

    Originally posted 2020-12-04 22:51:11.

  • How to Clean Grout in Shower Easily

    How to Clean Grout in Shower Easily

    Grouts could keep appliances and tiles in place but it can also bring pains to clean. Cleaning grouts surely needs effort and time to keep them free of mildew and mold.

    Although the cleaning requires effort, letting the grouts exist, especially in the bathroom, will make us uncomfortable in the room.

    To help you with the cleaning, here are some tips to clean the grouts in the shower:

    Read also: How to Clean Grout with Vinegar and Baking Soda Effectively.

    HOW TO CLEAN GROUT IN SHOWER EASILY

    1. Steam Clean the Grouts

    One of the most environmentally friendly and effective way to clean the grouts is using a steam cleaner.

    To use this machine to clean the grouts, you need to outfit it with a pointed and thin nozzle. Also, if possible, you need to attach a brush to the steam cleaner.

    The use of the nozzle is to reach the grout lines. When you clean the grout lines, make sure you apply the steam continuously and simply follow the lines of the grouts using the steamer.

    Even if your steam cleaner is not able to reach all the grouts perfectly, the steamer will somewhat clean the grouts and help you loosen the debris and dirt so that it will be easier for you to clean them using other cleaning products.

    2. Attack the Grouts with Vinegar and Baking Soda

    You may have heard many people or articles recommending the use of baking soda and vinegar to clean up grouts. Yes, those two materials are really effective. What you need are 30 grams of baking soda and enough water to create a baking soda paste. Get the enough amount of the baking soda so that you can make a thick baking soda paste.

    Once you finish making the paste, get a tooth brush and brush the grouts using it. After that, scrub the grouts. For the best results, you need to utilize a new toothbrush that comes with hard bristles. The hard bristles will scrub those grouts away. Just make sure you do the scrubbing in circular motions not back and forth movements.

    Once you are done with the scrubbing, spray the area of the grouts using the solution made of vinegar and warm water. Spray it and let it bubble for 30 minutes. Then scrub the baking soda paste and also the vinegar into those grouts again. Finally, rinse those areas using clean water.

    3. Use the Hydrogen Peroxide and Baking Soda

    Previously, it is mentioned that you can clean up grouts using baking soda and vinegar. In fact, baking soda can be mixed with another cleaning product to remove all the grouts. To utilize these products to clean up the grouts, you need to make a thin paste of the mixture of hydrogen peroxide and baking soda.

    Once you finish making the paste, grab a toothbrush to apply the paste on the grouts. Whenever necessary, pour additional peroxide to ease the grouts cleaning. Let the paste stay for a while. Finally, rinse the surface or the areas using warm water.

    When cleaning the grouts using peroxide and baking soda, make sure you pay attention to the following notes:

    You should not mix hydrogen peroxide with vinegar. Instead, clean the grouts area thoroughly and then wait for some days before applying the method.

    Second, if you think that hydrogen peroxide doesn’t really remove the grime and the dirt, you should know that at least the peroxide can remove the stains so that it can improve the grout appearance and can kill any present mold.

    4. Using Lemon Juice and Borax

    If you find it difficult to purchase hydrogen peroxide, vinegar, and baking soda, you can try cleaning up the grouts in your shower using lemon juice and borax. What you need to prepare and buy are a small bowl, 63 grams of borax, 3 ml of lemon oil, and any liquid soap. All those materials are used to make a paste to remove the grouts.

    To do the cleaning, you will need a toothbrush. With the brush, scrub the paste you have made into the grouts. Make sure you scrub the surface with grouts thoroughly. If needed, do the scrubbing for a couple of times. After that, simply rinse the surface with water. To get the best results, use warm water instead of the cold one.

    Try Lemon Juice and Borax for Cleaning Grout in Shower

    5. Use Commercial Grout Whitener and Cleaner

    If you think the materials above don’t really help you clean the grouts in your shower, you can always opt for commercial grout cleaners and whiteners that are sold in the market. There are lots of cleaners sold out there that are specifically designed and made for grout cleaning. Most of those products could be bought at any hardware stores.

    Although you can get the product easily, you still need to pay attention to any instructions provided with the manufacturers. You need to always follow all the safety precautions. Remember that these commercial grouts cleaner and whitener products are strong cleaning products. Follow all the recommended cleaning steps.

    For your information, the commercial grout cleaners will include the following: Goo Gone Grout, Zep, Tilex Tile and Grout, and Outrageous.

    6. Give the Products of Oxygen Bleach a Try

    Finally, you also have an option for grout cleaning using oxygen bleach. Oxygen bleach is actually another name of sodium percarbonate.  This is a special compound that is made of soda crystals and hydrogen peroxide. There are a lot of brands of oxygen bleach in the market. To mention some, you can find OxiClean, Bio Kleen, Cloroz, and Oxi Magic.

    To use these products, you simply need to mix it with water. To mix it properly, follow the instructions provided by the manufacturers of the products you are using. The instructions are usually written on the containers of the products. Once you get the mixture, you could directly apply the solution to the grouts affected area and then let the solution sit for about 60 minutes. After that, scrub the area using a brush and finally rinse the area.

    There are lots of products you can use to remove grouts in your shower. No matter what material you are using for the grout cleaning, make sure you always follow the cleaning instruction, especially when you are using strong cleaning product.

    Originally posted 2020-12-02 13:23:08.

  • How to Clean Grout with Vinegar and Baking Soda Effectively

    How to Clean Grout with Vinegar and Baking Soda Effectively

    If grout is not cleaned, the white color of it will change to unlikeable brown.

    But, don’t worry! You only need baking soda and vinegar to remove the mold stains and the dirt effectively without hiring a professional.

    Here are the steps on how to clean grout with vinegar and baking soda:

    Read also: How to Cleaning and Sparkling Glass Stovetop in Minutes.

    HOW TO CLEAN GROUT WITH VINEGAR AND BAKING SODA EFFECTIVELY

    1. Mix Your Baking Soda with Water to Make a Paste

    First of all, prepare all the equipment and materials needed. You will need to prepare baking soda, water, and a small bowl.

    Then mix the baking soda with water in the bowl. Make sure you mix equal amounts of water and baking soda to get the perfect solution.

    Once all the materials are in the bowl, stir them until they turn into a paste. A good paste is the one that is easy to be applied to the grout. One more additional note for this step is to get the right amount of the mixture to get enough amount of paste needed to clean all the grouts.

    2. Apply the Paste

    Next, grab a brush to apply the paste. To apply the paste, you need to pick up that paste using a brush and then spread the paste over grouts. You could apply the paste using the same brush you will use later to scrub the grouts.

    The kind of brushes used for brushing the grout and scrubbing the grout could be found in the nearby stores of home improvement.

    However, if you think you couldn’t find those brushes easily, you could use a sponge instead. Other alternatives to brushes are a sponge that has scouring sides or simply your old toothbrush. Those tools will work just perfectly well.

    3. Make a Mixture of Vinegar and Water

    The next step is making the solution from vinegar and water. To get the best result in the cleaning process later, make sure you use warm water instead. Also, to get the easier application in the cleaning process later, make the solution in a spray bottle.

    Once you have all equipment and materials ready, mix the warm water with the vinegar in an equal amount. For mixing them you could use another container such as a bowl. Then pour the solution into a spray bottle.

    4. Apply the Solution

    Now, apply the solution. Spray the mixture of water and vinegar onto any grouts you see. Before spraying the vinegar, make sure you have applied the baking soda on the grouts. Then spray the solution of vinegar directly on the baking soda.

    In the application, you don’t need to spray lots of solution. Even a single spray of vinegar solution will be adequate to make the baking soda begin fizzing.

    5. Wait for a While

    After the application of the vinegar solution, you need to wait for a while to let the baking soda work. You only need to wait for 5 minutes only. During this length of time, you will see how the vinegar making a reaction with the baking soda.

    The reaction between those two will cause a fizz. During that length of time, the fizz occurring will loosen the grout’s grime so that you could clean the grouts up easily later.

    6. Scrub the Grouts

    As you begin to see the grime on the grouts starting to lose, you could start scrubbing the grouts. To scrub it, use a grout brush. This kind of brush enables the vinegar to work furtherly with the baking soda. However, if you could find any grout brushes, you could use an alternative which is stiff-bristled brushes, toothbrushes, or scouring sponge.

    When you do the scrubbing, you may be required to use more muscle power. Although this step may be quite tiring, the grime will be removed easily with this action. When you do the scrubbing, make sure you look out for any dark areas.

    Such areas indicate the place at which the grime still stays on the grout. When you see such areas, try to do the scrubbing for many times. If the areas remain dark, you can use hydrogen peroxide to make the cleaning easier.

    How to Clean Grout with Vinegar and Baking Soda

    7. Wipe Up to Clean Up

    Once you make sure you have done enough scrubbing, you will need to wipe it up. Why the wiping is up needed? It is because the scrubbing process will leave you with dirty baking soda and vinegar. To wipe the dirt up, you will need paper towels. This will enable you to pick up any mess from the scrubbing.

    If you don’t have any paper towels or you want to save on the use of paper towels, you can simply use old rags. If you still find the difficulty in finding the rags, you can use a sponge. Sponges can ease the process of loosening the grimes and also of cleaning on the grouts.

    8. Mop the Floor

    Finally, here is the last process of cleaning the grouts. You surely want to have shinning floor. That’s why; you need to mop the floor. Yet, before mopping the floor, you need to do another step first. You need to make sure you already sweep and or vacuum up the left-over of baking soda on any surface of the floor. Make sure that you have removed all the left-overs from the scrubbing process.

    Once you are done with removing any left-overs, you could mop the floor just as how you normally do it. If you think you cannot reach the grouts on the unreachable surfaces, you can swap the mop with rag that is dampened into clean water.

    Once you are done with the mopping, just let the floor dry before you do any activities on it. Now you have clean and more comfortable floor. Whenever the grouts appear again, simply follow the steps above.

    Don’t worry too much if you see unpleasing grouts on the floor of your home. You only need vinegar, baking soda and effort to clean them up. Although the grouts can be cleaned, make sure you don’t wait until it gets worse because that will require more effort to clean.

    Originally posted 2020-11-29 11:10:12.

  • Home Guide for Cleaning Grout with Bleach

    Home Guide for Cleaning Grout with Bleach

    Cleaning grout using bleach is a popular suggestion so far even though you can find many cleaning products at the store today.

    Many people find it more satisfying to use bleach and homemade formula than those products. Probably, it is because of the final result of the cleaning.

    Are you considering the same way of cleaning your grout? Let’s learn some more.

    Read also: 4 Best Homemade Grout Cleaner You Must Try!.

    HOME GUIDE FOR CLEANING GROUT WITH BLEACH
    HOME GUIDE FOR CLEANING GROUT WITH BLEACH

    1. Cleaning Grout with Bleach

    First, you will need the right recipe. This may sound sophisticated but it’s not. Even the simplest recipe containing only two ingredients can be effective, like this one.

    This recipe will take around 30 minutes in total to do everything from preparation to cleaning and around 15 minutes to leave it to sit before rinsing. In total, you need 45 minutes to finish it.

    Now, let’s make the cleaner first. You will need:

    • ¼ cup of bleach, oxygen bleach is often considered the best option for being safer and milder for home use
    • ¾ cup of baking soda

    How to Make Grout Cleaner with Bleach and Baking Soda

    You will also need some more tools to help you during the process:

    • Old toothbrush or a scrub brush
    • Respirator
    • Safety glasses
    • Gloves

    Now, let’s make the cleaner. The steps should be:

    1. Prepare a small bowl in which you will mix the ingredients.
    2. Add the entire ingredients in the bowl and stir them until well mixed. You can use a teaspoon or the toothbrush you are going to use.
    3. After sometime, the mixture will turn into a paste. When it turns into a paste, it is ready to use.

    Are you ready to clean the grout now? It is pretty easy. Follow these steps:

    1. Rinse the area to remove the debris. It will make the cleaning process a lot more effective.
    2. Apply the paste on the grout. Make sure to apply generously and don’t forget to cover the area near the grout as well for pristine final result.
    3. Leave the paste to sit for several minutes, ten to 15 minutes should do it. If the dirt is extreme, make sure to leave it to sit for around 30 minutes.
    4. Rub the area using the toothbrush or scrub brush. Make sure your scrub nicely to really remove the remaining dirt.
    5. When you are done scrubbing, leave it for another ten or 15 minutes.
    6. Rinse the cleaner from the area. You can use the shower or the damp rag to wipe it off. The dirt will go away along with the cleaner on this stage.

    If you don’t find it white and pristine, don’t be discouraged. Sometimes, grout tends to be darker when wet. It is best to recheck the condition later when it is dry enough. It usually turns brighter by then.

    2. Important Notes You Mustn’t Forget If Using Bleach for Cleaning Grout

    As we are using bleach for cleaning here, there are several small things that need your attention.

    • As we are using bleach, we need to wear clothes that we don’t mind to use for this. Bleach tends to change color. We may think if won’t splatter, but it will. The splatters that touch your cloth will change its color. If it is jeans, you will get spots on it.

    In alternative to using old clothes, you can also use some kind of coat to cover your clothes. However, if your coat isn’t white, it will get bleach spots later after this.

    • Bleach can be irritating for your skin, especially if you have sensitive and delicate skin type. The best way to protect your skin is to wear gloves during the process. It prevents any sting and irritation.
    • For the same reason for the skin, you also need to protect your eyes from irritation. It is highly recommended to wear safety glasses or goggle.
    • In addition to your eyes and skin, you also need to protect your lungs, mouth, and nose. In this case, a respirator will suffice. However, if you don’t have it, simply open the window while you are cleaning the whole time. It prevents you from any danger and it keeps the room well circulated.

    Pros and Cons on Cleaning Grout with Bleach

    3. Pros and Cons on Cleaning Grout with Bleach

    As in other cleaning products, the use of bleach to clean the grout carries advantages and disadvantages as well. Despite the effectiveness of bleach in this case, you need to be aware of the other aspects too.

    The pros of using bleach are pretty heart-warming:

    • Almost all bleach products are guaranteed strong enough to handle mold and mildew on grouts. So it remains effective and powerful.
    • Bleach doesn’t only clean. It actually removes the smell for some times, and it also prevents new mold and mildew appearing for quite some times.
    • More than mold and mildew, bleach will be effective to use to clean soap scum as well.
    • Being powerful enough, bleach will leave you on ease. You don’t need to scrub so hard as it actually cleans well if you let it sit for a while.
    • Bleach works effectively, so it doesn’t take a long time to bring back pristine grout at home.
    • Bleach products are easy to find and the price is average. You can clean while on budget.

    The cons of using bleach are pretty alarming as well:

    • Using bleach will create a strong smell, and in several conditions, it isn’t safe.
    • Bleach fumes are toxic. It is why it creates respiratory problems. Wearing mask or respirator will help prevent health problems after using it.
    • It can cause irritation on your skin.
    • Bleach is dangerous for kids and pets
    • Bleach isn’t suitable for all materials. Avoid using this on vinyl, untreated wood, and fabrics.
    • Chlorine bleach is far more dangerous. It is best to use oxygen bleach instead.
    • Bleach can change the color of your grout. It is mostly visible on darker colored grout instead of the brighter one.

    So cleaning grout with bleach is recommended but you need to pay attention on several things too. It is best to clean things without causing new problems especially on your health.

    Originally posted 2020-11-27 12:43:13.

  • 4 Best Homemade Grout Cleaner You Must Try!

    4 Best Homemade Grout Cleaner You Must Try!

    Cleaning the grout may come from a good intention. However when you apply the store bought cleaner, the room can change into toxic ordeal.

    The cleaning alone can be messy while it is dangerous for you to breath in the room as well. As a solution, try homemade grout cleaner that aren’t toxic and safer.

    Here are several recopies and how to use it. Check it out.

    1. Simple Homemade Grout Cleaner

    This first recipe is probably the most popular one if you don’t know it yet. The ingredients used in this recipe are pretty simple and easy to get. You are going to need:

    • A teaspoon of dish soap, the liquid one
    • ½ cup of hydrogen peroxide
    • ½ cup of baking soda

    When you have the entire ingredients, let’s try to make the cleaner solution. First, find a small bottle with a squeeze top. It should make things easier from now on. Add the baking soda in the bottle and then add the hydrogen peroxide. While using the hydrogen peroxide, make sure to never touch your eyes, and use a glove. It stings on a small cut on your skin and you need clean rinse if it touches your eyes.

    Shake a little to mix both ingredients in the bottle. When you are done, add the dish soap and close the top. Give it a good shake to make sure all are dissolved well.

    To use the solution, we only need to apply it on the tile where it gets the grout. Then give it a rub. In alternative, you can use a sponge and add the cleaner on the sponge. Then, use the sponge to clean the area.

    If the grout is intense and it gets mildew and mold, you may need to cover the area with the cleaner and let it sits for several minutes. Then, use a wet sponge or towel and clean it. It will do magic.

    Simple Homemade Grout Cleaner

    2. Homemade Grout Cleaner with Essential Oils

    This second recipe is another great alternative that actually smells good because of the essential oils while it remains great as they are anti bacterial agent too. You are going to need:

    • Five drops of lemon oil
    • Five drops of lavender oil
    • Five drops of tea tree oil
    • ½ cup of baking soda
    • Three tablespoons of Castile soap

    Before you start making the cleaner, you are going to need a jar with lid. Then, add the entire essential oils in the jar and the castile soap. Mix them nicely using an old toothbrush or a teaspoon. Then, add the baking soda. Mix again well. The texture should be like a paste. When it reaches paste texture, the solution is ready to use.

    To clean the grout with this cleaner, you only need to apply the cleaner on the grout and then give it a rub using an old toothbrush or scrub brush you usually use. Then, give it a second brush. This time, make sure the brush is wet enough for the duty. It should create foam in this stage, and it means the cleaner works. The grout will go with the foam. Finally, rinse with water until clean.

    How to Make Homemade Grout Cleaner with Lemon Oil

    3. Homemade Grout Cleaner with Lemon Juice

    The third recipe contains even simpler ingredients while it also smells fresh and cleans the grout well. Lemon juice is known to be acidic. It means it can remove dirt and stains effectively. However, it won’t ruin your tile surfaces, because the acid is mild enough. To make this cleaner, you are going to need:

    • 3 tablespoons of baking soda
    • 3 tablespoons of lemon juice

    It is always preferable to use fresh squeezed lemon juice in this recipe to make sure it has the ultimate effectiveness when used.

    To make the cleaner, you only need a small bowl and an old toothbrush. First, add the entire ingredients in the bowl. Second, mix them well. It should form a soft paste in the end. When it becomes paste, it is ready to use.

    To use this cleaner, you only need to use the toothbrush or even your finger to apply it on the grout. When you are done applying the paste, leave it to sit for around five minutes. Then, use a rug, towel, or the toothbrush to brush the paste. Once you are done, rinse the area with clean water. Now, you have pristine surface without mildew or mold.

    4. Homemade Heavy Duty Grout Cleaner

    Sometimes there are stubborn stains and mold or mildew. Mostly, it is caused by average reasons but we fail to clean it immediately. These stains and dirt need heavy duty cleaner and this cleaner is easy to make as well. You are going to need:

    • 7 cups of warm water
    • ¼ cup of white vinegar
    • 1/3 cup of ammonia
    • ½ cup of baking soda

    It is the baking soda that will mostly clean the stains and grime on the surface, but it is the ammonia that will leave your tile clean and pristine. Both make a great combination. However, you aren’t allowed to use ammonia near to chlorine bleach.

    If you have any, make sure to set it aside before you start cleaning. When ammonia and chlorine bleach touches, it creates chlorine gas, and it is extremely dangerous to inhale.

    To make the cleaner, make sure to provide a gallon container. Add the entire ingredients in the container and stir them to mix it well. Now, it is ready to use. Take a spray bottle and use the help of funnel to transfer it from the container to the spray bottle.

    Spray the cleaner on the surface you want to clean. Let it sit for several minute for an ultimate result. Then, use a brush and use it on the area. It will remove the stains and grime nicely. When you are done scrubbing, rinse the area using a damp cloth or wet towel, and you are done.

    With only a few dollars, you can get rid of the grout without exposing yourself to chemical danger. Why do you want to use the commercial cleaners if you have one of these rock stars cleaner on hand?

    4 HOMEMADE GROUT CLEANER YOU MUST TRY

    Originally posted 2020-11-27 01:32:28.

  • How to Get Boy Room Ideas Small Spaces

    How to Get Boy Room Ideas Small Spaces

    Just like everybody knows, children are always active. It is the stage where they move a lot, ask a lot of things, and often hurt themselves while playing.

    Thus, many said that the ideal space for small boys require big space. A house with small rooms won’t accommodate the active play day. Is it really that bad?

    Read also: How to Decorate Small Bedroom for Teenage Girl – Best Décor Ideas.

    HOW TO GET BOY ROOM IDEAS SMALL SPACES

    1. Keep Neutral Color

    The most common mistake while decorating small room ideas is stuffing the whole space with colors. The idea behind this careless move is the fact that kids love colors.

    Even though the statement is correct, the parents or house owners should also think about the proportion of the room. A lot of color on the walls will make the space looks smaller.

    Therefore, the best option for limited space is applying neutral color. To provide the mark pf “boys room”, some colorful toys and decorations could be added. Start from the favorite cartoon or movie character for the curtain.

    Some action figures are also great display on the table. Put more colors with the bed cover and the blanket. Even with plain colors, the kids will bring in toys with vibrant tone.

    Neutral Color for Boy Room Ideas Small Spaces
    Image: Freshome.com

    2. Give More Room To Play

    Aside from the color, another thing that could make the space wider or tighter is furniture. Since it is the bedroom, then the biggest hurdle is the bed itself. It should be big enough for the kids to sleep but not cutting too many spaces for the kids to play. There are two available options for parents, each of them with its own consequences.

    For those who decorate limited space with limited budget, the best option is putting the big bed that will fit until the kids grow up. However, this decision might cut the playing area on the floor. To make the room look bigger, avoid using rug or carpet.

    The second option is buying small bed and give more room to run in the room. This choice might cost a lot, since the bed should be changed once the children is older.

    Blue Boy room ideas for small spaces

    3. Stick Wallpaper On One Side Only

    Not all people love the simple concept. In some cases, the parents want something bold on the room. Even though it fits more to big room, some tricks could be applied to the limited space bedroom.

    If the parents or house owners are planning to use wallpaper, then make sure to elaborate the whole room. The house owners will have limited options if it is installed on a painted wall.

    Choosing wallpaper for the bedroom is fun for the children. Ask them to come along when it is time to buy the wallpaper. To make the room aesthetically pleasing for the eyes, the parents could pair the wallpaper with natural color. If possible, avoid applying dominant color from the decoration on the wall. Generally, white or gray is the safe choice.

    Baby boy room ideas for small spaces

    4. Think About The Room Shape

    Many samples of room decoration ideas are using normal room with block style. For the house with limited space, any room must serve a purpose, even for the ceiling bed room. Considering the wide space for playing around, ceiling bedroom is not a bad idea.

    The challenge for boys room is choosing the furniture. Most of them will be short or squishy. The use of tables and chairs are minimum. Don’t forget that the wardrobe requires the highest corner.

    For a room with younger boys, try to pick the furniture with rounded corner. It will prevent any accident, or at least reducing the effect on the skin. For the rug, pick the one with short or medium thread. Later after the playtime, it will be easier to clean them and take shorter time to dry.

    House designer has different preference when it come to the ceiling. Some of them make it short, but the others make the ceiling high enough. In this second option, the house owners could make extra adjustment. It is not about adding even more wall decoration. If possible, make a window on the wall.

    Boy room space ideas for small spaces

    5. Put One For All Furniture

    Keep in mind that limited space room doesn’t have the luxury of putting one purpose item. In the end, the room will be packed with stuffs. The house owners cannot remove it, since they need it for later use.

    If the item stays in the room, then there is no space to put the other things. Fortunately, there are ways solve the problems; pick the furniture that could be folded or used for many purposes.

    While dealing with kids, they don’t need to hang a lot of clothes. Thus, a half drawer and half hanger wardrobe is a smart option. Now try to apply similar concept to the chair. Pick one that could be used by kids to do their homework but tall enough for mother to sit. Next, find another furniture that could serve at least two function in the bedroom.

    Smart toy storage for boys room for small space

    6. Pick A Theme

    Writing a list of bedroom furniture is easy. The hard part is matching them. This is a trick to make things work: applying a theme for the boys. Some popular look for them are nautical, stripes and world map.

    A nautical theme corporates blue and white. To make it livelier, add some buoy and rope wall decoration. Some ship stickers will also be great. Stick it above the wave for realistic effect.

    Stripe theme basically combines two colors at the minimum. For bedroom, it is okay to pick up to three colors. More than three and the room will be too dull. The color could be taken from one spectrum or contrastive sides.

    As for the world map, the parents basically cover the whole wall with world map pictures. Since it might not last long, painting is also a great solution. Just make sure that the world map could be seen clearly.

    For a kid, bedroom is not just a place to sleep. It is quite challenging to prepare a multi-functioned room, especially in small space. Thankfully, if the house owners pick the right items, the children could still play happily even in small room. Good luck!

    How to Get Boy Room Ideas for Small Spaces

    Originally posted 2020-11-25 00:26:14.

  • Natural Home Hacks to Get Rid of Ants

    Natural Home Hacks to Get Rid of Ants

    Seeing ants crawling in many places in your home is absolutely annoying and disturbing.

    It gets even worse when those animals start to interfere you favorite food and beverage on your dining table.

    If that’s what happens to you, you need home hacks to get rids of ants. Here are some natural home hacks you could try:

    Read also: How To Get Rid Termites On Wood Floors.

    NATURAL HOME HACKS TO GET RID OF ANTS

    1. Powdered Sugar and Baking Soda

    Powdered sugar and baking soda are not only for making bread or other food products. They are also good natural remedies for getting rid of ants in your home. You can lure ants using baking soda in particular toxic quantities.

    To make it even more toxic to ants, mix the baking soda with powdered sugar and also some drops of essential oil. The kinds of essential oil that can be used here is up to you. You can use your favorite one.

    Baking soda is so powerful to cure this ants issue as it can interfere ants’ digestive ability and thus cause the ants to explode and finally perish. To kill the ants, you need to put the mixture of those three in the ants nest’s entry points. Once you put it there, wait for the baking soda to do its magic. This home remedy is easy but impactful!

    2. Vinegar

    Another effective and impactful natural remedy for getting rid of ants is vinegar. To repel the annoying ants, you need to mix certain amount so vinegar and water. The vinegar itself can be apple or white cider. Once you mix the solution, you could spray it to the ant hills around your home for example the ones in the garden.

    If you see the ants nest inside your home, find the entry paths of the ants nest. Find the entry paths on counter tops, windows, and sink. Vinegar with its strong scent can make those ants get rid of the places sprayed with it.

    7 Natural Ingredients to Get Rid of Ants

    3. Boric Acid

    Running out of vinegar? Worry not! You can use boric acid that can also be toxic to those disturbing ants. Boric acid can be very toxic when it is ingested. Boric acid is suitable to be used in both garden and inside the home.

    To get the best solution of getting rid of ants, you need to mix the boric acid with maple syrup, sugar or honey, and also peanut butter to make bait for the ants. When the ants are approaching the mixture, they will ingest the mixture using glee and they may take some of it for their colony.

    Finally, that mixture will be the poison for the ants’ system. The mixture will also wipe out the ants’ entire clan just in one night.

    4. Lemon Juice

    Another natural remedy to get rid of ants is lemon juice. While lemon juice itself is one of favorite beverages for most of us, it is also an effective solution to get rid of the ants in your home. The citrusy scent of the fruit is a good solution to deter ants. Meanwhile, the acidic nature of lemon will mask the markings of natural scent the ants use to navigate the way to the ants’ surrounding.

    To use lemon juice to get rid of ants, you will need cotton balls and essential oil. First, soak the cotton balls in the lemon essential oil. Then leave the mixture on thresholds, windowsills, cabinets, and other spots in your house that are likely to be the ants’ nest and that the ants are likely to be.

    5. Food Grade Diatomaceous Earth

    Ants usually swarm garden party, family picnic, BBQ party in the backyard or whatever it is that contains food they can lend their legs on. Therefore, cleaning up what is bringing those ants into the place you are holding party is such a half winning battle.

    Meanwhile, another half winning battle will involve the diatomaceous earth.  Diatomaceous earth is a natural repellent for ants working in human-friendly and non-toxic ways. This way is great to disrupt the ant trails and also to prevent other ant problems.

    What is even greater about using this diatomaceous earth is that it can be used without bringing any contamination to your edibles and ornamentals. Simply put, dust the anthills and the plants using diatomaceous earth to get rid of the ants for now and the future.

    6. Cucumber Peel

    Cucumber is usually one of the common things we can often have in our kitchen. We use cucumber a lot in many dishes. Do you know that cucumber can also be a great solution to ant issues in your home? You can use cucumber to get rid of ants in your garden. Here is how:

    Ants are animals that are averse naturally to the cucumber taste. However, not all cucumbers can do great to solving this ant issue.  The best kind of cucumber is the ones with bitter taste. Yet, you can also rely on the normal cucumbers if getting bitter tasting cucumber is difficult.

    This natural remedy for getting rid of ants is actually effective but it comes with a downside. The one and only downside is that you need to replace the peels of the cucumber every day. You also need to continue doing the procedure until the ants disappear.

    7. Cayenne Pepper

    The last natural remedy to get rid of ants in your home is cayenne pepper. Cayenne pepper has pungent and strong odor that can destroy the ants’ signals that they usually use to communicate with other ants to go toward the nest. With the absence of the right signal, the ants will fail to move toward their home and thus to survive.

    To use this natural remedy, you can sprinkle the cayenne pepper in the exposed parts. This will be a great idea to drive away those disturbing ants. Another way to sue cayenne pepper is to mix enough parts of cayenne pepper and turmeric powder to create even more powerful barrier for those ants.

    To solve the issues of ants in your home doesn’t necessarily mean you need to purchase some chemical medicine. You can occupy those natural remedies to solve the issues. Choose the one that is the easiest to find and get rid of those ants!

    Natural Home Hacks to Get Rid of Ants

    Originally posted 2020-11-24 12:46:44.

  • Finding the Best Ski Cabin Decorating Ideas

    Finding the Best Ski Cabin Decorating Ideas

    Finding the right decoration of skin cabin is such an essential part of making your guests, friends, and especially family relaxed on the upcoming winter season vacation.

    There are absolutely many ways to create the ski cabin decorating ideas. Here are some selections of great ideas of skin cabin decorating ideas:

    FINDING BEST SKI CABIN DECORATING IDEAS

    1. Personalized Signs of Ski Cabins

    One of the easiest decorating ideas you can do is making ski cabins. To get one, you need to select the right design from various and different choices for the sign of your vintage cabin.

    Once you get the right design that you like, you can head to personalizing the signs with name of your ski cabin, family cabin, country or Lake Lodge or lake, ski resort or country area name. You can also create a special name for the new room for you.

    The choices are so various. You can even use summer sports, winter sports, ski run, or cabin rules. There are plenty of affordable and rustic options you can choose from. You can also get your sign from a rustic cabin supplier by ordering yours through their website.

    Go to the suppliers’ website to find out hundreds of cool and beautiful signs and many other ski cabin decorating items. You can also have your ski cabins personalized for example using custom metal or custom wood by ordering one by a talented artist.

    Modern ski cabin decor ideas
    Image: Potterybarn.com

    2. Pillows with Rustic Cabin and Ski Chalet Theme

    If you don’t really like ski cabins sign, you can opt for pillows with rustic cabin and ski chalet theme to decorate your home. Even a simple rustic cabin pillow or ski cabin pillow to insert a color splash while at the same time enhance the cabin theme of the room.

    What kind of pillows should be chosen then? There are a lot of choices. It can be skis, snowflakes and snowboards to bears, deer, moose, fish, cabin rules, and many other choices. You can also use cabin bedding and also furniture with rustic style.

    These additional decoration items will better your retreat in the room. In addition to that, you can complement your rustic cabin and ski chalet themed pillows with rustic-themed furniture, lighting, bedding, linens, and other decoration items in the room.

    Ski cabin bedroom decorating ideas

    3. Fireplace over TV

    Another great decorating idea to create best ski cabin vibe in a room is to choose fireplace over TV. You can forget and replace the existence of a TV and include a fireplace instead in the room. This fireplace could play several roles: warming when the winter hits its coldest temperature and becoming the room’s perfect focal point.

    Designing any room will not be complete without adding a focal point. Therefore, a fireplace is a great idea for your ski cabin room. Choose a cozy fireplace not technological stuff and put your coffee table along with your comfiest sofa across the fireplace.

    To get even way better feeling in the room, build a fireplace next to a window. By doing so, you can enjoy the winter view outside but remains warm because of the fire in the fireplace.

    Tahoe Ski cabin Kelly Abramson Decorating Ideas
    Tahoe Ski cabin Kelly Abramson Decorating Ideas. Image: Onedesign.com

    4. Don’t Take the Value of View For Granted

    Don’t you ever underestimate what view can do to your room’s design and vibe! What do you think can be a greater idea than gathering around the fire? It is of course looking at over the exquisite and incredible panorama from the windows.

    A ski lodge has a great way of framing the view outside or the outside world in a superbly romantic way thru the picture windows as well as thru the carefully installed patios.

    Installing picture windows or patios may include a little bit too many modifications to your home. However, this will surely be opening the blinds at times. So, if you think there are great views outside, don’t neglect it! Make the best of the outside world by having necessary installation like the picture windows so that everybody can have a better time in the related room.

    Chalets lodges ski cabin decor large window

    5. Don’t Let the Bricks Steal All the Shows

    We may have heard lots of recommendation of building walls with exposed bricks style. This kind of wall surely contributes a certain vibe and feeling to the room. However, using exposed bricks is not the one and only great option especially when you want to create a ski cabin decoration.

    Other elements that can be used in this kind of decoration style are rustic wood and or natural stone. Both of them will do the trick just as well as the exposed bricks do, or even better. The point here is to incorporate many natural elements when building the walls of the room so that you can infuse the vibe of ski cabin.

    Some examples of the natural elements are wood cross cuts or stones, all of which can be great alternative centerpiece to the room instead of using exposed bricks everywhere.

    Wooden ski cabin decoration ideas from duplex apartment

    6. Don’t Leave Some Warmth Behind

    The last ski cabin decorating idea you should try is bringing some warmth to the room. You may have encountered a couple of rooms that already occupy perfect furniture pieces or utilizes unique ski cabin interior design but you still feel something missing in the room.

    That happens because the room doesn’t have enough warmth. Warmth does contribute a lot to the coziness and comfort to the room.

    Now, the next question is how are we supposed to bring warmth to the room? Easy! Work with the right palette and lighting. Your ski cabin room will not feel great and comfy if you fail to choose the right lighting as well as the appropriate palette. Of all kinds of palette and lighting, choose the ones that come with dimmed style, earth tones, and also yellow glows.

    Ski cabin room decor ideas with right lighting

    There are tons of ideas on how to make ski cabin decorating ideas. It can be about adding new pieces of decorating items, choosing the right color for the room, setting the right lighting, using other elements to build the wall, and creating the right focal point. Which idea would probably be your preference?

    Originally posted 2020-11-22 03:45:30.

  • Best Idea DIY Fall Signs You Can Do Easily

    Best Idea DIY Fall Signs You Can Do Easily

    A creative and sign is a perfect addition to your home to welcome fall season. That new piece in your favorite room will infuse a particular vibe when it is properly displayed.

    However, what fall sign to display? How if the ones sold in the stores don’t suit your interest? Chill! Why don’t you make one?

    Here are some ideas:

    BEST IDEA DIY FALL SIGNS YOU CAN DO EASILY

    1. Watercolor Fall Art

    The first idea of DIY fall sign you should try is this watercolor fall art. It is super simple to do. The materials are also easy to find. This fall sign could transition your beloved home for the upcoming fall season.

    All you need are a thick art paper. The color of the paper is up to your preference. Besides, you will also need art painting with any color that you like. If you think you can do art painting well, you could search printable fall signs in the internet.

    There are plenty of watercolor printable files with many patterns and style. Choose the one that suit your style the most. Then, paint the drawing with the color of your choice. Let the watercolor dry and then hang the fall sign on the door of your bedroom or other rooms.

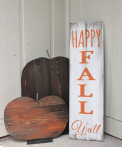
    Happy Fall Sign Decor with Watercolor Art
    DIY Fall Sign Ideas

    2. “Gather” Weathered Sign from Wood

    Second idea will be “gather” weathered sign from wood.  This fall sign is surely handmade. For this DIY project, you will need to work more with your creativity especially when doing hand lettering. But before going further with the hand lettering, let’s see the materials needed for this project.

    What you need to make this wood sign is barn wood in gray color. This kind wood is chosen to create a farmhouse style to the room you place the sign later at. If you cannot find barn wood, you can simply use reclaimed wood. Make most of any left-over wood you can find in your warehouse. If needed, you can paint the wood to meet your color preference.

    Once the painting is dry, do the hand lettering by wiring “Gather” on the wood. Let it dry. Now you have an instant and effortless fall sign that can infuse rustic vibe to your favorite room in your house.

    “Gather” Weathered Fall Sign from Wood DIY
    Fall Sign Porch Decor Ideas

    3. Giant Distressed Fall Sign

    Do you think you want to go big with your fall decoration? Well, you surely need a big fall sign! You can create a large and big distressed sign for welcoming your fall party guests. This distressed sign will give your guests an inviting and warm feeling.

    To make your distressed fall sign, all you need to have is white paint, dark walnut stain, and foam brushes. To make it, first, apply the dark walnut layer to the board with your foam brush and let it dry for about 15 to 20 minutes. After that, wipe away all the stain that was not soaked into the wood of the board.

    Next, sand the side of the board that will be the front part of your fall sign. This is the prep for the painting. Make sure you sand the board before painting it so that the stain will stick to the board very well.

    Once you are done sanding, wipe away all the dust. Then create the vinyl  “FALL” lettering using cutting machine. Make sure the size of the letters match the size of the board. Then stick the letters cutting to the board and paint the board in white. It will leave the board with the shape of the letters in black. Give two coats if you think it’s necessary.

    Last, sand the board until you get the distressed degree you like. Once you get it, your fall sign is ready to be displayed in your porch. To accompany the fall sign, you can add festive blooms and pumpkins around the fall sign. Now your porch is complete!

    Welcome Giant Distressed Fall Sign Porch Decoration Ideas
    Image: lovegrowswild.com

    4. Fall Harvest Sign

    Do you have some pieces of scrap wood that are just left unused in the warehouse? Why don’t make most of them in a DIY project? With those chipped and old pieces of scrap wood, you can repurpose them and make them into a cute sign of fall harvest.

    To make the sign, you will need 4 boards of scrap woods. You don’t need to paint them, simply leaving them with their natural color to get the rustic vibe from it. On each of those four boards, you can write some words related to fall harvest. For example, write in black the word “U PICK” on the first board. Then, for the second board, write “APPLES” using white paint. Then for the third board write “PUMPKINS” in white and on the fourth board write “HAYRIDES” in black paint.

    If your scrap wood pieces are in white, write the words in black. If the scrap wood pieces are in natural wood color, opt for white paint to write the letters. Once you are done writing the words, you can give any finishing you like. You can even create the shape of the board differently from one another.  The next step would be sticking them on the walls. The fall harvest sign is ready to welcome your guests!

    DIY Fall Harvest Sign Decor Ideas
    Nice Fall Sign Ideas. Image by: prodigalpieces.com

    5. Pumpkin Spice Print

    The last fall sign idea is this pumpkin spice print. This may be the simplest DIY fall sign project ever. All you need are just blackboard and colorful chalks. As October, the month of fall season, is about to come, we need to welcome this season of pumpkin spice latte!

    Prepare your blackboard and your creativity to use colorful chalks. Create an art of cozy chalkboard that features some colorful leaves such as in pink, green, and yellow, as well as the illustrations of pumpkins (the big and the small ones). What to hand letter then? Easy! Simply write HAPPY PUMPKIN SPICE SEASON in white and yellow. Then decorate the writing with leaves and pumpkin drawing.

    Pumpkin Spice fall sign chalk board

    Having a nice and cure fall sign isn’t necessarily buying it from store. Make your own! By doing that, you can always personalize the fall sign. All the materials of the DIY fall sign projects above are also easy to find in the nearest store. Which one is your favorite?

    Actually, many ideas that you can make as fall sign. The following are some ideas in the pictures for you. Hopefully it can add to your creativity.

    Originally posted 2020-11-21 03:25:01.