Blog

  • Simple Ways to Clean Ninja Coffee Maker

    Simple Ways to Clean Ninja Coffee Maker

    It is impossible for you to have fresh and tasty coffee in every single brew without clean our Ninja Coffee Maker.

    Therefore, it is important for you to wash your coffee maker and keep it in good performance.

    If you do not clean it regularly and correctly, you will find some calcium and minerals remain in your coffee maker.

    Moreover, you will drink your coffee along with those calcium and minerals.

    Actually, you can use our free time to clean your Ninja Coffee Maker. It will only take a few minutes.

    Read also: How to Clean a Burnt Pressure Cooker Pot without Scrubbing. Some Powerful Ways!

    Simple Ways to Clean Ninja Coffee Maker

    1. Clean the Ninja Coffee Maker with White Vinegar

    Vinegar is known as substance that can help us to dissolve and clean some deposits on our coffee maker. Therefore, it is important for you to make sure that you have it at home. Do not let your coffee maker full of deposit and cannot brew the coffee well.

    • First thing you should do is to prepare vinegar mixture. The mixture is depends on the calcium that you have in your coffee maker. It means, if you see that there are alt of deposits there, you can add more vinegar. However, some coffee maker prefer to use a ratio of 1:1.
    • The next step is to clean the machine with water. Before you use the vinegar to dissolve the deposit, it is better for you to clean it with some water. After using the coffee maker, pour some water into the reservoir and run the machine. This can help you to get rid of the debris from the previous brewing activity.
    • Then, after you clean it with water, you can pour the vinegar mixture that you have made before. In this session, you have to make sure that you pour it up to the maximum fill line. Then, press the brew button.
    • After 1-2 minutes, turn the machine off and let the mixture still inside the coffee maker for about 30 minutes. It will help you to destroy the calcium deposit in the coffee maker.
    • After 30 minutes, turn the machine on again without removing the mixture. Do it in 1-2 minutes again after that, you can pour out the mixture.
    • The last step is to rinse out the vinegar. You should use water to get rid of the vinegar smell.

    How to clean ninja coffee maker with vinegar

    2. Using Lemon Mixture

    Usually, people tend to use white vinegar to clean their coffee maker. However, there is still another way to do it.  Using lemon juice can also help you to clean the calcium deposits in your coffee maker. There are some simple steps to do it.

    • The first thing you must do is to make the lemon juice. You have to squeeze the lemons and then mix it with some water. The best ratio for the solution is also 1:1. Make sure that you get the correct ratio to make the cleaning process run well.
    • Before you use the lemon juice to clean the coffee maker, make sure that you have cleaned the debris from the previous brewing process. Use some water to do it. After that, you can pour the lemon juice mixture into the coffee maker up to the maximum line. Then, turn on the machine for about 1 minute. After you do it, let the mixture still in the machine for about 20-30 minutes.
    • After letting the lemon juice to soak the coffee maker, remove the solution and also the old filter. Then, rinse the machine with some clean water. You can do it for couple times until you are sure that you have got rid of the lemon smell.

    3. Using Hot Water and Soap

    Perhaps, this will be one of the simplest ways to clean your coffee maker. You only need soap and some hot water to get rid of the dirt in your coffee maker. However, you can only do it if you are sure that the machine is not too dirty or there are only little calcium deposit in it.

    • You can start the process by removing the brew basket and also the pot. This can help you clean the coffee maker easily.
    • It is better for you to use the top rack of the dishwasher from the cleaning since the glass carafe is dishwasher safe. However, it is only on its safer side.
    • Then, wipe down the outside part of the machine from the remaining coffee by using cotton cloth that has been added some hot water and soap.
    • In this process, you should make sure that the soap residues are not on the machine.

    4. Washing the Coffee Maker Parts

    There is also a way that you can do whenever you finish brewing the coffee. You can wash the parts of the coffee maker. Here are the steps that you need to do:

    • First, of course, unplug the coffee maker from the power source. It is important to let it cool down before you clean and what the coffee maker parts.
    • Then, remove some parts that you can wash. Do not forget to remove the filter and also take out the brew basket.
    • The next step is to clean inside the carafe by using soft cloth or bottlebrush.
    • After you do all of these steps, you can wipe the machine

    Those simple ways can help you to keep your Ninja Coffee Maker clean. There will be no calcium deposit that can damage the freshness of your coffee. By doing those steps, you can make sure that you can get fresh coffee after the brewing process. Those ways also can make the coffee maker durable. You do not need to buy the new one in the near future if you can maintain the machine well.

    In addition, to clean the coffee maker, you have to make sure that all materials you need are in the correct ratio. Beside, you also have to pay attention to all parts of the machine. Do not forget to follow the chronological steps so that you can get the best result of cleaning your Ninja Coffee Maker.

    Originally posted 2020-12-30 02:51:00.

  • How to Clean Vicks Humidifier

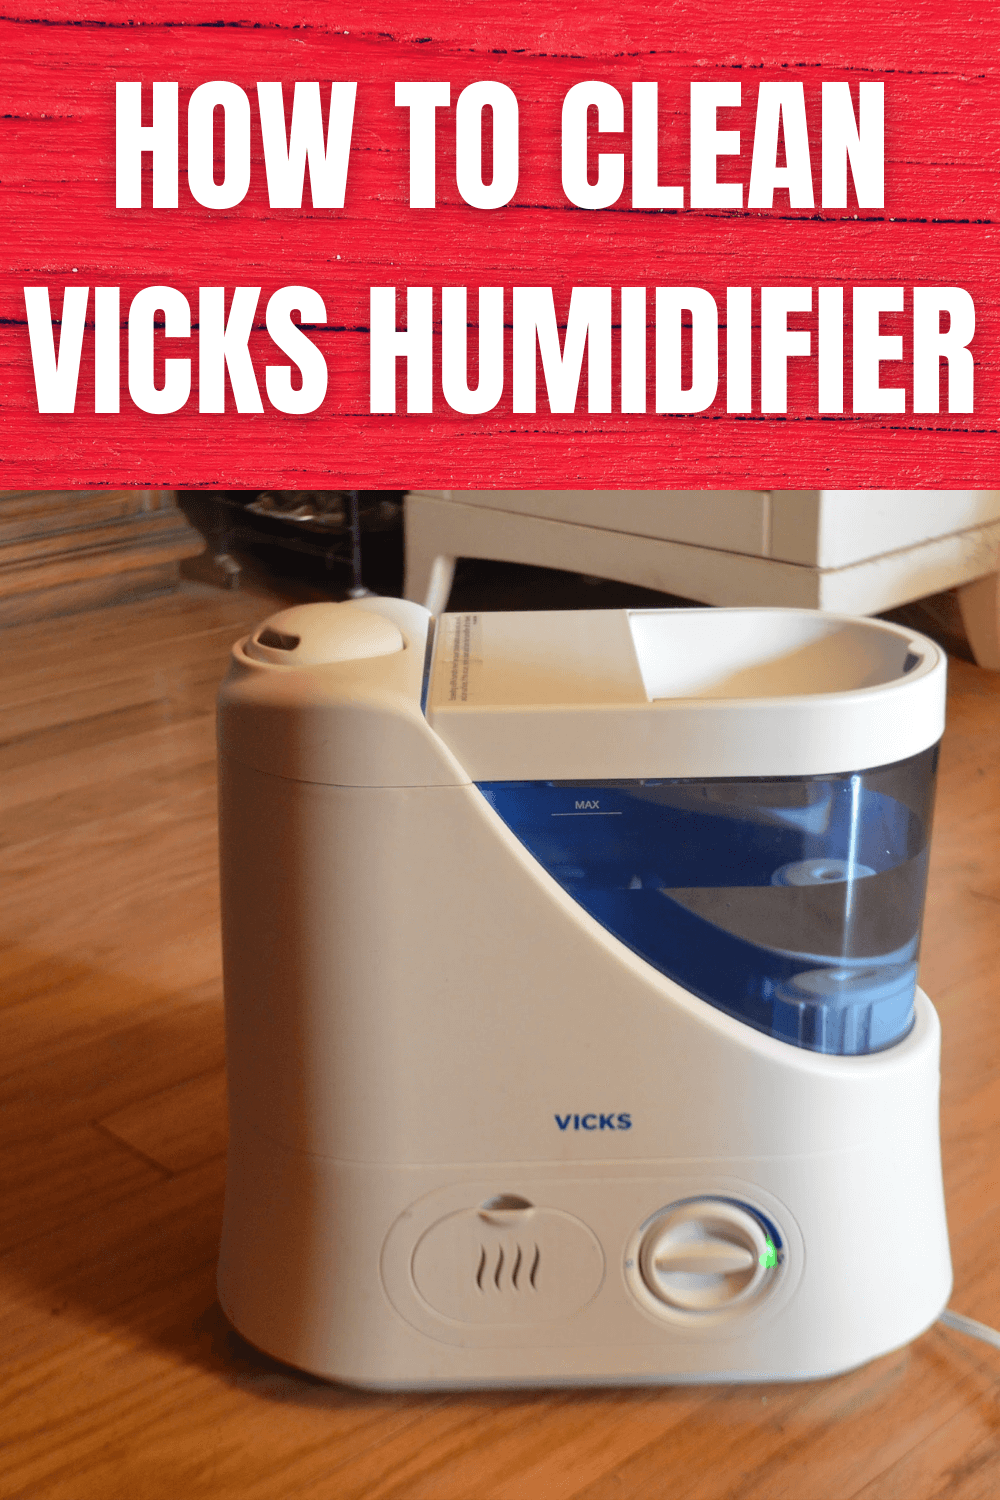
    How to Clean Vicks Humidifier

    Vicks Humidifiers are made to help the users get temporary relief from congestion and cough.

    Such humidifiers occupy special filters that are designed to get rid of smoke, dust, pollen, and many other kinds of contaminants and odors during operation.

    Therefore, maintaining the clearance of Vicks humidifiers is important. Take a look at the following steps to find out how to do the cleaning:

    Read also: How to Clean a Jetted Tub.

    HOW TO CLEAN VICKS HUMIDIFIER

    Daily Cleaning

    The cleaning of your vicks humidifier can be done in two ways: daily cleaning and weekly cleaning. To decide which way suits you the best, check each of the following steps and then adjust them to your need and available time. Now, let’s see how to do the daily cleaning.

    • To begin with, turn off the humidifier’s cool mist by unplugging the cord from wall outlet. You need to do this daily cleaning on a surface that is flat and big enough. To ease you cleaning process, make sure you have adequate space.
    • Next, pull the water tank out and also the water tray on the models using V3100 or other removable containers. Then attach the tank and the tray to the base of the cool mist. Freeing the water tank lets you lift the tray out. When you are doing this step, make sure you always work carefully so that you will not damage wicking filter. If it is with Cool Mist that comes with no water tank like V400, you need to take the top housing off and then lay the top housing upside down on a stable and flat surface. You also need to make sure not to rest the housing on water pickup tube that can damage the housing.
    • Remove the cap of the water tank and then get out of any water. After that, flush that container using fresh and warm water. Remember! Don’t use hot water for the ones like V3100 that comes with a water tank that is separated from the tray. If the models are Cool Mist (such as V400) that lack water tank and water base, you need to empty that base from any water. Then flush the base using warm water and then wipe the base down with a paper towel or a clean cloth.
    • Wipe down the surface of the water tank and the tray thoroughly. Then, over the top housing’s exterior (V400), run a clean and dry cloth. Only use a dry cloth as the moist one can trigger an electric shock. Then clean the unit’s remainder, then the base, and also the cord. Then grab a damp cloth and keep cleaning.

    Vicks humidifier cool mist

    Weekly Cleaning

    If you happen to have less spare time to clean your vicks humidifier, you can conduct this weekly cleaning. The steps are different from the daily cleaning. Here are the steps you need to follow:

    • Empty the water tank and then flush the tank using warm water. After that, set the tank aside (V3900 and V3100) temporarily. Then turn the V3100 on. With its tank removed, let the air flows thru the humidifier’s wicking filter. You need to stop the flow when you find the filter is already dry. Then turn the humidifier off and thus unplug the humidifier from the wall. If you currently cleaning a V400 model, the ones lacking water tanks, turn the modifier off and then unplug it before removing the top housing. Then dump any remaining water out, wipe it down, and dry it.
    • Next, bring the wicking filter up from the tray and then pull it straight up to prevent the filter from being torn. This method is applicable for both models, the V3900 and the V3100. The V400 one is a bit different because it uses cartridge filters fitting into its top housing. On the contrary, clean the filters and then replace them.
    • Pull the water try out so that you can separate the water tray from the water base. Do this to V3100. Then pour one or two cups of undiluted vinegar into water tray. Let is set without being disturbed for about 20 – 30 minutes. For V3900 and V400, you need to dampen a sponge or a cloth using straight vinegar and then wipe the base out in the inside to eliminate the scale. Then rinse it using warm water.
    • Next, detach the V400’s pickup tube and then clean its unit thoroughly. Rotate that tube to the direction indicated by the arrow by making the top housing upside down. Prepare a bowl of undiluted vinegar and soak the tube in it for about twenty minutes so that the scale deposit can be loosened. Then wipe down the top housing’s interior using a sponge or cloth that is already dampened in vinegar. Don’t forget to clean the area around the tube hole too.
    • Next, wipe the water tray of V3100’s interior with a sponge or a cloth that is dampened with vinegar. Do the wiping as if you are washing a roasting pan from the inside. You need to make sure that you can remove all the scale deposits when the tray is soaked in the vinegar. After that, rinse it using warm water.
    • Next, rinse the pickup tube of Vicks Cool Mist using warm water. Remember that you need to do this step and the previous ones using warm water only. Run the warm water thru the pickup tube and also on the outer part of it.
    • Finally, clean the Vicks Cool Mist’s exterior weekly so that you can maintain the cleanliness and the clean appearance of the humidifier unit. Utilize a dry cloth whenever you clean the unit’s exterior around the outlets, inlets, filters, and also mechanical or electrical parts. Remember that you need to dampen a cloth or a sponge to clean the unit’s underside whenever necessary and also the unit’s power cord.

    In short, cleaning vicks humidifier can be done either weekly or daily. Choose the one that suits your needs and your available time best. Whenever you’re cleaning it, make sure you follow each instructions and also the do and don’ts so that you won’t harm your humidifier.

    Originally posted 2020-12-29 02:20:00.

  • How to Clean a Jetted Tub

    How to Clean a Jetted Tub

    A Jacuzzi tab is such the best place to have a relaxing time after a long day at work.

    Yet, the Jacuzzi time can be disappointing when you find the tub full of mold and bacteria.

    Clean your jetted tub with the following steps:

    Read also: How to Clean Grout in Shower Easily.

    HOW TO CLEAN A JETTED TUB

    1. Cleaning a Jetted Tub Using Household Supplies

    Cleaning your beloved jetted tub doesn’t necessarily require you to buy costly equipment and materials.

    You can even rely on household supplies you already have in your house. Here is the way to clean the tub with household supplies with steps:

    • Fill your tub with hot water until it reaches about 10 cm of the height of the tub.
    • Turn off the valve of the induction of the air to make sure that what is going through the pipe is only water not water mixed with air.
    • Add 50 ml of cleanser to hot water. One of the cleansers you can use is powdered dishwashers detergent. You can also use Cascade Complete as well. Just make sure you don’t use any acidic detergent. Some manufacturers of jetted tub don’t recommend the use of acidic detergent as it can damage the tub. Make sure you don’t miss this information so that you will not damage your tub instead of cleaning it.
    • Add 100 ml of bleach. This solution is a great disinfectant for your tub. However, before using it, you need to make sure that the manufacturer of your tub recommends the use of it for the tub’s maintenance or not.
    • Next, run the tub’s jet for about 10 – 15 minutes by setting the jets into the maximum pressure. Then, turn the jet on. Be ready to witness some disgusting stuff coming out from the jet.
    • After that, drain your tub, clean the residue out, and then refill the jetted tub with some cold water.
    • Then, run your jets for about 10 minutes to thoroughly rinse every single thing out.
    • Then, drain your tub and then clean the tub thoroughly. Once this step is done, you are done. Go get yourself ready for your relaxing bath.

    How to Clean a Jetted Tub Using Household Supplies

    2. Cleaning a Jetted Tub with Cascade Complete

    Cascade Complete is just another household supply that you can use to clean your jetted. Here are the steps you can use to clean your jetted tub using cascade complete.

    • First, fill your tub with some hot water. Make sure the water reaches the level of 15 cm above the holes of the air injector.
    • Add some Cascade Complete to the tub and also add 10 milliliter of dish washing detergent into the tub. Cascade Complete is really a great cleanser for your jetted tub. Try to see how it works later.
    • Add 100 ml of bleach. Before using the bleach, make sure you read the manual instruction of your jetted tub to find out whether the use of bleach is allowed by the manufacturers. Some manufacturers don’t recommend the use of this as it can damage the tub by drying out the tub’s internal gaskets. Follow what the manufacturers of your jetted tub recommend so that your tub can be long lasting.
    • Turn the air blower on for about two minutes to let the water mix with the cleanser.
    • After two minutes, shut the air blower down to let the bath soaks in the mixture. Let it soak for about two hours.
    • Turn air bath on and let it run for about five minutes.
    • Then, turn the air bath off and also the drain tub. After that, thoroughly clean the jetted tub to avoid any residue. After this step, your cleaning process is done. If you are now in the mood for bathing, this is the perfect time.

    Cascade Complete

    3. Cleaning a Jetted Tub with a Biofilm Remover

    Another great way to clean your jetted tub is using a biofilm remover. Over time, a jetted tub like yours will develop lots of stubborn combinations of biofilms in their tubing. Such bio films aren’t really penetrated with just any household cleaners.

    Bio films can also potentially bring dangerous or harmful bacteria. Therefore, you need to remove them. To do that, you can use particular cleaners that are designed especially for such purpose. Here are the steps to clean your jetted tub with bio films:

    • Find the instructions written on the container, read, and follow the instructions carefully. Following those instructions are important to make sure you can avoid any potential injury and or damage to the tub.
    • Next, fill some warm water to your jetted tub. If you are not sure about the amount of water that needs pouring into the tub, you just need to make sure the water can cover those jets. After that, turn on the jets.
    • Now that you have read the instructions on the biofilm remover container, you know the recommended amount that can be used. Add the right amount of the biofilms to water in the tub and then run those jets in your tub in a specified interval. If it is initial cleaning, you need to run that tub for about one hour. If it is done for maintenance, you need to occupy the biofilm remover in a lighter concentration. Also, you need to run the water in a shorter duration which is about 10 up to 15 minutes.
    • Next, you need to drain the jetted tub and also to clean any invisible residue that you can find around the tub’s sides. After that, refill your tub again until the jets are covered with water. Next, run it again for another few minutes and after that drain it. After you are sure that you no longer see any reside on the sides, you now can use the tub as usual. Go enjoy your bathing time in your clean and enjoyable jetted tub.

    Cleaning a tub is not a complicated task to do. All you need is to choose the right method and to know the steps of the cleaning process. The main materials you need to do the cleaning is also simple. You only need household supplies that you may have already had in your home.

    Cleaning a Jetted Tub with a Biofilm Remover

    Originally posted 2020-12-28 23:06:00.

  • Get Ready for The Halloween: Best Pumpkin Painting Ideas

    Get Ready for The Halloween: Best Pumpkin Painting Ideas

    Halloween is a celebration that getting more popular not only in the USA but also in other countries.

    Even the main purpose of Halloween is to remember the dead, but nowadays Halloween is identic with the costume party, trick or treat, and decoration.

    One of the decorations that are always related to Halloween is the carving or painted pumpkins.

    Read also: How to Decorate Dining Table for Christmas.

    BEST PUMPKIN PAINTING IDEAS FOR HALLOWEEN

    1. Painting vs Carving Pumpkins

    Currently, people are more into the painted than the carving pumpkins. Carving pumpkins could be a very hard work to do.

    It is also messy since you need to take out the inside. Painting pumpkins are easier since you don’t need to worry about the inside part. It could be a fun activity to do with your kids.

    2. Spooky Pumpkins

    Spooky is always related to Halloween. So why don’t go with spooky decoration that could make your guests getting excited and thrilled at your Halloween party?

    First, you can stick Halloween adhesive cut-outs which have many forms such as bats, birds and bugs. Next step, paint the entire pumpkin with black colour, let it dry and remove the adhesive cut-outs.

    Spooky painted pumpkins ideas

    3. Animal Themes Pumpkin

    These probably will be the most favourite pumpkins for the children. You can create many animals from pumpkins. Some of the ideas are cow, sheep, owl, bunny, piglet and bat pumpkins. Below are steps to create the bunny, piglet and bat pumpkin.

    • Bunny Pumpkin.

    You can use the white pumpkin or paint the orange pumpkin into ivory colour. Then, you make the ears and nose using the stencils, glue these to the pumpkin. For the eyes, you could use the top from oak nuts.

    Bunny painted pumpkins

    • Piglet Pumpkin.

    Use the white pumpkin or paint it with light pink or white colour. then you could make the ears and nose by yourself or using any template that you could find on the internet. Make sure to have a pink colour for these ears and nose.

    Next, you could use the hot glue to attach these ears and nose to the pumpkin. Use black paint to draw the eyes and nostrils. Don’t forget to glue the tail by twisting small pink paper or pipe cleaners in coils. Have one big size and a few small sizes so you could have the Piglet family joining the Halloween party.

    Piglet pumpkins painting ideas

    • Bat Pumpkin.

    Use white pumpkin and paint the half section with gold colour. After it dries, you could glue black satin ribbon that you cut the ends, so it looks like wings.

    Painted bat pumpkin ideas

    4. Fall Theme Pumpkins

    Halloween is celebrated on 31 October which is in the fall season. Therefore, fall theme pumpkins will be a match decoration for your Halloween Party. Halloween decoration doesn’t have to be always spooky and you could use these beautiful ideas.

    All you need to do is trace leaves onto colourful tissue paper and then use mod podge to stick it to the pumpkin.  You also could use the real leaves and stick it to the white pumpkin using the mod podge.

    Fall pumpkin painting ideas

    5. Write the Pumpkins

    Another brilliant idea that is quite easy is to write the pumpkins with some words. Paint the pumpkins with black colour and write BOO or Trick or Treat with bright colours.

    Another idea is to paint the pumpkin with any bright colours that you like then write the Halloween-themed funny phrases with black marker. You also could use pumpkin as the decoration in front of your house and write the address number on it.

    Words to write on pumpkins

    6. Blackboard Drawings

    To make a different pumpkin decoration than any other house, paint the entire pumpkin with a chalkboard spray-paint and you can draw spiderweb or write down spooky phrases with a white colour of chalk marker.

    Pumpkin chalk paint

    7. Play with the Colours

    Halloween is identic with the pumpkin, black or white colour. But nowadays, people start to add colourful decoration to the Halloween party. Why not start it with the colourful pumpkin? You even can have the children to do this fun activity together.

    Make sure to put some cover to the table or floor to avoid the stains, then you can pour different colours of paint from the top. You could also paint the entire pumpkin with different kinds of oil pastel pumpkin.

    You could make an ombre pumpkin by painting it with three different shades. Once it finished you could put a black sticker to replace the carving. Wants to have a bright neon colour pumpkin? Paint the whole pumpkin with white colour in matte finishing then drip it into the neon paint, turn upside down for a short time so it could give the drips effect.

    Colorful pumpkin painting ideas for kids
    Colorful pumpkin painting ideas for kids. Image: trendir.com

    8. Other Ornaments on the Painted Pumpkins

    Use other ornaments to level up the painted pumpkin decoration. Below are some ideas of the additional ornaments that you could use

    • Floral Pumpkin.

    Why don’t you try to make this beautiful girly pumpkin? After you paint the whole pumpkin with the colour that you want and let it dry. Drill small holes and you could stick the fresh flowers as the decoration.

    Floral pumpkin painting
    Image: homedit.com
    • Use the metal thumbtacks to create the wording.

    First, you need to paint your pumpkin in any matte colour. Then use a pencil to write down the word on the pumpkin, keep it short to make it clear to read. The last step is using a hammer and tapping the head of thumbtacks on the wording.

    • Use Sequin for glittery look pumpkin.

    Paint the pumpkin into white or any pale colour. then you could glue the sequin and make it as a small circle on the pumpkin. Repeat to any empty space of the pumpkin and you will have the glittery polka dots pumpkin.

    • Glitter Pumpkin.

    Whatever you choose the colour for the body of the pumpkin, you can stick the glitter on the stem with glue to make the colour pop up.

    Glitter pumpkin painting
    Image: homedit.com

    Halloween is a fun celebration holiday to spend with friends and family. Children are always looking forward to Halloween because of the costumes, candies, fun games and the decoration. Decorating the pumpkins are no longer exhausting activity and you could keep your children busy. Will you try one of the ideas from the painted pumpkin above?

    Originally posted 2020-12-27 04:53:00.

  • How to Light Gas Fireplace Pilot without Ignitor

    How to Light Gas Fireplace Pilot without Ignitor

    Gas fireplace exists to provide us with the warmth without the need of cleaning up the ash as it’s powered by propane gas tank or simply a natural gas line.

    This household fixture is actually easy to use and operate.

    However, how to light the fireplace pilot when it doesn’t have any ignitor?

    Read also: Contemporary Fireplace Design Ideas for All Cozy Feels

    HOW TO LIGHT GAS FIREPLACE PILOT WITHOUT IGNITOR

    First, Pay Attention to the Warning!

    To begin with, you need to pay attention to the warning first. Make sure you read and also follow all the instructions coming with your fireplace. If you don’t follow the instructions exactly, an explosion or a fire may result.

    Also, your house can just blow up and you and your family can die. It is not exaggerating but it is possible to happen. That’s why; please really pay attention to the instructions from the manufacturers and then activate your common sense whenever lighting the gas fireplace pilot.

    One more important thing here is that you shouldn’t generalize any instructions from any manufacturers. A certain fireplace must come with its own instructions. Therefore, get the instructions card of your fireplace and pay attention to only that instructions card.

    Know What to Do Before Lighting

    Before you light your gas fireplace pilot, make sure that you smell around the location at which your fireplace is located. Smell for gas around. Also make sure that you smell next to the floor because some gas may get heavier than the air in the room and the gas will tend to settle on the floor.

    If you do smell gas, don’t proceed! If you do smell gas in the room where the fireplace is located, make sure you do the following things:

    Do not try to light any appliance in the room or simply keep any electronic appliances away from the fireplace or from the room; do not touch any electric switch in the room as it will be very dangerous; do not utilize any mobile phone inside the building, even in the rooms next to the location of the fireplace; reach the supplier of gas as soon as possible using your neighbor’s phone!

    Don’t use your own phone; once you are able to reach them, follow any instructions given by the gas suppliers; finally, if you are not able to reach the supplier of your gas, you need to ring the fire department. Don’t belittle the destructive effects of gas that is leaking. Although the smell is just soft, it is still not recommended for you to light the fireplace. Stay alert and safe.

    On the contrary, if you don’t smell any gas in the room or in the building, you can simply proceed to the next step of lighting the gas fireplace pilot.

    Remove the Cover

    To begin with, you need to remove the fireplace cover or any decorative cover of it so that you can reveal the control of the gas at the bottom of the fireplace unit that is located near the floor. Once you remove the cover, you will be able to find the gas shut-off value.

    Then turn the fireplace’s handle parallel into the gas pipes’ direction so that you can turn the gas on. If you cannot see any valve, you may need to look at the area behind your fireplace. Find it there and then turn it on.

    Pull Off the Assembly

    Next up, you need to pull the assembly of the fixed glass off of your fireplace. Remember that this step is a critical precaution for your safety that can prevent any gas to build up if the pilot light is difficult to relight.

    Locate the Dial

    Now, locate the dial of the gas control. Then above the dial, you need to see any black or red button. Press that button 1x or 2x so that you can verify whether there is spark at the pilot tube’s end. If you fail to see any button, you need to manually light the flame.

    Turn the Control of the Gas

    Next up, turn the control of the gas until the setting of the pilot aligns to the mark located on the outer rim of that control. Make sure that you push that button in while pushing the starter. If after pushing the button the pilot does not light, wait for about 10 seconds before you push the button in again. Do not push the button again and again consecutively. Continue doing this step until you can start the pilot.

    Light the Flame

    Now, it is time for you to light the flame. You can light it using long-barreled lighter or a match. When lighting it, you need to hold the button of gas control down, while at the same time you hold the lighted match’s end or hold the lighter at the pilot tube’s end. If you are able to do this step correctly, you will see the pilot start lighting as soon as that flame is getting closer.

    Hold the Button Down

    The next step is holding down the pilot button. Do that step for about twenty seconds so that you can give the fireplace enough thermocouple time to be heated up. Once it is heated up, release the button. At this step, the pilot of the fireplace is supposed to stay lit. However, if it doesn’t happen that way, it means you need to relight it again. Besides, you may need hold the button down again but now for a little bit longer.

    Turn It On

    Finally, turn the button to the on position. After that, replace the assembly of the fixed glass and also the decorative cover of your fireplace. If you are done with this step, it means you are finished with lighting your fireplace. Now, it is the time for you to enjoy the warmth of the fireplace while having your chilling time.

    So, that is more or less the instructions of lighting gas fireplace pilot with no ignitor. Once more, pay attention to what the manufacturers of your fireplace say on the instructions card and follow it. Before lighting the fireplace, check whether or not there is any smell of gas. That’s all for your safety!

    How to Light Gas Fireplace Pilot without Ignitor. Guide.

    Originally posted 2020-12-24 23:02:00.

  • How to Stain Wood Cabinets without Sanding

    How to Stain Wood Cabinets without Sanding

    Staining a cabinet after sanding it will take a lot of time. Many people simply can’t wait for the process when they try to do it themselves.

    Meanwhile, it takes a lot of time to do it properly. The fact is you don’t need to always sand your cabinet before staining it.

    Several wood cabinets with no serious scratches or dents don’t need sanding step actually.

    So if you plan to stain it, follow these steps:

    Read also: How to Clean Faux Marble Table Top of Stains Without Find Any Difficulties.

    HOW TO STAIN WOOD CABINETS WITHOUT SANDING

    Step 1: Check and Prepare the Cabinet

    First, you need to make sure that you don’t really need sanding process. As mentioned before, your cabinet may not need sanding if you can’t find major scratches or even dents on it. If the surface is still fine and it looks ready to stain, you are ready. This applies to both used and new wooden cabinets.

    Then, prepare the area where you are going to stain. It is suggested to cover the floor with cloth or old newspaper so the stain won’t get everywhere.  Put the cabinet in the middle to make it convenient. It is also best to stain the cabinet first before hanging it if you plan to. While it will be easier to stain, it also allows you to stain the entire surface.

    If the cabinet is already hung before staining, you should consider removing the cabinet doors using screwdriver and cover the wall and countertop with newspaper and paint tape. It prevents the stain from ruining other surface during the process and allows you to stain perfectly.

    Step 2: Clean the Cabinet

    Before we start staining, it is important to clean the cabinet. Debris and dust will affect the staining result, which is never great. For cleaning, it is recommended to wipe it with tack cloth. If the cabinet already stayed in the garage for some times, it may have serious debris on it.

    The best way to clean it is vacuuming it. It will remove the entire debris and the surface should look cleaner. Then, continue cleaning using duster. It will remove the dust, which isn’t wanted for staining process. Last, you can wipe it with tack cloth as recommended before.

    This cleaning also applies for new cabinet with factory sanding on it. It makes sure the surface is sleek enough, ready for the next process.

    Step 3: Removing the Old Stain

    This step is needed if your cabinet is already have stain or paint on it.

    Before you add new color on your wooden cabinet, it is recommended to remove the previous staining. While it allows you to apply the paint a lot easier later, it also gives you the ultimate result especially the paint shade. The old paint can be removed quite easily.

    First, you need the paint stripper. It is available on store where you can purchase the paint as well. Second, when you are ready, apply the paint stripper on the cabinet. Make sure to cover the entire surface of the old paint you want to remove. Then, follow the instruction on the label of the stain stripper.

    Commonly, you are required to wait for several minutes or more. When it is time, scrape the stripper. You will need the scrapper tool to remove them effectively. As you remove the stripper, the old paint will be removed as well.

    Of course, there will be several parts that are hard to remove. Simply repeat the steps until your cabinet is naked and clean, ready for new stain on the surface. This process may take some times, so it is fine for planning to stain it the other day.

    Step 4: Re-Clean the Wooden Cabinet

    Now as the old paint is all removed, we need to re-clean the cabinet to make it ready. First, make sure that you clean the cabinet face as well as doors. It is recommended to use special cleaning solution to do this. Wood cleaner product is the best recommendation.

    Wood cleaner will not only make sure the wood is ready and smooth enough for the staining later, but also clean the de-glosser on the cabinet. When you are done using the wood cleaner, wipe the cabinet with a rag until clean. Wiping it will make sure the entire remaining paint and chemical from the cleaner is removed.

    Step 5: Staining It

    Now, we are about to stain the cabinet. First, we need to wait until the wood cleaner dry. You may already wipe it, but it takes several minutes for it to get fully dry. When it is dry, prepare the stain you want to apply and a clean rag or cloth. Dip the rag in the stain and then apply it on the entire surface of the cabinet.

    You may need to use small paint brush to reach tricky corners and joints. For the best staining result, you should apply the stain in circular motion. It creates even color and the same shade on the entire surface of the wooden cabinet. Don’t forget to stain the doors that you detach previously too.

    Step 6: Another Layer

    When you are done applying the stain and you like it, leave it overnight to dry. It allows the stain to get the ultimate look perfectly. The next day, it is suggested to apply another layer on the cabinet. You should do the same method, but this time, please use a new rag for the same great result.

    When you are done, leave it overnight before you decide to do other things. You should see if it reaches the expected color or not the next day. If you are satisfied, you can continue the process.

    Step 7: Reassemble the Cabinet

    The entire staining process is already done, so you are allowed to reassemble the parts now. Make sure to use the appropriate tool to attach the doors and everything. Don’t do it in a rush. Using the appropriate tools, methods, and taking time prevents you from scratching the new stain on the cabinet. When you are done, your new looking cabinet is ready to use.

    How to Stain Wood Cabinets without Sanding. Easy Tips

    Originally posted 2020-12-22 22:47:00.

  • How to Clean Leather Couch DIY

    How to Clean Leather Couch DIY

    Leather couch looks good and luxurious but it needs special method of maintenance and care as well.

    Many people prefer to call the professional and spend a lot of bucks for the service. Meanwhile, there are tools and products you can buy and use today.

    Here is a little guide on how to clean it by yourself.

    Read also: How to Clean Bluestone Table in One Touch Only.

    HOW TO CLEAN LEATHER COUCH DIY

    1. How to Remove Debris

    Removing the debris seems simple. However, you need to know that some debris is too hard and harsh for leather.

    If you just swipe it, you may hurt the leather and create some kind of scars. This is the moment when you regret treating carelessly.

    Instead of ruining your couch, try the following steps:

    • The simplest way is to use the vacuum. In order to reach even the smallest debris, it is highly recommended to use the hand tool instead of the big one you usually use for the rugs and carpet. It allows you to reach more in the couch. Make sure to reach on the folds and creases.
    • When you are done using the hand tool, you should consider repeating using the brush. Attach the brush on the hand tool to replace the previous tool, and start brushing the leather couch slowly. It allows you to vacuum the remaining smaller debris without scratching the leather surface. This time, please make sure to reach on folds as well as creases again.
    • Now, this is the last touch. As we already remove the debris, it should be safe to dust the couch. Microfiber or feather dusters are highly recommended as they work effectively while being soft to the leather. Make sure to use the duster only after you are done vacuuming the debris.

    How to Clean Leather Couch DIY Easy

    2. How to Treat Stains

    Now this is trouble. Stain can change the leather look while several more dangerous stains can ruin it. The thing is you need different method to clean different stain. It is because each stain can be caused by different properties and each property is different. Check out the following suggestions for cleaning your couch from stains.

    • Cleaning the Grease Stain

    Grease stain is commonly caused by food, beauty products, or your hair. Cleaning it is actually pretty simple. It is important to clean the grease as soon as your couch gets it. Use the leather cleaning solution and soft cloth to wipe it out. If there is still stain remains, spread cornstarch or baking soda on top of it. Leave it for several hours before brushing it clean.

    • Cleaning the Ink Stain

    Ink stain can be a little tough but there is a trick. First, take a cotton ball and dip it into rubbing alcohol. Make sure to dip it right, not too soaked. Second, blot the stain with the cotton ball. Make sure to blot it, not rubbing it as it spreads the ink. In addition to it, don’t soak the leather. The alcohol will ruin it. Third, dry the area with a damp rag as the stain goes away, and then wipe again with other dry rag.

    • Cleaning Liquid Stain

    Liquid stain is mainly caused by spilled red wine, coffee, or tea. When they are spilled, make sure to immediately wipe the liquid. Use an absorbent and clean cloth to wipe it and make sure not to give pressure while wiping. Once the liquid is wiped, get the leather cleaning solution and clean the area with it. When you are done, dry the area with clean and dry rag.

    • Cleaning Darker Stain

    If you leather is fairer than the stain, you need to make special potion to really clean the stain. Mix cream of tartar and lemon. Make sure both are on the same measurement. Then, apply the mixture on the stain and leave it for around 10 minutes. Last, wipe it clean using damp cloth and dry the area using dry rag. If the stain remains, repeat this treatment as needed.

    3. How to Do Routine Cleaning

    Routine cleaning is as essential as the previous treatments. It is what makes your couch stays fit and pretty. This cleaning isn’t that complicated as well actually. Try to apply these steps:

    • Take a small bowl or bucket, and add white vinegar and water in equal parts in it. For the water, it is recommended to use the room temperature water instead. It is also suggested not to use tap water as it may contain chemicals that can ruin the couch leather.

    If you don’t feel like making this solution, you can buy leather cleaning solution in alternative. You only need to read the label to make sure you know the proper use.

    • Take a clean rag and dip it into the solution you just made. Then, wring it until it is damp. It is important not to use drench rag as the dripping can ruin the leather.
    • Then using the damp rag, wipe the couch slowly and softly. You can work it down for best result. Remember, you don’t have to give it a pressure so you don’t ruin the leather. When you need to repeat, dip the rag into the solution again. Give it several strokes and then wring it before using again.
    • After you are done wiping, you need to take a fresh dry cloth and wipe the couch dry.

    Barrington leather sofa

    4. How to Condition the Couch

    Conditioning the couch is actually needed as well. It is recommended to do it every six to twelve months. It keeps the color, the leather condition, and the entire details, making sure they stay. Try the following tricks to keep the couch awesome.

    • Take a small bowl and mix two cups of white vinegar and 10-15 drops of tea tree oil or lemon. Mix them well until all are dissolved. Then, take a soft and clean cloth or rag and dip it into the solution. Give it several strokes and then wring it until it is damp.
    • Use the cloth or rag to wipe the entire couch. Make sure to reach the corners and folds to really clean it. Then, dry the couch with dry cloth.

    Originally posted 2020-12-21 22:46:00.

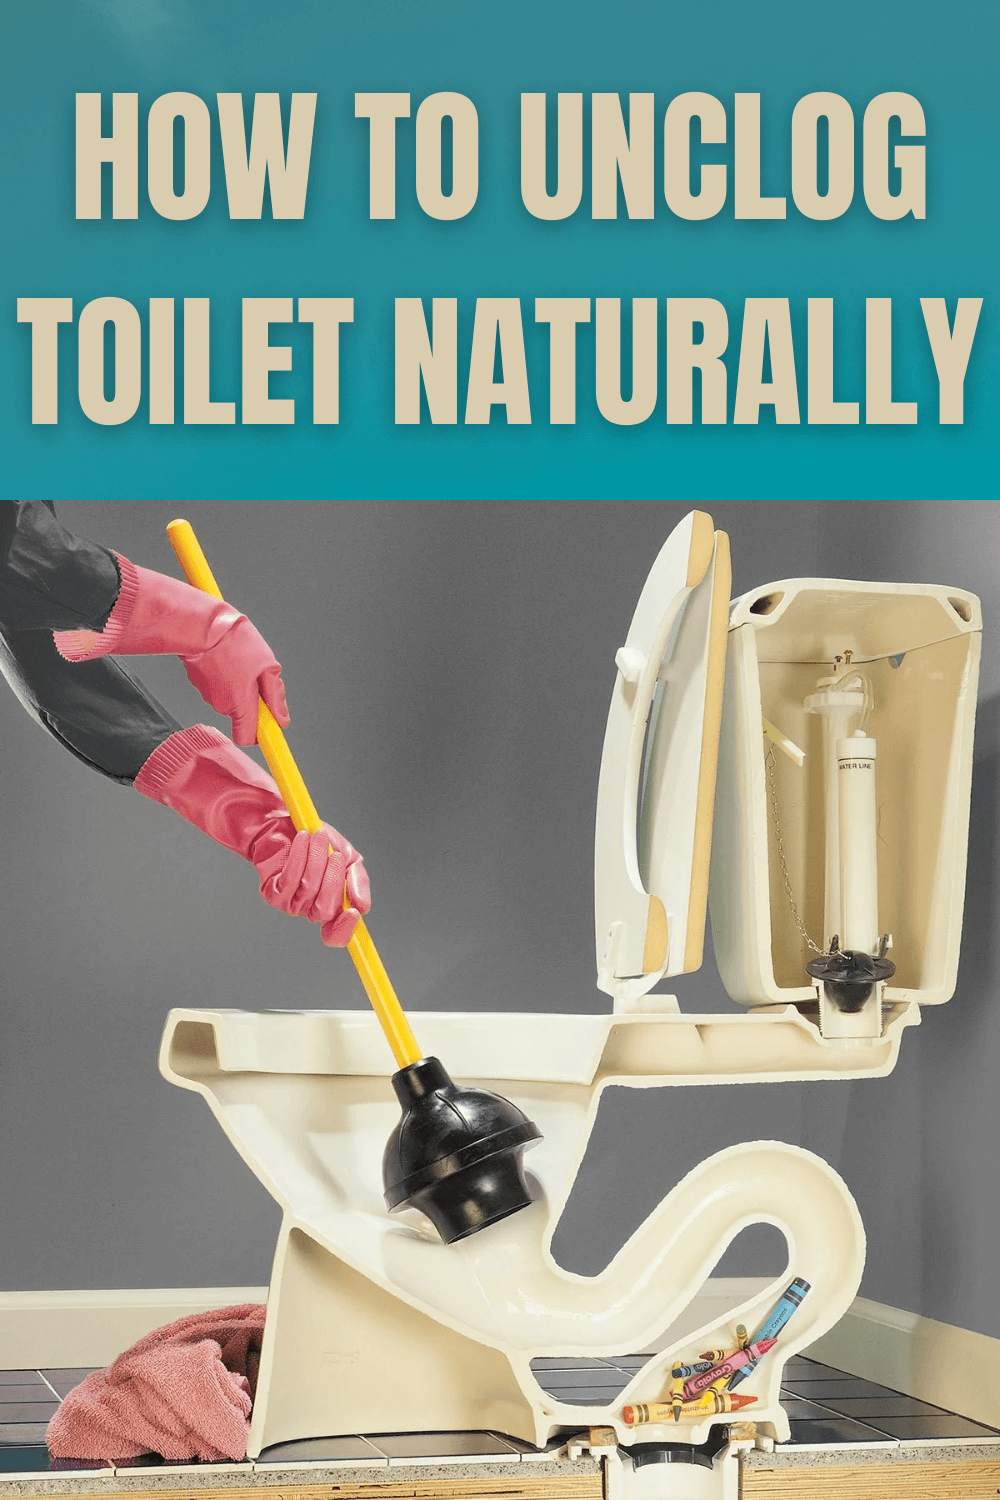
  • How to Unclog Toilet Naturally

    How to Unclog Toilet Naturally

    One of the most annoying yet always urgent problems in the house is toilet clog.

    We can always try to ignore it, but when we need it the most, we don’t have much choice.

    Actually, there are several useful tricks that we can try and it doesn’t even use any chemical products. Check this out.

    Read also: How to Get Slime Out of Carpet

    Method 1: Use Your Wire Hanger

    This is already a widespread trick, but you may not know it yet. Instead of using any product in your house, you should consider using your wire cloth hanger.

    This method commonly works well on issue that happens in the first few inches of the toilet drain. In addition to it, this is a perfect method if you don’t want the obstruction back as well.

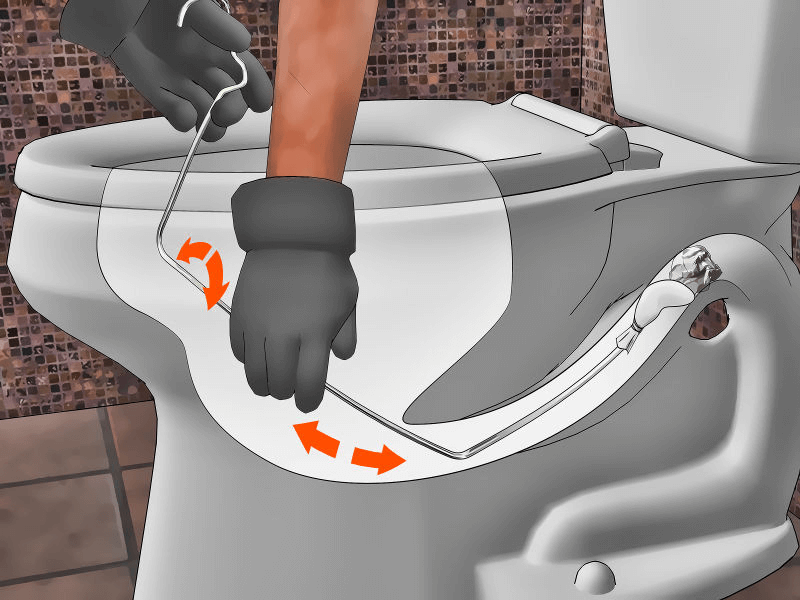
    First, we need to fashion the wire hanger. Let it loose from the original shape, and straighten the wire. Cover the wire end that will go into the drain with duct tape. It helps in preventing the tip from damaging your toilet porcelain. Now, you are ready to unclog.

    Let’s stick the taped end into the toilet drain. Once it is in, you will need to push, move, as well as maneuver it so it reaches the obstruction. Make sure to do it in circular way for effective result. Once you feel like you are touching the obstruction, keep pushing until the water starts to drain. If you don’t, you seem to need the next method.

    Once the water starts to drain, flush your toilet. It should allow the water and obstruction to flow freely. Your problem will be solved by then. Make sure to wear safety gloves while doing this method because you may get splashed during the process.

    How to use wire hanger for unclogging toilet

    Method 2: The Plumbing Snake

    If the first method doesn’t work, or if you can’t find the obstruction yet, this method should help you. This method is well known to be effective to obstruction located deeper. Unlike the previous trick, plumbing snake is actually a tool that really exists. It means you don’t have to create or make one.

    You can go to the store and ask for plumbing snake. The most recommended one is the closet auger. This coil of wire is flexible. It can get deeper because it can go through the drain like a snake. It is specially designed so it doesn’t stain or damage the bowl. Professional plumbers will recommend this too.

    The clear the obstruction, you need to do the same thing as you do in the first method. Just push one of the ends into the drain. You may need to make some effort to make sure the tool gets deeper. When you find the obstruction, you need to pull back and then push again with some power. The point is to break the obstruction into pieces so it can be flushed.

    At this point, you will spend a few minutes to break the obstruction, depending on the material of the stuff. It will be a little trickier as well when it breaks to smaller pieces. As long as they are small enough, it is ready. Last, flush the drain and you are done.

    Unclogging toilet with plumbing snake

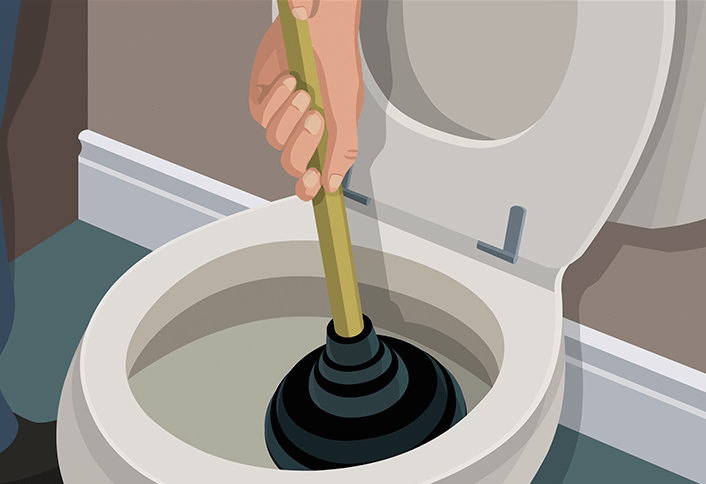
    Method 3: Plunging It

    This is probably the simplest method you should try at the first place. When you try flushing the toilet once and it doesn’t work, you should stop doing it again. Doing it again only adds water that flows into the bowl. Just close the lid. Now let’s move our effort to the toilet tank.

    Remove the toilet tank lid, and you will find the tank filled with water. This water is clean. You don’t need a pair of glove to protect your skin. We will need to find the flapper. The flapper is normally located on the bottom. It looks like a drain stopper in circular shape. It is normally attached to small chains. Push the flapper to close it. By then, no more water gets into the toilet bowl.

    Next, take old newspaper or towels and place them around the toilet. We are going to reach through the obstruction and the water may splash. So, you may need to change your clothes too. Use a pair of elbow-length gloves to protect your skin. It can be a little smelly but it should be quick.

    When you are ready, reach through the drain and feel the obstruction. Take out the thing and your toilet bowl should be drained automatically.

    This method works on obstruction that doesn’t go too deep, and the stuff is easy to pinch and pull out.

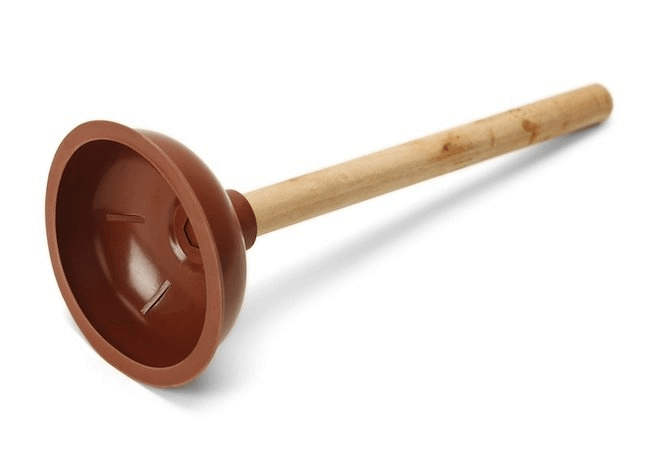
    Unclog a Toilet with Plunger

    Method 4: Use the Wet/Dry Vacuum

    If the other three methods don’t work for you, this is time to use the wet/dry vacuum cleaner. Remember not to use the ordinary one as it won’t work. You specifically need the wet/dry one. Let’s start when you are ready.

    First, we need to dry the bowl. So, take the flexible hose and insert it into the toilet bowl. Then, vacuum the entire water and possible debris appear in the bowl. We need the bowl to dry to vacuum the obstruction.

    When you are done draining the bowl, we will get deeper. Push the hose a few inches deeper to the drain, and then cover the drain door with towel to seal. Next, start vacuuming the water again. In this phase you may get the thing that causes the obstruction.  It is also important for you hold the towel with your hands to make sure the seal is tight.

    It takes a few minutes and maybe a few try before you can finally suck the clog up.  However, it usually works well even with things that are hard to get with other method. Sure, you need this particular vacuum to make it work.

    There are several more methods, but these ones are the most natural. You don’t need chemical or home products. You will need several tools but they won’t be hard to get. Always try the simpler method first before you try the next one. Good luck!

    HOW TO UNCLOG TOILET NATURALLY

    Originally posted 2020-12-20 02:24:00.

  • How to Cool Down a Room Quickly

    How to Cool Down a Room Quickly

    Too much humidity and heat are the main reason why a room can be too hot, uncomfortable, and too stuffy.

    Of course, air conditioning system is a quick way out.

    However, turning it on the entire summer will be a waste of resource and expensive.

    Here are several tricks to cool down a room in a flash.

    Phase 1: Reducing the Source of Heat

    The first thing we need to do is to remove the cause of the problem. We need to reduce the amoung of heat sources in the room. Here are the steps you can follow:

    • According to research, 30% indoor heat sources come from the window. The direct sunlight heat the room and we need to stop this. The solution is to close the curtain or blinds. Covering the windows will prevent the sunlight to get directly into the room.

    If you don’t have any curtain or blind yet, invest on some. It is proven that windows covering help in reducing indoor temperature up to 20°.

    It is important to keep closing the window covering when the sun is at its peak. If the heat remains persistent, you probably need to invest on thermal insulation curtain for best effect.

    • The next step is to turn off any electronic device that produces heat, for example televisions, computer, and even light bulbs. If it is impossible to turn off the lights, you should consider dimming the light so you can see well without allowing it to produce too much heat.

    It is also recommended to use more environmentally friendly electronics like LED bulbs instead of the usual. We get enough options for this today.

    • Next, clean the house from clutters. Take a look around and see if you have too many clutters in the house. Clutters like dirty clothes can absorb the heat and keep it there in the room. In addition to it, it often restricts the airflow, which is a serious problem in cooling down a room. It explains why the house feels hot. Remove them from the room.


    • Last, open the windows if you feel like the indoor is hotter than the outdoor. Probably, the room absorbs too much heat from the day. Open the doors and windows and let the heat out of the room. Close the rooms you don’t use so the room you’re in cool down faster. When the temperature is fine, close back the windows and doors immediately.

    Open windows to cool down room quickly

    Phase 2: Start Circulating the Indoor Air

    This phase will speed up the cooling process as well. There are several tricks you can try to make your room cooler faster.

    • The best way to circulate the indoor air is by using fan. Ceiling fan is often considered the best option. Ceiling fan pulls up the air. The hot air will rise and the room beneath it gets cool immediately after that. If your fan has several speed setting, make sure to use high level first to quickly cool down the room.

    If you have other fans too like ones on your table, your bathroom exhaust fan, and other fans as well, turn it on. It is beneficial to set up several fans at once during the summer. In case the heat is too much, you can get enough help from them.

    • Create your own cooler by setting up a tray of ice in front of one of your desk fans. As it blows the air, the cool temperature will spread and cool down the room. Of course, the indoor air can be a little bit misty too. In case you are out of ice, you can improvise with frozen vegetable or products in your fridge.


    • You should also consider transferring the indoor air outside. To do this, you only need to place one of your desk fans right in front of a window facing outside. Then, turn it on. The fan will pull out the indoor air and transfer it outside. In return, it transfers the cooler outdoor air inside the room.

    This trick is extremely effective when you find that the outdoor air is cooler than the indoor air, which happens all the time as the room is already exposed the sunlight.

    Phase 3: Control the Heat

    While cooling down the room temperature is possible to do in many ways, it is also important to control the room heat at all times. It prevents you from the need to cool down the room again and again. There are several tricks that you can learn to control indoor air temperature.

    • The best solution and the most practical way to keep controlling your room temperature is by installing Air Conditioning system. Of course, it takes more money and effort but it is totally worth it. Of course, there are cheaper alternatives too.

    You can consider buying portable A/C for a change, in which you don’t have to install one in each room but removing the device to the room you want.

    • The other trick is to open the window during the night. At this time, the temperature drops in normal condition. When you open the window, you allow the outdoor air to get indoor and vice versa. Your room temperature will drop as well.


    • Get a dehumidifier. If the climate is humid in your area, it is best for you to have one. It prevents the room from getting too much humidity. It keeps the temperature cool and fresh instead of stuffy.


    • The last, get proper window covering. As it helps in preventing direct sunlight from getting indoor, it helps in managing the indoor temperature. Consider investing on good curtains and blinds to use during the day.

    In short, there are many ways you can do to cool down a room quickly. You can try the simple tricks first and continue to a more advanced way if you need to. It is wise to be prepared during summer though, as the heat can be unbearable.

    HOW TO COOL DOWN A ROOM QUICKLY

    Originally posted 2020-12-19 05:55:00.