Blog

  • How to Clean Hardwood Floor Stains

    How to Clean Hardwood Floor Stains

    If there are stains or dirt on the hardwood floor, then how to clean hardwood floor stains without causing damage?

    Hardwood floor is a type of easy to maintain floor, so here are some easy steps on how to get rid of stains from hardwood floor.

    Read also: How to Clean Floor Tile Grout with OxiClean

    HOW TO CLEAN HARDWOOD FLOOR STAINS

    Getting Ready to Clean Up

    First things first, there are some general knowledge about cleaning hardwood floor as it has many different types of floor.

    Therefore, it is better to know the kind of hardwood floor finish. Here are some explanations that are needed to know.

    Prefinished floor; it is a type of hardwood floor that is easiest to spot as every board on the floor has slightly raised edges. Besides, if the surface of the floor isn’t glossy or shiny then it is categorized as an unfinished or stained floor. This kind of floor is the most difficult to recognize. So, it is better to carefully and gently handle this hardwood floor.

    There are several tools and substances that should be prepared as well. The equipment and the ingredients needed to clean up stains from hardwood floor are described as follows.mineral spirits cleaning wood

    The substances:

    1. Mineral Spirits;
    2. White Vinegar;
    3. Household Bleach;
    4. Oxalic Acid;
    5. Water; and
    6. Stain, which is needed to match the undamaged floor and to re-stain the floorwhite vinegar floor cleaner

    The tools:

    1. Clean Rag;
    2. Steel Wool;
    3. Small Bucket or Bowl; and
    4. Finish, which is also needed to match the undamaged floor and to re-finish the floor

    Now that all the tools and substances are prepared, it is time to get rid of stains on hardwood floor.

    Removing Stains from Hardwood Floor

    There are few steps to follow in order to remove stains from hardwood floor. It is recommended to follow the steps in order to get maximum results. They are described as follows.

    Before starting to clean up the floor, make sure to read all label directions on the cleaning ingredients and also make sure that the room has working ventilation. The air circulation needs to keep working. It is also recommended to use fans to maintain air flow. Wear gloves and eye protection to avoid unwanted injury because the ingredients are considered as harsh cleaners. Make sure to test the ingredients on hidden area as well to see the reaction on the floor.

    First, use mineral spirits and steel wool to rub the stained area. Do this carefully and thoroughly on the area, so that the stain is covered with mineral spirits and it doesn’t have any scratches from the steel wool.

    After that, prepare a clean rag and wet it with white vinegar. Lay the rag over the stained area and allow it to sit for few minutes. This step is important to do because white vinegar is supposed to be able to lift up even tough stain on hardwood floor.

    It is also recommended to repeat this step as necessary to make sure that the stain is lightened. If the stain is lightened, wipe off the white vinegar until it is clean. Make sure not to leave behind any residue.

    Then, make a solution made of half water and half household bleach. Mix them thoroughly and apply it to the stained area. It is better to only apply the solution on the affected area because it will probably damage other floor area that has no stain. So, do it carefully.

    If the stain still sticks on the floor, then it is necessary to add oxalic acid to it. Make sure not to spread this solution on other surrounding space except the stained area because it will seep into the wood. Repeat this step as necessary.

    If the stain is gone, then neutralize the area with acid. Wait until the spot gets dry. Then, if there is any residue on the floor, it is better to remove it with clean mop or rag. Re-finish and re-stain to match the rest of the floor using a stain and finish.
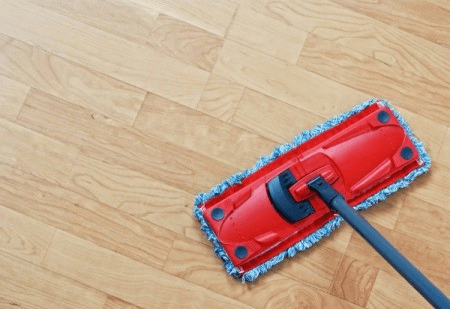
    Best mop to clean hardwood floors

    Additional Cleaning Advice

    After knowing the steps to remove stains on hardwood floor, these additional cleaning advice are better to know as well. Here are some cleaning advice for hardwood floor.

    • Please be careful on using the steel wool as it is described above because if there will be no way to repair the wood if it gouges or makes scratches on the wood.
    • Make sure to not ever use any cleaners that need water for rinsing or water-based cleaners because water will ruin and cause damage to the wood floor.
    • Also, it is recommended to always work with cautions when using bleach as it is considered as a hazardous chemical. Always use protective gears, such as gloves and eye protection to avoid any unwanted accident.

    Cleaning hardwood floor indeed needs a bit of hard work, but the results are well worth to the effort. Therefore, the steps on how to clean hardwood floor stains are best solution to get rid of stains on hardwood floor.

    dark hardwood floors living room

    Originally posted 2021-01-17 01:14:00.

  • DIY Tablecloth Decorations Dining Rooms Ideas

    DIY Tablecloth Decorations Dining Rooms Ideas

    Holiday is coming! You might want to give a makeover to your dining room. How about making DIY tablecloth decoration for your dining room?

    Let’s check some awesome ideas for making DIY tablecloth decorations for the dining room.

    Read also: How to Decorate Black Dining Table

    DIY Tablecloth Decorations Dining Rooms Ideas

    1. DIY Reversible Placemats Cotton

    If making the tablecloth too much for you, you can start by making DIY reversible placemats from the cotton fabric.

    The placemats will add charm to your dining room. This is a super easy and fast DIY project, even for the beginner.

    All you need to do is preparing two fabrics in the same size. Make sure that you use two different patterned fabrics for making the DIY reversible placemats. Place the fabric together by sticking the front side.

    You can start to sew the fabric from the edge. Make sure that you give space from the edge of the fabric to the sewing part. Now, you can reverse the fabric and sew the other side to make it complete.

    DIY cotton placemats ideas for dining table decorations

    2. DIY Painted Tablecloth

    You can create a new look for your old tablecloth. Add some DIY painting as a decoration to the old tablecloth. You can paint simple shapes, like the flower on the side of the tablecloth.

    Use the acrylic paint to give decoration to the old fabric, it will give beauty and you don’t have to buy the new ones.

    DIY painted tablecloth dining rooms
    Image: homeology.co.za

    3. Lace Tablecloth

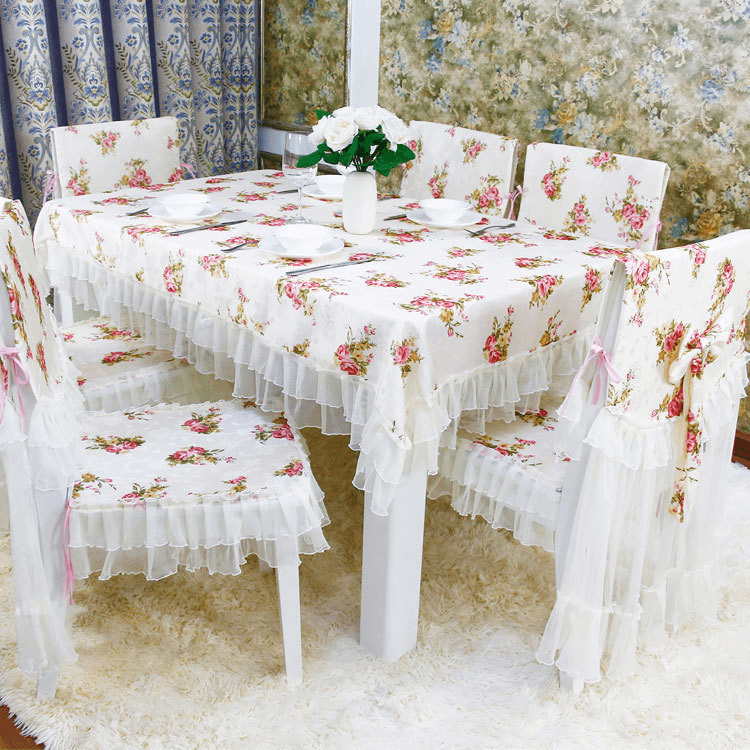
    The addition of lace on the tablecloth can make the dining room looking awesome and beautiful. If you want to add some feminine looks to your dining room, come up with a lace tablecloth idea.

    There are many kinds of lace that you can choose as the decoration for your tablecloth. For making it look natural, you can start with white or creamy white lace to give an accent to your tablecloth.

    You can sew the lace on the fringe of the fabric. Lace will go well for round or square tablecloths. If you want something cuter than the lace, you can replace it with the tassel. The lace and tassel can be bought in meters through the offline or online craft shops.

    Vintage shabby chic lace tablecloth dining room

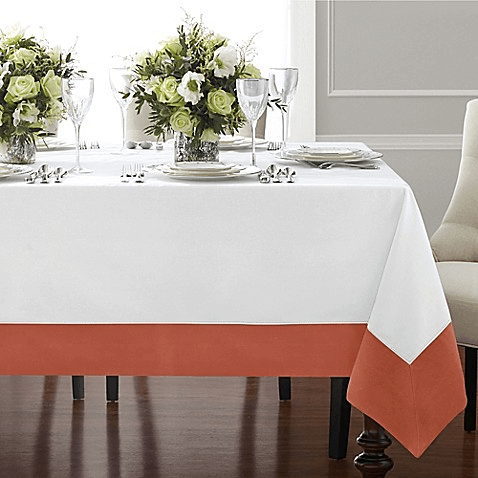
    4. Bordered Linen Tablecloth

    Linen is often chosen by some crafter to make a tablecloth. Linen is stronger than cotton. It can absorb the water well. This fabric can be washed using hands or machine. Due to its strength, a lot of people choose linen for various sewing projects, such as clothing and home decoration projects.

    You will need two different colors of linen fabrics to make your own bordered linen tablecloth. The main idea of this DIY tablecloth project is by creating the bordered line at the edge of the tablecloth using the different color of linen fabric.

    You can decide the size of the bordered line for your tablecloth. You can start with the size of 3 inches for the average size of the bordered line. You can go with the larger size if you want the wider line.

    DIY bordered linen tablecloth decor ideas

    5. Ombre Tablecloth

    Have you ever heard with the term Ombre? Ombre is quite popular nowadays. Ombre can be described as the gradual shading color from a color to another darker color. Usually, people get light color to dark color to get the Ombre look for hairstyle or lip colors.

    The technique of Ombre also can be applied to the fabric to create Ombre tablecloth. You can choose two up to three colors for your Ombre tablecloth. Try from the white color, light color and goes to the darker color. For example, you will go with pink color, you can start from white to light pink and then darker pink, such as fuchsia. It will give a cool look for your dining table.

    You can create the Ombre look on your tablecloth using spray paint with various shades and colors. It is easy and will look superb to decorate your dining room. Where to get spray paint? You can get it in paint shops in your local neighborhoods.

    DIY pink ombre tablecloth dining table decoration ideas

    6. Printed Tablecloth

    The printed graphics tablecloth might be your next idea to create a decorative item for your dining room. The adorable look of the tablecloth can be the focal point for the room. If you have a minimalist theme for your dining room, you can choose the printed graphics tablecloth for making the minimalist style perfect!

    You can purchase white linen fabric and pour out your idea on the top of the fabric. Try to make simple shapes that will look great and in balance with the minimalist style. The circle patterns will look great on the fabric. If you have the budget to print your fabric, you can try to print it in the fabric print stores in your area.

    If you want to do it yourself, you can create your printed tablecloth using simple materials, such as fabric, fabric paint, and glass. You can use the bottom part of the glass to create a circle pattern on the fabric. You can do this project with your kids. The kids will love to do this fun activity!

    DIY printed tablecloth floral for dining table decor ideas

    7. Tie Dye Tablecloth

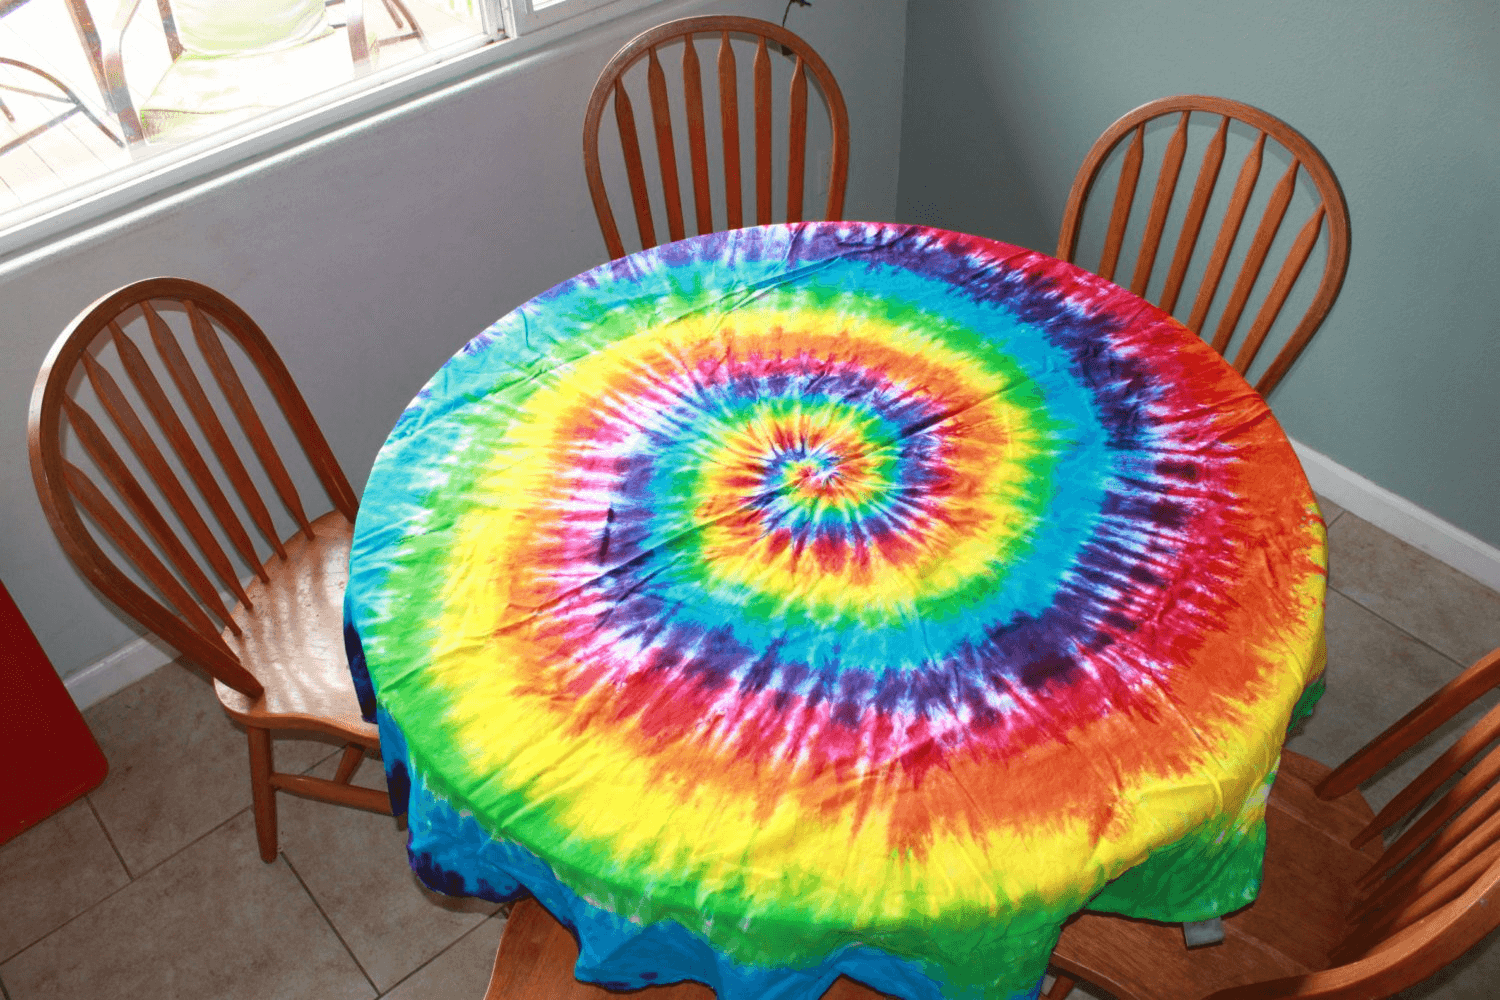
    If you want to create something unique and colorful, you can try to make tie-dye tablecloth using cotton and food coloring. Basically, you can use fabric coloring but it is safer to use the food coloring if the children joining in the making process. The basic principles of the tie-dye method are by creating the pattern on the fabric by tying the fabric with the rubber to get the different color from the dye process.

    The tie-dye method produces a unique pattern which makes the fabric has a beautiful look and color. People use tie-dye method to create unique fabric for clothing and apparels. However, you can also try this method to get a decorative tablecloth for your dining room.

    Tie dye tablecloth table linen dining room decor ideas

    There are many attractive ideas of DIY tablecloth that can be a perfect decoration for your dining room. You can try DIY reversible placemats cotton, DIY painted Tablecloth, lace tablecloth, bordered linen tablecloth, Ombre tablecloth, printed tablecloth, and tie-dye tablecloth. All these ideas are easy to do and simple. So, which one is your choice?

    Originally posted 2021-01-15 03:49:00.

  • How to Clean Floor Tile Grout with OxiClean

    How to Clean Floor Tile Grout with OxiClean

    Tile is very beautiful and durable. Learning how to clean floor tile grout with OxiClean can be very beneficial to maintain it. Indeed, tile is easy to clean but cleaning grout is one thing.

    So, what is the best way to clean it? Here are several things you need to know:

    Read also: How to Clean Ceramic Tile Floors and Grout?

    HOW TO CLEAN FLOOR TILE GROUT WITH OXICLEAN

    Step 1: Preparing All

    1. Before cleaning floor tile grout, here are things that need to be prepared:
    2. A bucket or something similar for stirring OxiClean with water
    3. A mop (not a steam mop)
    4. A scrub brush,
    5. An old toothbrush,
    6. Cup rubbing alcohol
    7. Gloves
    8. Hot water
    9. Broom
    10. Old towels
    11. OxiClean
    12. A mask to cover mouth and nose

    oxiclean tile grout cleaning

    Step 2: Mixing OxiClean

    Before mixing, please wear glove and mask. It is beneficial to prevent any accident. OxiClean is chemical solution that can be dangerous when it makes contact with our body. OxiClean is also best mixed with hot water. So, prepare hot water and pour it to the bucket. Pour four scoops of OxiClean into it. Stir it continuously until it is all dissolved.

    Step 3: Cleaning the Tile

    Here are the steps for cleaning tile:

    1. Before pouring any Oxiclean, please clean all of floor surface! Make sure it is all clear and there is no debris left. You can sweep and mop the tiles, and wait for it to get dry before starting.
    2. Slowly pour out OxiClean mixtures on tile. Do not pour it on too large areas. It is better to focus on 1.5 up to 2 square meters.
    3. Spread OxiClean mixture around. Mop or brush can be used to spread the solution. It should be spread evenly and not too thin.
    4. Leave it for 30 minutes. The OxiClean mixture will start foaming and bubbling up. Focus on its grout whether it has been covered or not.
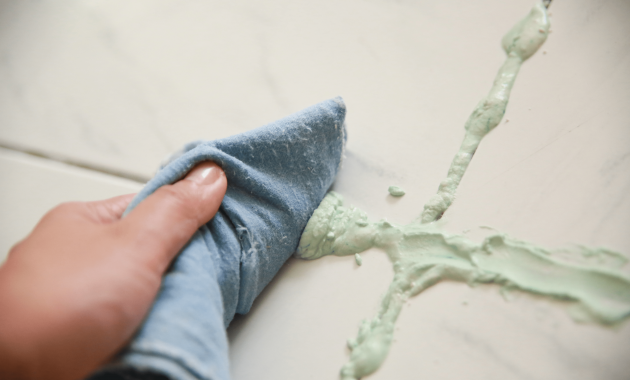
    5. After 30 minutes, scrub the area with scrub brush or an old toothbrush for a special area which is harder to clean. Toothbrush is very useful to clean tile grout which is quite dingy and deep. In addition to it, a hard bristle brush can be used for cleaning grout.Floor Tile Grout Cleaning with OxiClean
    6. Whip all dirty water residues with old towels.
    7. Mop up area for 3 or 4 times with clean water. It is effective for getting all OxiClean mixture off the floor.
    8. Dry up all tiles with an old towel.
    9. Move to another 5 up to 2 square meters area.
    10. Repeat it until all floor is clean.
    11. Just to make sure, we should mop tile with hot water and dry it up with towel once again.
    12. To make all tiles look clear, sealing the grout can be great solution.

    As additional tips, it is better not to cover all areas at once since it will make OxiClean mixture dries up. It will leave many stains which is hard to clean. Tile floor is easy to be cleaned and it has long durability. However, cleaning its grout is not easy. Follow the tips on how to clean floor tile grout with OxiClean above and use OxiClean appropriately. It works every time.

    Clean floor tile grout easy way

    Originally posted 2021-01-14 03:25:00.

  • The Easiest Ways of How to Clean Grout Floors

    The Easiest Ways of How to Clean Grout Floors

    Grout or tile floors sometimes can transform into dirt and stain if it is not cleaned for a long period of time. Some types of stains will be difficult to remove.

    Then how to clean grout floors in the easiest ways? There are few things to know about it. Check this out.

    Read also: The Best Zep Grout Cleaner Reviews

    THE EASIEST WAYS OF HOW TO CLEAN GROUT FLOORS

    Things to Know Before Cleaning Grout on Floor

    There are several things to know before cleaning grout or tiles. It is beneficial to avoid any damage caused by cleaners or methods that are applied improperly to floor grout.

    1. First of all, check the types of grout or tiles on floors and make sure the method that will be used to clean them is mastered. There are certain chemicals that should never be used to clean certain types of floor as they can cause damage to floors as well.
    2. Make sure to clean the surface of the floor before cleaning the grout to get rid of any extra dirt and mildews.
    3. Try to work methodically, for example, start from one corner of the room, then treat the vertical or horizontal grout lines first to make sure every floor surface is completely covered.
    4. Do not forget to always rinse all treated floor grouts with clean water.
    5. Dry the floor with a clean and dry towel to make sure that the floor is dry and not slippery.

    Methods of Cleaning Grout

    Dirty and stained grout floor will of course make the room environment rather unpleasant and uncomfortable. In order to get rid of dirt and mildews that makes grout filthy. There are several methods worth to try. They are described as follows.

    1. Grout Tile Cleaning Using Grout Pens

    Grout pens are a good tool to apply a layer on grout lines to cover any stains and dirt. Besides, substances in grout pens are best to fight mold and mildew. Grout pens are available at local supermarkets, especially in most hardware stores. However, it can take longer duration to clean a large area.

    grout dye pen

    2. Grout Tile Cleaning Using Natural Remedies

    Yes, even tile grout deserves natural remedies. Natural remedies can be used to clean dirt and stains on grout as well. These natural remedies include white vinegar, lemon juice, and baking soda. How to use them to clean grout? Make a paste of lemon juice and baking soda or dissolve white vinegar with water to make a solution. Apply one of the solutions directly to the grout and let it stand for about 10 to 15 minutes before scrubbing and rinsing it. Make sure to only mix the natural remedies as the recommendation and test it first on a small area to make sure the formula is right.

    white vinegar and water cleaning solution

    3. Clean Grout Tile Using Chlorine Bleach or Oxygenated Bleach

    These products are considered as harsh cleaners, so make sure to use them with care and follow the instructions from the products before using them. These products can effectively disinfect and clean grout. However, they may lighten colored grouts as well. Apply the solution on the grout and let it stand for about 15 to 20 minutes. Then, start to scrub them with a toothbrush or nylon-bristled brush and rinse off the treated areas with clean water to remove any residue of the solution.

    oxygen bleach cleaner

    Tips for Maintaining and Protecting Tile and Grout

    Actually, floor grout also needs to be maintained and protected to avoid dirt and mildew. How to do grout maintenance? Make this grout cleaning activity as a regular cleaning schedule to slow down the re-appearance of dirt and mildew and the discoloration of the grout. This activity can be done daily or weekly. It depends on how fast dirt and mildew get into the grout. Commonly, once a week cleaning is enough to keep it squeaky clean.

    Clean grout makes pleasant floor in every room. If you are selling the house, it will affect the price too. Cleaning dirt and mildew on grout isn’t as complicated as it sounds. Try these tips on how to clean grout floors above and get clean and shiny floor all the time.

    ceramic tile design ideas for living room

    Originally posted 2021-01-12 04:19:00.

  • How to Clean Kitchen Tile Floor Grout

    How to Clean Kitchen Tile Floor Grout

    There are effective ways on how to clean kitchen tile floor grout. Cleaning tile grout may be difficult for few people who still don’t know how to do it. Don’t worry.

    Here are some easy steps to make tile grout on the kitchen’s floor looks sparkling.

    Read also: How to Clean Grout in Shower Easily

    HOW TO CLEAN KITCHEN TILE FLOOR GROUT

    The Best Ways to Clean Tile Grout

    First and foremost, please remember that cleaning grout can be done with simple basic cleaning equipment or cleaners.

    So, it is better to avoid wasting money on expensive harsh or chemical cleaners that gives promise to work wonders on tile grout because there is almost no different on using simple cleaners with chemical cleaners.

    It is also guaranteed that the tile grout will be sterilized from dirt as it is cleaned with expensive chemical cleaners.

    The Best Ingredients and Equipment for Tile Grout Cleaning

    There are four easy and simple steps to follow to clean tile grout. First, make sure to prepare these substances and equipment. They are the best agents to use to get rid of dirt and mildew on tile grout. They are:

    • Baking Soda
    • Vinegar
    • Oxygenated Bleach
    • Hydrogen Peroxide
    • Dish Soap
    • Steam Cleaner

    Okay, so after preparing those substances and equipment, it is time to really clean the dirt and mildew from the tile grout on your kitchen’s floor.

    vinegar to clean black and white tile floors kitchen

    1. Cleaning Tile Grout with Baking Soda and Vinegar

    Baking soda and vinegar can be used to clean tile grout. The procedure on how to clean tile grout with these ingredients is described as follows.

    1. The first step is to make a paste of water and baking soda. Mix one part water and 3 parts of baking soda to make a thick paste. Then, apply this paste to tile grout with finger. It is also recommended to use rubber to prevent unwanted accident, such as irritated skin from the abrasive of baking soda.
    2. Mix white vinegar and water to make a solution and place it in a spray bottle. After that, spray the vinegar solution to the applied baking soda paste on tile grout.
    3. After spraying the white vinegar solution on the tile grout that has been covered with baking soda paste, there will be bubbles appearing, which means the natural cleaning process has been started. Wait until the solution stops bubbling. When the bubbling stops, it means the chemical cleaning process is finished.
    4. Then, use a tooth brush or nylon-bristled scrub brush to scrub along each tile grout. Make sure to pay attention to hidden areas like corners and edges of the room.
    5. The last step is to mop the floor with water. Use a mop and clean water to any residue of vinegar and baking soda.

    2. Cleaning Tile Grout with Oxygenated Bleach

    There is a way to clean tile grout with oxygenated bleach as well. The steps are described as follows.

    1. First of all, make a solution from oxygenated bleach with two cups of warm water. Make sure to mix it thoroughly, so that the oxygenated bleach can be fully activated.
    2. Then, apply a small amount of oxygenated bleach solution on the tile grout in the corner to test whether it makes the tile grout’s color changes or not.
    3. After that, pour the oxygenated bleach solution on the tile grout and make sure that the solution completely covers it. Pour the solution carefully to avoid having wet floor.
    4. Prepare nylon bristled-brush to scrub the tile grout that has been covered by the oxygenated bleach solution. Scrub the grout back and forth and make sure to scrub tile grout on the corner of the room as well.
    5. Then, rinse the floor with a mop and clean water to get rid of any residue of oxygenated bleach solution.

    cleaning tile grout with oxygen bleach

    3. Cleaning Tile Grout with Hydrogen Peroxide, Dish Soap, and Baking Soda

    Actually, hydrogen peroxide, dish soap, and baking soda are useful against dirt on tile grout. Here are some steps on how to clean tile grout with these substances.

    1. First thing first, make a paste using ¼ of hydrogen peroxide, ¾ cup of baking soda, and 1 tablespoon of dish soap. The paste will be highly effective to clean out tile grout from dirt and mildew.
    2. Apply the paste using a nylon bristled-brush or a toothbrush. Make sure to thoroughly apply the paste on every tile grout in the room.
    3. Let the paste stand on the tile grout for about 15 minutes. There will be bubbling reaction as hydrogen peroxide and baking soda interact.
    4. After the bubbling reaction stops, clean the paste with warm water, then use a rag to wipe out any residue of dirt and solution.
    5. The final step is to mop the floor with clean water and a mop. Make sure that there is no residue that remains on tile grout.

    kitchen floor steam cleaner

    4. Cleaning Tile Grout with Steam Cleaner

    Another way to clean tile grout from dirt and mildew is using a steam cleaner. A steam cleaner is highly effective to clean any type of tile grout as there is no need to use chemical cleaners.

    1. Please, make sure to read the manual book to properly and safely use the steam cleaner. There is no need for any unwanted injury while cleaning tile grout with a steam cleaner.
    2. After that, fill the reservoir with water as it is described on the manual. Do not mix the water with any chemicals or soaps.
    3. Turn the steam cleaner on and wait until it is heated up. There will be exact time on how long to wait after turning on the steam cleaner before using it.
    4. Move the cleaning brush on the steam cleaner to clean tile grout forth and back. It is recommended to start on one side of the room to the other end of the room.
    5. After the cleaning process with the steam cleaner is done, use a mop or a towel to wipe up the moisture on the floor.

    Cleaning tile grout from dirt using these ways are really effective to make tile grout clean as new again. Therefore, after knowing how to clean kitchen floor grout, there will be no more difficulty.

    Originally posted 2021-01-09 02:19:00.

  • Bathroom Décor with Plants Ideas You Must Adopt!

    Bathroom Décor with Plants Ideas You Must Adopt!

    Some people were born as green thumbs while the others are the total opposite.

    If you are included in the second group, yet you want to keep your life green, incorporating your plants as bathroom décor is a great idea.

    It prevents you from forgetting to water them, while it makes a decent idea for interior stylish touch.

    Check out these ideas for some inspirations.

    Related: Best 10 Bathroom Decorating Ideas for Small Spaces.

    Bathroom Décor with Plants Ideas You Must Adopt

    1. Fill in the Extra Space

    Instead of creating new space which will take too much effort and money, it is great enough to fill in the available extra space in the bathroom. If you have a shelf above the sink, you should consider resetting the stuffs so you can use some of the space.

    If you still want more plants in the bathroom, hanging some on the shower curtain will be great idea. It makes a decent facelift in the bathroom while you don’t have to create special space for it.

    Garden bathroom decor bath tubs extra space for plants

    2. Bathtub Ledges Mini Jungle

    One of the spaces you can use in a bathroom for plants will be the bathtub ledges. It makes enough space for small pots. If you like this idea, you should try lining the ledges with several potted plants. For best looking mini jungle, choose different heights for it.

    For cute looking ledges, you can add some more accents like cute watering can, idyllic gnomes, or other possible accents you can find. It makes the room greener while staying charming.

    Bath tub plants bathroom ideas

    3. Mirror Drama

    Mirror is one of the best decoration items including in a bathroom. You can use the charm even more by adding oversized potted plant near it. It makes a bold style and it creates enough drama for stylish look.

    You can even add high plant on it if you want to. Many times, it exposes the room depth you have been missed before. This way, it makes the room even richer and more stylish than you ever think. If you feel playful, place it on your countertop near the mirror.

    Farmhouse bathroom with plants, hanging lamp, and mirror as decor ideas

    4. Make It Additional Neutral Color

    Most colors included in a bathroom are monochromatic and neutral. Many times, it doesn’t incorporate neutral color like greens. This is your chance to add the color. You can try with one or two pots of plants.

    While it adds neutral color in your bathroom, these plants will brighten up the room instantly. One of the best choices is eucalyptus and you only need clear vase. If you are feeling playful, you should consider using different level of greens. It spruces things up a little and you’ll like it.

    Nice pot for bathroom plants decor ideas

    5. Bougie Hotel Room Touch

    Do you remember how stylish a bougie hotel room can be? These rooms look all very high end. The key is simple. You need to incorporate benches and stools with your plants selection. For the plants, you can consider adding cactus for the bathtub feet, succulents, as well as leafy plants.

    To set up various heights for the plants, you need to place the pots on the benches and stools. While it looks refreshing, this set up creates super stylish as well as high end looking bathroom.

    Bougie bathroom decor with plants indoor

    6. Be Bold

    In alternative to small plants that look totally stylish, you can also use big plant instead. A big plant is often enough for a bathroom. You can place it anywhere you like. In addition to it, you can leave it that way. Let it bends naturally because it looks good anyway.

    You may feel hesitated if a big plant is the right option for you. The good news is it makes a perfect choice for a bathroom with so many accents as well as a minimalist one. Feel free to choose your own green level for even bolder touch.

    Huge bathroom plants decor ideas

    7. Simply Hang It

    Hanging plants are always delightful for the rooms and eyes. It is always great to hang it instead of setting it up on the floor. If you like this idea, you can consider using small and simple plants. Make sure they are flowy for the best look for the wall.

    The options include hanging it from the ceiling as well as on your towel hanger on your eye level. It looks fresh and stylish anyway. If you look closely, you will find several plants hanger with stylish design that fits best for your bathroom.

    Hanging plant bathroom small spaces

    8. Shelves Plants

    The best thing about adding plants in the bathroom is that the plants actually fit well anywhere including your shelves. If you have empty shelves in the bathroom, place the plants in it. Choose short plants to fit in because most shelves are narrow enough for rather high plants. Don’t worry, you have abundant options for this.

    While you need to keep it short, you are free to choose something flowy or simple instead. In fact, the combination of both or more will look great and vibrant. Boston fern is one of the best choices you can consider. Feel free to be playful on leaves shape as well.

    Shelves plants indoor bathroom decor ideas

    9. Green House Bathroom

    This idea is very bohemian but many people really like it. The idea is to add as many plants as possible. You can plant flowy leaves on a basket bag and hang it behind the door. You can also hang some of the plants above the bathtub.

    In this plan, most kinds of plants are great to add and use. You only need to make sure you place it right so it fills the room without interfering the bathroom traffic. You’ll love how nice it is soaking while looking at the plants.

    Garden green house bathroom decor ideas

    10 Teeny Tiny Plants

    This option is the best option for small bathroom with very limited space. Tiny plants are maybe small but they have big impact too. The key is how you pair it with the right planters. Most of the time, sleek and stylish planters work wonderfully.

    Tiny flower plants for bathroom decor

    Place it on your countertop, or hang a single shelf to place these plants. They will make huge facelift of the room while it adds freshness at the same time. Feel free to use cactus and leafy plants for this scenario.

    Originally posted 2021-01-07 03:22:00.

  • How to Clean Ceramic Tile Floors and Grout?

    How to Clean Ceramic Tile Floors and Grout?

    How to clean ceramic tile floors and grout can be one of your frequently asked questions. Cleaning ceramic tile floors and grout, actually, is not problematic at all.

    Tile floors, unlike any other tiles, are very durable and longer lasting. It is made of natural particles that have been forged within very high temperature. Unfortunately, in the long run, the color of these tiles might fade.

    So, what should we do then? Please take a look at the following guide for further explanation.

    1. Daily maintenance
    2. Cheap trick for you
    3. Use simple tips

    Read also: How to Clean Concrete Floor in Basement: Complete Steps and Tips.

    HOW TO CLEAN CERAMIC TILE FLOORS AND GROUT

    Daily Maintenance

    As has been explained briefly in the previous paragraph, tile floors might fade in the long run since many people walk all over the tiles in your house hours after hours. The situation becomes worse when these people spill either food or beverage.

    The stain left by the food and the beverage will definitely ruin the tile shade. The more these tiles get stained, the more the tiles get discolored. Certainly, by the end of the month, let’s say, your lovely tiles will lose its true color.

    Daily maintenance is ultimately important for preserving the color of your tiles. In order to perform the daily maintenance, there are some easy procedures that you can do. These procedures are:

    1. Sweep your tiles with fluffy dust mop or vacuum cleaner

    This procedure should be conducted in order to get rid of loose dust, dirt, sand and grit. Such particles can cause heavy scratch in your tiles. In doing so, fluffy dust-mop or vacuum cleaner can be good options. The two cleaning tools won’t cause any scratch all over the tiles. Remember not to use any stray broom because this one definitely causes scratch.

    2. Mop your tiles once in a week

    This might be surprising. Whether you believe it or not, mopping your tiles with mop and warm water can keep your tiles shiny all the time. Since water is liquid, it can sweep away any particles unseen by our eyes. Make sure you clean your tiles first before you mop them. This will give you the ultimate look of the tiles.

    3. Dry the floor right away after mopping

    After mopping the floor, you should dry it right away. This action will prevent new dirt from quickly setting into the wet floor. This step is also important to do because the quickly set in dirt over the wet floor might become hard-to-remove grimes.

    4. Wipe up spills, including water, quickly with absorbent cloths

    Any spills can discolor your tile right away. So, you have to clean up these spills immediately with absorbent clothes. For your information, some spills might be chemically hazardous. In this case, make sure you use either cleanser or disinfectant. Disinfectant may dull your tiles too so you have to make sure that you only spray these cleaning chemicals only on the spot.

    5. Put doormat both inside and outside your house

    Putting doormat both inside and outside your house will help preventing any dirt to be spread all over your tiles. Thus, your cleaning activities will be much easier. Remember to do this especially during rain and snow seasons.

    In order to make these tiles keep shiny and better, you have to clean the grout as well. You may use a mixture of baking soda and water; this paste is ultimately powerful for cleaning your grout. Then, all you have to do is as follows:

    1. Spread the mixture all over the dirty grout.
    2. Wait for a while or an overnight; this will depend on how dirty your grout is
    3. Scrub the grout with any brush; old toothbrush will do
    4. Wash the grout with warm water. By the end of the day, the result can be seen. It commonly reveals the original shine on the tile and grout.

    best way to clean ceramic floor tile and grout

    Cheap Trick Ceramic Floor Tile Cleaning

    Cheap trick here refers to using vinegar for cleaning your floor tiles. This might be quite surprising. Not many people know that vinegar can be used for cleaning your ceramic tile floors and grout. It is also environmentally safe and it can help you to save a lot of money. When you want to use this vinegar as your cleanser, you just need to follow the procedures below:

    1. Sprinkle baking soda all over the grout. You may use your finger to make sure that the baking soda has been widely spread throughout the grout. Then, put vinegar in a spraying bottle and start spraying this vinegar to the baking soda. The chemical reaction occurred between baking soda and vinegar will be helpful in cleaning the dirt.
    2. Take any brush and start scrubbing the grout (grout brush is preferable). Soon, your tile floor will be muddy. Therefore, you need to keep a cup of water. Pour the water all over the solution right after you have scrubbed the grout completely.
    3. Wipe up the solution immediately. When you have done this, you just need to vacuum the excess baking soda and mop the floor.
    4. Soon after finish mopping the floor, you can see a totally different tile floor. You might even surprise to see that the tile floor is totally clean and shiny.

    Simple Tips to Clean Ceramic Floor Tile and Grout

    Here are some tips that you might want to read concerning on cleaning your ceramic tile floors and grout:

    1. Clean up spills or tracks as soon as possible from your floor
    2. Regular maintenance is ultimately important for your floor
    3. Quick sweeping or vacuum will always be helpful from preventing the stain embedded in the floor
    4. Water is quite effective in keeping your shiny tile floors
    5. Use grout sealer for everlasting shiny grout

    How does it sound? Well, whatever your opinion is, cleaning the tile and grout will be easier from now on. You just need to read all of the provided instructions and follow the tips. At the very first time, it might be difficult. As time goes by, you will be an expert and you can always keep your tile floors and grout shiny. You can always consult the instruction on how to clean ceramic tile floors and grout here whenever you are about to clean your tile floors and grout.

    Originally posted 2021-01-06 00:05:00.

  • How to Clean Garage Floor for Painting

    How to Clean Garage Floor for Painting

    Painting for garage floor is one thing thus it needs adequate knowledge on how to clean garage floor for painting.

    Garage floor is one of the dirtiest floor in the house due to the types of activities to do there.

    How clean this floor thoroughly? Here are the steps:

    Read also: How to Apply Garage Floor Paint.

    How to Clean Garage Floor for Painting

    Step 1: Checking Garage Floor and Preparing Tools Needed

    The first thing needed to do before cleaning garage is checking how hard the muck and/or dust is. We also need to check the moisture of the dirt or stains, and see if there is any remaining oil or paint on the floor. Knowing all of those will help to prepare what kind of tools and solutions to prepare. Here are those things needed to be prepared:

    1. Ammonia-based detergent
    2. Baking soda
    3. Breathing mask
    4. Duct tape
    5. Garden hose
    6. Large piece of plastic
    7. Muriatic acid
    8. Plastic watering can
    9. Power washer
    10. Push broom
    11. Rubber gloves
    12. Stiff-bristle push broom
    13. Wet/dry shop vacuum

    All of those are prepared based on the needs. It means that there is no need to prepare all of that. It depends on how hard is the floor muck or dust and any other dirt on the floor. One more things need to check is weather forecast. It affects the way paint drains. If it is going to rain or too much wind, it will take longer time to dry it out and it makes its paint quality less good than usual.

    Step 2: Preparing the Cleaning Agent

    After preparing tools and floor, it is time to prepare the cleaning agent. Here are the steps on how to prepare cleaning agent:

    1. Remove any dust or dirt or anything that is not anchored down on floor. It can be done by sweeping out the heavy dirt.
    2. Remove any electrical outlets or cables around floor. It is also possible to cover it by taping using plastic. It is important to avoid any electrical damage.
    3. Prepare some concentrated concrete degreaser. It is also possible to use Tide laundry detergent or TSP (Trisodium Phosphate) for cleaning concrete.
    4. Mix those cleaning agent with hot water on a bucket.

    If the floor is possible to be cleaned without any cleaning agent, it is okay to only use a broom to clean the hunk. Do not forget to clean the floor around garage door tracks and ones against the walls too.

    Step 3: Cleaning Garage Floor

    It is time to clean the floor. Here are things we should do:

    1. Pour the warm soapy solution to floor and start scrubbing with deck brush. For really dirty floor, pour the solution and leave it for a few minutes. After a few minutes, start scrubbing on the dirt, grime and stain. If it is still needed, add more solution and keep scrubbing it until it gets clean. Add more pressure while rubbing if it is really hard to clean. What is needed to be notice is the solution should not be dried up because it will leave some stain which is hard to clean. In addition to it, do not use broom to clean while using solution as it is not effective for large areas.
    2. After all dirt is clean, immediately wash the entire floor. Water or diluted degreaser can be used in this case. Then, clean any liquid using a foam squeegee. It is also important to make floor dry quickly to prevent any additional stain caused by water or diluted degreaser. It is also possible to use fan to make the floor dry faster.
    3. After the floor is dried up, check all edges and walls for any leftover. It is also recommended to clean the floor once again by using clean broom.

    Now, the garage floor has dried and it will have a nice clean surface. If it is already clean, it is possible now to apply paint on it. Hopefully, these tips on how to clean garage floor for painting will help you on making paint applied well, resulting in perfect desired color.

    Originally posted 2021-01-05 02:52:00.

  • How to Clean Concrete Floor in Basement: Complete Steps and Tips

    How to Clean Concrete Floor in Basement: Complete Steps and Tips

    People may find serious difficulty on how to clean concrete floor in basement from stains. Concrete floor is made of versatile and durable material and it makes it trickier to clean.

    Here are few things that are needed to know about cleaning concrete floor.

    Read also: How to Clean Leather Couch DIY.

    TIPS HOW TO CLEAN CONCRETE FLOOR IN BASEMENT STEP BY STEP

    Preparing Cleaning Equipment

    Before going further to the explanation of how to clean concrete floor, some cleaning equipment should be prepared first. Some basic cleaning supplies are listed as follows.

    • Prepare duster and broom, or a vacuum.
    • In order to get rid of stains, a nylon-bristled brush is needed.
    • Prepare Laundry bleach, detergent, and trisodium phosphate to remove mildew.
    • In order to get rid of stubborn stains, it is also recommended to prepare ammonia, bleach, or hydrogen peroxide.
    • Also, prepare a bucket and water to mix cleaning substances.

    After preparing all the basic cleaning equipment, it is time to get rid of stains that contaminate the floor.

    Cleaning Concrete Floor

    There are some steps or ways to clean concrete floor. Cleaning concrete floor cannot be done in random ways, so here are some steps that need to follow.

    1. Clear Any Furniture before Cleaning

    Before starting to clean the floor, do not forget to relocate any furniture or decorations that are still on the floor that will be cleaned. It will effectively ease the cleaning process and also fasten it. It is because there is no need to clean around furniture or continuously move the furniture around while cleaning up the floor.

    2. Dust and Sweep Up the Floor

    After moving everything on the floor that needs to be cleaned, it is time to sweep and dust the floor. Get all large debris and dirt using the broom from corners of the room to the other corners. After that, repeat the same way to remove fine dust and particles using duster.

    However, it is recommended that dusting should be done daily, and sweeping is done weekly. If there is a good vacuum available, then the broom and duster are not needed as the vacuum will effectively clean large dirt, fine dust, and particles.

    3. Clean up the Stains

    If there are stains that contaminate the floor as well, then what to do is to fill up a bucket with hot soapy water. After that, wet the scrubbing brush or the nylon-bristled brush with water for few seconds. Then, scrub it on the area, which is contaminated by stains, using the brush.

    Once the stains are removed, it is recommended to rinse the area to completely get rid of any residue left after cleaning the stains.

    4. Use Stronger Cleaners to Clean Up Stubborn Stains

    If there are tough and stubborn stains that cannot be easily removed from the floor, then use bleach, hydrogen peroxide, and ammonia in order to remove it. Mix the cleaning substances with water and spray them on the stains. Let it stand for about 20 minutes. After that, scrub it with a brush.

    Do not forget to rinse the area with clean water to remove any residue. Make sure to wear gloves and any protective gears when using harsh cleaners and also make sure that the room has good and working ventilation.

    Nice result after washing concrete basement floor

    Additional Cleaning Tips

    There are some additional cleaning tips about how many cleaning processes should be done in a month, how to protect the beauty of the floor, and many more. It is described as follows.

    1. Cleaning concrete floor in basement is recommended to be done once a month. However, it is also important to know that the appearance of the floor is decreased if the use of harsh cleaners is continuously during the cleaning process. Therefore, do not use any harsh cleaner if there is no need to use it.
    2. Concrete floor also needs to be refined and protected. Therefore, it is recommended to reseal the floor every 3 to 4 years. It is highly suggested to hire a flooring professional to perform this task to make sure it is done properly and efficiently. Alternatively, there are available products that can be installed without the help of the professional. With proper installation, it cuts the budget.
    3. Always check and make sure there is no spill that remains on the floor. Even though the concrete floor is properly sealed, the spill can cause stain if it is left on the floor for too long. In order to anticipate it, simply use a damp cloth to wipe up the spills.
    4. Concrete floor needs to be rebuffed occasionally as well to preserve its shine. To do this, it is recommended to use a high-speed buffer with white pad which is available at rental stores. However, it is also recommended to contact a professional to perform this task, so the floor is rebuffed properly.
    5. If there are stubborn stains that cannot be removed using any regular mopping, then simply use cleaners that are designed to remove it. Spray the contaminated area with the designated cleaners and let it stands for about 20 minutes. This period is commonly enough for the cleaner to dissolve the stain and totally remove it. After that, use a damp cloth to wipe the stains and to make sure there is nothing left.

    Maintaining concrete floor, such as cleaning it from stains is important task to do. Fortunately, cleaning concrete floor is now an easy task to perform. Use steps and additional cleaning tips on how to clean concrete floor in basement for your personal cleaning guide.

    concrete basement floor ideas

    Originally posted 2021-01-03 05:03:00.