Blog

  • How to Clean Leather Couch DIY

    How to Clean Leather Couch DIY

    Leather couch looks good and luxurious but it needs special method of maintenance and care as well.

    Many people prefer to call the professional and spend a lot of bucks for the service. Meanwhile, there are tools and products you can buy and use today.

    Here is a little guide on how to clean it by yourself.

    Read also: How to Clean Bluestone Table in One Touch Only.

    HOW TO CLEAN LEATHER COUCH DIY

    1. How to Remove Debris

    Removing the debris seems simple. However, you need to know that some debris is too hard and harsh for leather.

    If you just swipe it, you may hurt the leather and create some kind of scars. This is the moment when you regret treating carelessly.

    Instead of ruining your couch, try the following steps:

    • The simplest way is to use the vacuum. In order to reach even the smallest debris, it is highly recommended to use the hand tool instead of the big one you usually use for the rugs and carpet. It allows you to reach more in the couch. Make sure to reach on the folds and creases.
    • When you are done using the hand tool, you should consider repeating using the brush. Attach the brush on the hand tool to replace the previous tool, and start brushing the leather couch slowly. It allows you to vacuum the remaining smaller debris without scratching the leather surface. This time, please make sure to reach on folds as well as creases again.
    • Now, this is the last touch. As we already remove the debris, it should be safe to dust the couch. Microfiber or feather dusters are highly recommended as they work effectively while being soft to the leather. Make sure to use the duster only after you are done vacuuming the debris.

    How to Clean Leather Couch DIY Easy

    2. How to Treat Stains

    Now this is trouble. Stain can change the leather look while several more dangerous stains can ruin it. The thing is you need different method to clean different stain. It is because each stain can be caused by different properties and each property is different. Check out the following suggestions for cleaning your couch from stains.

    • Cleaning the Grease Stain

    Grease stain is commonly caused by food, beauty products, or your hair. Cleaning it is actually pretty simple. It is important to clean the grease as soon as your couch gets it. Use the leather cleaning solution and soft cloth to wipe it out. If there is still stain remains, spread cornstarch or baking soda on top of it. Leave it for several hours before brushing it clean.

    • Cleaning the Ink Stain

    Ink stain can be a little tough but there is a trick. First, take a cotton ball and dip it into rubbing alcohol. Make sure to dip it right, not too soaked. Second, blot the stain with the cotton ball. Make sure to blot it, not rubbing it as it spreads the ink. In addition to it, don’t soak the leather. The alcohol will ruin it. Third, dry the area with a damp rag as the stain goes away, and then wipe again with other dry rag.

    • Cleaning Liquid Stain

    Liquid stain is mainly caused by spilled red wine, coffee, or tea. When they are spilled, make sure to immediately wipe the liquid. Use an absorbent and clean cloth to wipe it and make sure not to give pressure while wiping. Once the liquid is wiped, get the leather cleaning solution and clean the area with it. When you are done, dry the area with clean and dry rag.

    • Cleaning Darker Stain

    If you leather is fairer than the stain, you need to make special potion to really clean the stain. Mix cream of tartar and lemon. Make sure both are on the same measurement. Then, apply the mixture on the stain and leave it for around 10 minutes. Last, wipe it clean using damp cloth and dry the area using dry rag. If the stain remains, repeat this treatment as needed.

    3. How to Do Routine Cleaning

    Routine cleaning is as essential as the previous treatments. It is what makes your couch stays fit and pretty. This cleaning isn’t that complicated as well actually. Try to apply these steps:

    • Take a small bowl or bucket, and add white vinegar and water in equal parts in it. For the water, it is recommended to use the room temperature water instead. It is also suggested not to use tap water as it may contain chemicals that can ruin the couch leather.

    If you don’t feel like making this solution, you can buy leather cleaning solution in alternative. You only need to read the label to make sure you know the proper use.

    • Take a clean rag and dip it into the solution you just made. Then, wring it until it is damp. It is important not to use drench rag as the dripping can ruin the leather.
    • Then using the damp rag, wipe the couch slowly and softly. You can work it down for best result. Remember, you don’t have to give it a pressure so you don’t ruin the leather. When you need to repeat, dip the rag into the solution again. Give it several strokes and then wring it before using again.
    • After you are done wiping, you need to take a fresh dry cloth and wipe the couch dry.

    Barrington leather sofa

    4. How to Condition the Couch

    Conditioning the couch is actually needed as well. It is recommended to do it every six to twelve months. It keeps the color, the leather condition, and the entire details, making sure they stay. Try the following tricks to keep the couch awesome.

    • Take a small bowl and mix two cups of white vinegar and 10-15 drops of tea tree oil or lemon. Mix them well until all are dissolved. Then, take a soft and clean cloth or rag and dip it into the solution. Give it several strokes and then wring it until it is damp.
    • Use the cloth or rag to wipe the entire couch. Make sure to reach the corners and folds to really clean it. Then, dry the couch with dry cloth.

    Originally posted 2020-12-21 22:46:00.

  • How to Unclog Toilet Naturally

    How to Unclog Toilet Naturally

    One of the most annoying yet always urgent problems in the house is toilet clog.

    We can always try to ignore it, but when we need it the most, we don’t have much choice.

    Actually, there are several useful tricks that we can try and it doesn’t even use any chemical products. Check this out.

    Read also: How to Get Slime Out of Carpet

    Method 1: Use Your Wire Hanger

    This is already a widespread trick, but you may not know it yet. Instead of using any product in your house, you should consider using your wire cloth hanger.

    This method commonly works well on issue that happens in the first few inches of the toilet drain. In addition to it, this is a perfect method if you don’t want the obstruction back as well.

    First, we need to fashion the wire hanger. Let it loose from the original shape, and straighten the wire. Cover the wire end that will go into the drain with duct tape. It helps in preventing the tip from damaging your toilet porcelain. Now, you are ready to unclog.

    Let’s stick the taped end into the toilet drain. Once it is in, you will need to push, move, as well as maneuver it so it reaches the obstruction. Make sure to do it in circular way for effective result. Once you feel like you are touching the obstruction, keep pushing until the water starts to drain. If you don’t, you seem to need the next method.

    Once the water starts to drain, flush your toilet. It should allow the water and obstruction to flow freely. Your problem will be solved by then. Make sure to wear safety gloves while doing this method because you may get splashed during the process.

    How to use wire hanger for unclogging toilet

    Method 2: The Plumbing Snake

    If the first method doesn’t work, or if you can’t find the obstruction yet, this method should help you. This method is well known to be effective to obstruction located deeper. Unlike the previous trick, plumbing snake is actually a tool that really exists. It means you don’t have to create or make one.

    You can go to the store and ask for plumbing snake. The most recommended one is the closet auger. This coil of wire is flexible. It can get deeper because it can go through the drain like a snake. It is specially designed so it doesn’t stain or damage the bowl. Professional plumbers will recommend this too.

    The clear the obstruction, you need to do the same thing as you do in the first method. Just push one of the ends into the drain. You may need to make some effort to make sure the tool gets deeper. When you find the obstruction, you need to pull back and then push again with some power. The point is to break the obstruction into pieces so it can be flushed.

    At this point, you will spend a few minutes to break the obstruction, depending on the material of the stuff. It will be a little trickier as well when it breaks to smaller pieces. As long as they are small enough, it is ready. Last, flush the drain and you are done.

    Unclogging toilet with plumbing snake

    Method 3: Plunging It

    This is probably the simplest method you should try at the first place. When you try flushing the toilet once and it doesn’t work, you should stop doing it again. Doing it again only adds water that flows into the bowl. Just close the lid. Now let’s move our effort to the toilet tank.

    Remove the toilet tank lid, and you will find the tank filled with water. This water is clean. You don’t need a pair of glove to protect your skin. We will need to find the flapper. The flapper is normally located on the bottom. It looks like a drain stopper in circular shape. It is normally attached to small chains. Push the flapper to close it. By then, no more water gets into the toilet bowl.

    Next, take old newspaper or towels and place them around the toilet. We are going to reach through the obstruction and the water may splash. So, you may need to change your clothes too. Use a pair of elbow-length gloves to protect your skin. It can be a little smelly but it should be quick.

    When you are ready, reach through the drain and feel the obstruction. Take out the thing and your toilet bowl should be drained automatically.

    This method works on obstruction that doesn’t go too deep, and the stuff is easy to pinch and pull out.

    Unclog a Toilet with Plunger

    Method 4: Use the Wet/Dry Vacuum

    If the other three methods don’t work for you, this is time to use the wet/dry vacuum cleaner. Remember not to use the ordinary one as it won’t work. You specifically need the wet/dry one. Let’s start when you are ready.

    First, we need to dry the bowl. So, take the flexible hose and insert it into the toilet bowl. Then, vacuum the entire water and possible debris appear in the bowl. We need the bowl to dry to vacuum the obstruction.

    When you are done draining the bowl, we will get deeper. Push the hose a few inches deeper to the drain, and then cover the drain door with towel to seal. Next, start vacuuming the water again. In this phase you may get the thing that causes the obstruction.  It is also important for you hold the towel with your hands to make sure the seal is tight.

    It takes a few minutes and maybe a few try before you can finally suck the clog up.  However, it usually works well even with things that are hard to get with other method. Sure, you need this particular vacuum to make it work.

    There are several more methods, but these ones are the most natural. You don’t need chemical or home products. You will need several tools but they won’t be hard to get. Always try the simpler method first before you try the next one. Good luck!

    HOW TO UNCLOG TOILET NATURALLY

    Originally posted 2020-12-20 02:24:00.

  • How to Cool Down a Room Quickly

    How to Cool Down a Room Quickly

    Too much humidity and heat are the main reason why a room can be too hot, uncomfortable, and too stuffy.

    Of course, air conditioning system is a quick way out.

    However, turning it on the entire summer will be a waste of resource and expensive.

    Here are several tricks to cool down a room in a flash.

    Phase 1: Reducing the Source of Heat

    The first thing we need to do is to remove the cause of the problem. We need to reduce the amoung of heat sources in the room. Here are the steps you can follow:

    • According to research, 30% indoor heat sources come from the window. The direct sunlight heat the room and we need to stop this. The solution is to close the curtain or blinds. Covering the windows will prevent the sunlight to get directly into the room.

    If you don’t have any curtain or blind yet, invest on some. It is proven that windows covering help in reducing indoor temperature up to 20°.

    It is important to keep closing the window covering when the sun is at its peak. If the heat remains persistent, you probably need to invest on thermal insulation curtain for best effect.

    • The next step is to turn off any electronic device that produces heat, for example televisions, computer, and even light bulbs. If it is impossible to turn off the lights, you should consider dimming the light so you can see well without allowing it to produce too much heat.

    It is also recommended to use more environmentally friendly electronics like LED bulbs instead of the usual. We get enough options for this today.

    • Next, clean the house from clutters. Take a look around and see if you have too many clutters in the house. Clutters like dirty clothes can absorb the heat and keep it there in the room. In addition to it, it often restricts the airflow, which is a serious problem in cooling down a room. It explains why the house feels hot. Remove them from the room.


    • Last, open the windows if you feel like the indoor is hotter than the outdoor. Probably, the room absorbs too much heat from the day. Open the doors and windows and let the heat out of the room. Close the rooms you don’t use so the room you’re in cool down faster. When the temperature is fine, close back the windows and doors immediately.

    Open windows to cool down room quickly

    Phase 2: Start Circulating the Indoor Air

    This phase will speed up the cooling process as well. There are several tricks you can try to make your room cooler faster.

    • The best way to circulate the indoor air is by using fan. Ceiling fan is often considered the best option. Ceiling fan pulls up the air. The hot air will rise and the room beneath it gets cool immediately after that. If your fan has several speed setting, make sure to use high level first to quickly cool down the room.

    If you have other fans too like ones on your table, your bathroom exhaust fan, and other fans as well, turn it on. It is beneficial to set up several fans at once during the summer. In case the heat is too much, you can get enough help from them.

    • Create your own cooler by setting up a tray of ice in front of one of your desk fans. As it blows the air, the cool temperature will spread and cool down the room. Of course, the indoor air can be a little bit misty too. In case you are out of ice, you can improvise with frozen vegetable or products in your fridge.


    • You should also consider transferring the indoor air outside. To do this, you only need to place one of your desk fans right in front of a window facing outside. Then, turn it on. The fan will pull out the indoor air and transfer it outside. In return, it transfers the cooler outdoor air inside the room.

    This trick is extremely effective when you find that the outdoor air is cooler than the indoor air, which happens all the time as the room is already exposed the sunlight.

    Phase 3: Control the Heat

    While cooling down the room temperature is possible to do in many ways, it is also important to control the room heat at all times. It prevents you from the need to cool down the room again and again. There are several tricks that you can learn to control indoor air temperature.

    • The best solution and the most practical way to keep controlling your room temperature is by installing Air Conditioning system. Of course, it takes more money and effort but it is totally worth it. Of course, there are cheaper alternatives too.

    You can consider buying portable A/C for a change, in which you don’t have to install one in each room but removing the device to the room you want.

    • The other trick is to open the window during the night. At this time, the temperature drops in normal condition. When you open the window, you allow the outdoor air to get indoor and vice versa. Your room temperature will drop as well.


    • Get a dehumidifier. If the climate is humid in your area, it is best for you to have one. It prevents the room from getting too much humidity. It keeps the temperature cool and fresh instead of stuffy.


    • The last, get proper window covering. As it helps in preventing direct sunlight from getting indoor, it helps in managing the indoor temperature. Consider investing on good curtains and blinds to use during the day.

    In short, there are many ways you can do to cool down a room quickly. You can try the simple tricks first and continue to a more advanced way if you need to. It is wise to be prepared during summer though, as the heat can be unbearable.

    HOW TO COOL DOWN A ROOM QUICKLY

    Originally posted 2020-12-19 05:55:00.

  • How to Get Slime Out of Carpet

    How to Get Slime Out of Carpet

    Of course, we need to admit that slime is a great product and it helps the kids to learn. It is safe for the kids, but of course, it isn’t the same for your carpet.

    Once slime gets on your carpet, it will be hard to remove it unless you know how. Learn some helpful steps here.

    Read also: How to Get Boy Room Ideas Small Spaces.

    HOW TO GET SLIME OUT OF CARPET

    Phase 1: Removing the Slime from the Carpet

    Before we can clean the entire thing, we need to remove the slime from the carpet first of course. It makes cleaning a lot easier. You can remove the slime by doing the following steps:

    Step 1:

    When it happens, kids often leave or drop a pretty big blob of slime. The first step you need to make is to remove the blob. You can use a spoon if it is still fresh. If it is already there for some times, it may get hard.

    In this case, you need sharper tool. It is recommended to use a knife to remove the slime. You need to do it slowly because you don’t want to scratch the carpet. Cut the slime close from the outside to the inside.

    You don’t have to remove them all at once. Remove as much as you can and continue until you can remove them all.

    Step 2:

    Of course, you will still find remaining slime on your carpet. The best way to remove the slime is to wait until it gets dry. So leave it there for a while. Then, touch the slime to make sure it is dry. When it is, you should consider using the vacuum to remove the remaining slime.

    It is important to wait until the slime is dry before vacuuming it because wet slime can clog your vacuum cleaner.

    Step 3:

    The next step is to clean it with some products. In this step, you are free to choose your own product to use. Please consider using products that are safe for your carpet and kids as well.

    There are several possible product options. It includes WD-40, citrus solvent, goo remover, rubbing alcohol, and vinegar. Several people will prefer on more natural solution like vinegar but as long as your carpet is fine with it, you can use the other solutions too.

    How to Get Slime Out of Carpet

    Phase 2: Handling the Stain

    Now, we already remove the slime from your carpet. The next thing to deal with is the stain. Sometimes, it is tough to remove the stain. However, slime is made with safe materials, and it tends to be easier to clean the stain. Here are several effective steps you can follow to remove it.

    Step 1:

    The first step to do is to apply the cleaning solution you already choose. If you choose WD-40, distilled white vinegar, or rubbing alcohol, you can directly spray or pour it on to your carpet. It won’t hurt your carpet back. However, if you don’t want to pour too much, you should consider transferring them into a spray bottle and spray it to the carpet instead.

    Spraying the solution is highly recommended as you can control more and you can cover or saturate the entire areas in the best possible way.

    However, you need to pay more attention if you decide to use goo remover or citrus solvent. Because of the character, you need to prevent them from soaking your carpet. It is because they can dissolve your carpet back. If you decide to use these solutions, please first pour it to a towel. Then, dab the towel on the slime and stain.

    Step 2:

    When you are done applying the solution, you should leave it for at least 10 to 15 minutes or as needed or suggested on the instructions.

    You are advised not to skip this step. Leaving the solution to soak in is beneficial as it softens the dried slime remained, and it penetrates the carpet fiber. In the end, it helps in cleaning the stain better.

    Step 3:

    When the solution is well soaked in, you can start cleaning the stain. Take an old towel, and wipe the area using the towel. You shouldn’t need to give it a pressure or to make too much effort to clean it. Wipe like usual and the stain will be well removed.

    In case the stain still remains a little, repeat this phase until the stain is well cleaned.

    Step 4:

    Now, we need to rinse the area. Prepare a small bucket of hot water and clean towel. Put the towel into the hot water and drain the remaining water. Next, blot the area with the towel. You shouldn’t scrub or wipe it to make sure the remaining stain and slime don’t spread.

    Step 5:

    This entire phase can add new problems which is smell. To prevent your carpet from smelling, you should immediately dry the blotted area. Take another dry and clean towel and press it on the area. It allows the towel to absorb the remaining water on the carpet. Press it for a little while and repeat until the carpet gets pretty dry.

    Additional Tips

    There are several other tips that will be helpful for the cleaning processes.

    • Clean the slime as soon as possible before it gets dry and too sticky. It will be easier to clean on this stage and it is less destructive than the dry one when you clean it.
    • Never use brush and scrap your carpet. It will only ruin the carpet, not to mention spreading the slime and make the entire cleaning processes even more difficult.
    • Use only solutions that fit well for your carpet material. It prevents you from damaging the carpet while cleaning.

    In sum, slime is easy to clean when it drops on your carpet. Of course, it takes several steps but you don’t need to call a professional to clean it. Don’t get upset. Those steps above should help you effectively.

    Originally posted 2020-12-16 00:07:00.

  • Garage Lighting Ideas

    Garage Lighting Ideas

    A garage is the best place to do every kind of activity, from only to park your car to do your crafting hobby.

    The garage is designed to have no window and it might be very dark even when it is still afternoon.

    To support every activity you want to do in your garage, you need to consider to install additional lighting.

    Read also: How to Choose Best Dining Room Lighting Design Tips.

    GARAGE LIGHTING TIPS HOW TO CHOOSE THE BEST LIGHTING AND HOW TO INSTALL

    1. Choosing the Best Lighting for Every Purpose

    Before you choose the lighting for your garage, you need to know the purpose of the garage itself.

    Some people only need the additional lighting to park their cars, but the others use it for different purposes, like woodworking. The reason behind it is that each light output and power have different lighting efficiency.

    For only parking the car, the lower lux is enough but for other activities, like woodworking, requires a great amount of lighting. If you want a better lighting for your activities, you need to choose the light with at least 400 lux. You can also increase the lux number if you use the garage for more detailed work.

    2. The Best Place to Install the Additional Lighting

    After you have decided the purpose of the garage, you need to know the best place to install the lighting. If you just use the garage for parking your car, you can simply hang the lighting on the ceiling.

    But, if you want to use the garage for a different purpose and it needs more lighting, you can add additional lighting around your garage. There are numerous garage lighting that you can choose that are suitable inside and outside the garage.

    If you want to use the garage to park the car only, you can purchase the security lighting to give additional light at night. The security lighting will light automatically when you open your garage door and give you a brighter view when you need to park the car.

    You can also consider buying a decorative lighting that is placed in your garage door to light the outside part of the garage. But, if you want a better lighting for your activity, you can add more lighting to the garage and place them on the wall. By doing so, the garage will be well-lit and you can do your work comfortably.

    Garage wall and ceiling lighting ideas

    3. Getting Crafty with LED Strips

    Installing the lighting for your garage can be very pricey since you need a help for a professional technician. Not only paying for the installment, but you also need to rebuild the garage. If you want to reduce the budget, you can get crafty with LED strips that you can buy almost everywhere.

    Although it is pretty cheap, using the LED strips for your garage is very helpful since it has a long lifespan of 50,000 hours. You can install the LED strips almost in every corner of your garage but you need the correct measure and the correct instructions to use them.

    To install the LED strips, you just need to glue them in the desired area in your garage. Consider adding Scotch tape to give extra support to the LED strips. To light the LED strips, you need to attach the insulations and solder them together.

    After you have done it, you need to connect the Led strip lighting to the PC power supply and you just need to turn on the switch to get to the brighter side. Although it is pretty easy to install the LED strips in your garage, you need to consider adding 2 or 3 more LED strips since one strip won’t help your garage become brighter.

    4. Hanging Shop Light

    If you want to go basics, you can consider choosing the hanging shop light for your garage. The hanging shop light is very easy to install and it can give more light to the dim-lit garage. The best thing about this hanging shop light is that its price and you can get the tubes for around $2 to $10. If you want to install this light, you just need to hang the light with some screw on your garage ceiling.

    Choosing the hanging shop light is suitable if you don’t need a brighter light for your garage. It is because this light can give you annoying shadow if you need the light for detailed work. It can also produce bulb flicker and it can disturb your work in the garage. Another downside of this light is that it might not work well under the cold weather or below 50 degrees 50. To get the best hanging shop light, you need to carefully select the tubes.

    5. Consider Choosing LED Tubes

    If you want another alternative for your garage light, you can consider choosing LED tubes. The LED tubes have more advantages than other lights and they are very suitable if you want to do your detailed work at your garage comfortably.

    Compared to the hanging shop light, that is using fluorescent tubes, the LED light is the best to light your garage. If you consider the quality of the light output and its lifespan, which are three times brighter and three times longer, LED light is definitely the best answer for you.

    It is true that LED tubes are more expensive than the other light and you need a help of a professional technician for installation. But, choosing LED tubes will allow you to have cheaper bills for the electricity. It will also last longer and very suitable for a large garage.

    Having the LED tubes for the garage will also come in handy when the weather gets colder since it can power up without any problem, unlike the fluorescent bulbs. There are numerous LED tubes brands that you can choose, but you need to consider the light output and power and make sure it will help every activity you do.

    Led tube shop light garage ideas

    There are numerous lighting ideas that you can adapt for your garage. You can choose the basic one to the luxurious one, but more importantly, you need to consider the choice of lighting you want to maximize the use of the garage for your every activity.

    Originally posted 2020-12-15 01:15:00.

  • Best Garage Décor Ideas

    Best Garage Décor Ideas

    Garage does not necessarily need to be boring. Garage too is an interesting room if only the homeowners know how to décor it well.

    Decorating garage is just like decorating any other rooms in the house, meaning that there are lots of décor ideas to use.

    Here are some selections of best garage décor ideas you might want to try:

    Read also: Simple Creative Garage Makeover Ideas.

    BEST GARAGE DECOR IDEAS

    1. Tin Signs

    How about decorating your garage with good old fashion Tin Signs? These signs are just usable in any spots of your garage.

    These signs also come in many sizes and can suit any interest of the homeowners. What is even great from these Tin Signs is that you can afford them with cheap prize. You can simply load up on those signs.

    If you want to use the original pieces, you can go to the collectors of brands that still exist until today, although the prices will not be cheap anymore. Finding the collectors is not difficult. Simply google it up to find the nearest collector from where you reside! You can also go to e-commerce site like eBay or Amazon to find one.

    Vintage garage tin signs

    2. Neon Signs

    Imagine how boring a garage is without the presence of a neon sign that glows on the wall! But, wait, how do they exactly work? Well, neon signs are decorations made of glass tubes. The tubes are then filled with a gas and then are bent into the expected decorative designs such as shape of letters.

    Once the tube is shaped, a high-voltage electrical current should be passed through the tube’s gas so that the tubes can emit light. You can get neon signs easily from the online shop in the internet. Simply head to Etsy, Amazon, or eBay! The neon signs may cost you 25 – 150 bucks. If you wish to have the neon signs personalized, you can go to neogsignusa.com. You can order neon signs with your own design without any additional charge!

    Custom neon garage signs

    3. Prints or Paintings

    You don’t favor signs? How about using some prints or paintings? Again, it is print or painting not poster. One thing for sure when decorating your garage: never ruin the good vibe of your garage along with the overall look of it with cheap and messy posters. Yet, if you do want to use posters to décor your garage, at least put them in a good frame!

    Some people may forget that lots of talented artists out there work in the automotive world. We may not be able to purchase the originals. We, however, are still able to afford the prints. So, our suggestion will be: google up whatever your interest is and then adds the artwork to Google search the term.

    Another suggestion will be trying to contact the artists directly and purchase the prints directly from them. It may cost you more time and effort but you may end up paying less bucks and even you can bring home a signed copy from them. Your print will surely mean more when it is signed by the creator of it, don’t you think?

    Wall printing decor ideas for garage

    4. Laser Engraved Blueprint Artwork

    When it comes to laser engraved blueprint artwork, you may think about blueprint, your own car, and laser that is engraved on many different materials. If those things are your favorite, you need to find someone who can make the artwork of those things for you.

    When you order the engraved blueprint artwork, you will need to provide specific information about the vehicle such as the colors, vins, mods, and also the names. Find also the one that can offer LED light that can light up the artwork so that you can have more sophisticated décor for your garage.

    Laser Engraved Blueprint Artwork for Garage Wall decor

    5. Automotive-Themed Furniture

    Furniture is an unavoidable element when it comes to decorating a room. It is indeed involved in decorating garage. Instead of using mainstream furniture pieces for your garage, why not using automotive-themed furniture? There are plenty seriously great and cool furniture items that can be used in your garage.

    To get some inspiration, you can go to carguygarage.com or cargarage.com. At those websites, you can see Ferrari race seat chairs, engine tables, and many other furniture featuring automotive elements. Not only are the automotive-themed furniture pieces unique, they are also able to make your friends and guests left in awe!

    Wheel rim table ferrari style as garage decor ideas

    6. Car Parts

    Do you work in car detailing field? If you do, you may have collected lots of unused car parts lying around the house. Instead of letting those car parts clutter your garage or other rooms in your house, why not turning them to be an art? They can be made unique arts that can decorate your garage! They are just too many parts of a car that can be made into art work.

    You can use original exhaust system or OEM hood. You may also have unused race slicks set. Arrange them and hang them on the wall of your garage. In addition to the materials, you will need to work with your creativity.

    Car parts garage decor ideas

    If you think you need some inspirations and ideas on how to arrange those car parts on the wall, go to Pinterest. You may end up getting lots of great ideas that you have never thought of before. Get ready for making your own masterpiece!

    7. Kegerator or Fridge

    Last but not least, you can rely on kegerator or fridge as a decorative item for your garage. Not only is that item decorative, it is also functional. You can even decorate your kegerator or fridge with decals or custom pains.

    If you don’t think you have enough spare time to make your own, you can order one from another company. Simply tell the company your style preference, the size of the fridge, and the other details of the fridge so that it can complement other items in your garage.

    Kagerator garage decor ideas

    Don’t settle for less in decorating your garage! Choose decorative items that are not mainstream, unique, and not common. If possible, choose the items that are also functional for your activity in your garage. So, which idea from the list above that you like the most?

    Originally posted 2020-12-13 22:52:00.

  • Top Modern Wooden garage Doors Ideas

    Top Modern Wooden garage Doors Ideas

    Are you currently in need of finding a perfect garage door for modern homes of yours?

    We’ve got lots of design ideas of favorite modern wooden garage door that will surely suit your modern homes best.

    When it comes to choosing the right garage doors, it is very important to pick the one that can resemble your home design.

    Read also: Creative Garage Design Ideas for Your House

    AWESOME MODERN WOODEN GARAGE DOOR DESIGN IDEAS

    1. Cowart Door – Full View Garage Door with Mahogany Frame

    Loving furniture from mahogany? You need to try this Cowart garage door then! This Cowart door comes with full-view style and a frame made from mahogany. This garage door is a great idea from Designer Doors, Inc. This garage door is able to provide you with a very distinctive feel than the garage door with aluminum frame.

    In short, this full-view garage door has a frame made from mahogany that comes with dark finishing. This garage door occupies glass in sea-blue tone that really complements the tone color of the frame. This garage door even looks “wow” when the color of the glass is in the same tone with the color of the garage floor tile.

    For the walls of the garage, it is suggested that homeowners use pastel colors like soft grey. This garage door simply makes the vibe of the front part of the house softer and way more sophisticated.

    2. Cowart Door – Modern Wood Garage Door

    Here comes another modern wooden garage door ideas made from mahogany. If you don’t really like full-view-styled garage door, opt for this one. This Cowart door is a customized wood garage that is made from Sapele mahogany.

    What makes this garage door different from the previous one is that this garage door occupies flooring joint T & G boards of horizontal flush. The T&G boards are able to create a furniture comes in high elegance. Using this kind of garage door will surely make you reminisce the fine dining table from the 18th century.

    To even give more elegance feel, this garage door is stained with Sikkens Cetol 1/23. Besides, the door is also stain system in Teak color. The finishing of this garage door effortlessly makes the garage door simply elegant and modern.

    3. Cowart Door – Custom Wood Garage Door

    This garage door employs a layer of Groove and Tongue boards. This door is made with flush joins as well as a “dime gap”. The gap and the joints are surely the key elements that make this garage door both subtle and also sophisticated.

    The design of the garage door is actually simple. However, the dark finishing of this garage door along with the subtle gray paint on the garage wall really create a modern and contemporary vibe to the front part of the house. Another great color choice for the garage wall paint can also be subtle brown that is still in the same color family with the finishing tone of the garage door.

    The element of the garage door mingles perfectly with the garage wall. To make some contrast, it is suggested that homeowners use bright floor tile. Don’t use dark floor tile so that the feel around the garage won’t be too dark.

    4. Cowart Door – Garage Door from Quarter Sawn White Oak

    Are you fans of sawn white oak or simply oak? You must try this garage door then! This garage door is made from sawn white oak. The wood simply makes the garage door the prominent feature that catches big attention in the front part of the house.

    The garage door comes with many features: horizontal T&G boards, quarter sawn white oak, and flush join in “dime gap”. Quarter sawn oak is one type of wood that has been favored for architectural trim and furniture for more than 100 years in both Europe and the US.

    What makes quarter sawn oak great for a garage door is the sophisticated and unique look that is enhanced by the finishing from Sikkens. This garage door can even look more perfect when it is blended with traditional materials and a modern interpretation.

    5. Cowart Door – Modern Wood Garage Doors with “Dime Gap”

    Here comes another great garage door idea made from Sapele Mahogany. This time, the Sapele Mahogany is crafted in contemporary horizontal design that is complemented with a “dime gap”. This garage door also features two vertical stiles that are inlaid perfectly.

    To complement the Mahogany wood soffit and the wood features of this garage door, the stain finishing from Sikkens is used. All those features along with the finishing mingle together to create beautiful front part of the house. To complement the look of the garage door, give the garage door dark frame and to give some contrast, choose light floor tile.

    What is so unique about this garage door is the apparent absence that can be seen in the horizontal breaks in between door sections. This garage door is located only twenty feet or so from the street. It enables the garage doors to show off its sophisticated details of its wood grain to its casual viewers.

    6. Cowart Door – Modern Wood Garage Door with Clopay Model

    Last but not least, check this modern wood garage door that comes with two Clopay Model 33 Flush Luans that is made from mahogany wood. This garage door has some unique features that boost its modern vibe.

    One of the features is the Long Panel windows that are installed in the upper part of the garage door, making it less boring and more contemporary. Those windows are also able to provide sleek upgrade and warmth to the modern house.

    To complement the modern and contemporary vibe of the garage door, the finishing from Sikkens Cetol 1/23 + Stain system are chosen to enhance the elegance of the door and to make sure that the doors are long lasting for years.

    You surely have plenty choices of modern wooden garage door. All you need to do to choose the right garage door is to understand the style of your modern house, your preference, and the vibe you want to have in the front part of your home.

    Top Modern Wooden garage Doors Ideas

    Originally posted 2020-12-12 01:59:00.

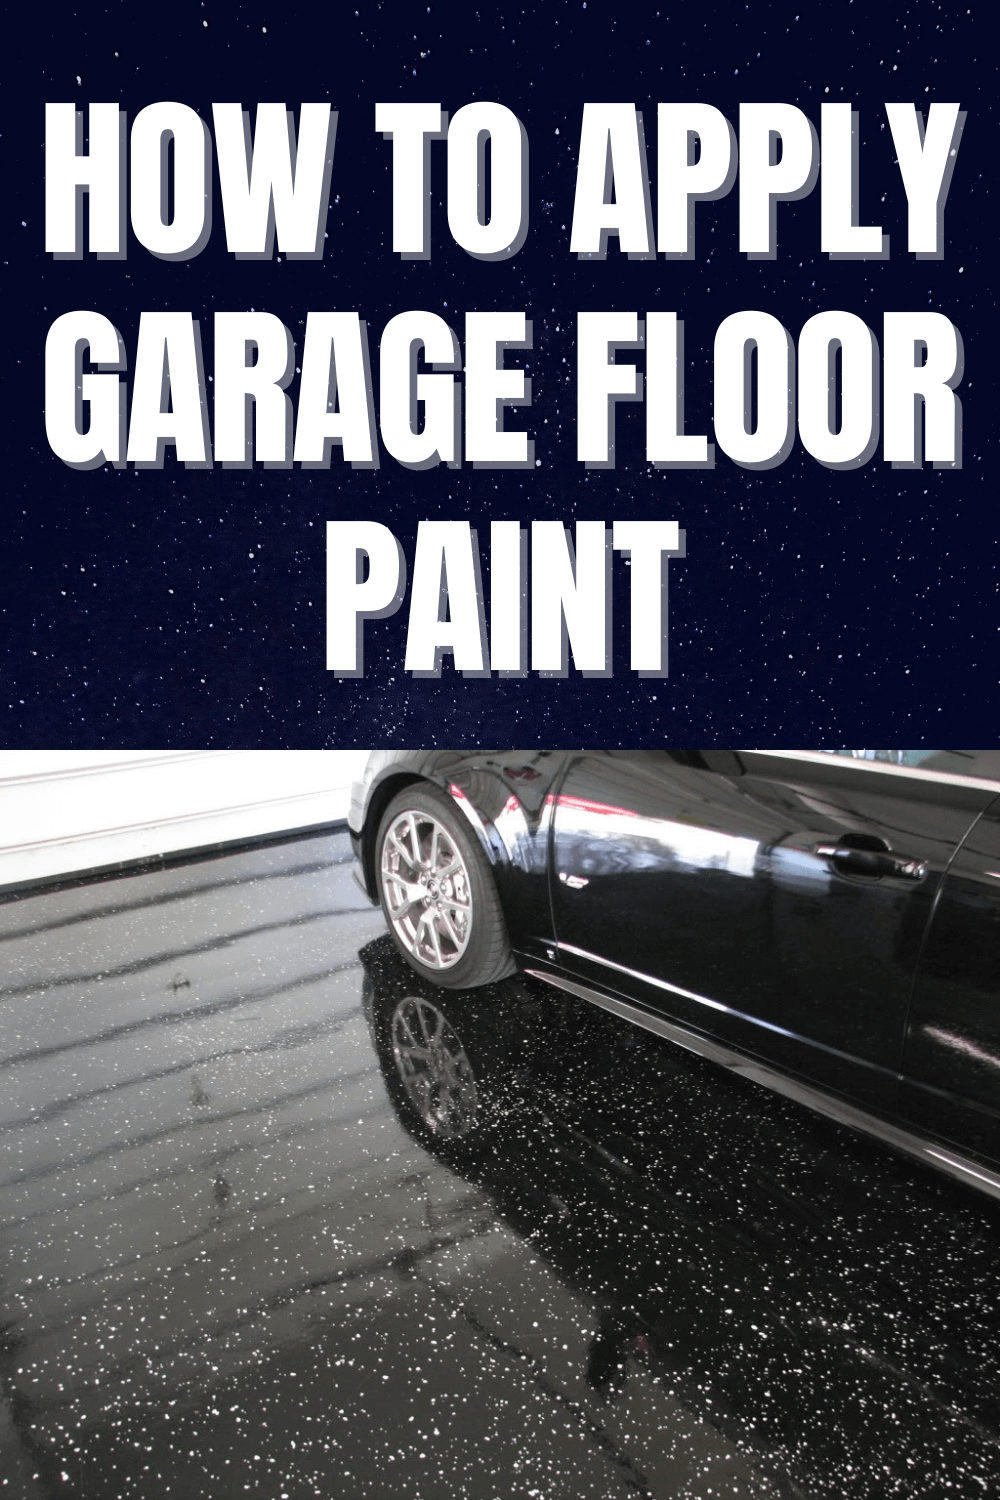
  • How to Apply Garage Floor Paint

    How to Apply Garage Floor Paint

    Epoxy paint is one kind of garage floor paint that is more recommended as it is more durable.

    Also, such garage floor paint can provide a better bond to the floor’s concrete so that it makes the concrete more chip resistant.

    Painting your garage floor using epoxy paint soon? Here we’ve got the painting guidance for you:

    HOW TO APPLY GARAGE FLOOR PAINT

    1. Cleaning the Floor and Doing the Prep

    Remember that concrete of your garage floor is porous. The concrete is also quick in collecting grime and dirt so that cleaning the concrete using floor buffing machine or a power washer is a perfect idea.

    One thing for sure, you better not skip this step! If you think you prefer the pressure washer more, then you need to add some degreaser to the water to really make sure the cleaning process is perfectly done. After that, just let the floor dry well.

    Yet, if you think you cannot get any power washer, you can clean the garage floor using a stiff-bristled scrubbing brush. Along with that machine, you also need to use a hose that comes with a nozzle with high pressure. Those two things can be an alternative to the power washer.

    To make sure that you really get all dirt out, you will need to use more elbow grease. Another thing to bear in mind when doing the cleaning process is that not to let the cleaning solution to dry on your garage concrete.

    In this step, you may need to work with chemical stripper. This chemical thing is needed when your garage floor is not a bare concrete floor. You need this if you have any sealers or old pain on your garage floor. Make sure you remove the pain or the sealer first before you go to the next step. Missing doing this step will result in unsatisfying painting later.

    2. Filling Any Cracks on the Concrete

    To do this step, you can use various products sold in the market. If you only have small cracks, you can simply use mortar or concrete repair compound. Yet, if you have thicker crack on the garage concrete, you will need to buy concrete patch.

    Meanwhile, if the cracks on the concrete are deep, you will need to fill in the crack layers and then to let it dry between layers. A head up: it may take up a while!

    Once it is dry, you need to wipe off the access product using a scrapper or wet rage to level the stuff out and also to make sure you get a smooth surface. In doing the filling, make sure that you read all the instructions provided by the manufacturers on the repair product so that you know the recommended cure times before you start painting the floor. In some cases, it may take around a week, while some other may require you to wait until a month.

    3. Etching the Floor

    You will need to etch your garage’s surface although it all depends on the surface of your garage’s concrete floors. Etching is all about opening up the concrete pores to let the paint absorb more effectively.

    To find out whether your garage floor needs any etching, you can conduct a test by dropping a small amount of water on your garage floor and see how quick it’s absorbed. If the water drop is absorbed quickly, you are less likely to do etching.

    Yet, if it ends up with pooling on the floor surface, you will need to go with commercial concrete etcher. It is the recommended product. Once you already apply the etcher, make sure you let it dry thoroughly!

    4. Applying the Bonding Primer

    Now, you reach the step of applying the bonding primer. This is a pre-treatment that is meant for porous concrete. The bonding primer is specially designed to promote and to strengthen the adhesion of the garage floor paint.

    In applying the primer, you will need a paint brush and a roller. The paint brush is needed to cut in the garage’s edges while the roller is used for the rest.

    When you are applying the primer, you may see the result is a little bit milky. It lets you see where you’re painting. Don’t worry about it because it can dry clear. Once the application of the bonding primer is done, you need to let is set.

    You may need to wait around four hours or maybe longer. There are some cases where the painter needs to wait way longer than 4 days yet it will never goes for more than 30 days. Make sure that the primer is dry before you start applying the garage floor paint.

    Interesting red white garage floor paint colors

    5. Applying the Part One of the Epoxy Paint

    The epoxy paint goes on very smoothly and covers the floor well. As you use the bonding primer, you will just need to cut around the garage’s edges with a brush and then to roll on the rest of the floor.

    Although you just apply the first coat of the paint, you may be able to see that the floor looks good already. However, if you want to go for the safest result, it is recommended to apply another coat of the paint.

    When applying the second coat, you need to apply it in the opposite direction of the first one. For example, the first coat is applied in length wise. That means you need to apply the second coat in width wise.

    However, if you think that the layout of your garage makes you difficult in applying the coat in width wise, you can simply go with the lengthwise for both of the coats. After the second coat application, it is suggested for you waiting at least seven days or a week before start stepping your feet or driving on the garage floor.

    Applying the epoxy paint to your garage floor may require you with lots of attention and detail. However, if you can make sure you follow every instruction and guidance above, the result is worth the time and effort spent.

    Originally posted 2020-12-11 03:04:00.

  • Most Popular Home Insurance Companies

    Most Popular Home Insurance Companies

    There are more than ten reasons to get an insurance for the house. First, the natural disaster. No one knows when and where the incident will happen.

    In fact, it is almost impossible to predict, leaving the person with the  total damage when the disaster happens.

    What is the best home insurance insurance?

    MOST POPULAR HOME INSURANCE COMPANIES

    1. Amica Home Insurance

    Thanks to the friendly costumer service task, the brand has the privilege to sit on the top chart of the best home insurance in the world.

    Aside from home insurance, Amica also offers insurance for house and life. It is Amica’s aim to keep costumers’ satisfactory. Therefore, all the staffs are working together to make sure that the costumers get the perfect product for their need.

    Instead of offering the strict control to payment plan, Amica offers different options to the costumers. Upon opening the insurance account, the costumers could choose the payment plan offered. In addition, the company has discount for the members who have joined for certain period.

    2. Allstate

    Registering a house to an insurance company is not an easy process. There are documents to prepare and lots of forms to fill in. The costumers who opens their account for the first time might have difficulties through the early stage. Thankfully, Allstate insurance is ready to help. Try to visit the website and the costumers will get the video. It is also possible to get the PDF version.

    Aside from its great help, the Allstate company also kindly offers several extensive program. It covers several items, such as expensive sport belonging, or musical instruments. Check the invoice to see whether these offers are still on. Allstate also has deadly weapon; a discount for the members, given even before they sign the agreement contract.

    3. State Farm

    Insurance has firm meaning and description. However, each people might need the insurance company to protect their valuable items in different way. Upon this request, State Farm is the best insurance company that could provide the answer. The concern might seem simple, but the details mentioned by the costumers are important.

    Instead of talking to the costumer service by phone, the house owners could visit the website and enter the online quote form. There are specific questions about the construction, total furniture in the house, total rooms, etc. It is suggested to bring all the necessary documents. Furthermore, State Farm provides excellent tips for the house owners about the security and house shopping.

    4. Nationwide

    Try to count the number of disasters that happened in the neighborhood. In some cities, the worst threat is strong wind and rain. In the other cities, the disasters come and go as the season changes. Some examples are flood, earthquake, etc. While most insurance company covers only the damage caused by fire, Nationwide offers more extensive insurance such as flood and also house repair project.

    After claiming the insurance, the costumers usually get the reimburse. The calculation for the value is taken from the deducted price after the item is broken or stolen. There is one special program in Nationwide, however, offering the members to buy brand new products from the initial brand. The costs for this purchase is paid in the beginning. So don’t be surprised to see high insurance billing.

    5. MetLife

    Imagine the worst scenario that might happen to the house after getting the insurance. It could be partial or total destruction. This is what the normal insurance will give to the members: 50% of the house value in the market. Is this the best offer? Not really. Metlife could give something better. It provides the full costs to rebuild the house. Furthermore, the term “rebuilt” also covers the furniture inside.

    The weakness of MetLife is its poor online website. The costumers who want to register will always get trouble. Thus, it is recommended to call or visit the office building. Upon your arrival, the friendly staffs are going to guide you through all the processes. MetLife might not be as good as Amita, but the service given is top quality. Skip lots of documents and get the claim instantly.

    6. Travelers

    While some house owners are satisfied with concrete and blocks building, some others prefer to build Green house. It is basically a system to reduce the waste product. The organization that has the power to decide which house applies LEED (Leadership Energy and Environmental Design) is the LEED organisation. It is not only about the initial program, but also the continuity.

    If the owners are upgrading their green house, they will get extra discount from Travelers. In addition, the policies applied by the travelers are strong enough. It means that all the lines will bring advantages to the costumers instead of the company. This statement was released by A.M.Best.

    The turn down from Travelers is the slow handling for claiming process. A summary from Costumers Report concludes that most costumers were complaining about the service provided by claims representative. A further investigation also revealed that the staff had lack of ability to determine which claim should be granted and nullified.

    7. Safeco

    Have you ever heard of bundled insurance? See how an insurance company offer different kind of service; house, life and car? Bundled insurance is the hot package from Safeco. The members are required to take at least two insurances at the same time. Later when the house and car get serious damage at the same time, the member should only pay one single loss deduction cost.

    For some products which cannot be repaired, Safeco guarantees that the members will get a valuable replacement. The items will have “Energy Star” label on the package. This service is included in the monthly payment, so the members don’t have to register to “home warranty” again.

    The reason to put the house in an insurance is simple. It is to ensure that the house owners are going to get certain amount of money to repair the damage caused by the specific events mentioned in the contract. More or less, the system is similar to saving account. Interested yet?

    Originally posted 2020-12-10 22:55:00.