Author: Taufiqul Hasan

  • Simple Steps on How to Decorate a Round Wall

    Simple Steps on How to Decorate a Round Wall

    A round wall needs some special treatments and considerations in the case of decorating.

    There are some numbers of unique designs to make your round wall look more beautiful yet elegant.

    It will be the center of attention when your guests enter your room Do you want to have an attractive and valuable decor asset inside your house?

    Read this following information for getting the answers.

    SIMPLE STEPS HOW TO DECORATE ROUND WALL

    1. Hang pictures with long and narrow frames

    Some people are afraid to hang some artworks or photographs on their round wall. They think that it will not be suitable for that kind of wall. In fact, the round wall will look more adorable with several artworks or frames.

    You need to choose long and narrow frames. If you hang more than one frame or decorations, make sure that they have similar size and colors to make them simpler. Choose the darker color to give cool sensation in your room.

    White round wall decor with long narrow picture frames

    2. Emphasize windows with curtains

    If your round wall has windows, you need to deal with beautiful curtains on them. It is better to hang a delicate sheer curtain with soft color between each window.

    To make the curtains more adorable, you need to tie them back to emphasize the space. If you want to have a simpler design, you may use a curtain that can close every part of the window.

    If you have high ceilings on the windows, long curtain panels will be more appropriate to make your room has different look.

    Read also: Fabulous Simple Stairway Wall Decorating Ideas

    3. Use bold wall art

    If you already have an interesting architectural statement, you may draw the eye on it by giving dark color, putting some wall decals, or using a stencil.

    The best part of applying decals is you do not need to find curved rods to put several decorations or frames.

    Some people think that this way is simpler and cheaper but the results are more satisfying. You may call several experts to paint your round wall to have more stunning results.

    Read also: Wall Decor Ideas with Recycled Wood

    4. Hang a chandelier to give warm statement

    Chandeliers can give a breathtaking atmosphere in your place especially in a room with a round wall. It brings the warm and calm statement which is suitable for taking a rest.

    Moreover, putting a chandelier can give an elegant look in your favorite space. You need to choose a chandelier which suits you well to make a stunning entryways on your house.

    Round wall decor with mirror, flower, and good lighting
    Image: decoist.com

    5. Put some tape stripes

    Putting some tape stripes are great for decorating your round wall because they will make the round shape clearer. You can nail every part of tapestries if you do not care about some holes on your tapestries.

    There are several designs of tapestries and you make choose them based on your favorite. You have to find the one that fits your space perfectly.

    Those are several simple tips for decorating your round wall to make it more stunning. Do you still confuse on how to choose the one that fits on your home? May the tips above are really helpful for you.

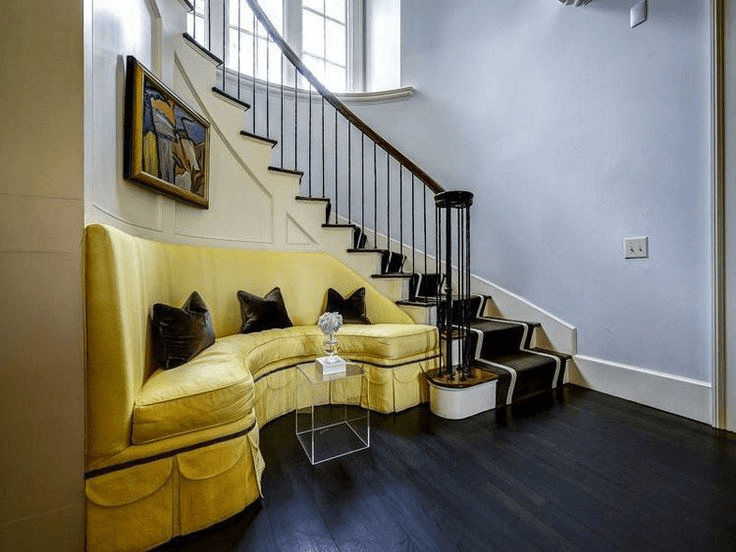
    Modern living room with round wall decor and sofa
    Image: houzz.com

    6. Use a circular-shaped mirror as an art

    One easy way to decorate around wall is by using a circular-shaped mirror as an art. This can add a unique and interesting focal point to the room. You can find mirrors in a variety of shapes and sizes, so find one that best suits your needs and style.

    Circular-shaped mirror art is also easy to install. Simply attach two hangers on the back of the mirror and hang them on your wall using nails or adhesive hooks.

    7. Hang a circular-shaped clock with hands on the wall

    A Circular-shaped clock with hands is another great addition to the room. It has a unique and artful shape that can help create an interesting focal point on any wall. If you don’t want to buy a new clock, just take apart an old one and reassemble it on the wall.

    8. Hang up decorative vases on the wall

    Vases on the wall are another fun way to decorate the round wall. Hanging up vases of different sizes and shapes will create a colorful pattern that can enhance your room. You can either display a single vase or multiple ones to create a unique focal point on your wall.

    The important thing is safety. Whether you are hanging the vases with nails, adhesive hooks, or even tape, make sure to secure them on the wall first.

    9. Have a rounder vanity mirror

    A Rounder vanity mirror is another great idea to decorate the round wall. This is an excellent place for makeup application or hair styling, so adding a circular shape will give you more space and add some interest to the room.

    Another thing you can do is paint your round wall with a dark shade to give an impression of depth. This will make it look like the wall is bigger than other parts.

    10. Have some drapes hanging from the ceiling

    Another way to add some interest to a round wall is by hanging drapes from the ceiling. This will add some height and drama to the room. You can either choose a single color or go with a patterned design. Just make sure that the drapes are hung evenly so that it doesn’t look lopsided.

    There are several ways to decorate around walls in your home or apartment. You can use the above tips and tricks, and decorate your round wall in a way that is unique to you and your style.

    If you would like more information on how to decorate around the wall, please contact your local home improvement professional or speak with an interior decorator.

    In conclusion, the steps to decorate around the wall are as follows: hang long and narrow frames, emphasize windows with curtains, use bold wall art, hang a chandelier to give a warm statement, put some tape stripes on the wall to create a pattern, use a circular-shaped mirror as art, hang a circular-shaped clock with hands on the wall, hang up decorative vases on the wall, have a rounder vanity mirror, and have some drapes hanging from the ceiling.

    Originally posted 2022-01-12 11:01:00.

  • How to Decorate Living Room End Tables Flawlessly

    How to Decorate Living Room End Tables Flawlessly

    A coffee table is not enough to keep your room into the best one.

    Every room needs the end tables to keep something entertaining in the casual space.

    Try to design your living room with the end tables and make it better.

    Read also: Best Tips How to Decorate a Living Room Coffee Table?

    1. Spacious Living Room

    If you like to give some space in the living room, you can use this design. Put a small, simple, yet effective end table in the living room.

    It will match with the single cushion sofa and ottoman chair. The end table is used here to set a table lamp as simple as that.

    POPULAR LIVING ROOM END TABLE DECORATION IDEAS

    2. Contemporary Style

    Contemporary design with dark wood and fireplace will match well with the three end tables. You can put two end tables with different glass color in the side of the sofas.

    If you want the corner for intimate sitting place, put the end tables near it. Use the end table to add a small vase of relaxing flower such as geranium and lily. It will make the cozier atmosphere.

    Living room end table with drawers

    3. Grand Room

    The perfect spot to put the end table is a capacious room. You can use an end table with multiple purpose, it can use as a display for your collection.

    Set a photo or your work of art there. Put a round end table beside the armchair, and the larger one next to the sofa.

    Read also: Rustic Farmhouse Living room decor ideas

    4. Open Concept

    Enjoy the fresh air while sitting in the living room. Do not forget to open the door and windows to lead the view outside garden or pool. If you like chic design, put two end tables in the two separated seating areas.

    Pay attention to the tone of color from your sofa and the end tables. Make sure it mix perfectly. You also can contrast the color between the wall and the end table to make it swanky. It will attract the attention and admiration.

    5. Bold and Modern

    If you like modernity, set a dark coffee table in the center and the armchairs in front of the bookshelves. In the other side you can design a larger wet bar. Add end tables beside the two sides of the armchairs.

    You can set one carved structure end table to put the reading glasses and the table lamp. While, put the enormous end table next to the velvet sofas. Taste very modern-looking from your own living room.

    6. Traditional Living Room

    The single dark wood end table will match well with this concept. You can set this end table in the living room with the cowhide rug.

    Pay attention to the sits arrangement if you want to deliver the taste of the past time for your guest. Set it with L-formation and hide the end table in the corner of the formation. You can set a box of marbles or another traditional game on the end table.

    You can attract people to stay a little bit longer with your decoration in the living room. If you can pay attention to the smallest details like an end table, the people will impress. Nowadays, end table is not only storage anymore. It can enliven the mood. Begin to set the end table perfectly and it will spell magic!

    Living room end table ideas

    Another living room end table decoration ideas are:

    1. Mixing Colors

    Mixing colors is always a good idea. You can choose the light blue and white combination for your living room. This will be more relaxed than the black and white.

    2. White and Black

    White and black is the classic combination that never goes out of style. The white and black combination will give a clean look to your living room.

    3. Rustic Style

    The rustic style is all about natural materials. Choose the wooden end table and the leather chair. Your living room will become a cozy space.

    4. Blue and Brown

    Blue and brown is a classic combo. It will create a warm feeling in your living room.

    5. Dark Wood and Light Wood

    Dark wood and light wood combination will bring a great atmosphere in your living room. It will stimulate your mind and relax your body.

    6. Red and Gray

    Red and gray is a simple but effective combination. It will add warmth to your living room. You can use the red and gray combination as a background for your photos.

    7. Green and Grey

    Green and grey is a perfect combination. It will enhance the green plants around your house.

    8. Purple and Orange

    Purple and orange is a unique combination. It will make your living room more interesting.

    9. Pink and Yellow

    Pink and yellow is a bright combination. It will make you feel happy when you enter your living room.

    10. Coffee Table Bookshelf

    If you have a small living room, try to place the coffee table book shelf there. It will save your space and also help you organize your books.

    11. Decorative Accents

    Decorative accents are always a good choice. You can decorate your living room with some decorative accessories. For example, you can hang up some pictures, collectibles, and paintings.

    12. Candle holder end table

    Candle holders are always a good choice for your living room. They will make your living room looks warm and welcoming.

    13. Lampshade end table

    Lampshade end tables are available in many styles. You can choose the one that suits your living room best.

    14. Wooden end table

    Wooden end tables are very popular nowadays. You can buy them online or offline. They are easy to install and maintain.

    15. Glass top end table

    Glass top end tables are more modern and elegant. They are suitable for those who love contemporary design.

    Also use coffee table decor ideas for better living room decorating ideas. Here the ideas:

    1. Use a lamp shade as a coffee table

    A lamp shade is a good choice for a coffee table. It will provide soft lighting for reading and watching TV.

    2. Create a mini-library

    Create a mini library on top of your coffee table. It will be a nice addition to your living room. It’s a good way to keep your favorite books close at hand.

    3. Add an extra storage

    Add an extra storage under your coffee table. It’s another option for keeping things within reach.

    4. Keep it simple

    Keep it simple. Don’t go overboard. A few items such as vases, candles, and picture frames will do.

    5. Add a rug

    You can add a rug to your coffee table. It makes your living room look bigger and warmer.

    6. Floral arrangements coffee table

    Floral arrangements coffee table is a great idea if you want to give your living room a fresh new look.

    7. Place a plant on your coffee table for decorative elements

    Plants are good choices for coffee tables. They will not only beautify your living room, but also serve as a decoration element.

    8. Hang up a mirror

    Mirrors are great options for coffee tables. They are both useful and beautiful.

    9. Put a clock on your coffee table

    This decorative elements is a classic. It will make your coffee table more attractive.

    10. Fresh flowers

    Fresh flowers are always a good idea. They will bring color and fragrance into your living room. Don’t forget using nice vase of flowers for your coffee table.

    Piece of advice:

    Don’t put too much stuff on your coffee table. Choose a few decorative elements instead. This will make your living room look cozy and inviting.

    Tips for small space living room decorating ideas:

    If you don’t have enough space in your living room, then you should think about creating a small library. It will be a perfect solution for your problem.

    Here are some tips for you:

    1. Make sure that all furniture pieces are well organized. The first thing you need to do is to arrange your furniture according to their function.

    2. If possible, place your sofa near the window so that you can enjoy natural light.

    3. Arrange your furniture carefully. Don’t let any piece of furniture block the view from other rooms.

    4. Avoid placing heavy objects on your coffee table. It might damage your flooring.

    5. Try to avoid putting too many lamps on your coffee table. This may cause glare and shadows.

    6. Consider adding a shelf above your coffee table. It can hold magazines, books, and knickknacks.

    7. Use a glass top coffee table. It looks more modern and elegant than wood or metal ones.

    8. You can hang pictures on the wall behind your coffee table. This will create a nice visual effect.

    9. Use curtains to cover your windows. They will protect your furniture from sunlight and heat.

    10. Cover your coffee table with a cloth. This will prevent dust and dirt from accumulating on it.

    11. Use a rug to soften the hard surface of your coffee table.

    Originally posted 2022-01-10 01:24:00.

  • Crafting the Vista: How to Decorate Wall for Birthday Party

    Crafting the Vista: How to Decorate Wall for Birthday Party

    Backdrop carries the meaning of the party. Pay attention to the design of the wall, your party will write there.

    It becomes the first impression of a bash.

    Get ready to shower the details of the party in your wall and turn it up!

    Read also: Birthday Party Home Decor Tips.

    1. Spell a Massage

    Use the wall as a center of attention when you want to deliver massage to someone. Pick a banner, stick around photos and bring the memories back to the party. You can add gold glitter banner to impress the guest.

    HOW TO DECORATE WALL FOR BIRTHDAY PARTY

    2. Bring Spring Inside Your House

    You can use flowers for any kind of celebration. When spring comes, do not forget to add flowers garland into the walls. It will look amazing with the different color scheme. Arrange the flowers together with the organza butterflies.

    If you like artificial things, you can make a paper flowers garland or rosette combine with ombre pompom.  Embracing something new in the combination and you will see something refreshing.

    3. Royal Room

    Let the Midas comes to your party, add stunning features in your wall as if you are the royalty. Set the backdrop behind the chair of honor at the birthday party like never before.

    If you like Ancient Rome taste, add mine craft swords in the wall as the symbol of gladiator. Use vintage style template of Victorian crown to enliven the view.

    Read also: Fabulous Simple Stairway Wall Decorating Ideas

    4. Simple and Fun

    Who says that you need lots of money to decorate the gorgeous backdrop? You also can do it by yourself with the scrapbook or crepe papers. You can make a chain paper with colorful combination and put it in the wall.

    Use your sewing machine and sew the scrapbook paper based on the pattern and tape it. Draw Zigzag streamers on the papers and bring it together.

    5. Balloons Idea

    Wall decoration ideas for birthday party
    Image: wall–art.com

    Balloons are a must-have item in a party. If you want to host a party, it is good to combine the balloons in the background. Consider balloons as the main decoration and it will create different atmosphere based on your creativity.

    You can use hanging balloons with photos in the wall; it will make the guest want to take home the balloons along with your photo on it.

    You also can painted polka dot, make confetti, or paint it gold to make it chic. If you like to play with vary height, you can tape balloons with different size in the wall. The outlook will turn out to be awesome.

    6. Holiday Theme

    Make the holiday unforgettable with throwing a bash! You can design the wall just like your favorite holiday. If you like White Christmas, tape white angles wings and hang the miniature of traditional Christmas tree in the wall.

    If you like Halloween, use tinsel design. Put Tinsel ghost, pumpkin, and bat in the backdrop. You can also add cute Halloween banner with the glitter spider and Web decoration.

    The things that easily be seen become the power of your party. How you design the view in the wall will impress your guest. Let the wall becomes the vantage point, spell the massage and let your celebration shine!

    Wall decor for birthday party

    Other ideas you may need:

    7. Vintage Style

    Vintage style always looks great. If you have a lot of old stuffs, why don’t you try to incorporate them into the party? You can put a vase of roses in the wall and hang some old framed pictures.

    8. Colorful Combination

    Colorful combination never goes wrong. You can use different colors to give the room an eye-catching effect. For example, if you like pink and green, you can use pink and yellow as well.

    9. DIY Wall Art

    Do you know how to make DIY wall art? You can make simple wall art using wood frame, cardboard, and fabric. You can print the picture on the fabric and cut it according to your desired shape. Then, you can glue it on the wooden frame.

    10. Make Your Own Banner

    Do you want to make your own banner? It is easy to do so. Just draw a sketch first and then choose the color you like. Cut the paper and paste it on the canvas.

    11. DIY Lampshade

    Lampshade is one of the most important part of any room. You can make your own lampshade at home. All you need is to find a piece of cloth, scissors, and glue.

    12. DIY Mirror Frame

    Mirror frames are very popular nowadays. You can make your mirror frame at home. All you have to do is to buy a frame, cut the glass, and attach it together.

    13. DIY Table Runner

    Table runner is another thing you should consider when planning a party. You can make your table runner at home by cutting the fabric according to the size of the table.

    14. DIY Fabric Flower Centerpiece

    Fabric flower centerpiece is one of the best ideas to make your party more attractive. You can make your centerpiece yourself. All you need to do is to search for a floral patterned fabric and cut it according the size of the table you want.

    15. DIY Paper Lantern

    Paper lantern is a must-have item for every party. You can make it at home. All you needed is to cut the paper into small pieces, fold them, and stick them together.

    16. DIY Ribbon Garland

    Ribbon garland is perfect for parties. You can make it yourself by finding a long ribbon and tying it up.

    17. DIY Basket Weave Chair Cover

    Basket weave chair cover is another good idea. You can make this cover at home. All you had to do is to find a basket weave fabric and sew it together.

    18. Wallpaper Flowers

    Wallpaper flowers are really beautiful. They look lovely hanging on the wall. You can make these flowers at home. All you should do is to take a sheet of wallpaper, cut it into strips, and paste it on the wall.

    19. Wall Hanging Wreath

    Wreath is also a must-have item. You can make your wreath at home. All you just need to do is to wrap the wire around the tree branches and tie it with the string or yarn.

    20. Birthday wall decals

    Birthday wall decal is the easiest way to add fun decorations to your walls. You can get these decals from online stores. These decals will help you create a unique space that everyone would love to visit.

    21. DIY Water Bottle Holder

    Water bottle holders are great decoration items. You can make your water bottle holder at home. All you got to do is to paint the plastic bottles in the color you like.

    Originally posted 2022-01-06 01:13:00.

  • Keep It Unforgettable: How to Decorate for 80th Birthday Party

    Keep It Unforgettable: How to Decorate for 80th Birthday Party

    Anyone that reaches the age of 80 have been through a lot of things. This person surely deserves a special celebration, 80th birthday party.

    It should be different from the regular birthday party. Instead of highlighting the festive atmosphere, go with something decent and sophisticated.

    How to decorate for 80th birthday party? These decorations might help you to go with the lifetime theme.

    HOW TO DECORATE FOR 80TH BIRTHDAY PARTY

    1. Black and White Color with Popping in Red for 80th Party Decoration

    Color is the first thing that comes to your mind. You cannot put rainbow all over the room; it will not please the guests. Remember that the honoree has passed its teenage days. Go with the timeless color: black and white.

    Infuse the passion with red flowers or small decorations. Coordinate all the items in the table with the dominant colors only: cutlery, glasses, napkin, and table cloth. For the table cover, you can pick either checkered or stripe pattern.

    Read also: How to Decorate for Birthday Party at Home

    2. How to Decorate 80th Party with Picture Centerpiece?

    In the center of the table, put a piece of honoree memorable pictures. There are several themes you can choose: the wedding day, graduation day, or any other happy day. The bright smile on the picture will enhance the atmosphere.

    Print the photos in monochromatic color. Put in into a mason jar. To make it prettier, you can add three pinwheels made from old newspaper. Vary the height and size of the pinwheel. If you hold the celebration at night, replace the pinwheel with candle.

    3. Wine Glass and Candle for 80th Party Decoration Ideas

    This item has meaningful resemblance with the honoree: wine. As a bottle of wine grows older, the quality becomes more valuable. This aspect is similar to the honoree. Set the wine glass upside down on the table as decoration.

    Let some lavender or purple colored flower trapped inside. Place a short candle on the top to create dim light. This setting is easy, but sophisticated and elegant. If you plan to pour the drink into the wine glass, then take out the candle.

    80th birthday party decorations
    Image: birthdayowner.com

    4. Lifetime Garland Decoration Ideas

    When stepping into the room and having conversations, your guests will briefly scan the decorations in the room. Let them stop on the garland wall.

    They could see the shortened lifetime story of the honoree. Careful arrangement could bring the guests to the sea of memories, allowing them to feel warmth and sadness within the pictures.

    You may start from the day the honoree was born, childhood, teenage, and go further until the last grandchildren birth. Should there be any funeral, it is your decision whether to put it in.

    5. Milestone of 80 Years Old

    The big family must have adored and cared for the honoree for a long time. Express the love through words and songs.

    Pick one song that describes the honoree best. Put together some videos and old photos until it becomes a milestone of honoree’s life. Insert some loving opinion and wishes inside.

    It would be perfect if the family could make a short video. Play this video on loop as the main event. Without doubt, it will be the best present ever!

    Reaching 80 could also mean being the eldest in the family. Create an unforgettable occasion where everybody could rewind the time to the past. Since excessive colors hurts, pick the soft dim instead. Bring back good old memories in celebration. Deliver the memorable moments through every piece of the decoration in the room.

    80th bday party ideas

    Originally posted 2021-11-09 01:14:00.

  • Awesome Yellow Bathroom Tile Ideas

    Awesome Yellow Bathroom Tile Ideas

    Bathroom with yellow tile was a hit back then. Somehow, it makes its own way to today’s taste.

    Not only for vintage looking bathroom, a modern-looking bathroom is possible to achieve as well with yellow tiles.

    If you want something different in your bathroom and you need ideas to use yellow tiles, you will like the following ideas.

    Read also: Bathroom Tile Ideas in Grey

    1. Honeycomb Art Yellow Bathroom Tile 

    What is nicer than presenting a honeycomb design with yellow color? It looks just right. To make more creative look, wear honeycomb shaped tiles in yellow on the tub area wall.

    Add a little accent by applying the same tiles in black for the tub wall. The combination of yellow and black never fails.

    However for consistent look, you should use white grouts on the tiles for more defined style. It is completely fine too to wear the same honeycomb black tiles for the entire floor. It makes the yellow color pops more and makes the entire concept works well.

    Honeycomb Art For Yellow bathroom tiles
    Image: mydomaine.com

    2. Bathroom with Yellow Tile and White Mix

    If your bathroom has four walls, wear two of the walls with yellow ceramic tiles. You can arrange the setting like the subway tiles do.

    Then, add white grout for them. It makes a perfect and cheerful combination already. The other two walls should be finished with white tiles in the same arrangement and setting. Instead of white grout as well, they should be enriched with yellow grout.

    Extend the combination with white bathroom amenities and yellow finished fixtures. It gives you enough yellow for summer feeling, yet it keeps thing in balance.

    Yellow and white combination for bathroom wall tiles
    Bathroom with yellow tile

    3. Yellow on Black and White Background Bathroom Tile

    You don’t have to cover the entire bathroom with yellow tiles. Instead, you can focus more in making the yellow focal.

    Let’s start with white tiles with small black squares on it. It should make a perfect floor for the bathroom. Continue to finish the bathroom with these tiles up to half down of the wall.

    Make borders with black slim tiles for strong finish. The yellow tiles should go from the half wall to top.

    Combine the entire concept with white cabinet and black countertop and you find yourself a very creative bathroom with elegant concept.

    Yellow and black bathroom tiles

    4. Yellow and Gray Bathroom Tile Ideas, Yay!

    Let’s get a little more creative in combining. Instead of using black or white or both with yellow, let’s try gray.

    Choose medium squares gray for half of the wall to the floor and then finish it with soft gray border. It makes sure darker shade is on the below part.

    Using the same gray tiles, cover the floor in diagonal setting or other possible patterns you can make.

    Finish the rest of the wall bathroom with yellow tile. To pop the yellow up more, use white and yellow bath rug for décor.

    Black, yellow, and gray bathroom tile ideas
    Image: modwalls.com

    Basically, yellow is still an interesting color for a bathroom. It doesn’t have to be hot if you can select the right combination for it. Be creative in setting up the entire tiles. Yellow is the perfect color for summer and fun feeling. Which idea you will pick?

    Read also: Yellow Bedroom Color Ideas

    Combination color ideas for yellow bathroom tile

    Originally posted 2021-10-03 01:39:00.

  • HOW TO INSTALL BATHROOM SINK PLUMBING STEP BY STEP

    HOW TO INSTALL BATHROOM SINK PLUMBING STEP BY STEP

    Here is about bathroom sink plumbing: the parts, how it’s working, the diagram of assembly, and how to install the plumbing of bathroom sink drain. I hope this information help you. Check it out. 

    Read also: Bathroom Sink Drain Pipe Size

    IMPORTANT PARTS OF BATHROOM SINK PLUMBING

    1. Shutoff Valves

    Shutoff valves is metal or plastic. The size is small. It is located between the supply hoses or tubes (this part is connected with the tailpieces on the sink faucet) and the incoming water supply pipes.

    The shape of the handle shutoff valves in oval or sometimes spherical. The handle is work for open or close the valves. So, this shutoff valves are often called Stop Valves.

    With this part, you no need to shutting off supply the water to the whole house. Because you only need use this shutoff valves to turn off the water supply at the sink only.

    The shutoff valves are pairs. One for hot waters, and one for cold water. The installation is easy, because use compression fittings, so you install onto the water pipes without soldering. But, if you want to replace shutoff valve, you need to turn off the water to the house.

    SHUTOFF VALVES BATHROOM SINK PLUMBING

    2. Supply Tubes

    Usually, supply tubes made of chromed copper, solid plastic (gray), plastic mesh (usually white), or braided wire mesh. For supply tubes position, you can see from the sink faucet tailpieces then down to stop valves.

    Supply tubes connected to shutoff valves and tailpieces with attached nuts. Sometimes, supply tubes fail. If that happen, you need replace it.

    3. Drain Tailpiece

    Drain tailpiece also called sink tailpiece is the straight part of pipe, and it’s connects to the sink drain fitting bottom. If you have pop-up drain sink, you can find on the back tailpiece to check the drain assembly.

    Drain tailpiece using a slip nut to attached with drain fitting. It’s easy to controls. Under the nut you can find a tapered plastic washer that make a watertight seal.

    If you drop item into the drain sink, you can open these slip-nut joints. Then you can take the item.

    DRAIN TAILPIECE BATHROOM SINK PLUMBING


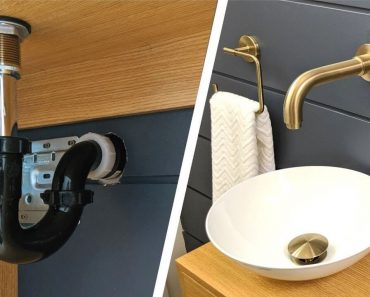
    4. P-Trap

    P-Trap have 2 parts, U-bend and trap arm. These parts make your sink connected to the sewer line. The curved trap allows your sink safety from holds standing water, also prevents the sewer gasses rising up and out to the sink.

    The U-bend bottom always filled with water, so the gasses can not back to sink. If you run water to the drain, you always change the water in the U-bend with new water.

    The P-trap easy to replace because using slip-nut joints to assemble it. But old design using solvent-glued, so better for you to change with trap with slip-nut joint.

    5. Drain Pipe

    This part is connected with the household plumbing system. Drain pipe connects to trap arm with slip-nut joint. So, the sink drain pipe easy to repairs.

    The size of drain pipe is 1½ inch in diameter, but it can be larger or sometimes smaller.

    Related post: Best Tips on How to Decorate a Small Bathroom Sink

    HOW BATHROOM SINK PLUMBING WORKS

    Usually, bathroom sink has 3 fixture holes: 4, 6, or 8 Inch centers. The larger size used to receive a split set faucet that faucet handles and the spout separated. 4 or 6 Inch for a center set faucet or a single lever faucet. The water flow from supply tubes to shutoff valves then to tailpieces on base of faucet.

    Besides that, Pop-up stopper at the drain pipe bathroom sink plumbing that raises and lowers if you pull up or down on knob/handle that located behind the faucet body. The knob is head of lift rod that tied to a clevis (connecting bar).

    Clevis connects to pivot rod and ball assembly, that consist of rod through rubber pivot ball. This part is slightly up to the tailpiece of stopper.

    If you push the knob, the lift rod will down, and it cause pivot rod push the stopper will up. And the opposite will happen, if you pull the knob, you make the stopper down.

    Because some reason, if you want to remove or replace assembly, you can pull it right out. Or, you maybe should to twist it to remove it from the clevis.

    Bathroom sink drain has a flange. With plumber’s putty, the flange was sealed to the sink hole and screwed into drain body. And with a lock nut, it’s tightened to under the sink bowl.

    And then how to P-Trap works, I explained above. Including how water is trapped and hinders the return of gases to the top.

    Then, by observing the following bathroom sink plumbing diagram, it may be easier for you to understand how it works as a whole.

    DIAGRAM OF PLUMBING BATHROOM SINK DRAIN ASSEMBLY

    DIAGRAM OF PLUMBING BATHROOM SINK DRAIN ASSEMBLY
    Image: hometips.com

    HOW TO INSTALL BATHROOM SINK PLUMBING

    Generally, Installing bathroom sink plumbing is need two phases: rough-in and finishing phase. The rough-in is more difficult phase. It depends on the system’s configuration overall.

    Bathroom sink no need high water volumes. So, we must be able to branch the ½ inch supply lines from the tub or shower.

    After that, we can tie the 2-inch drain line into an existing one. Remember too about sink vent. If not, maybe it will not drain properly. We have to raise the 1 ½ or 2-inch vent from the drain within 5 feet of the sink trap. And don’t forget to tie into an existing vent or to the roof.

    1. Installing the Bathroom Sink Plumbing Pipes

    Important to know is the position of the supply tubes and drain pipes. Drain pipes and sink drain should be lined up, and straight between the supply stub outs.

    Uncover the wall to pass the pipe out. The water must be off when the tees soldered onto the pipes.

    The drain slope is ¼ inch per foot toward the sewer, and so does the vent in its incline toward its tie-in point.

    After that, allow the stub-outs lengthwise a few inches from the wall, then close it after you install the sink.

    2. The Stub-Outs Prepare

    Install shutoff valves on the supply stub-outs before hook up the sink. Solder slip-joint valves to pipes or with a wrench, tighten on compression valves.

    Gluing on the valves is the options if you using CPVC plastic pipes instead of copper ones. But, if you don’t glue the P-Trap to the waste pipe, you can glue on a P-Trap adapter.

    3. Connecting the Sink

    Install the faucet and the drain onto the sink before install the sink. It’s will be easier for you. Install tailpiece with same lever as the top of the drain. It’s makes the trap connects easily.

    Connect the faucet supply hoses to the shutoff valves and faucet inlets. Then tighten with adjustable pliers. The connectors must be right at size to fit, so better you check before you buy it. If the pop-up stopper was connected, the sink ready to use.

    Finally, its all of information for you about bathroom sink plumbing. If you want us to discuss further, please write in the comments column below.

    Originally posted 2021-09-24 06:24:00.

  • Bathroom Sink Drain Pipe Size: Guide on Size and Units Connected

    Bathroom Sink Drain Pipe Size: Guide on Size and Units Connected

    Working on your bathroom sink drain pipe is actually a lot simpler than working with ones in the kitchen.

    However, to make sure it is going to be fully functional, you need to understand the entire drain pipe sizes and count the number of pipe units to be connected with it. Check out the following guide for bathroom sink plumbing details.

    Read also: Bathroom Sink Materials Pros and Cons.

    BATHROOM SINK DRAIN PIPE SIZE

    The Standard Bathroom Sink Drain Pipe Size and Setting

    Every state may have different code on plumbing and it may affect the required size of the bathroom sink pipe. However, most of the bathroom sinks use 1 ¼ inch drain pipe. This bathroom sink drain size is precisely the diameter of the pipe instead of the length. For installing the plumbing, You can read in this related article, How to Install Bathroom Sink Plumbing.

    When you visit a real hardware store or plumbing section, the shop assistant will mostly recommend you to use the same size. This size is actually half as big as one on your kitchen sink drain. It is actually an appropriate size for bathroom sink considering that the duty is smaller as well.

    Your plumbing bathroom sink drain will throw away water mostly, or toothpaste and tiny stuffs sometimes. Therefore, bigger diameter of the pipe is actually unnecessary.

    Related post: Best Tips on How to Decorate a Small Bathroom Sink

    Unlike drain pipe on the shower or tub that will be connected to two units, this sink drain pipe will be connected to only one unit on the drain line. Kitchen sink is commonly connected up to two units or three units for one with disposer.

    However with vertical drain stack, this drain pipe size can handle up to two units connection well too. So if you plan to have more than one unit to be connected, stack it vertically.

    Standart bathroom sink waste pipe size

    The Other Bathroom Drain Pipe Size

    Even though the above size is the recommended standard bathroom sink drain size, you are allowed to use other sizes too. There are actually several others alternatives available.

    The first size to consider is 1 ½ inch drain pipe. This is slightly bigger than the standard yet it offers more connections as well. In horizontal stack, this drain pipe serves up to three units connected.

    See also: Cheap Bathroom Cabinet Organizer under Sink Ideas

    Meanwhile in vertical stack, it can work with up to four units connected. It is a custom size on private and public restroom for being practical for two or more sinks.

    The third size is 2 inch drain pipe. This drain pipe can be connected to up to six units in horizontal stack and up to 10 units in vertical stack. This drain pipe is recommended for all models and types of washing machine. So yes, it is perfect for your laundry.

    Related post: How to Unclog Toilet Naturally

    The fourth size is 3 inch drain pipe that can be connected to 20 units in horizontal stack and 30 units in vertical stack. This is the minimum size to use for building sewer or drain pipe that is connected to the toilet.

    The last size is 4 inch drain pipe that can be connected to 160 units in horizontal stack and 240 units in vertical stack. This pipe size is commonly used for sanitary drainage.

    Read also: Bathroom vanity with cooper sink.

    So there are many sizes available. Each offers different ability too. However for bathroom sink, you only need 1 ¼ inch drain pipe or the next size if you insist. Bigger pipe costs your more and it offers abilities you don’t actually need for a bathroom sink.

    Chrome bathroom sink drain smell pipe

    Originally posted 2021-09-24 02:05:00.

  • Awesome Unfinished Kitchen Island Buying Tips

    Awesome Unfinished Kitchen Island Buying Tips

    It may seem just right to you when the price of unfinished kitchen island is far cheaper than the painted one. Automatically, your common sense told you that this type of furniture is not worth buying. Bare wood shows low quality.

    This opinion is wrong! Stain or paint is often applied to cover any crack or holes on the wood before handed to the costumers. This, and some other reasons, set people’s eyes to this item.

    Read also: Rustic Kitchen Island on Wheels.

    Why Buying One Unfinished Kitchen Island?

    First of all, you need to recognize the definition of “unfinished kitchen island”. This term is not signaling for its quality. Instead of its rate, unfinished refers to the absence of last stage of the production.

    This product has not been painted or stained. Instead of being defected, this type of product is in its best condition to buy.

    You, as the buyer, will notice if there is any crooked or broken part. Also, the manufacturers cannot hide the wood and its quality.

    For these reasons, many customers choose this product. Particularly for creative brains, the unfinished kitchen island is just like an empty canvas waiting to be sketched.

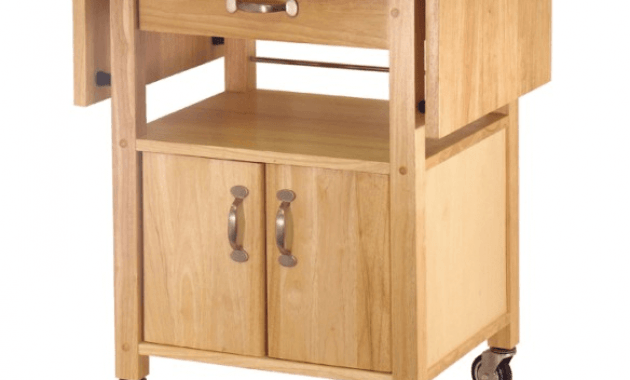
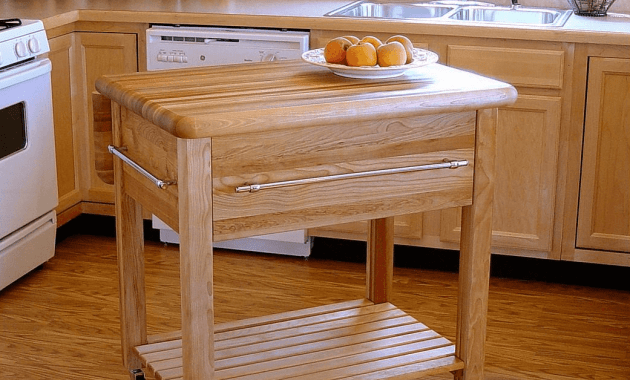
    Unfinished Kitchen Island with seating

    Types of Unfinished Wooden Kitchen Island

    If you compare the design, there are two types of kitchen island: the face frame and the frameless one. The first one has drawers to store kitchen tools such as knifes, spatula, etc.

    It faces to the front, within the arm reach of the cook. Having these drawers installed will be a huge help.

    However, it will leave no space for you to keep things under the island. The second type has no drawers, leaving a spacious interior space under. The frameless design will perfectly fit to the modern kitchen.

    Besides the attractive model, some portable drawers might need to be installed, if you like things to be practical. The image below give you example of unfinished kitchen island with drawers. 

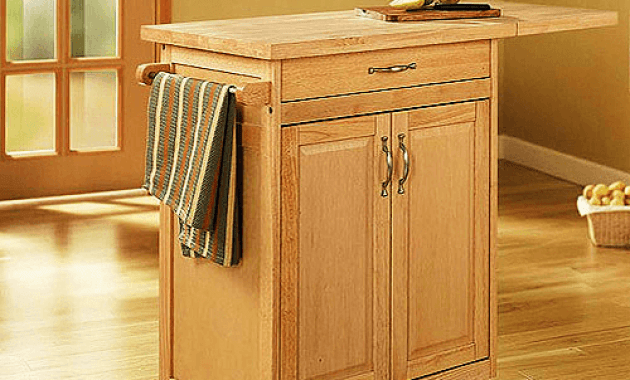
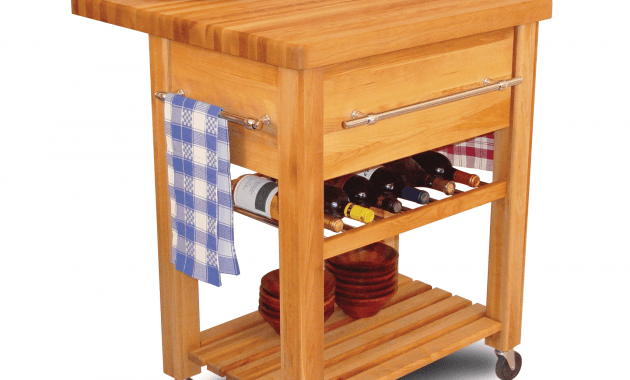
    Unfinished Kitchen Island bases cabinet

    Unfinished Kitchen Island Buying Tips

    The first suggestion is to know better about the material. Wooden unfinished kitchen island is usually made from mahogany, pine, cherry and oak.

    Keep in mind that each of these materials has different stain absorption level. Once it gets dark stain, there is almost no way to make it as light as the new one.

    The only option is to stain the island with even darker paint. If you prefer less maintenance type, then you have plywood materials.

    Wooden kitchen island only use hardwood, with all the consequences. Plywood offers longer durability and better resistance to stain. In the other words, you will perform minimum maintenance.

    Purchasing a new island also means that you are throwing out the old one. If that is the case, then do not forget to visualize the type of kitchen island design you wish to have.

    Consider about the installation, efficiency, and the number of kitchen tools you are going to tuck in. The fastest way to deal with this matter is by choosing similar design to the old one. If “one design, brand new item” could satisfy you, why bother to look for the better?

    Read also: Kitchen Island Breakfast Bar: What Factors to Consider.

    What could be better than an unfinished wood, so clear that you could observe the detail in every corner? Apart from saving some money from your pocket, there are several benefits lines up, only if you could be detailed enough to consider the things above. Happy shopping!.

    Unfinished Kitchen Island Image Gallery:

    SIMPLE TIPS BEFORE BUYING UNFINISHED KITCHEN ISLAND

    Unfinished Island Base Only

    Sometimes, we need to buy unfinished kitchen island base only. Why? if you want to modified the top island. you can choose nice material top kitchen island that you want. Marble top, ceramics, wooden, concrete, or other material for kitchen top.

    Here to sample of unfinished kitchen island without top. Interesting, right!

    Unfinished Kitchen Island Base Only

    Originally posted 2021-09-21 10:31:00.
  • Things about Porch Blinds For Wind And Rain

    Things about Porch Blinds For Wind And Rain

    Why you need porch blinds for wind and rain? Do you just leave your front porch seat to move inside? If it is because of windy weather or dripping rain, why don’t you do something so you could stay longer?

    You could purchase a blinds for your porch and tackle the wind and pouring rain. It is a simple, yet elegant addition for your house exterior.

    HOW TO COVER PORCH FROM THE WIND AND RAIN

    Why Porch Blinds for Wind and Rain Works Better?

    When you do immediate research to find the best blind, you might read this term: shade. It is one similar product like blind, but may not perform well outdoor.

    The first obstacle is the fabric material. It could filter lights, but will shake crazily upon breezing wind.

    As for blinds, its structure has leveled thin layers, allowing the wind to pass easily. You could control the angle and coverage area, too.

    Shades will surely get soaked after rain and without proper drying, the smell will cause another problem. Blinds, on the other hand, only calls for wipe and it will be completely dried.

    Those who love colors and pattern will tend to set their eyes on shades. It has warm tones and plenty of drawings to choose.

    However, this time you should remember what you are dealing with: wind and rain. Thing such as outdoor shades work mainly for blocking the light.

    What Are The Best Porch Blinds for Wind and Rain Options?

    There are three popular blinds that works best against wind and rain. They are the cafe curtains, verandah blinds, and retractable blinds. Each of them has weakness, which should be considered before the actual purchase.

    Cafe Curtain/ Cafe Blind

    Being the first one in the list, this item offers the best protection from water, sun light, and excessive wind. It is made from PVC and available in tinted or clear material.

    Installing the cafe blind will automatically set the barrier between you and the area outside the porch. In addition, cafe blind is the best among the others for durability.

    Verandah Blinds

    Owning an open porch grant you and the passerby access to enjoy what is in store. Keep a little privacy with verandah bliss.

    It covers the area from the ceiling to the floor, but let you see outside through the small gaps. You could dodge the heat, wind and rain while enjoying the vain beauty of surrounding nature.

    Retractable Blind

    This one may not be the most favorite for those who still love to observe the view. It blocks the view as well as 80% of UV rays.

    However, it comes in vibrant colors and water resistant materials. You will get locking brackets in the set, setting the fix place for the blind when the wind comes.

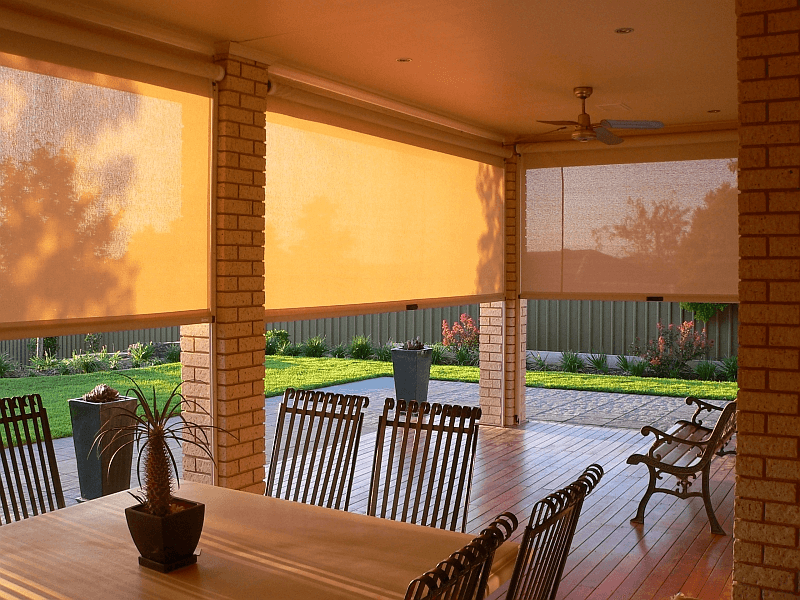
    Porch blinds for wind and rain

    See also: Outside mount blinds with window trim

    Is There Any Porch Blinds for Wind and Rain Installation Tips?

    Awning

    You could extend the protected area by installing awning near the area of screened porch perimeter. Moreover, it will be the sloping side, letting the water falls effortlessly.  Some devices could be retracted.

    Hook

    The lower part of the blind might hang loosely after installation. To prevent to much swaying, attach hook and pull it to the ground. If your blind can’t extend, then tie rope to the hook.

    Porch is a place to admire the nature beauty. Things like wind and rain should not change the whole plan. To fix this problem, you might want to install porch blinds for wind and rain that could block not only overwhelming lights, but also blowing air and dropping water. For its practical use, you pay for fair to low price.

    Front porch blinds outdoor for wind and rain

    Originally posted 2021-09-19 07:30:00.