Blog

  • How to Paint Kitchen Cabinets with Chalk Paint to Look Antique

    How to Paint Kitchen Cabinets with Chalk Paint to Look Antique

    There are so many ways that people can use to paint their kitchen cabinets. One of the ways is by using chalk paint.

    You can also make your kitchen cabinets to look antique using this paint.

    The problem is not all of us know how to paint kitchen cabinets using chalk paint.

    Here are some steps that you may try to make your kitchen cabinets look antique.

    Read also: Kitchen Cabinet Long Island.
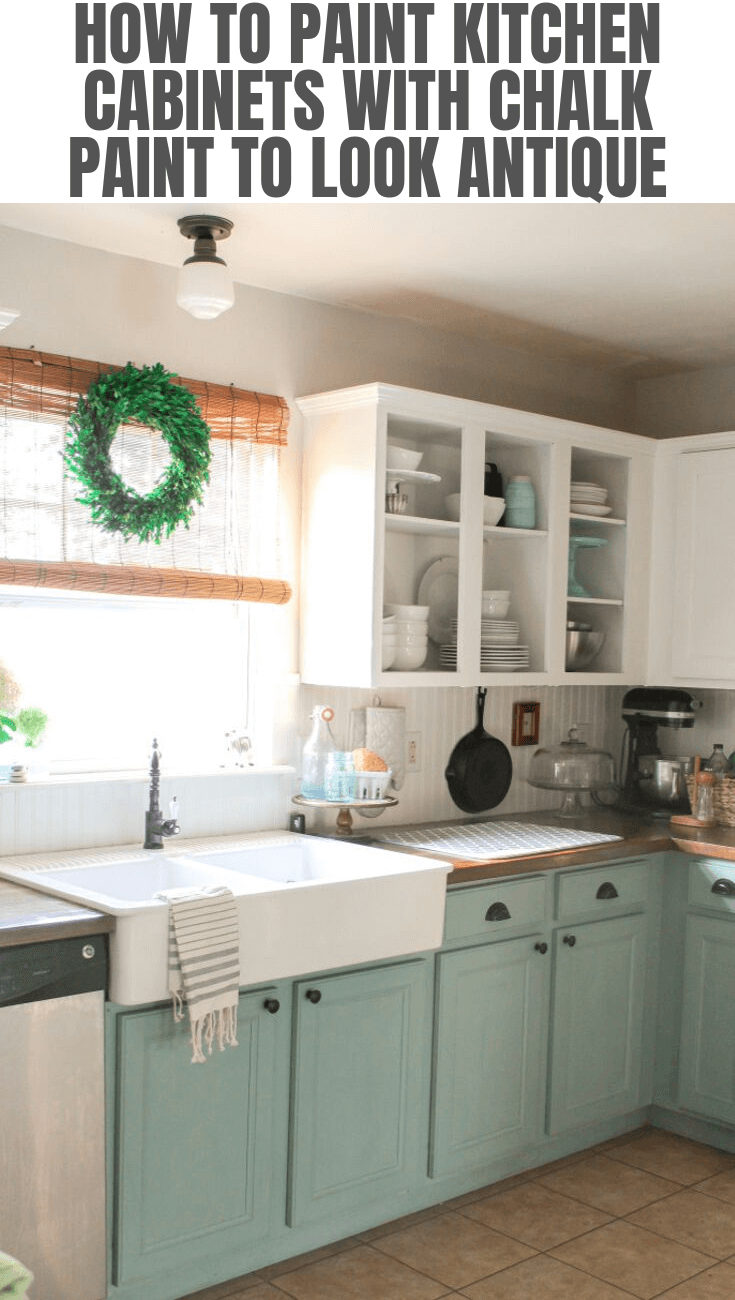
    HOW TO PAINT KITCHEN CABINETS WITH CHALK PAINT TO LOOK ANTIQUE
    Image: ourstoriedhome.com

    1. Wipe Your Cabinets

    The very first thing you need to do is wipe all of the cabinets using a cleaner. You can choose any product that you want. This first step is needed to be done to remove any stain from your cabinets.

    Make sure that your cabinets are also clean from oils and grease before you start the painting. It is suggested that you do this step while the cabinets are still hanging.

    2. Remove All Hardware

    Not only hardware, you also need to take all of the doors and drawers in your kitchen. Keep the hardware in the reachable place to help you find it when you will put it back again.

    Kitchen cabinet chalk paint white color ideas
    Image: slmdesigninteriors.com

    3. Add Enough Coats

    Flip the brush a few times to clean it from bristles. You can try to mix pure white color and old white color of paint as long as you shake them well before you open the can.

    The first coat may look strange but keep it that way because the mixing takes time to work. You will find it works on the second or third coat. Wait until each coat was dry before you put another coat.

    Make sure that you put enough coat to make sure that it really works to your kitchen. Save your energy by working effectively.

    Get antique impression with Kitchen cabinet chalk paint white color ideas
    Image: wenamedia.com

    4. Put It Back Together

    After the surface is painted, it is time to put all things back before you wax all of the drawers, doors and cabinets. You can choose any product of waxing. It is suggested that you apply the wax in small sections, for example 2 x 2 ft. sections.

    Purchase the wax brush to make the process easier and more effective. Dip the tip of the brush only into clear wax and do it in circular motions to get all of the crannies and nooks of your piece.

    Take a rymplecloth and use it to wipe the excess wax off. Your drawers, doors and cabinets should not be coated by wax. We use wax as a sealer only. More than sealing your cabinets, it also gives a wonderful matte appearance.

    5. Polish the Wax

    This can be the step that needs the longest process. You will need to put wax and polish it for many times until you think that your kitchen looks antique enough.

    One thing you should note is an antique look does not always need a long process, so it depends on how satisfy you are about the look of your kitchen.

    Read also: 10×10 Kitchen Cabinet Design Ideas.

    Having an antique look kitchen can be done in so many ways. Those are the steps that you may try if you would like to have an antique look kitchen using chalk painting.

    Red kitchen cabinets with chalk paint

    Kitchen cabinets gallery:

    Originally posted 2019-09-16 05:36:14.

  • 8 Steps How to Paint Kitchen Cabinets without Sanding

    8 Steps How to Paint Kitchen Cabinets without Sanding

    The older the age of your kitchen is, the more scratches and corrosion you will find.

    There are so many things you can do to make your kitchen bright again. One of them is by painting it. Usually we need to do the sanding before start painting. It will surely spend much time.

    Therefore, here are some tips to paint the kitchen without sanding.

    Read also: Kitchen Countertop Paint Color Ideas.

    HOW TO PAINT KITCHEN CABINET WITHOUT SANDING

    1. Removing All Hardware

    You are going need to remove all hardware in your kitchen to make your job easier. Put them in some place near your kitchen, so you can easily reach them whenever you need during the process.

    2. Removing Doors and Drawers

    If you want to paint your entire kitchen, you need to remove your doors and drawers. They will be painted separately outside the kitchen.

    You also have to empty the drawers to keep everything inside it clean, but everything can stay inside the cabinets since the glass will protect them from the paint droplets.

    3. Paint Your Hinges

    Again, if you want to paint the entire kitchen, you need to go until the hinges. You can spray paint the hinges rather than buying new ones. It will save your money. You can also choose the color you want if you spray paint them by yourself.

    4. Patching Any Holes

    It is better for you to patch all holes that you think you are not going to use anymore using spackle appropriately.

    5. Wiping Down

    Before you start painting, wipe down all drawers, doors and cabinet first to remove any grime and dirt. It is recommended that you use Lysol wipes to make it more effective.

    After that, wipe again all the drawers, doors and cabinets liquid glosser. Do not scrub the old finish on your cabinets because it will not look any different after the wiping.

    6. Do the Painting

    If you finish with the wiping, it is time to do the painting. When you already decided the product of the paint, prepare the equipment. Use a paint brush to paint any detail and small parts.

    Then for larger surfaces, it will be more effective if you use a dense foam roller. Make sure that you do not miss every single part of your kitchen.

    7. Applying the Coat

    If you think that your painting is dry enough after some time, it is time to add a high performance coat to all surfaces of your doors, drawers and cabinets. It will make them look brighter. Then after putting the coats, replace your drawers and re-hang your doors once everything is dry.

    8. Attach the Hardware

    Finally the last step is attaching your hardware that you remove at the first step. Put them back in the position and do the last cleaning in your kitchen.

    Read also: How to Stain Wood Cabinet without Sanding.

    Actually, sanding process in painting should not be avoided, but some people just like to paint their kitchen without sanding. Those are the steps that you can try to apply to your kitchen. It will not need any sanding, so you can save your time for another activity.

    How to Paint Kitchen Cabinets without Sanding

    Originally posted 2019-09-15 13:15:44.

  • The Benefits of Using KitchenAid Mixer Glass Bowl

    The Benefits of Using KitchenAid Mixer Glass Bowl

    As one of kitchen equipments, kitchen aid mixer has some crucial parts in preparing your meal or food.

    The problem is when you need to decide whether you are going to use glass or stainless mixer bowl.

    Here are some comparisons that you need to consider before you choose between glass and stainless mixer bowls.

    Read also: Kitchenaid Mixer Care Guide.

    THE BENEFITS OF USING KITCHENAID MIXER GLASS BOWLS

    1. Practical Uses

    Even a kitchen aid mixer can be made of some materials, and each kind of mixer has to be handled differently. In this case, glass mixer will be heavier than the stainless one when you are about to pour ingredients from the bowl.

    However, you can see the ingredient quantity by marking the bowl since you can see through the glass while you will not be able to do the marking on the stainless one because you cannot see through it. That is why you will find glass bowl is more practical than stainless bowl.

    Kitchenaid mixer glass bowl replacement

    2. Expense

    It is not a secret that usually kitchen aid mixer glass bowl is more expensive than the stainless one. As you will find any kind of price range, stainless mixer bowl is still less expensive than the glass.

    Even the most expensive stainless mixer bowl sometime has the same price tag with an ordinary glass mixer bowl which is not categorized as an expensive one.

    There are some reasons behind this price tag. One of them is because glass mixer bowl will match with any design of kitchen. The fact that we can see through glass make it perfect in any design of kitchen interior.

    3. Aesthetics

    Correlating with the previous factors, glass mixer bowl also has an aesthetics point that stainless do not have. Usually stainless mixer bowls are only match with kitchen with vintage style, but it will be strange if you have it in your rustic kitchen for example.

    Meanwhile, glass mixer bowls will match with almost all design of the kitchen because of its transparency. Its transparency will not ruin the design of kitchen that you already have.

    4. Useful Features

    The last but not least, glass mixer bowls have some useful features that stainless mixer bowls do not have. Even some stainless mixer bowls are made with measuring lines that will ease you to follow a recipe. Sometime, the measuring lines do not work really well.

    A different recipe will affect the taste of your meal or food. If you use glass, the measuring lines will work perfectly since you can also see the ingredients through glass.

    Glass mixer bowls provide more various levels of measuring lines which will help you to be more accurate. Glass bowl can also be put into microwave to heat chocolate or butter. It is clearly something that you cannot do with stainless bowl.

    Kitchenaid mixer stainless steel bowl

    Read also: Kitchenaid Mixer Recipes.

    Basically, each type of bowl has its benefits. Being sure of what meal you are going to cook and prepare is actually more important than thinking about what style that will match with your kitchen. It will be much better if you can get and combine both factors.

    Kitchenaid Mixer pictures gallery:


    Originally posted 2019-09-14 05:20:46.

  • Which Kitchen Aid Mixer Size/Dimensions You Like to Use?

    Which Kitchen Aid Mixer Size/Dimensions You Like to Use?

    As one of kitchen aid, mixers are really useful in helping our kitchen’s daily job. We can almost prepare any kind of meal with this kind of kitchen aid.

    To specialize their function, there are some size or dimensions of mixer based on their utility.

    Here are the common dimensions you usually find.

    Read also: DIY Kitchen Island Drop Leaf.

    MOST POPULAR KITCHENAID SIZE AND DIMENSIONS

    3.5 Quart Kitchen Aid Mixer

    The smallest size of a mixer that you will find is a 3.5 quart kitchen aid mixer. With the 3.5 quart size, this mixer is usually used to mix at least 5 dozen cookies in a single batch.

    This size of mixer has 10 optimized speeds that you can control depends on what kind of food you want to mix inside it. Avoid putting too much food because 3.5 quarts are the smallest size of the mixer.

    3.5 kitchenaid mixer dimension mini

    4.5 Quart Kitchen Aid Mixer

    Move to the bigger size, there is a 4.5 kitchen aid mixer. Basically, this size is just a little bit bigger than the previous one.

    This size of mixer will allow you to mix for about 6 dozen of cookies or any other ingredients in a single process. A 4.5 quart kitchen aid mixer also has 10 optimized speeds that you can control in the mixing process.

    5 Quart Kitchen Aid Mixer

    Even it only has 0.5 quart gaps with the previous size, a 5 quart kitchen aid mixer gives a significant difference in the quantity of ingredients you can mix inside it.

    This size of mixer can cook until 9 dozen of cookies or any other food ingredients in a single mixing process. It also has 10 optimized speed control depending on what ingredients you mix.

    Read also: Kitchenaid mixer recipes

    6 Quart Kitchen Aid Mixer

    The next one is 6 quart kitchen aid mixer. With this kind of dimension, you will able to mix for about 13 dozen of cookies and any food ingredients in a single batch.

    Still with 10 optimized speeds, 6 quart kitchen aid mixer also has 10 optional powered attachments to be mixed inside this mixer. It will allow you to mix a lot of food ingredients.

    7 Quart Kitchen Aid Mixer

    With 1.3 powerful horsepower motor, this kind of mixer can handle until 18 dozen of cookies and any other food ingredients in a single mixing. The 10 optimized speeds are supported with more than 10 optional attachments that you can mix inside this mixer.

    7 kitchenaid mixer KSM7586PCA candy aple red

    8 Quart Kitchen Aid Mixer

    The biggest size of a mixer is 8 quart kitchen aid mixer. With this kind of dimension, you will able to mix more than 20 dozen of cookies and any other food ingredients in a single time. 8 quart kitchen aid mixer is also supported with 1.3 horsepower motor and allow you to mix more food ingredients inside it.

    Read also: How to Install Kitchen Island Hood.

    Choosing a kitchen aid mixer that you are going to use will be easier when you are definitely sure about what meal or food you are going to prepare. The most important thing is the quantity of your food ingredients. As long as you count it well, any kind of mixer will support your process.

    Kitchenaid mixer gallery:

    Originally posted 2019-09-14 01:52:47.

  • Kitchenaid Mixer Recipes

    Kitchenaid Mixer Recipes

    Kitchenaid is famous with its mixer and cooking appliances, but who knows that it also provides food recipe on its website? Among these recipes, there are some recipes that need a mixer to make.

    Therefore, these are the best and the most delicious mixer recipe you need to check out:

    Read also: Most Popular Kitchenaid Mixer.

    THE BEST KITCHENAID MIXER RECIPES
    THE BEST KITCHENAID MIXER RECIPES

    Cheesecake Pancakes Recipe

    Have you ever made a cheesecake pancake? It is delicious and fun to bake. To make this recipe, prepare the Kitchenaid mixer, 1 egg, 1 tablespoon of sugar, 250 grams of cheese, lemon zest, 3 tablespoons of all-purpose flour, some berries, some coconut oil, and 1 tablespoon of raisin, thick sour cream and agave syrup.

    First of all, put the egg and sugar into the mixing bowl and whisk it until it is fluffy. Then, remove the hub and replace it with grinder for grinding the cheese. Put the cheese, lemon zest, flour and raisins into the mixing bowl and mix it well until the dough is done.

    After that, take out the dough from the mixing bowl and make it into shape. When you’re done with it, pour some coconut oil into the frying pan and set the fire to medium heat. Then, put the dough into the pan and fry it until the color turns brown.

    Next, make the sauce by heating the agave syrup along with the berries on the frying pan. Pour the sauce onto the pancake and garnish it with some berries. The cheesecake pancake is ready to be served.

    Banana Loaf

    Banana loaf pictures

    Baking a banana loaf is simple, fun, and it will be great to be eaten at tea time. Prepare your Kitchenaid mixer, 2 bananas, 2 Eggs, 3 teaspoon ground cinnamon, 2 tablespoons of milk, 225 grams of self raising flour, 1 teaspoon of baking powder, 190 grams of caster sugar, and 100 grams of unsalted butter. Now, let’s begin.

    First of all, mix 1 teaspoon of ground cinnamon and 30 grams of sugar. Then, sprinkle the cinnamon sugar mixture inside the loaf tin. After that, set the oven to 180 degrees Celsius to pre-heat it.

    Then, mash the 2 bananas and put it into the mixing bowl. Whisk it for a while, then put in the remaining ingredients (eggs, 1 teaspoon of ground cinnamon, milk, flour, baking powder, 160 gram of caster sugar, and the unsalted butter) into the mixing bowl and whisk them up until the dough is done.

    Take the loaf tin and pour the dough into the tin, then distribute it evenly. Sprinkle the remaining ground cinnamon on the dough then put the tin into the oven for 55 minutes. When it’s done, you can serve it together with tea or milk.

    These desserts surely have great taste and texture when it is done. Kitchenaid is not only giving you great offers of their great products but also the recipes as proofs that the mixer products from Kitcheaids can make the baking process easier and faster. Kitchenaid is surely the best solution for your kitchen needs.

    You must have:

    Originally posted 2019-09-13 01:19:43.

  • Artisan Kitchenaid Mixer Mini

    Artisan Kitchenaid Mixer Mini

    Kitchenaid is a mixer and kitchen appliances manufacturer. Kitchenaid mixers are often get great reviews because of the outstanding features and quality.

    Beside the usual mixers, Kitchenaid also offers the mini version of the mixers called Artisan Mini Mixer.

    To find out more about it, check out these following explanations below:

    Read also: Most Popular Kitchen Knife Types.

    Comparison with the Regular

    This mixer is more like the mini version of the Artisan Series 5 Quart Tilt-Head Stand Mixer from Kitchenaid with code KSM150PSER. While the design of this mixer is almost the same as the regular one, it still has some differences.

    The first one is the size. While the regular size has height of 35 cm, width of 22 cm, and length of 35 cm, the mini one has height of 31 cm, width of 19 cm, and depth of 31 cm.

    Also while the regular one is 26 kg, the mini version is only 6.5 kg. Even so, both the regular and mini version has the same speed adjustment of 10-speed modes.

    It means that even if you are using the mini version, you can make your cake with the same speed as the regular one.

    The Specification and Features

    Even if Kitchenaid’s Artisan Mini Mixer has smaller and lighter design than the regular one, it still has awesome specification and features.

    First of all, it is made of durable full die cast metal that promises long-term uses. It also has some colors like black, red, blue, grey, silver, orange, etc.

    Artisan Kitchenaid Mixer Mini - variant of colors

    Read also: Most popular kitchenaid mixer

    The design is simple and elegant, yet it also brings retro atmosphere to the kitchen due to its old-school shape. Like the other Kitchenaid mixers; it comes with a bowl. The bowl can be placed tightly on its place to support steady whisking and kneading.

    The bowl itself is made of brushed stainless steel and it has no handle on it. Even so, the bowl can hold up to 3.3 liters and it can help the mini mixer to mix 8 egg whites and 680 grams of all-purpose flour.

    The hub can also be removed so it can be replaced with the attachment parts like fruit slicer or pasta cutter. This mixer also comes with a mini coated dough hook, a mini flat beater, and a mini wire whisk. It is indeed small, yet it has powerful output of 250 watts.

    The Disadvantages

    If you have never bought the regular ones, then this mixer is worth the shot. But if you have, then you may see some disadvantages right away which is the bowl. It has no measurement marks and there is no handle attached on the bowl.

    The measurement marks are important to measure the amount of water or dough that needs to be put in while the handle is needed to grab the bowl so it will be comfortable to move the bowl around. Also, the beater, hook, and whisk are small. It would be rather tricky if you need replacements due to its size; you cannot replace with the regular ones.

    Kitchenaid’s Artisan Mini Mixer is surely a great mixer even when it is compared with its regular one. it is lighter, smaller, yet it is still powerful. The bowl and the mixer tool size are the only disadvantages of this mixer. Yet, this mixer is surely an excellent choice for your baking experience.

    WHY USE ARTISAN KITCHENAID MIXER MINI

    Originally posted 2019-09-12 02:38:32.

  • Kitchenaid Mixer Parts, Cover, Use and Care Guide

    Kitchenaid Mixer Parts, Cover, Use and Care Guide

    Kitchenaid is a famous brand that manufactures mixer and cutlery hardware.

    What is great from Kitchenaid is that the stand mixers have removable hub that can be replaced with other parts with different uses. The parts are sold separately.

    Therefore, these are the parts and other information of cover, use and care guide from Kitchenaid:

    Read also: Artisan Kitchenaid Mixer Mini.

    The Best Mixer Attachment Parts

    There are many attachment parts for Kitchenaid stand mixers. The parts can be installed by replacing the hub with the attachment part. Among all of the attachment parts, these are the best reviewed parts.

    The first attachment part is Blade Spiralizer with 5 blades which use is to core, peel, and slice fruits and vegetables.

    The second part is a pack of food grinder, sausage maker, and juicer. Simply attach it into the mixer hub and it is ready to be used. The food grinder and sausage maker is provided with food tray on top; makes it easier to process your food.

    The third one is juicer and sauce maker. It is provided with a wide tube; even half-sliced apples can get in easily. It comes with 3 pulp screens; sauce maker, jam maker, low and high pulp juice maker.

    Fourth, there is a grinder called All Metal Grain Mill. This grinder is used to grind low-moisture grains like corn, buckwheat, oats, wheat, rye, and rice. The result texture can also be adjustable; whether you want it cracked or fine-grinded.

    Lastly, there is Pasta Rollers and Cutter Set. This attachment part is consisted of a spaghetti cutter, a pasta roller, a fettuccine cutter, and a cleaning brush for cleaning the pasta remains on the parts.

    Kitchenaid mixer parts diagram

    The Best Mixer Cover

    The best mixer cover is the ones that have great reviews from the buyers. There are some Kitchenaid mixer covers that are considered as bad products due to its size.

    Among all of the covers, there are some that are considered as great covers because they have quality.

    The first one is called Cloth Cover. This cover is made especially for any type of tilt-head stand mixers and it has four choices of color; red, black, grey, and white. It also has pocket on the side to store cards, small book, or even mixer parts.

    The other best cover is called Fitted Stand Mixer Cover. This cover is made of 100% cotton and any tilt-headed stand mixers can fit into this cover perfectly.

    Kitchenaid mixer covers pattern

    Kitchenaid Mixer Use and Care Guide

    Before using the mixer, make sure you read the manual first that there are things you need to pay attention to. The most important thing is the electrical requirement.

    The plug of the mixer has 3 prongs and it has to be plugged into a grounded 3-prong outlet. Removing the ground prong is prohibited. Also, using an adapter and extension cord is also prohibited.

    Violating these guides may lead to electrical shock, fire, and even death. Also, if the plug is damaged, do not plug it into the outlet. Instead, you should call the customer service for help and more information.

    Kitchenaid manufactures many kinds of mixer and other kitchen appliances. It also provides the mixers with attachment parts for other uses and covers for easy-storage purpose. Not only that, Kitchenaid also cares for the customers by giving detailed use and care guide. Kitchenaid is surely one of the best kitchen appliance manufacturers.

    Kitchen equipment gallery pictures:

    KITCHENAID MIXER PARTS, COVER, AND HOW TO USE AND CARE GUIDE

    Originally posted 2019-09-11 05:06:32.

  • 5 Best and Most Popular Kitchenaid Mixer

    5 Best and Most Popular Kitchenaid Mixer

    Who has never heard of Kitchenaid? This well-known brand manufactures great quality mixers for your baking purposes.

    Yet among all of the products, there are some of them that are very popular and these products seem like to reap many great compliments from the buyers.

    To find out more about it, check out these five Kitchenaid mixers below.

    Read also: Kitchenaid Mixer Recipes.

    BEST 5 AND MOST POPULAR KITCHENAID MIXER IDEAS

    1. KSM155GBCA

    This mixer is also known as Artisan Design Series 5 Quart Tilt-Head Stand Mixer with Glass Bowl. This mixer is made of metal that offers durability through years of your baking experience. The visible glass bowl is provided with measurement lines and it also can hold up to 2.37 liters.

    Also, you can adjust the speed from 1 up to 10 speed modes. This product is also able to be tilted so that it would be easier to put, attach, or remove the bowl.

    There are more than 12 attachments, you can purchase separately so your mixer can be used for other cooking purposes.

    Kitchenaid mixer KSM155GBCA

    2. KP26M1XPK

    As for this mixer, it has many choices of colors and it is made of zinc so the durability is great. Then, the bowl can hold up to six quarts and it is made of stainless steel that offers great durability in long term use. The speed can also be changed between 1 to 10 modes of speed.

    The hub can be changed into more than 10 attachments and they are sold separately. By purchasing this product, you will get three different attachments which are Flat Beater, Powerknead Spiral Dough Hook, and Stainless Steel Wire Whip.

    Kitchenaid mixer KP26M1XPK

    3. K45SSWH

    This mixer is categorized as a classic mixer and it looks simple yet elegant at the same time. The bowl is made of stainless steel with no handle and it can hold up to 4.5 quarts.

    It has powerful performance of 275 Watts motor with 10 adjustable and multi-purposes speeds. Like the other products, it can be tilted up and the attachment can be changed.

    Kitchenaid mixer k45sswh

    4. KP26M1XER

    This mixer has simple and thin design which is perfect for small kitchens. There are many color choices that can be chosen. Also, it comes with stainless steel bowl and it has a comfortable handle. The bowl can hold up to 6 quarts.

    Like the other products, it has adjustable 10 speed modes and the attachments can be changed. It also comes with 1 piece pouring shield, wire whip, burnished Powerknead spiral dough hook, and burnished flat beater.

    Kitchenaid mixer KP26M1XER

    5. KSM150PSER

    Among all of the mixers above, this mixer is the best one. It has excellent performance and it is proven from its great reviews that come from so many people all over the internet.

    As for the colors, there are more than 35 colors that you can choose to match your kitchen design. It comes with a 5 quart stainless bowl and it has a comfortable handle.

    Kitchenaid mixer ksm150pser

    The bowl has enough capacity for making 4 loaves of bread and 9 dozens of cookies. Also, there are accessories included by a single purchase which are; 1 Wire Whip, 1 Piece of Pouring Shield, 1 Nylon Coated Dough Hook and Flat Beater.

    Read also: The Benefits of Using Kitchenaid Mixer Glass Bowl.

    These are the 5 best and the most popular stand mixers from Kitchenaid. To find out about the reviews and the detailed information about these mixers, please visit Kitchenaid’s official website. If you are about to choose one, which one of these would you buy?

    Kitchenaid mixer Gallery:


    Originally posted 2019-09-09 01:53:00.

  • DIY Kitchen Island Drop Leaf

    DIY Kitchen Island Drop Leaf

    Moving to a new property is sure thrilling and exciting! As you might learn from your past experiences, having a portable and foldable item would bring a great benefit for many occasions.

    You could set out a bigger table when holding a house warming party. Then, you could also make it big enough to fit the corner space and provide adequate spaces for personal dinner.

    Island kitchen drop leaf sounds just great. What about making one?

    Read also: How to Build 2 Tier Kitchen Island.

    The Materials

    Before jumping into the pleasure moment of cutting and installing, you need to pay a visit to the store and purchase several things: 144 inches of poplars, 212 inches of pine pieces, 612 inches of pine slabs, and 98 inches of three inches pine.

    For the finishing touch, you might also need wood conditioner and stain. Don’t forget to buy a corner bracket and screws to support the folding function.

    Add the sandpaper and adhesive glue to your shopping list. You will need them later to attach and remove sharp edges.

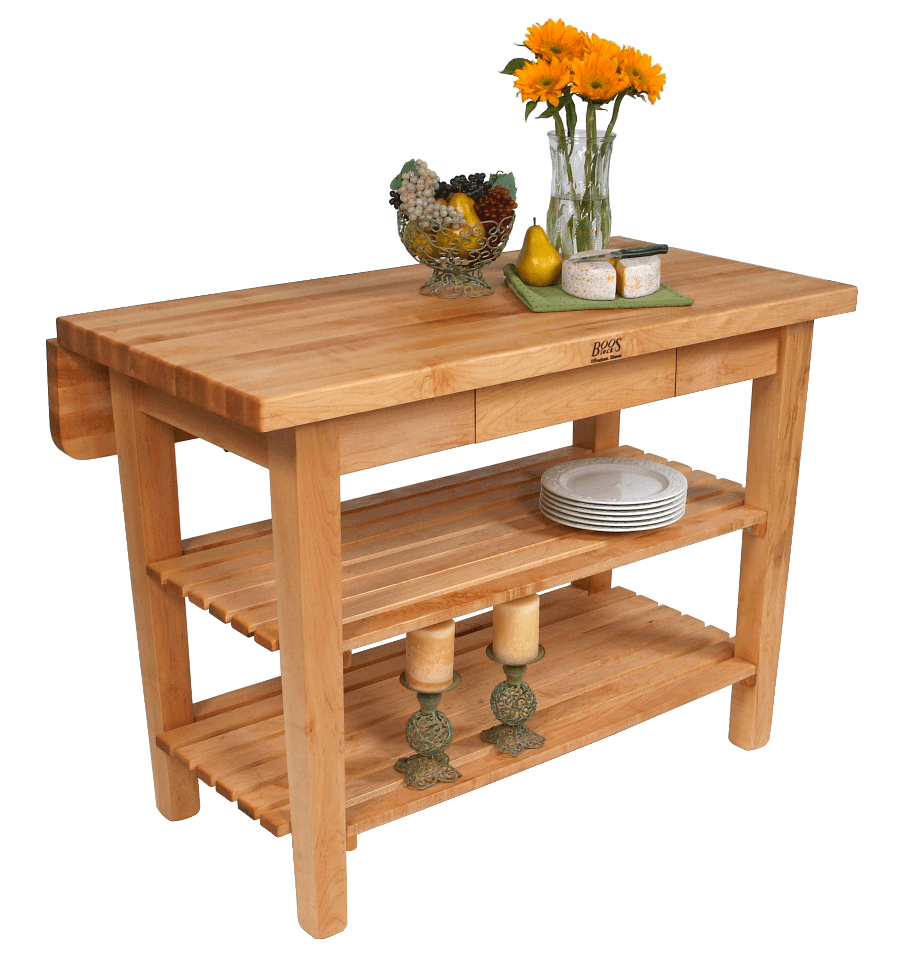
    White Kitchen island with drop leaf breakfast bar

    The Procedure

    In the table making, you only need to cut, assemble and paint the prepared materials. Each steps is explained further in the following section.

    1. Cutting

    Start off with cutting the 144 inches poplars into four pillars. Each of them should measure 36 inches. The 212 inches one is divided into two pieces: four items with 36 inches size, and another four cuts with 17 inches size.

    The 612 inches slab should be equal 17 inches cut. If you do it right, the final product should count to thirty six pieces. The 98 inches pine is cut into 4 pieces: two of them is ten inches wide, and the rest is thirty nine inches.

    You could use saw to cut the thin pieces, and the electric saw if you need more power to divide the thicker wood. After you finish cutting, eliminate any sharp edges with the sandpaper. The final product should have smooth surface.

    2. Assembly

    The first part to put together is the frame. Create two squares with thirty six times seventeen inches. These rectangles would fill the bars inside the leaf table. Attach them together with glue and apply pressure for several minutes to let the glue works.

    Then, take the seventeen inches wide pine to make the bars. One rectangle could fit up to eighteen pines. Next, you can start assembly the rest of the poplars for a standing frame. Then, you can assembly the wood to fit the countertops and side skirts.

    Attach the top butcher with long screws to the frame. The drop leaf wings are then screwed to this main frame with shorter screw. Don’t forget to install the drop bracket under the main countertop.

    3. Paint and Stain

    Here comes the most fun part. You could pick any colors you want, but never forget the layer to prevent any termite. This layer should come first, before applying the layer of vibrant colors.

    The most favored color is dark brown: it emits the natural beauty of the wood itself. Also, it suits in any wall decorations. You might have to give several layers to the wood to get the right shade.

    Read also: Kitchen Island with Cooktop.

    In most cases, things you see in online shop do not fit your personal imagination of a practical item. Instead of remodeling things, it would be less problematic to build one from scratch! The materials are easy to find, and you only need to borrow few architect trick to finish the project. So, what are you waiting for?

    Kitchen island with wheels and drop leaf

    Kitchen island with drop leaf gallery:

    HOW TO BUILD DIY KITCHEN ISLAND DROP LEAF

    Originally posted 2019-09-08 01:28:05.