Blog

  • Clean Oil off Garage Floor Effectively at Affordable Cost

    Clean Oil off Garage Floor Effectively at Affordable Cost

    Oil or grease stains make your garage floor look bad. Moreover, its stickiness to the floor yet slippery on the top texture may also cause falls and hard to clean tracks into your house, and ruin your shoes.

    Cleaning and coating the floor are the step that must be done to make the garage look better. Nevertheless, how to clean it effectively and at an affordable cost?

    Here are the ways that actually work to clean oil of from your garage floor.

    Read also: How to Clean Oven Quickly.

    HOW TO CLEAN OIL FROM GARAGE FLOOR

    1. Pour the Mixture of Ammonia

    Using this way is not too dangerous as you think if it is done correctly. Mix one cup of ammonia to one gallon of water.

    Then, scrub the stains using the mixture of ammonia until it is removed. Rinse the floor after all the steps are completed.

    2. Spray the Oven Cleaner

    Because it has the same function in cleaning the oil stain, the oven cleaner can also be used in removing the oil droppings on the garage floor. Spray the oven cleaner to the spot and let it settle for ten minutes.

    After that, scrub the mess with a bristle broom and rinse it off. If you have a severe stain problem, it will require a second application to clean it.

    Read also: How to clean garage floor for painting

    3. Use Soda

    Soda can also be used in cleaning the nasty oil stains on the garage floor. You only need a few cans of soda. Then, you also need to prepare these following tools: a small bag of cat litter, laundry detergent, bleach, a stiff bristle broom, bucket, rubber gloves, and eye protection.

    The steps are easy to be followed. First, you need to cover the floor with a thin layer of cat litter. Brush it with evenly distributed motion.

    Then, clean up the litter and pour the cola on that spot. Flatten it by using the bristle broom and leave the cola for about 20-30 minutes.

    While waiting for the cola works, mix ¼ cup of laundry detergent and ¼ cup of bleach into 1 gallon of warm water. Finally, clean the mess by the laundry detergent mix and mop it up.

    4. Pour the Mixture of Baking Soda

    This way can be done easily because the tools are easy to find in your house. Mix the baking soda with the laundry detergent.

    Then, add a little water to make it easy in applying to the stains. Scrub the stains with the mixture and let it settle for 20 minutes. After that, brush it with bristle broom and rinse it with clean water.

    5. Spray the WD-40

    WD-40 is usually used for motor oils. This penetrating and water-displacing oil can also be used to clean oil stains on your garage floor. It is simple to be done. Just spray the oil stain spots and brush as necessary. Then, hose it down by water to remove the dirt remains. The garage floor will be perfectly clean.

    Read also: How to Clean Garage Floor for Painting.

    So, what do you think? Do not make your housework harder. By using these simple ways to clean the oil stains off, you will get your garage looks better and faster. In addition, the ways above only use tools that are easy to obtain and they solve your problem at an affordable cost.

    Cleaning tools gallery:

    Originally posted 2019-10-01 00:05:57.

  • Easy Steps: Kitchen Cabinet Hinges Repair

    Easy Steps: Kitchen Cabinet Hinges Repair

    Especially when purchasing old cabinets on sale market, you need to be aware that the hinges might be broken in months.

    This case also happens in an old house with antique furniture.

    Since it is impossible to prevent the loose hinges, the best option is to learn how to repair it.

    Read also: What is a 10×10 Kitchen Cabinet?

    HOW TO REPAIR KITCHEN CABINET HINGES

    1. For Squeaking Hinges

    A great shape cabinet should not make any sound when you open and close them. Unfortunately, the humidity could make rust, thus creating the disturbing sound each time you move the door.

    To solve this problem, you need to clean the hinges and apply some oil. Unless you have time to do regular cleaning every week, be thorough while cleaning. If needed, detach the screws.

    2. For Unbalanced Cabinet Doors

    The culprit of this case is shallow screws. As a result, the hinges are not strong enough to hold the door steady on its place.

    You can easily see protruding screws when opening the cabinet. Support the tilted door to its original position with your left hand. Then adjust the screws with your right hand.

    The most common hinges for cabinet is the Euro type. To adjust, find the depth and side screw. They are nailed on the horizontal bar, attached to the inner board of the cabinet.

    First, you need to lose both screws. Then perfect the position of the door. Hold the door steady while tightening the screws.

    If both cabinet doors have unbalanced position, finish one door first before moving to the other door. While adjusting the screws, use a manual screwdriver instead of cordless drill. The cordless one might do further damage not only to the screws, but also to the cabinet.

    3. For Loose Screw Holes

    When you know that the hinges have problem, the immediate action is to observe the installation. Then you might find that the screw holes are bigger than the screws. No wonder, the hinges cannot work properly to hold the door. To repair this damage, grab screwdriver, hammer, toothpick, and wood glue.

    Start the reparation project by removing the screws on the hinges. Clean both screws and the hinges, since you will re-install them again. Find small cup to put the wood glue.

    Don’t be too generous, the holes are small, pour just the right amount. Scoop the glue with toothpick and push it to the holes. Make it tidy: no glue outside the holes area. If you spill the glue, trim the excess by using knife.

    You don’t need to wait until the glue totally dried. Half-dried is enough; it will help the screws to get fixed position. Adjust the door to its straight position and put the hinges back.

    Remember to tighten the hinges’ grip with screws. Do the same process for another door. Once you are finished, close the door and allow the glue to dry for an hour before use.

    Read also: Rustoleum Kitchen Cabinet Refinishing Kits.

    Weather and humidity are the main reasons for loose hinges. None of these factors could be restricted or prevented. Once you notice that the cabinets are broken, it is suggested to immediately fix them. Ignoring the unmatched doors for too long might result in worse damage. Therefore, mastering the repairing steps is important.

    Kitchen cabinets hinges types:

    Originally posted 2019-09-30 00:52:12.

  • Top 5 Tricks on How to Remove Crayon from Walls

    Top 5 Tricks on How to Remove Crayon from Walls

    At first, it is adorable to see your children developing their talent as artists at home.

    The bad news is you need to clean what’s left on the wall. Will you take it easy and ask your browser to find out how?

    The tips might work, but not all could give you the cleanest result. Find out the ones that perform the best job.

    Read also: How to Clean Smoky Walls or from Cigarette Smoke Only With Few Minutes.

    TOP 5 TIPS HOW TO REMOVE CRAYON FROM WALLS

    1. Blow Dryer and Dish Soap Solution

    First, you need to make a dish soap solution. Squeeze the bottle for a few drops of the dish and mix them with two cups of water.

    Soak the cleaning cloth in it. Now here comes the scientific part. Crayon is made from wax. Thus, the best way to ease your cleaning is by heating it.

    The max will melt and automatically drip from the wall. The next thing to do is wipe clean the melted crayon by using wet clothes you have prepared before.

    2. Commercial Adhesive Removal

    If you to the store and ask for this product, the staff might offer several options: the original, the gel spray, and the wipes. For crayon marks, the original works best. Get your paper towel and pour a few drops of the product.

    Use the wet paper towel to wipe the marks. Repeat the process until the wall is clean. Usually after cleaning, you will get oily surface. Eliminate the grease with a wet clothes, dipped in dish soap solution.

    Commercial Adhesive Removal

    3. Ammonia-based Glass Cleaner

    When you have this product in your stock, make use of it. Not only glass, your wall could also get its bright color back. Spray the cleaner to the walls and let it sit for several minutes. Scrub the wall with dry cloth.

    Do it gently, otherwise the wall color will fade. Repeat the process if your first try is not clean enough. You can also do immediate cleaning after spreading the glass cleaner. However, it will require more time.

    4. Bicycle Lubricant

    There is one famous brand of bicycle lubricant which surprisingly does double function as a cleaner. Usually it is equipped with tiny long straw to reach difficult part in the chain.

    While cleaning the wall, this tool helps to control the liquid amount. Grab the handle and apply the liquid on the crayon mark. Wipe it with paper towel. You can also put the liquid on the paper first.

    The bad news is this product stinks and leave greasier surface than the adhesive removal. If you are not bothered with the smell, then there should be no problem to clean the grease with dish soap liquid.

    5. Baking Soda and Water Paste

    To make the mixture, keep in mind that the proportion should be 1:1. It means one spoon of baking soda should be mixed with one spoon of water. Take the sponge and dab it to the paste. Rub the crayon marks. Baking soda residue on the wall could be cleaned with soapy water.

    Almost all parents have this one problem with toddlers: doodle! It happens in minutes. Although the activity makes them happy, you have to do the hardest part: cleaning the wall. Now you don’t need to worry about this matter. At least you know what to grab. Happy scrubbing!

    Toddler room wall decor

    Originally posted 2019-09-29 02:40:13.

  • What is a 10×10 Kitchen Cabinets? And How Get Cost Under $1000?

    What is a 10×10 Kitchen Cabinets? And How Get Cost Under $1000?

    Kitchen cabinets are known to be able to be replaced. Many people tend to spend a lot of money just to replace their kitchen cabinets.

    Including professional helps, a project of replacing kitchen cabinet may cost about $3000.

    To get cheaper price, you might want to know about these following points first:

    Read also: How to Get the Right Unfinished Kitchen Cabinet.

    HOW TO GET CHEAP 10x10 KITCHEN CABINET UNDER $1000

    What is a 10×10 Kitchen Cabinets?

    The name of 10×10 kitchen cabinets actually refers to the name of 10×10 L kitchens. These kitchens are also called as basic kitchens that are usually being used as sample kitchen by kitchen industries.

    Then, there are 8 up to 12 cabinets that are shown as samples. These cabinets are usually also called as RTA (Ready to Assemble) cabinets.

    The basic pricing of these cabinets is called 10×10 pricing which shows that the price range would be at the most inexpensive. If you are about to buy these cabinets, then you should know that it comes in a set.

    The usual set consists of wall cabinets, blind base cabinets, sink base cabinet, base cabinets, and corner base cabinet.

    The cabinets are made by using maple, oak, shaker, cherry, and birch wood. The usual pricing range of 10×10 cabinets would be about $1,000 and the price can still increase until it reaches $2,400.

    The pricing is called basic pricing, yet the fact that $1,000 is still a huge amount of money will make you think twice to purchase these cabinets.

    10x10 kitchen cabinet layout

    How to Get Cost Under $1000?

    Like what has mentioned before, $1,000 is still a lot of money. Therefore, you can have those cabinets if you are not too picky.

    There is a set of 10×10 kitchen cabinets that you can buy for $999 in the Amazon. These cabinets are made of solid wood and they are pretty durable.

    If you are about to press the price, you might also need to reduce the amount of cabinets that you are about to install for your 10×10 kitchen. If you do this; then instead of buying the whole set, you can buy them separately.

    The cheapest cabinet that you can buy is about $120. If you want to press the budget even more, you might want to buy unused cabinets that have been used before.

    Buying these cabinets would definitely be cheaper. If you want to refinish it, simply buy the cabinet doors for $13 each and repaint it. This will cost you way under $1,000. But if you still want the cabinets to be brand new, you should try looking for oak cabinets.

    Oak is a wood that is used to make cabinets and it is known to have cheaper price than the other wood. There is one set of oak cabinets from a website called kitchencab.com and it costs for about $999.

    Read also: Which Kitchen Cabinet Trim Ideas Do You Choose?

    The basic pricing of $1000 10×10 kitchen cabinets is called as the cheapest price. Yet, there are some clever tricks to press the budget like buying unused cabinets from people who don’t need it anymore then refinish it with new door panel and paint. If you can get the cheapest, why should you buy the expensive ones?

    10x10 white kitchen cabinets

    Kitchen cabinet pictures gallery:

    Originally posted 2019-09-27 10:35:32.

  • Rust-Oleum Kitchen Cabinets Refinishing Kits

    Rust-Oleum Kitchen Cabinets Refinishing Kits

    Do you have the thought to change the look of your kitchen cabinets? If you do, then you should try Rust-Oleum Refinishing Kits.

    Buying these kits would save you a lot of money because you can do the refinish yourself.

    Without further ado, these are the kits and how to apply them:

    Read also: Kitchen Cabinet Door Design Ideas.

    RUSTOLEUM KITCHEN CABINET REFINISHING KITS

    Rust-Oleum Refinishing Kits

    Many people tend to replace the whole kitchen cabinets than refinish them by themselves. This can cost a lot of money.

    For one project, people may have to spend about $6,000 including professional help. But, buying these kits will only cost you $70 up to $90 for each kit.

    Basically, these kits consist of ingredients to repaint your kitchen cabinets. There are two kinds of Rust-Oleum Kits that you can choose; Cabinet Transformation Light Kit (to lighten up your cabinets) and Cabinet Transformation Dark Kit (to darken your cabinets).

    In each box of Cabinet Transformation Light and Dark Kits, you get two bottles of deglosser, a can of bond coat, two small cans of protective top coat, a small can of decorative glass, some scrub pads, some stir sticks, decorative glazing cloth, and manual disc.

    Read also: How to paint kitchen cabinets.

    How to Apply

    Before applying the kits, there are things you should do beforehand. First, you must measure your cabinets’ length. Exceeded length may cause you to buy additional kit due to insufficient paint.

    Second, you need to prepare two paintbrushes, three containers, a dry cloth, rubber gloves, and painter tape.

    Third, empty your cabinets, then remove the cabinets’ doors and shelves. Then, remove hinges from the cabinet doors and keep them somewhere else. Next, cover your kitchen countertops with paper or plastic so the paint won’t drop.

    After that, apply painter’s tape on the side of countertops, on the front edge inside the cabinet, and on the edge behind the cabinet.

    Finally, clean your cabinet doors and carcasses with dry cloth so there won’t be any debris or dust.

    When you are about to use the Cabinet Transformation Light or Dark Kits, then what you should do after cleaning the doors and carcasses is to apply deglosser on them; make sure the surface is entirely covered.

    After that, pour the bond coat inside a container and start painting your cabinet door and carcasses. Do not use a roller and use paint brush instead for perfect result.

    When you’re done, let the paint dry for three hours, then apply second coat layer. After that, pour the glaze in a container and apply the glaze on the cabinet doors and carcasses.

    Then, use the glaze cloth to wipe off the excessive glaze and let it dry for eight hours. Finally, pour the top coat into a container and apply it on the cabinet doors and carcasses.

    Read also: Kitchen Cabinet Toe Kick Ideas.

    Rust-Oleum offers two great kits that will make your kitchen cabinets look more beautiful. The paint coming from this kit is different with normal paints; it is more durable and it won’t peel. Rust-Oleum is simply one of the best brands when it comes to refinishing kits.

    Rust-Oleum Kitchen Cabinets Refinishing Kits

    Originally posted 2019-09-27 01:47:33.

  • Kitchen Cabinet Doors Hinges Types

    Kitchen Cabinet Doors Hinges Types

    Sometimes, the unseen things can be so important. So do hinges. They are rarely seen, but they actually have crucial roles in keeping the balance of your cabinet doors.

    Proper and good hinges can ensure your kitchen cabinet door to live longer. There are so many types of hinges that we can use.

    Here are some hinges types that you can apply to your kitchen cabinet doors.

    Read also: Most popular kitchen cabinet door design.

    KITCHEN CABINET DOOR HINGES TYPES

    1. Blum, Grass and European Hinges

    In Europe, these hinges are considered as the most used cabinet hinges. Their modern forms usually give a complete concealed installation.

    This kind of hinges can be installed on either frameless or face frame cabinet, overlay cabinet doors, inset cabinet doors and partial inset cabinet doors.

    2. Semi Concealed Cabinet Hinges

    This type of hinge can be used for face frame cabinets only. Half hinges are mounted on the back of the door while the other hinges are visible on the face frame.

    This hinge is available in nine choices of colors, allowing you to choose the perfect one for your cabinet doors.

    3. Surface Installed Cabinet Hinges

    This hinge is designed for cabinet with a frame and surface installed hinges. Surface mounted cabinet hinges will also work with any installation which has flushed frame and door each other.

    The entire hinge will be visible from the front side. There will be a concealed type for the surface mounted hinge as well. That is why it is also considered as semi concealed hinge sometimes.

    4. Demountable Hinges

    This kind of hinge will attach with flat insert that fits into a slot cut either for the cabinet or the door. It is also available in two types which are single demountable and double demountable. Demountable hinges are available in overlay and partial inset style.

    5. Youngdale Hinges

    Made in America, this hinge will support overlay doors and 3/8 inch partial inset doors. The hinge is completely concealed whenever the door is closed.

    Youngdale hinges are an excellent alternative if you cannot get the Europe ones and they are easier to be installed. They also work for both frameless and face frame cabinets.

    6. Pivot Hinges for Cabinets

    What makes them different from other hinges is these hinges pivot around at a point, not along at a longer hinge pin.

    Pivot hinges support overlay doors, inset doors and also partial inset doors. You can install some of them as concealed hinges too.

    7. Ball Tipped Butt Hinges

    These hinges are full of mortise butt which designed for cabinet and also feature as decorative ball tips. Ball tipped butt hinges is available in a wide variety of sizes and finishes. This kind of hinges will support both face frame and frameless cabinets.

    Read also: Kitchen Cabinet Door Locks for Safety.

    Choosing the proper hinges for your kitchen cabinet will need some consideration. Therefore, you need to be sure about the type of cabinet you already installed. Once you pick the correct hinges, it will last longer with your kitchen cabinet doors.

    Kitchen cabinet door hinges

    Kitchen cabinet door gallery: 

    Originally posted 2019-09-26 02:23:25.

  • Kitchen Cabinets Door Locks for Safety

    Kitchen Cabinets Door Locks for Safety

    Since you use your kitchen cabinet to save and keep all kitchen equipment, you need to make sure about its safety.

    Not being worried if the things will be stolen, it is more about to keep your underage children from reaching it. That is why you are going to need to apply cabinet door lockers.

    Here some suggestions you may want to consider.

    Read also: Most Popular Kitchen Cabinet Door Design.

    KITCHEN CABINET DOOR LOCK FOR SAFETY

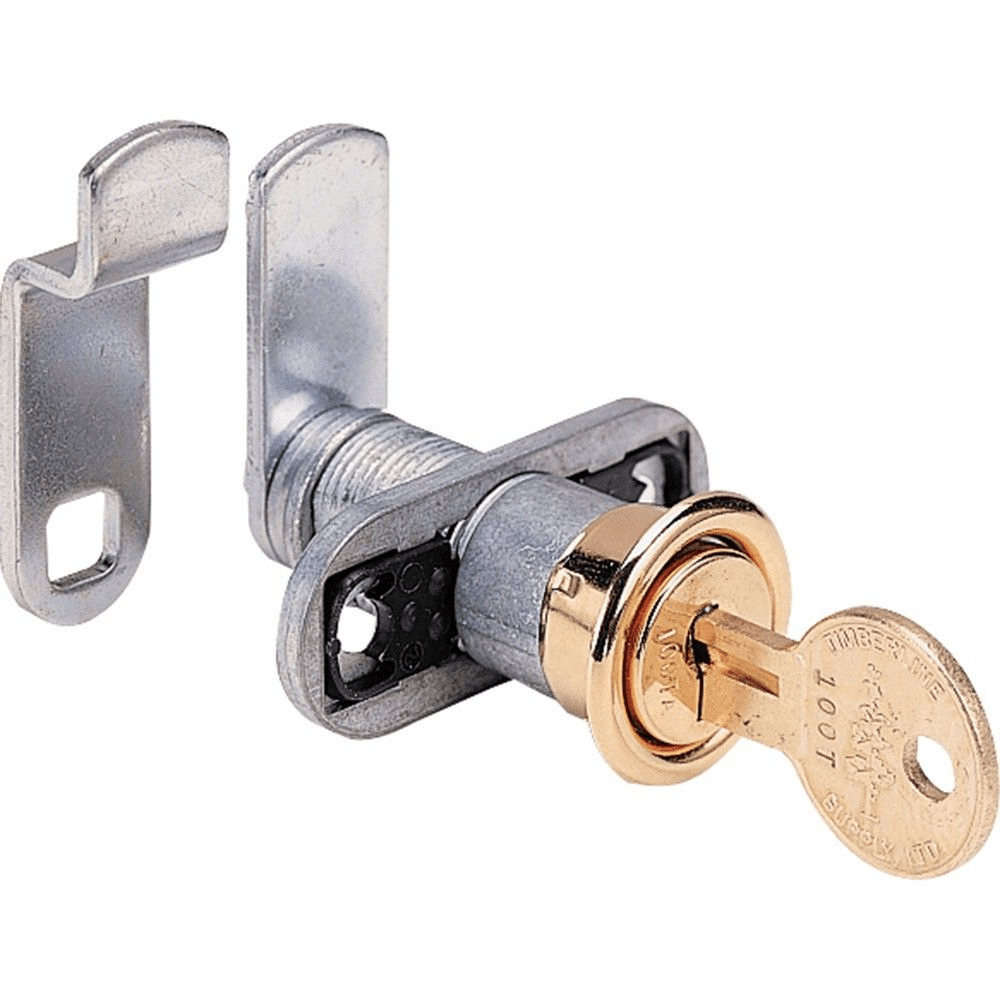
    1. Chrome Drawer and Cabinet Keyed Cam Lock

    This kind of lock is used on wood or metal cabinet doors for security. With one lock, one spur washer, one trim collar, two rotations washers, two cams, two keys and one lock nut, chrome drawer and cabinet keyed cam lock can be installed to ½ inch up to an inch.

    2. Brass Drawer and Cabinet Keyed Cam Lock

    Constructed and designed with steel cams and housing, this door lock will guarantee the safety of your kitchen cabinet. Brass drawer and cabinet keyed lock can be installed to a wood or metal door and drawer with 13/16 inch thick.

    Finished with brass, this door locker includes two keys, two cams, one lock, one lock nut, one rotation washer, one spur washer and one trim collar.

    3. Classic Bronze Cabinet and Drawer Lock

    Made of die-cast and steel components, this door lock is finished with classic bronze. With a 1 – 3/8 inch length which will accommodate to an inch thick panel, this door locker features a ¾ inch outside cylinder diameter.

    Classic bronze cabinet door and drawer lock can be installed to wood and metal doors or panels of drawers. It includes a trim collar, two keys and fasteners, two reversible rotation washers and three cams.

    4. Mortise Cabinet and Drawer Lock

    Come with brass plated finish, mortise cabinet and drawer lock will fit until to 7/8 inch thick panel. It also includes mortise keeper and installation to make sure that your kitchen cabinet will be safe.

    5. Spring Loaded Cabinet and Drawer Lock Mortise

    This kind of cabinet and drawer door spring latch features a beveled bolt which will work for slam to lock function. Spring loaded drawer and the cabinet lock mortise is easy to be installed with its mortise installation design on it. It also includes fasteners and a keeper that can be installed quickly.

    6. Compartment and Brass Drawer Lock

    This is a die-cast lock construction that will fit with a 7/8 inch mortise and also 5/16 inch bolt throw. Compartment and brass drawer lock come with brass plated finish.

    7. Polished Brass Keyed Cabinet Bolt

    Polished brass keyed cabinet bolt has 3 bolt retainers that will offer you flexibility in mounting this kind of cabinet lock. It will work for both swinging and out swinging doors. This lock comes with brass plated die-cast and polished brass finish.

    Read also: How to Paint Kitchen Cabinet without Sanding.

    All parts of your house need to be secured, including your kitchen and especially your cabinet and drawer. Using lock will protect your children from reaching any kitchen equipment that can be dangerous for them.

    Other Kitchen Cabinets Door Locks for Safety:

    Originally posted 2019-09-24 01:27:04.

  • What Type of Cabinets Door Knobs Do You Prefer?

    What Type of Cabinets Door Knobs Do You Prefer?

    For the sake of a good-looking kitchen, there are many people who are willing to focus on every detail of their kitchen.

    One of the small details that you cannot skip in maintaining your kitchen is the doorknobs of your kitchen cabinet.

    From so many types of knob that already existed, here are some lists that you may apply to your kitchen cabinet.

    See also: Most Popular kitchen cabinet door design.

    CABINET DOOR KNOBS TYPES

    1. Steel Knobs and Bin Pulls

    This kind of knob is well-known for its cleanliness and simplicity. You will see so many of them are paired with unadorned and simple cabinet hardware.

    Do not worry about your kitchen style because this type of door knob is so versatile. It will match either with modern or vintage kitchen style.

    This steel knob and bin pulls is often seen being finished with a vintage kitchen style. Normally, knobs are applied on doors and bin pulls are applied on drawers.

    Steel knobs and bin pulls will work well with inset cabinetry with industrial lighting style, stainless steel, and exposed hinges, honed and white marble black countertops.

    Red door knobs for kitchen cabinets

    2. Vintage Glass or Ceramic Knobs

    It will be nice to make some contrast look with the cabinet hardware by using a white glass knob. A vintage style glass sometimes is used as another classic choice for cabinet.

    Although pulls are friendlier for users in everyday use, it may become a great vintage touch if you put knobs on drawers.

    Usually this kind of knob is available with or without a face screw. It also has any variant colors; opaque, transparent and clear as well.

    Vintage glass or ceramic knobs will be suitable with stained wood cabinet, scullery or butler’s pantry cabinet, glass font hutch cabinet, subway tile, until white and black kitchen.

    Glass kitchen cabinet door knobs

    3. Turbular Bar Pulls

    If you have a traditional kitchen style with shaker cabinet, use stainless steel or nickel turbular bar pulls to give a modern touch to your kitchen.

    Turbular bar pulls work equally well on shaker door style, it is even often seen on flat panel or slab doors. This type of hardware can be shaped as short and classic or long and dramatic.

    It is also usually referred as barrel pulls and also offered by most of Hardware Company. Turbural bar pulls have any variants of size and finish which will make them a recommended choice if you need to add a modern touch to your kitchen cabinet.

    This kind of hardware will be matched with rectangular and oversize tiles, skinny and long mosaic tiles, espresso or ebony cabinet and also modern pendant lighting.

    Read also: Most Helpful Kitchen Cabinet Door Stopper.

    Choosing right and proper kitchen cabinet door knobs will not only make your interior look good, but also help you with your daily activities in your kitchen. With many variantions explained above, you can choose which type of knobs that will really suit with your kitchen cabinet. Make sure that the type of knobs you will choose can work well with the kitchen cabinet.

    Kitchen cabinet door knob and pulls picture gallery:

    Originally posted 2019-09-23 15:51:31.

  • Applying the Most Helpful Kitchen Cabinets Door Stopper

    Applying the Most Helpful Kitchen Cabinets Door Stopper

    Since the kitchen cabinets door has important roles, you need to take care of it as well as possible.

    Choosing the design and the type of the door sometimes does not really help the job of the door.

    To maximize its job, you will need to complete the door components, including the stopper.

    Look at some recommendations below:

    MOST HELPFUL KITCHEN CABINET DOOR STOPPER

    1. Satin Nickel Hinge Pin Door Stop

    This door stopper will fit with most of standard door hinges that are usually applied. Using an improved self-adjusting pad, this door stop will help you in preventing any damages to your cabinet doors.

    There will be no fasteners needed and no more holes on your cabinet doors if you want to apply this door stopper. Satin Nickel Hinge Pin Door Stopper is available in six variant of colors.

    Satin Nickel Hinge Pin Door Stop

    2. Satin Nickel Spring Door Stopper

    This next door stopper is really easy to be installed and it will directly give protection on your wall just in a minute. Designed with spring and rubber tip, this door stopper will make sure that your cabinet door is safe from any damages.

    To match it with your cabinet hardware, Satin Nickel Spring Door Stopper is also designed in multiple finishes. It is also available in six colors.

    Satin Nickel Spring Door Stopper

    3. Satin Nickel Solid Door Stopper

    Satin Nickel Solid Door Stopper is really helpful in keeping your door from any damages to wall whenever you open the door. Either your cabinet doors or any other parts of your cabinet will be safe from getting damaged since it has rubber bumper tip to protect the door stopper.

    Made of steel, this door stopper is easy to install and available in seven colors. You do not need any fasteners if you want to use this door stopper.

    Satin Nickel Solid Door Stopper

    4. Satin Nickel Light Duty Hinge Pin Door Stopper

    This pin door stopper is held in places with hinge pin. It will also make a full contact with the opening point of the door because of its self-adjusting pad. This pin door stopper will protect your door from any trims with its oversized mounted bumper that is placed on the adjusting screw.

    With an easy installation, this pin door stopper does not need any fasteners because it is made of zinc. There are three colors available for this pin door stopper.

    Satin Nickel Light Duty Hinge Pin Door Stopper

    5. Satin Nickel Entry Door Stopper

    Constructed and made of aluminum, this door stopper comes in finished brass. In a locked position, this door stopper will protect your cabinet doors by preventing any lock picking and lock bumping.

    It also has a safety child design and will fit with any size of cabinet doors. This entry door stopper is available in only two colors.

    Satin Nickel Entry Door Stopper

    Besides thinking about the look of your cabinets, you also need to think about its condition. You can start by choosing the most proper door stopper to your kitchen cabinet doors. Proper door stopper will keep your cabinet doors from any kinds of damage.

    Originally posted 2019-09-23 02:11:38.