Concrete table top is popular with its durability and it is quite confusing when it comes to How to Clean Concrete Table Top. Since it is popular with its advantage, durability, many people love this.
It is also known as the one that is able to support the outlook of your room in the house, so you can beautify the look of your house by adding these styles and interior into your house.
On the other hand, concrete table top is also known as furniture that is easy to be stained. The reason, because concrete countertop needs regular cleaning.
As a result, for the home owners who has this furniture or even interior should do some regular activity, such as cleaning the dust and remove the stains.
Therefore, since there are many issues that makes people confused, we provide you some best tips and suggestion that will work to your problems. Here they are!
1. Use Soap and Warm Water
The first simple things that you can do by yourself in few minutes is to utilize soap and warm water. These things will work out to your problems, especially in removing stains and keep it clean. Furthermore, I suggest you to choose soap that is liquid one.
The reason because it is easy for you to consider the calculation or even the percentage about the liquid soap. Furthermore, you can add two tablespoons of soap liquid to the warm water. The percentage for the warm water itself is approximately in the medium size container.
After it is ready, you can use cloth or even towel to scrub to the place that need to be cleaned. If it is not enough for you to remove the stains and make it clean, you can do this tip regularly.
2. Use Detergent and Stain Remover
Besides using soap and warm water, you also can try to use detergent and stain remover. These items will help you to remove the stains or even keep your concrete to stay clean.
For the procedure that you can do with these two items is to start by using the stain remover, it is better if you completed it with towel or cloth and then scrub gently into the part that you think is needed to be cleaned. Moreover, you can wait a minute to make sure that the remover is working to clean the stain.
Besides, you can following the detergent into the place that needed to be cleaned from the stains. When you do this step, you can do it with using a towel and even cloth.
The last idea that you can follow easily to remove stains and keep it clean is by using concrete specific cleaning product. One of the is to use PH balanced that is formulated best for concrete’s cleaning stains.
This product is also popular as the product that is able to be used in protecting your concrete for damage. So, it will help you to keep the durability of your concrete.
Last but not the least, those are the best ideas that you can follow easily. On the other hand, you have to make sure that you are responsible to keep your concrete to stay clean and durable. The reason because tips and How to Clean Concrete Table Top will not work well if you are not ever trying to do it regularly.
When you have great furniture in your house, it means that you should have some regular activities in cleaning and taking care of them.
The important to do is Formica table top cleaning. Formica table is known as beautiful furniture to complete the look of your lovely house.
Besides, it is also popular as the well-known brand of countertops that has lots of patterns and styles. Moreover, it is also known as great furniture that is able to beauty your beloved house’s outlook.
However, when it comes to the one activity, that is cleaning, you should make sure that you are able to do it regularly. Particularly, when you want the look of your Formica table top still beautiful and best in its durability.
Therefore, in helping you with this idea we are helping you with some suggestion that you can do by yourself in few minutes. So, are you interested to know more? Here, just read by yourself.
The first idea that you have to prepare relates to the materials that needed by you when you are cleaning your Formica table top. The first tool that is a must is countertop cleaning supplies. Furthermore, you will need other supporting tools, such as: cleaning rags, especially one that is not abrasive, bucket, gloves, wire brush, and even glass cleaner.
These equipment will help you in supporting your activity, particularly in cleaning and taking care your furniture such as Formica table top. If your tools are already completed, you just can go to the next step.
The second thing that you should do after preparing tools is to clear the counter top. You can start by removing some spots by using sponges and use a trusted Formica cleaning to support you in removing the spots.
After it is done, you can go to the next step that is to use a cloth especially that not contains abrasive. Cloth is known as one of supporting tools that is best to be used as the cleaner for Formica. You can add a little liquid detergent on the surface of the cloth and wring it with warm water. Then, you can scrub to the place that need to be cleaned.
Rinse and Dry
After you know those steps, you can go to these two steps. The first one is to rinse the countertop with clean water. If you have already washed it with clean water, you can wash it with cloth or even towel, especially one that is non-abrasive. Furthermore, do not wait until the water penetrates at the Formica table top, but use towel or cloth to keep it away from wet.
We hate to do it, because there is a reason that we have to remember. So, what is that? Formica is known as the furniture that is known with its durability, but when it comes to be wet, it will not stay longer anymore. The reason, because the water that is penetrated to the Formica will cause the layer separates and ruin the countertop.
Briefly, those are the best options that you can do by yourself. Particularly, since it is easy to do and not taking much time. So, remember that cleanness is essential! Do not ever forget to clean your furniture, especially how to Clean Formica table top.
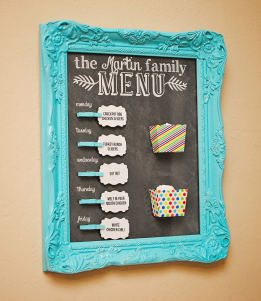
At the end of a packed day, most of us will spend a lot of time to think about the best dish to have for dinner. To ease the planning of dinner menu, we surely need meal plan for the week. This need of having meal plan can create an idea of creating a kitchen decoration which is menu board. It is an easy project to make.
The materials are also easy to find. All you need are plywood, wood coasters, and frame pieces. This menu board could help you plan your weekly meals and thus ease your grocery shopping for the cooking materials. In short, this menu board could really help you get your dinner more organized.
Here are the steps to make it. First, measure the frame pieces and thus cut your plywood to make it fit. After that, you need to paint the plywood using the paint of chalkboard. Meanwhile for the frame, you can have fun with the color. One of great choices for the color of the frame is teal color. You could absolutely go with the color of your choice.
What is the use of the coasters then? Well, they could play a role as the board of writing the days of the week. Those coasters are then stuck to the board. To stick the coasters to the board, you could use liquid nails. In this step, there is an important point to remember which is equally spacing the coasters apart.
To do this job, you could get a help form two yard sticks. What you need to do is simply moving the sticks around accordingly. When you stick the coasters to the board, make sure the nail attach them perfectly so that the coasters won’t fall down.
The next step is writing the letters of the name of the days on those coasters. To write these, you could use a marker with black paint. As we cannot make the board very big, you don’t need to write the name of the days with a complete spelling. Simply choose the first letter of each day of the week to indicate the name of the day. For example, use “M” for Monday, “T” for Tuesday, “Th” for Thursday, etc.
Once you are done writing those letters on the coasters, you could grab your white chalks to start writing the plan for the dinner meal for the week. Now you and your children could easily see what they could expect to eat in every dinner.
This menu board definitely makes the meal planning easier and the grocery shopping hassle free! While this menu board is great for planning dinner meal, this board is also great for organizing schedules for the week, activities, and appointments.
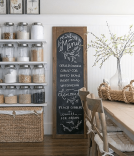
Here are some kitchen menu board design ideas you can try:
Another great DIY decorating idea for your kitchen is a floating shelf. This DIY project is easy and simple. Even you can make the floating shelf quickly. This floating shelf is a nice place to display your favorite plants or succulents or simply any home décor items that you like.
This decoration item will surely be a nice addition to your kitchen especially if you are a plant lover. Besides, this floating shelf will also be a great addition to your kitchen that carries minimalist design with a little twist of bohemian touch.
To make this floating shelf, the materials you will need are scissors, yarn, and round wooden plate with any size depending on the plant or decoration item you want to display,. Yup! You will only need to prepare three materials. They are indeed easy to find in the nearest store!
Now, let’s find out the steps to make it. First, cut more or less 48 yarn pieces. You can go with more number of yarn pieces. After that, make a knot at the center of those yarn pieces. The knot will be the centerpiece of the floating shelf’s hanger. Next, divide all the yarn pieces into 4 equal sections. If the total of the yarn pieces you have is 48 then each section has 12 pieces. Divide accordingly.
The next step will be dividing each section into two equal parts. In here, as each section has 12 yarn pieces, so each part of the section has 6 yarn pieces. After that, twist each part together. Another option for doing this step is to separate the sections into three and then to braid them.
Next, hang the piece in anyplace that high. Then make a knot at approximately four inches under the top. Make sure you make a strong knot. Finally, make another knot at the bottom. Once you make sure that every knot is firm, you can slip the wooden plate on.
After that step, you have many options to give the floating shelf a finishing. You can stain the wooden plate or you can simply the wooden plate in its natural look which is the color of wood. If you prefer to stain it, make sure you choose the right shade so that the floating shelf can match the colors of other furniture or the colors of the items you want to put on the wooden plate. This is just for making a good color harmony.
The very last step is of course arranging the decoration items on the wooden plate. You can arrange succulent planters or other small decoration items on it. Your floating shelf is now ready to add a new touch to your lovely kitchen.
Giving a new decoration item to a kitchen doesn’t necessarily mean spending lots of money to make a purchase in stores. We can simply occupy our creativity to make DIY decoration items to decorate our lovely kitchen.
3. Another Creative DIY Kitchen Decor Ideas
Creative rustic design ideas kitchen shelf with small wooden plate and pipe:
For those of you who like plants, you can try this method. How to make it easy.
DIY kitchen decor ideas with plant pot:
If you like coffee, this kitchen decorating idea will be interesting, coffee cup hangers.
What do you think, is this interesting enough. Let’s be creative with our kitchen. Good luck.
Artistic and Creative Kitchen Wall Art Painting Ideas:
If you want to imitate this idea, here are the tips. For the motif, you can adjust it to your own taste. The tree motif with hanging roots is also interesting, and easy to make. Abstract themes are also interesting. In essence, your creativity is very necessary in this matter.
For a bedroom, the aspect of comfort is the first point to consider in decoration.
Sometimes, people are confused while deciding the best wall color in the bedroom that fits with the furniture inside.
If you already have white furniture, you have a beneficial situation. Why? It is because the wall can be painted on colors as what you want to. Here are some suggestions.
Deep blue color delivers calm mood in the room. It is perfect for you if you are a hard worker or a busy person. Maybe, this color will make your bedroom looks smaller.
However, if you use many small details in it, it will work so well. Bring the white for the coverlet and headboard and give the coral accents that deliver lighter color than the wall. For the finishing touch, suit the color of the pillow and rug. You will feel like in the deep sea.
2. Light brown
Light brown for wall color is also a good choice for soothing and warm atmosphere around the room. In addition, it also gives the bedroom modern design.
For the best option, paint the ceiling white to give a touch of brightness. Then, use a brown coverlet and pillow for the white mattress. The combination and also the minimal decoration in the bedroom make the room looks larger. Somehow, it makes a perfect place for dwelling.
3. Orange
Use the orange color for the wall if you like the exotic one. It is a symbol of creativity and playfulness. Besides that, it also makes you feel warm and calm at the same time.
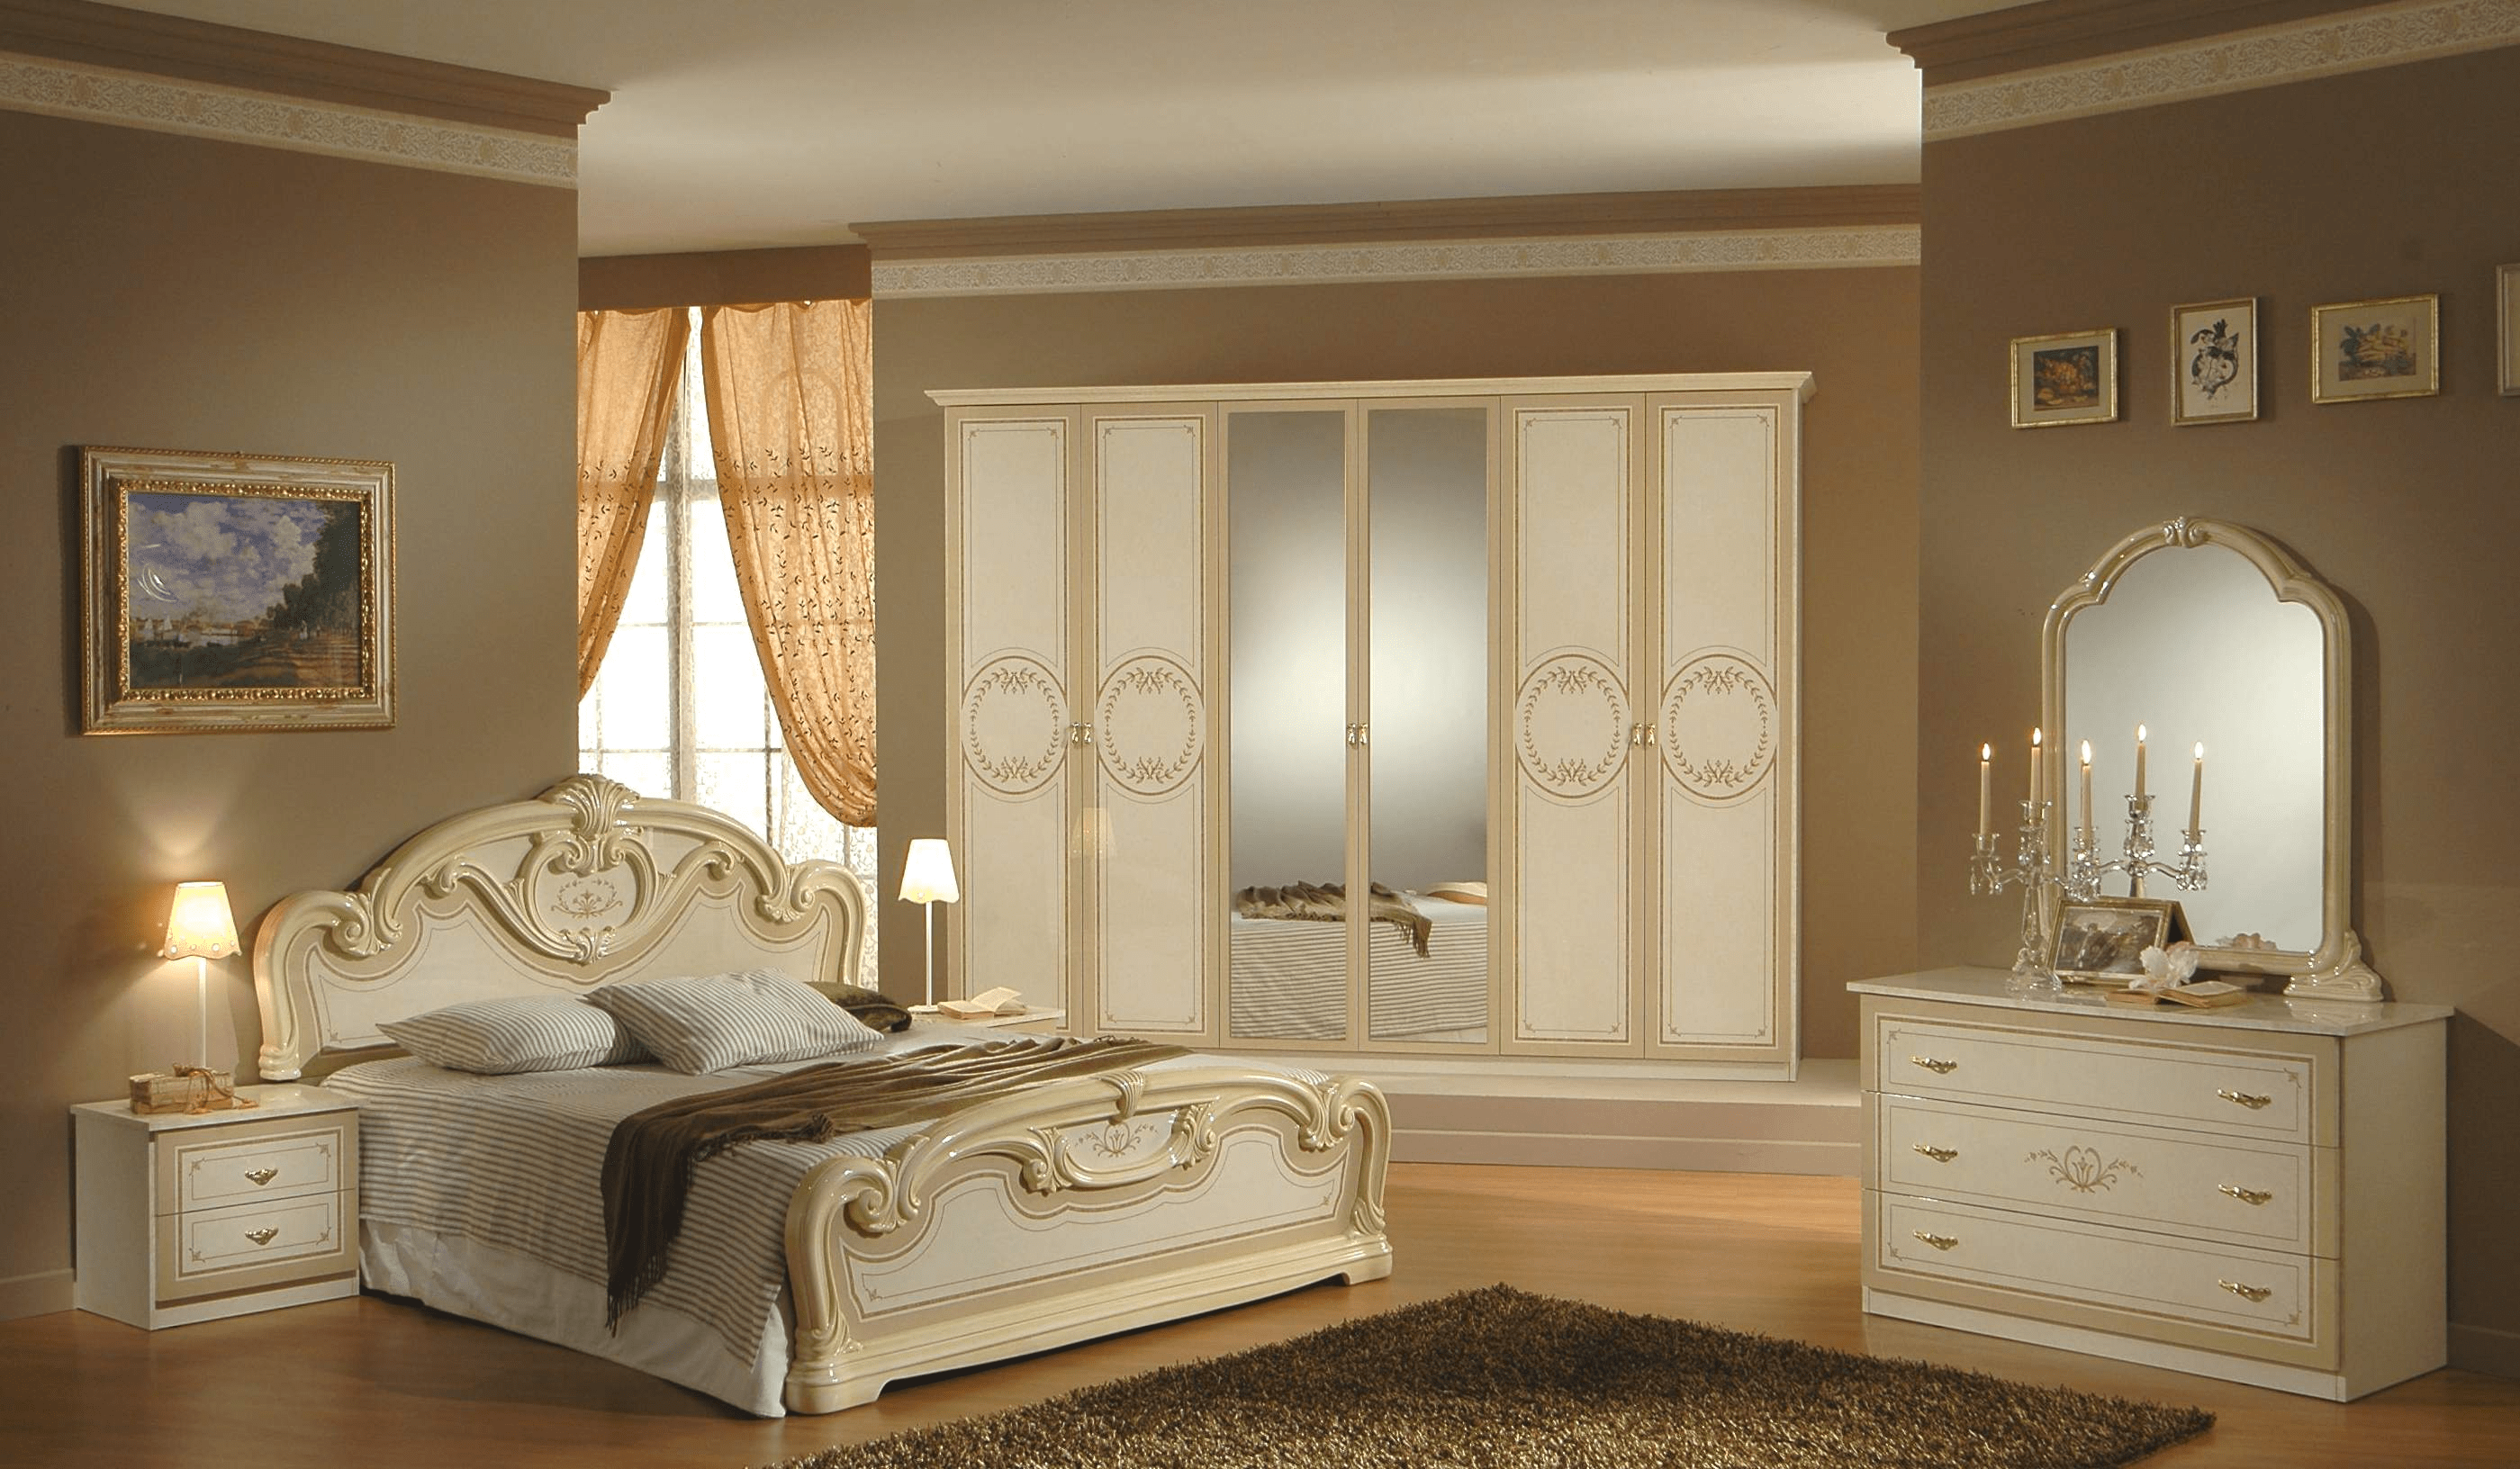
The combination of orange and white bedroom furniture still creates a calming setting while it gives balance to the atmosphere of the room. Give all white colors for the bedroom furniture, and also the coverlet and pillow. Give a little crème accent on the bed cover.
Last, if you have large windows, it will provide perfect natural light to the wall, making it shine even more. Perfect!
4. Light Green
It is perfect for you if you are a nature lover. The green of leaf color will make you warm, like you are in the woods. Combine the wall color with white finish for ultimate result.
Alternatively, white painting for the ceiling will make a decent touch as well. In addition, it will give a touch of brightness. For the perfect result, put a green rug near the bed, and flower accent or another unique structure on the wall.
For the bed and linens, finish it all white, except for the pillow. Give another touch of darker color, such as gray, black, or bold brown. You will feel like in the nature while it feels so roomy.
5. White
The white color of the wall is also a perfect idea. It is perfect for those who like simplicity in the bedroom. Besides that, it gives an ultra-modern look. Give all white finish for the wall and the bedroom furniture. It is perfect if you put small black or metallic accessories inside the bedroom. Flowers like lilies and other small stuffs on bright colors will be a great touch as well. It will give natural freshness and create the modern oasis.
So, these are the suggestions for you to choose for the best wall color. The important is how this wall color is made matches with the bedroom furniture. The color combination also needs to make you comfortable in your bedroom while it remains classy as well. Choose a combination that expresses you the most.
Cherry wood furniture is known for its elegant craft and its glamour looks. The color of the furniture itself is difficult to be mixed due to its dark-reddish brown color.
To balance bedroom color with cherry furniture, it is better to mix it with creamy, warm, cool, or dark colors to make the bedroom more comfortable.
But if you still confuse about question about, what color bedroom furniture should i get?, maybe you need read this explanation. Keep reading.
1. Oil based vs. Water Based
Before discussing about the colors, the color base needs to be chosen first. By using oil based colors, the wall will have attractive gloss with a smooth finish and it becomes durable too.
By using water based colors, there are a few advantages. First, the painting will be easy to be cleaned up by using water. It dries quickly and it has resistance to cracking. In addition, it has low levels of toxic emission too.
2. Creamy Milk
Cream is a beautiful color, it shows simplicity yet warmth. Cream is yellowish white. It is whiter than yellow. Do not choose cream paint with more yellow or it will not mix well with the cherry furniture.
It is better if you choose creamy white. Not only simplicity, it also shows elegance that is compatible with cherry furniture’s dark-reddish color.
3. Warmth without Harm
As for warmth color, beige is the best color. Coloring your bedroom wall beige will make your bedroom looks like it is filled with harmony while it also looks comfortable.
Beige helps to balance the dark color of the cherry wood, but installments like windows are needed for lighting. A beige colored room would feel bland without sunlight.
4. Cool, Calming Colors
Blue is also a nice color for a bedroom with cherry furniture, especially Sleepy Blue. Sleepy Blue is blue with bright color, giving a vintage look when mixed with cherry wood furniture.
The dark-reddish brown on the cherry wood is balanced with it, yet it would be better to add mirrors or furniture with bright color to give the bedroom not only vintage look but also calm, beautiful, and girlish touch.
5. Dark Slumber
The most important thing is to make the bedroom as comfortable as possible, choosing wrong dark colors for the bedroom may turn it gloomy.
The recommended colors are dark-greenish gray, navy, and dark gray. Never use black color unless you use normal beds. Dark-greenish gray gives soft looks for the bedroom.
It would be better if you put some plant decoration and other furniture like a mirror with wood-material frame to create natural and down to earth look.
Navy is also good to be mixed with cherry furniture, but it needs to be noted that not all of the bedroom wall need to be painted navy. It could be mixed with creamy white to give it a clean look.
Dark gray would give the bedroom peaceful look as well. At this point, it will be better if it is applied on the wall of smaller bedroom or the peaceful look could not be shown.
Colors on the wall of a bedroom build looks and nuances that can look different depending on your creativity in arranging them. Whether you put creamy, warm, cool, dark colors, or other furniture, the looks and nuances of your bedroom is yours to choose. Make sure your choice delivers your mood best.
Having a beautiful and wonderful house is a dream for every person in the world.
It means, not a few people are dreaming to have a beautiful house and of course, able to set based on their likes.
However, when they are having a chance to have a great house, most of them tend to confuse, especially in taking care of them.
As a result, many of their furniture, design; such as interior design or even exterior designs, and other stuffs are abandoned.
The things that should be beautiful and able to attract people is no longer beautiful, because the owner is cannot take care and even maintain the beauty of their house.
A sad thing, is not it? Nevertheless, do not be worry or even confuse to take care all of those designs and furniture in your lovely house.
The reason, because we will help you in providing some good tips that simple and you can do by yourself, especially in cleaning the concrete walls before painting the walls. So, are you interested to know more? Here they are!
Large concrete wall tiles for bedroom
1. Things that You Need to Clean
Before going to the next step of the cleaning times, you have to prepare some stuffs and items! Especially all of them that is able to support your cleaning section. So, are you ready to clean and throw all of dust and mold?
Furthermore, you will need some stuffs; such as bucket, rubber gloves, eye protection to protect and avoid the bad chemicals to your eyes because here we are going to use Trisodium Phosphate that will used as the liquid cleaner.
Moreover, stiff brush or scrub brush is also needed to brush and clean the concrete walls later. Furthermore, plastic sheeting is also important, especially that you can use to cover your floor, and the last thing is you will need powdered dish detergent or half cup of chlorine bleach and non-ammonia dish soap that later can be used as the cleaner agents for your concrete walls.
Concrete wall art ideas
2. So, How to Deal with Those Stuffs?
So, let us see and discuss together, how to deal with those stuffs that we already prepared to clean our concrete walls. The first thing that you can do is to make sure that you already covered the floor with plastic sheeting. It will help you to avoid the dirt that can be happened into the floor.
Besides, you also can start to take the vacuum cleaner as the best stuff to clean the concrete walls first, especially in cleaning the place of your concrete walls that is hard to reach. This stuff will help you to work quickly and well for dusting off the walls. Moreover, other things that you should prepare is to fill the water or around one gallon with water into the bucket.
If it is done, now let us add quarter non-ammonia dish soap into the water that you already prepared before in the bucket. Make sure that the water and non-ammonia dish soap is already mixed well. To make the best result in cleaning the concrete wall that is not already painted, you also can add another bucket that you should fill with warm water.
The next step that you can do is to wring the rag and then try to wipe down your walls. Next, you can use a stiff or scrub brush with water that you already filled with soap to scrub the walls. Do all of the steps until concrete walls clean and then wash it all with warm water or with half cup of chlorine bleach to make sure that the walls is already cleaned.
In brief, those all the simple ways that you can do. You will not need to find any difficulties because it is easy to do. Happy cleaning!
Not a few people already applied this style, cubicle walls, at their home.
As a result, not only offices that has these styles, because today’s era are love to apply the minimalist one into their part of the house.
The reason, because the minimalist styles are unique and able to give the owner of the house to maximize the function of their houses in a very good way.
Besides, not only best for minimalist house and help the owner to maximize the spaces, cubicle walls also great to be used as the office space that can be designed with some beautiful and simple partitions as the comfortable workstations.
However, most of people or the owner of the house tends to confuse when they are trying to clean cubicle walls and it does not mean good because this place can be an attractive one at your house. Therefore, in helping you with that case, we are providing you some tips.
Remove All the Stuffs from Cubicle Walls
The first tip that’s best for you to clean your cubicle walls is to make sure that you already removed all the stuffs form your cubicle walls. The reason, because cluttering is the beginning step that you have to do in all cleaning process. Besides, to make sure you do the next step, please put out all the stuffs or even items that is adhered in your cubicle walls.
Furthermore, it is also good for you to choose the use and unused stuffs and put them all, especially if it is no longer used you can put them all into the trash. Please remember that cleanness is everything! Without cleaning, your precious or even wonderful things only a thing that is left over.
Moreover, you also have to remove the items for the space that is mostly used by you. Make sure that all of the items that needed are put in the right box or other place that you think it is easy to get and access.
In addition, you also can separate the stuffs or even the items in different box or place based on their purposes. If this beginning step is already done, it means that you are ready to go to the next step!
Do Vacuum as the Main Step to Clean
The second step that you can do is to do vacuum as the main idea for you to clean. You can use vacuum cleaner first as the best idea for you to clean the cubicle wall before do clean the walls with scrub brush. This step, do vacuum, is the greatest idea for you to clean your cubicle wall, especially since it helps you to remove the dust that already accumulated and hard to get.
In addition, I suggest you also to take and start at the top of the wall first. It will help you to make sure that the top part of your walls were already clean. Then, you can go downwards slowly. Make sure that all of the accumulated dust is already gathered in the vacuum.
Use a Mild Liquid Detergent For Better Results
The last step that we suggest is to use a mild liquid. You can combine it with water and put the quarter cup of liquid detergent to the basin that you already prepared. If the detergent is already done, you can use brushes to clean the part of the cubicle walls that you think still need to be cleaned.
In brief, those three are three simple and best ways that you can do to clean the cubicle walls. Make sure that you do in circular motion. Happy trying!
Cigarette smoke becomes most of problems for the owner of the house, especially when there are some family members who are smoking in the room.
It will leave and collect the bad air and even bad odor that actually bad for our health and sniffing.
Besides, not only give the bad effects for our health, the cigarette smoke also causes a yellowish tar and even nicotine discoloration that will make the look of the wall not good. The reason because it will harden with the times.
Moreover, other disadvantages of cigarette smoke are also able to make the room and all the furniture smells bad.
However, do not be worried because there are some ways that best for you to remove the noxious smell and even remove the stink from the walls by using some natural ingredients. Here they are!
White Vinegar and Baking Soda to Remove the Bad Smells in Your House
Not a few people already knew that white vinegar and baking soda are one of many natural ingredients that best to remove the nasty smell in your house or even to your wall.
Many people already do their experiments by using these natural ingredients, especially when they know that the ingredients that vinegar and baking soda has is acetic acid. It is used to kill the microbes and fungi. As a result, it can be used as the effective cleaning agent, particularly to clean products.
By using white vinegar or even baking soda, you can save your times to do another thing because this is not taking too much time. The only thing that you have to do is to put out your ceiling, carpets, the coverlet of your chairs or couch, curtains, and other stuffs that related as the bad sources for the smelly room and wall.
After you already put out those stuffs, you can go to the next steps that is to put them all in the large washing machine.
Furthermore, if it is done, you can give the vinegar with 2 cups only to be added to the load.
Besides, you also can do with the same methods as vinegar to the baking soda to clean all those stuffs that becomes the sources of bad smells in your house and walls.
Ammonia Method
As we know, vinegar and baking soda are the best ingredients to clean everything. One of them is to clean all of those stuffs like what I have mentioned before. However, it is also good for you to know that vinegar and baking soda can be used as the wall scrub to clean the smoky walls.
So, in this section we are going to tell you how to use ammonia to clean your smoky walls. Especially since ammonia is well as the household cleaner.
The reason, because ammonia contains dilute ammonium hydroxide and ammonium hydroxide that is popular as the best cleaning agents, particularly to clean the yellow color such as the residue of cigarette smoke.
In using ammonia, you can combine a tablespoon of ammonia or even put a half cup of ammonia to your gallon that is already filled with warm water.
Moreover, if you have painted walls, you can use with a quarter cup to gallon with warm water. If it is done, you can wipe to the walls directly and then wait for a minute after you finished.
Don’t take much time to wait it because the wall should not absorb much water, then you should dry it with a microfiber. It is better for you to dry it with some fans also or even open the window and door to help the wall dry immediately.
Briefly, those all are the best ways that you should try. If the cigarette smoke still has nasty smells, you can repeat all of those methods. To give the best results do not forget to let the wall dry and wash it.
Let’s be real—home décor upgrades can feel like a total wallet-buster. But here’s the good news: giving your home a glow-up doesn’t mean you have to max out your credit card. With a little creativity, some elbow grease, and a few clever tricks, you can seriously refresh your space without spending a fortune. So if you’ve been itching to change things up, here are some cheap ways to upgrade your home décor that are totally doable (and fun too!).
🎨 Paint Can Fix Just About Anything
Alright, if there’s one thing that can totally change a space on the cheap, it’s paint. You don’t need to go wild and paint the whole house. Sometimes just adding a pop of color to one wall or refreshing a tired old chair is all it takes to make things feel new.
Quick paint ideas:
Go bold with an accent wall in the living room or bedroom.
Freshen up old kitchen cabinets—trust me, they’ll thank you.
Use painter’s tape to get creative with stripes or geometric shapes.
Spray paint thrifted items (like vases or lamps) for a mini glow-up.
“Paint is basically magic in a can—and it’s way cheaper than buying all new furniture.”
🖼️ Dress Up Your Walls Without Going Broke
Bare walls can make a place feel… blah. But fancy art prints? Yeah, those price tags can be scary. Good thing you don’t need to spend a lot to give your walls some personality.
Wall décor ideas that won’t drain your wallet:
Frame pages from an old book or calendar.
Print free high-res art online (seriously, there’s so much good stuff out there).
DIY some abstract art—no art degree required.
Hang baskets, mirrors, or even hats for a fun mix.
Gallery walls are a vibe. Mix up different sizes and frames and let your personality shine.
💡 Mood Lighting Makes a Big Difference
Lighting can change everything. You’d be surprised how much cozier your space feels just by swapping out a lamp or adding a warm bulb.
Light it up, budget-style:
Stick-on LED lights under shelves or cabinets? Game changer.
Replace old lamp shades with something more modern or funky.
Try string lights in your bedroom or balcony for some chill vibes.
Add dimmer switches if you wanna control the mood.
Fairy lights = instant magic. Trust me on this one.
🪴 Plants Are the Ultimate Cheap Upgrade
Plants are like the cool friend who makes everything better. They add color, life, and good vibes—and you don’t need to spend a ton to enjoy them.
Plant ideas (even if you don’t have a green thumb):
Start with pothos or snake plants—they’re basically unkillable.
Propagate what you have (free plants, hello!).
Use cute mugs, jars, or cans as pots.
Create a little herb garden in your kitchen.
Here’s a quick cheat sheet for budget-friendly plant picks:
Plant
Light Needs
Water Needs
Budget-Friendly?
Pothos
Low to medium
Weekly-ish
✅
Snake Plant
Low to bright
Every 2-3 weeks
✅
Spider Plant
Medium
Weekly
✅
ZZ Plant
Low
Every 2-3 weeks
✅
They make your space look like you have your life together—even if you don’t.
🛋️ Move Stuff Around and Boom Instant Upgrade
This might sound too easy, but hear me out: rearranging furniture can seriously change the whole feel of a room. And the best part? It’s completely free.
Rearranging tips:
Angle your couch for a more open feel.
Center your furniture around a window or fireplace.
Swap rugs or chairs between rooms.
Clear the cluttered corners and make things feel fresh.
It’s like giving your home a new layout without lifting a hammer.
🧺 Pretty + Practical Storage? Yes Please
Clutter is a total vibe-killer. But here’s the trick: use storage as part of your décor. You can tidy up and make things look cute at the same time.
Cheap storage ideas:
Fabric bins are perfect for hiding stuff (and they look good too).
Repurpose wooden crates into shelves.
Old ladders make awesome blanket racks.
Hang baskets on the wall to hold mail or accessories.
Form and function? We love to see it.
🛏️ Soft Stuff = Cozy Upgrade
Swapping out your textiles is an easy win. Throw pillows, blankets, rugs—those little things can totally change the vibe of a room.
Textile swap ideas:
Just switch the pillow covers—not the whole pillow.
Add a chunky throw at the end of your bed.
Layer small rugs for a fun, cozy look.
Switch up your curtains for something lighter or more dramatic.
You’d be amazed what a different pair of curtains can do. Instant mood changer.
🪞 Mirrors = Light + Space Without Renovating
Mirrors aren’t just for selfies—they’re sneaky little space-makers. They reflect light and make your room look way bigger than it is.
Mirror magic:
Hang one across from a window to bounce light around.
Group a few smaller ones for a funky gallery effect.
Prop a floor mirror in your bedroom—instant drama.
Bonus: You get to check yourself out more often. Win-win.
🧽 Declutter First Then Decorate
Sometimes, the best upgrade is just getting rid of stuff. Seriously—cleaning and organizing can make your space feel brand new.
Get your declutter on:
Tackle one room at a time.
Donate or sell stuff you haven’t touched in months.
Keep surfaces (like your coffee table or nightstand) clean and clear.
Store seasonal stuff away to avoid that cluttered look.
It’s free. It’s satisfying. And your home will instantly feel lighter.
🖐️ Get Crafty With DIY Projects
If you’re even a little handy (or just like hot glue guns), DIY is your best friend. There are so many cool projects that don’t cost much but look amazing.
Easy DIY wins:
Build your own shelf with scrap wood.
Make a candle holder out of a wine bottle (classy and eco-friendly).
Turn an old drawer into wall storage.
Create art with washi tape, pressed flowers, or fabric.
You don’t need to be Bob the Builder—just YouTube a tutorial and go for it.
🧴 A Good Smelling House = Instant Cozy
Let’s not forget scent. You can make your home look great, but if it smells like last night’s takeout, the vibe’s off. Good news: making your space smell amazing is super cheap.
Budget-friendly scent fixes:
Simmer water with lemon and herbs on the stove.
Use essential oils in a diffuser (or make your own).
Make DIY air fresheners with baking soda and oils.
Freshen up your couch and curtains with a fabric spray.
The nose knows, y’all.
✨ Little Swaps That Add Big Charm
It’s the little things. Seriously, some tiny décor changes can have a huge impact—and they’re usually super affordable.
Tiny upgrades to try:
Swap out old cabinet knobs or drawer pulls.
Add a decorative tray to corral your coffee table clutter.
Update your soap dispensers, towels, or coasters.
Add a fun clock or vase as a statement piece.
Sometimes all it takes is one or two little swaps to totally lift a room’s vibe.
Final Thoughts
Upgrading your home décor doesn’t mean you have to go broke or spend months on a renovation. With a few smart moves and some fun little projects, you can completely refresh your space—and actually enjoy the process too. Whether it’s moving your couch, throwing some paint on the walls, or lighting a scented candle, these cheap ways to upgrade your home décor are proof that a big impact doesn’t have to come with a big price tag.
Important Note:Before you buy anything, take a good look around—sometimes all it takes is seeing your space with fresh eyes (and maybe moving that lamp to the other side of the room).
Now go ahead—grab that paintbrush, fluff those pillows, and show your home some love. It deserves it. 💛
Manage Cookie Consent
To provide the best experiences, we use technologies like cookies to store and/or access device information. Consenting to these technologies will allow us to process data such as browsing behavior or unique IDs on this site. Not consenting or withdrawing consent, may adversely affect certain features and functions.
Functional
Always active
The technical storage or access is strictly necessary for the legitimate purpose of enabling the use of a specific service explicitly requested by the subscriber or user, or for the sole purpose of carrying out the transmission of a communication over an electronic communications network.
Preferences
The technical storage or access is necessary for the legitimate purpose of storing preferences that are not requested by the subscriber or user.
Statistics
The technical storage or access that is used exclusively for statistical purposes.The technical storage or access that is used exclusively for anonymous statistical purposes. Without a subpoena, voluntary compliance on the part of your Internet Service Provider, or additional records from a third party, information stored or retrieved for this purpose alone cannot usually be used to identify you.
Marketing
The technical storage or access is required to create user profiles to send advertising, or to track the user on a website or across several websites for similar marketing purposes.