Author: Taufiqul Hasan

  • DIY Wooden Crate Ideas for Rustic Home Decor

    DIY Wooden Crate Ideas for Rustic Home Decor

    Why so many people are obsessed with crate DIY projects? First, it could literally turn into any house furniture or decoration.

    In the other words, unused crate is a perfect object for creative exploration.

    It also has lower price compared to the newly bought one. In addition, making some of the furniture by yourself could give personal touch.
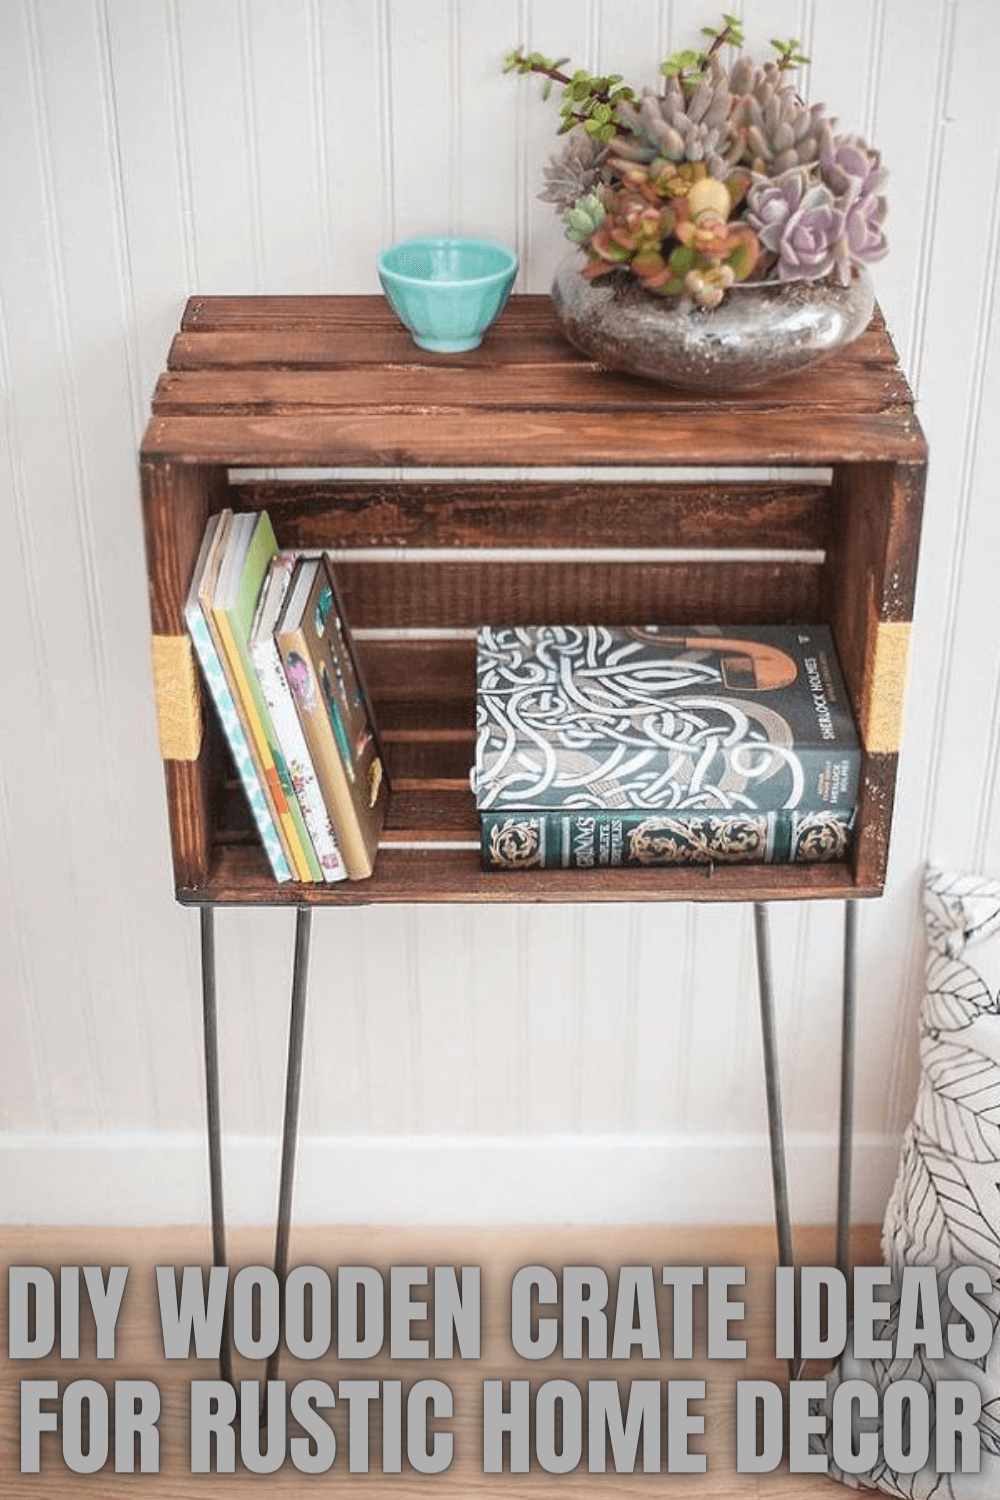
    DIY WOODEN CRATE IDEAS FOR RUSTIC HOME DECOR

    1. Crate Farmhouse Bench

    What could you think of when having crates for the DIY project? Most people will think of storage space, since it has perfect square shape and quite big space capacity.

    What about a farmhouse bench? It shares similar shape, but crate could make it special. It gives the European vibe with pastel color. You can even get the industrial look. All you have to do is painting it with dark tones.

    For this project you have to build the bench first. Make sure to give enough space for the crate to slip in. The bench feet should be white, the seat is dark brown, and aged green for the crate.

    It will look even more antique if you could find a spot with brick pattern. To complete the bench, provide several colorful cushions on the top. Cushion with solid color shouts elegance, while patterns gives festive atmosphere to the bench.

    Crate Farmhouse Bench for rustic home decoration ideas
    Image: Lifestorage.com

    2. Crate Lockers

    Thanks to the built, crate could fit to limited space without reducing the storage space in it. Thus, the crate is mostly used as the alternative storage. Many people simply re-paint the crate but you could make something fancier: the crate lockers. The idea is to have mini locked cabinet. To see what’s inside, all you have to do is peeking to the side. Fancy, isn’t it?

    To start the project, you have to purchase at least three crates. After rinsing and sanding them, you need to paint them. One layer won’t be enough, so apply several layer to get solid look. Allow the crate to dry before adding another layer. Then, add support piece to the crate. It is especially important if you want the vertical cabinet.

    Drill the corners to install the screws. For the plywood door, attach it using hinges. To make the cabinet prettier, you can vary the colors or add accessories such as plate numbers on the door.

    How to build Unique DIY Crate Lockers
    Image: littlehouseoffour.com

    3. Outdoor Bar Table

    Do you like spending your time outdoors? If yes, then you must be familiar with the hassle of having outdoor activities. It takes a lot of effort to clean up and then clean up the dirty plates after. Now you could have a multipurpose outdoor bar table, made from crates!

    Go to the second hand store and take twelve of their best crates. You will also need some deck boards for the top cover. Don’t forget to stock outdoor paints (in some shops they call it garden paint), castor wheel, plated bracket, and screws.

    The first step to do is painting the crates to solid color. If needed, you could clean the crates before coating it. After the crates dried completely, stack three of them horizontally and screw them together. At the back, screw the back plate on the connected joint. Bring two stacked crates together and screw them from the inner part. Repeat the process for the wings part. Then, add the top base. Paint it with darker color.

    Crate Outdoor Bar Table Sets

    Read also: Rustic Farmhouse Porch Decor Ideas

    4. Kids Organizers

    Teachers who work with kids at school has similar challenge to the parents at home. They love to explore things, have a lot of toys and stationery. In the end of the day, the room would be extremely messy because of their things. To deal with this problem, you could make kids organizers. They will help the kids to keep their toys safe.

    For starters, it is suggested to take six crates. Paint them all white. During this process, you have to be patient. Give enough time for the paint to dry before moving to the next step. When the outer side has been painted, it is time to coat the inner part. Choose bright, vibrant colors that the kids love: pink, mint green, sky blue, etc. If possible, apply different shade to each crate.

    Stack the crates horizontally. Make sure that the opened side is facing forward. Apply glue on the connected sides. Let them dry. You can also use screws for stronger bond. Voila! Your storage is ready to use!
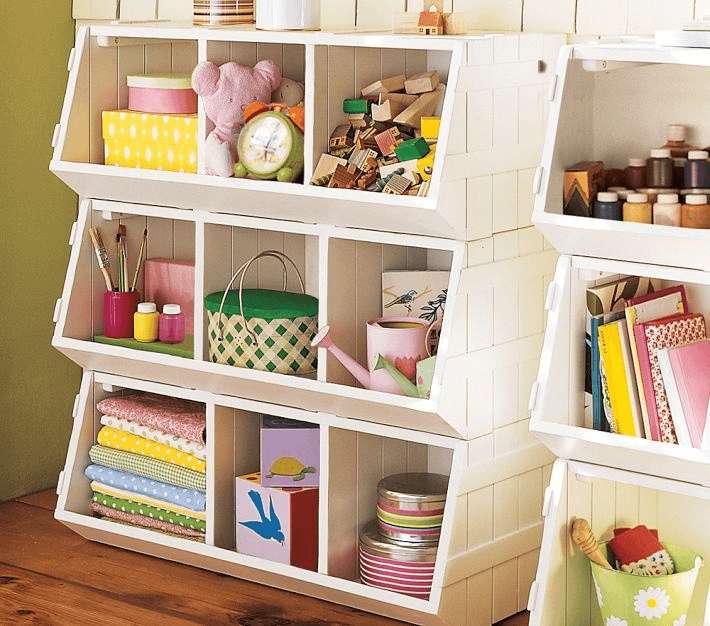
    Crate Kids Organizers Pottery Barn

    See also: Bathroom Cabinet Organizer Under Sink

    5. Book Shelves For Limited Space

    Many houses have that empty space behind the door. It is too small for normal cabinet, so most of the times this space has no function at all. Then you look at the books and magazine scattered on the floor. Isn’t it a great idea to have hidden book shelves for the room?

    For this project, you literally need one crate only. It will be divided into two symmetrical parts. You could make it smaller if the space behind your door is smaller than the crate cuts. It is important to measure the height of the crate as well the distance of the crates. Make sure the distance is reachable for kids.

    Paint the crate with any color or pattern you want. If you want to go classic, then pick either solid or pastel color. Pattern painting will make grand appearance when the room is already dominated with plain tone. Now install the crate shelf on the wall. Use screws or metal plate to support the shelves.

    Crate Bookshelf DIY ideas

    6. Coffee Mug Display

    Another smart way to use crates is making coffee mug display. The process only takes a day. You don’t even need to paint the whole crates. The work that requires painting is only letter block on the top which says “coffee”. The important aid for this project is hook. You are going to need a lot of them to hang the mug.

    Crate Coffee Mug Display DIY for Rustic Home Decoration
    Image: onelittlebirdblog.com

    When people are discussing about rustic house ideas, your imaginations might bring to the warm memories; barn, brown, black, white and wood. Since each person has different ideas about “rustic”, it might be difficult to find suitable pair in the store. So, why don’t you try to make one?

    Originally posted 2020-08-20 06:34:51.

  • Great Tips on How to Decorate a Small Front Porch

    Great Tips on How to Decorate a Small Front Porch

    Do you have a small porch and find it hard to decorate it without being able to make it feel spacious? Or, do you find it hard to choose the decoration?

    Don’t worry! You can make your small porch beautiful and spacious by applying some tips and tricks on how to decorate it.

    Make sure that your small porch can give enough access for the people come in and out the house. Don’t block the pathway with some inappropriate furniture.

    Any interior is welcomed to decorate your porch but you have to be really selective about them.

    Don’t let them consume all your porch space. If you fail to choose appropriate interiors for your porch, it will make it unpleasant and unappealing.

    SMALL FRONT PORCH DECOR TIPS

    Don’t forget to always bring positive impacts for everyone visiting your house. Try to give them your best sides through your house. It’s scary how people are able to judge you from your house condition. So, it is better to give them good judgment rather than the bad one, isn’t it?

    Actually, if you happen to own a limited space on your front porch and you just get cramped area to decorate, you can always go for some greenery. You can display your preferable flowers to decorate your small porch.

    To make it more interesting, you can plant your desired flowers or leaves with your DIY planters. When you still have some space left, add some seat or benches or chairs.

    Small front porch decorating ideas
    Image: digsdigs.com

    Match the decoration with the theme or style of your porch. For your rustic porch, you can decorate it with some old and upcycled flower planters.

    When your porch has dark painting tones, the decoration with some wooden interiors can make it brighter. Or, if you have a bohemian porch, you can hang some gipsy decors all around it.

    Rug is also a great decoration for your small porch. You can also create some original rug made of cork or pebbles.

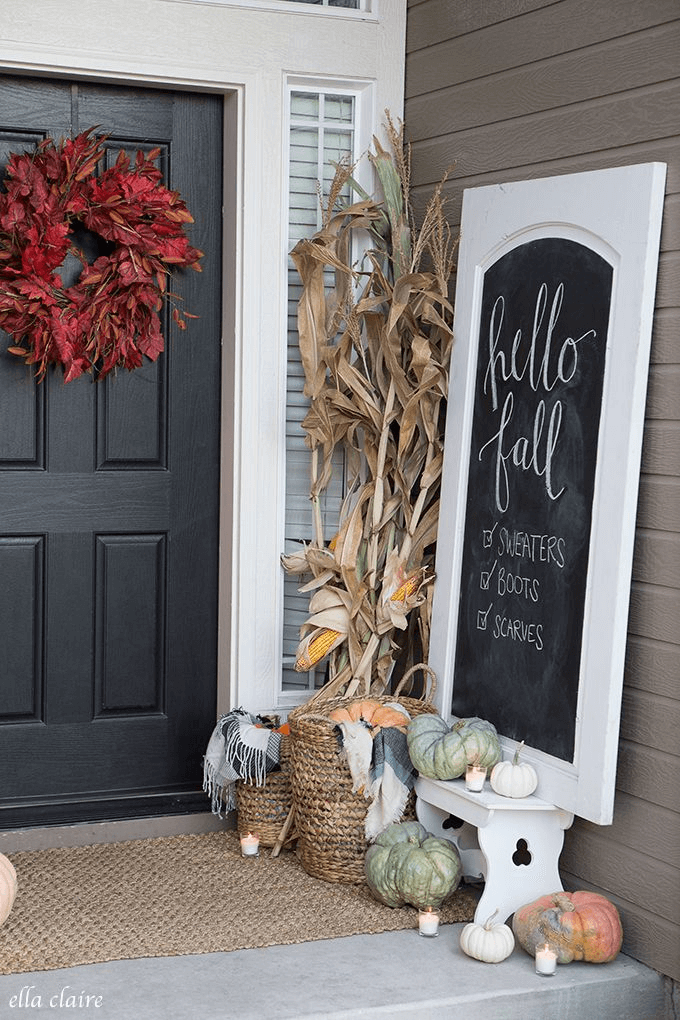
    You can also decorate your porch with the items which are on season. For example, if you happen to have Halloween celebration on the way, you can decorate it with some crafted pumpkins, lanterns, brooms, etc.

    You are able to decorate your porch just as the way you want it. But, wait! For small porch, you need to consider these dos and don’ts to create comfortable atmosphere.

    See also: Rustic Farmhouse Porch Decor Ideas.

    1. Always Go for Small Interiors

    To avoid the porch space to be overwhelmed, display small interiors or furniture. Choose small chairs, stools or benches. You can line up some small chairs on one side of the wall near your entrance door.

    Choose chairs or seat or benches with no arms to avoid visual bulkiness. When choosing small tables, choose the ones with round edge and not with angles or as no angles imply healthier traffic stream.

    Small front porch decorating farmhouse

    2. Divide the Space of your Porch

    You can always divide spacious terrace for some purposes, like a space for relaxing, eating, etc. But, don’t be too discouraged! You are able to divide the space of your cramped porch for several purposes.

    For relaxing, make use of couple square feet on the corner for your relaxing spot. Spread a small rug and put two cozy chairs on it.

    See also: Rustic Home Decor Sign Ideas.

    3. Choose Appropriate Greenery for the Porch

    For small terrace, never decorate it with big or tall leaves. Tall leaves, plants, shrubs, or other gigantic greenery are not gonna work as they will overpower the porch.

    Choose small leaves or dwarf flowers to be displayed. It means also using small or midsize planters for them. You can spread the planters all over porch’s corners.

    Small front porch decorating ideas DIY
    Image: Homebnc.com

    4. Build Connection

    Most front porches are designed to be in synergy with their surroundings, like other outdoor areas, driveways, and also backyards. Try to connect your front porch with all of them.

    You can match the theme for all the areas. By doing so, you can make your small porch bigger than its true condition.

    5. Choose Pretty and Practical Decoration

    To make use of the space optimally, you have to choose the interiors that you intend to display carefully. All of the interiors you choose should be meaningful.

    For example, when your wall is unsightly, you can choose a small painting to cover it. The way to conceal the unattractive wall, a small but unique painting is able to show that it is practical as well as a beautiful choice.

    Put a unique small round table near your small chairs as the place to store glasses or plates when you happen to have outdoor meals on your front porch.

    Small front porch decorating for fall

    6. Minimize Clutters

    Don’t keep many clutters on your front porch. Too many clutters can kill the livability from your porch. Throw away everything that has already worn-out, out-dated and also ill-used. Remember! Only keep items which are pretty and practical to display the space all over the porch.

    7. Decorate with Plants

    To disguise the border between the yard and the small veranda, put some greenery. Prefect sized plants which are located on between those two lines can make your porch looks bigger.

    You can display small pants along the pathways or hang some small soft-colored flower planters, or plant some trailing vegetation in soft hues to mix the softscape and the hardscape.

    8. Play with Colors

    To create spacious porch, you can play with the colors. Correct mixture of them can help you trick the eyes of the beholders. The combination of dark and light colors can make the atmosphere of your porch cozy and comfortable.

    The color combination is also capable of creating great image expansiveness. If you don’t have much information on the color combination for spacious look, you can consult the internet for some references.

    Do you have already in mind about what style to apply? Do you go for rustic porch style, bohemian style, Scandinavian style, or anything? If you have decided on the décor style, you can choose some interiors to go along with it. Follow the tips and be ready to make some amazing experiments on your small porch!

    Simple Tips How to Decorate a Small Front Porch

    Originally posted 2020-08-18 04:41:34.

  • Fabulous DIY Front Porch Planter Ideas to Brighten Up your House

    Fabulous DIY Front Porch Planter Ideas to Brighten Up your House

    Do you want to beautify your front door porch? Or, do you want to give an unforgettable impression for your guest?

    You can make all them surprised just by decorating your front porch correctly. You don’t have to make a total make-over on your porch. You just need to give some beautiful touches.

    People tend to give first judgment on what they see for the first time. When you invite your friends, your colleagues, or your relatives, they will create their opinions about you from what they see when they are in your house.

    The first thing to judge is your front porch. The decoration you put into it really matters for you. So, don’t ever think that whatever you put on your front porch is meaningless.

    The decoration style you put into your front porch should be able to show people about who you really are. Show your characteristics through your house! The perfect display to do it is from your porch.

    If you want to show them that you are cheerful, you can display colorful interiors to your porch. You can decorate it yourself by making use of some old items from your own house.

    Decorate your porch with several classic signs, unique stalls and benches or anything else. But, you can simply just add some unique planters to create the atmosphere that you want. The materials for potted planters are also very easy to find.

    You can put your flower potted planters everywhere. Put some beautiful flowers on each stair, hang some of small pots along the edge of the front roof or just put some big plant pots on each corner.

    Read also: Rustic Home Decor Sign Ideas.

    DIY FRONT PORCH PLANTER IDEAS

    Easiest and cheapest way to light up your porch is to decorate it with some DIY unique planters. DIY items are not being sold worldwide. You can have them only one in this world.

    To bring the unique and stylist decoration, you can always make your own planters using used items from your house. You can always create fascinating planters even with some old milk can.

    Make use of some of your upcycled things all around the house. These used items can make your planters unique and antique. You can play with planters’ sizes, shapes, colors and materials to create more proportional look for your porch. Don’t forget to match them with the color of other interiors sit on your porch to make them all balanced.

    Read also: Great Tips for Indoor Hanging Potted Plants

    One simple thing to decorate your porch is by placing some flowers pots on both sides of your door entrance. You can put them directly on each side of the door or you can place them along the vicinity of it. It is much better if your porch is covered so that it can protect your pots from the rain or other climate issues.

    Frankly speaking, making your own planters is easy, what you need to consider is to mix and match them with other décor on your porch. By playing with sizes, colors and materials of the flower pots, you can make your porch much lively and interesting. Here are some fabulous ideas how to DIY your planters décor. Check it out.

    1. Tall Unique Pots

    If you happen to have some tall pots, you can paint them in bronze or gold and fill them with two or three different plants. Put them on the corner of the porch.

    If you don’t have any but you have used tall milk container, you can use it. Don’t need to paint it. The rust from it can give a rustic style to your porch.

    Gigantic clay pot is also suitable for it. Choose old gigantic pot which has some washed paints to make it old and unique. Match the color of the pot with the color of your front wall and floor as well as the color of the front door.

    Tall Unique Pot Planters for Front Porch Decor Ideas
    Image: Houzz.com

    2. Cinder Block Planters

    Some leftover cinder blocks can also be used as the planters. Organize them near the wall of your front door. You can arrange them as your style vertically, horizontally or both. You can make one stack or two or more from them. When they are ready, just fill them in with some plants.

    You can plant flowers or some tall leaves in the same color or various colorful flowers on them. To make the cinder blocks look natural, just maintain their original colors. Don’t need to paint them.

    Cinder Block Planters for Front porch decoration ideas
    Image: decoradvisor.net

    3. Small Pots for the Front Steps

    Find some old metal buckets on the same size. Fill them up with the same colorful flowers. Arrange each bucket on each edge of each step. By doing so, you have been able to make wonderful path to reach your house.

    Small Pots for the Front Steps Decoration ideas
    Image: Digsdigs.com

    4. Old Fruit Basket Planters

    You can always make use of your old fruit basket as your porch decoration. If you have different size and dimension of the basket, it would be great.

    • Collect three wooden fruit baskets. Fill them with some flower plants. If the basket is tall and big enough, you can plant some small leaves.
    • Place them on the corner of the porch near your bench. If you have some small stools, place one basket on one stool and arrange them along the wall near your door entrance. Simple, isn’t it?

    Old Fruit Basket Planters for Front Porch Decor Ideas

    5. Stacked Flower Pots

    • Be creative with the arrangement of your planters. You can stack three different planter sizes. But, make sure that all of them should be on the same dimension and colors.
    • Fill them with flowers but put the flower circling the outside edge of the pots as the middle area will be used to stack the smaller pots. You can also write welcome lettering on the biggest pot.
    • Place them near your entrance door.
    Front Porch Decor ideas with DIY Stacked Flower Pots
    Image: Decorating-hq.com

    It is never a waste to be creative with plants and flowers as your decoration. You can make your porch to be colorful, rustic, whimsical, and even chic through planters’ décor. These décor can never be old. It will always be captivating for everyone who happens to visit or pass by your house.

    Originally posted 2020-08-16 03:54:09.

  • Amazing Rustic Farmhouse Porch Décor Ideas of the Season

    Amazing Rustic Farmhouse Porch Décor Ideas of the Season

    Do you happen to find that your porch uninteresting? Are you bored with your porch décor style? Do you want to change it into unique style? You can design your home porch with something rustic.

    You can even make the décor by yourself. You can make use of any old wood or cans to decorate your porch and set the theme of cozy farmhouse for it.

    When you come visiting your friends or your relatives, one side of the house which brings pleasant feeling is the front porch. The good or bad impression of your house can be directly seen from it.

    To give good impression to your guests, you can decorate your porch with the farmhouse setting. The interiors for it can also create comfortable and cozy atmosphere.

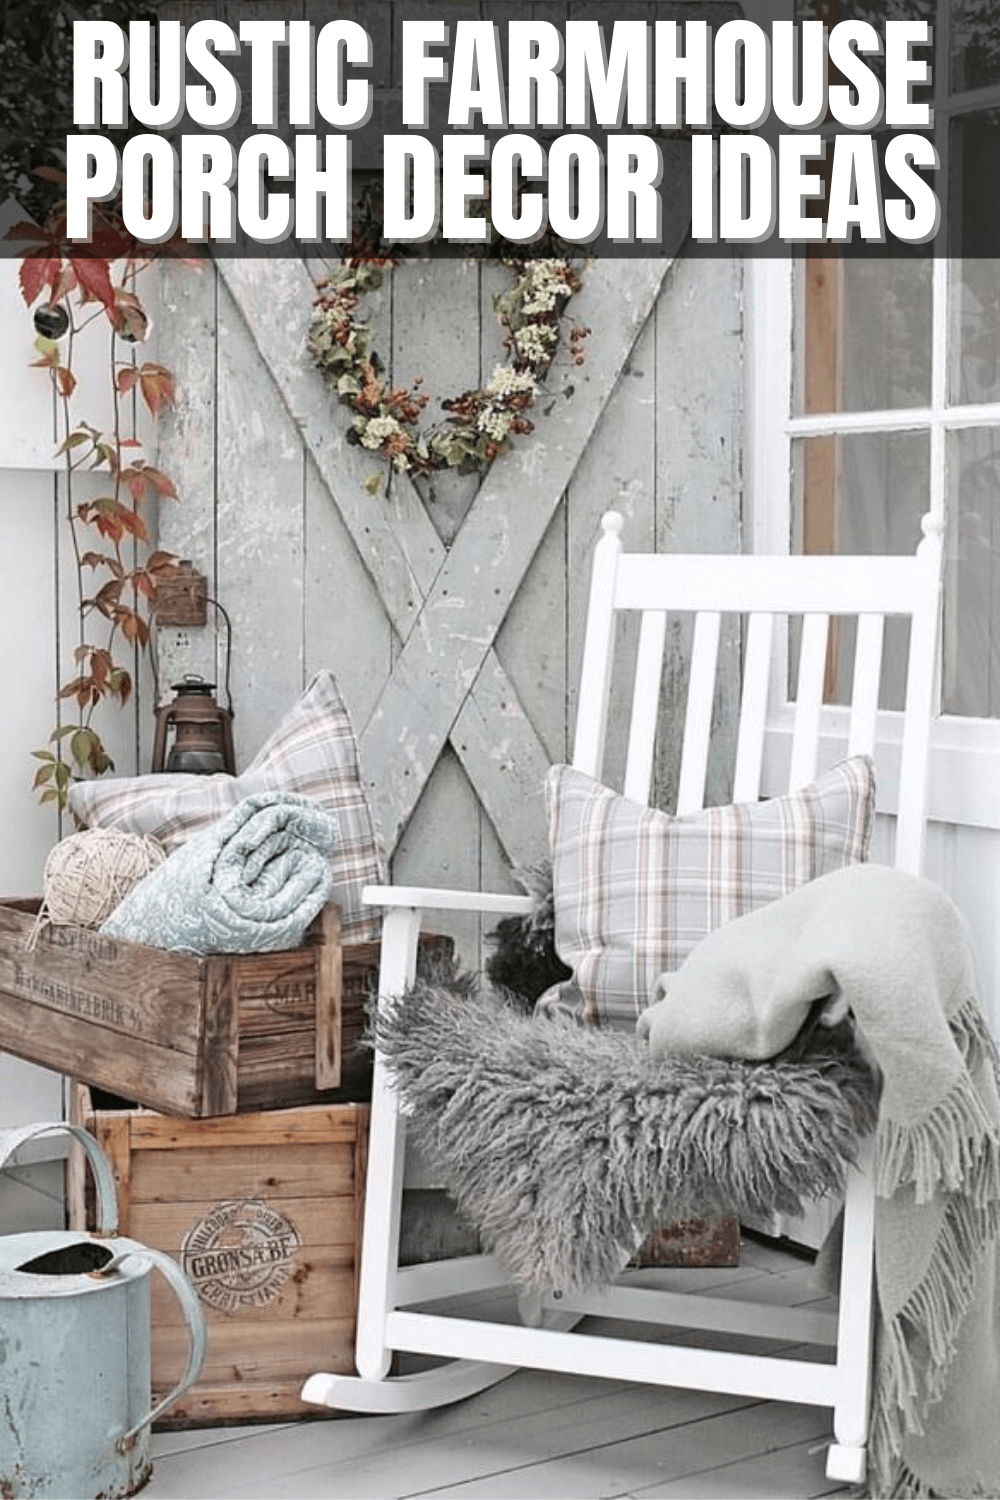
    RUSTIC FARMHOUSE PORCH DECOR IDEAS

    Before moving to the décor ideas, what is rustic décor style? You can say that a rustic design is always associated with an antique style. Yes, it’s completely true as you commonly use repurposed goods, the greenery, and also old wood.

    First place where you can boast off your rustic style is your front porch. This décor style is always being one of the favorites among the interior designers.

    What become the signs of rustic farmhouse décor style is wooden wall painted in white and natural wooden floor. Before decorating your porch with some unique and rustic interiors, try to paint your porch wall and set up the floor. Then, if the setting is ready, you will be easily choosing the interiors suited to your vintage farmhouse design.

    If you don’t want to hire some interior designers to give some rustic touch on your front porch, you can always try and make the decoration by yourself. Here are some DIY ideas on how to make your front porch into a farmhouse. It is easy to do and you don’t need lots of time to make it.

    Here are 8 ideas for rustic farmhouse porch decor. Check it out.

    1. A Welcome Sign

    Make your guests feel really welcomed when they find a large welcome sign written on a piece of wood.

    Find some old large wood first. You can maintain its natural condition or you can paint it. But, since rustic style is about nature, it would be better to leave it just the way it is. Then, write the welcome lettering vertically. After it is dry, put this large wooden sign near your front house entrance.

    Put one candle inside the used glass jar and place it near the sign. These two combinations can make the feeling of entering your house more tempting.

    To represent its natural side, also place one big potted leaf on the corner of the house near the welcome sign and the candle.

    Welcome Sign rustic farmhouse porch decor
    Image: Homebnc.com

    2. Plant Stand from Old Ladder

    Make use of your old painting ladder to decorate your porch. You can turn some useless trash into magnificent display. Rest the old ladder on one side of your porch wall.

    To give more artistic impact on the ladder, attach sheets of old washboards onto the wall. After the setting is ready, put some small potted plants on each ladder board. You can also display some colorful potted flowers or your old object collection.

    Plant Stand from Old Ladder for Rustic Farmhouse Porch Decor ideas

    3. Repurposed Reel Stall

    Do you happen to find used round wooden cable reel near your house? You can trick it into a beautiful stall to sit on your front porch.

    Paint the reel in white and positioned it as the stall. Decorate the reel with some lanterns and lamps which have been painted in the same color. The mixture of the cable reel and the lightings can bring the atmosphere of outdoor camping at night. Mix this décor with parquet floor and white-painted wall to bring out the classic farmhouse look.

    Repurposed Reel Stall for rustic farmhouse decor ideas

    See also: How to Decorate a Bohemian Living Room

    4. Planters from Old Tin Bucket

    Decorate the stairs of your front porch with some greeny planters. Collect some old tin buckets which are on the same size. To create the rustic look, don’t paint them. Keep their natural conditions. Change your old tin buckets into some planters. Plant some colorful flowers or some small greeny trees. Arrange them on each stair of your front porch.

    Planters from Old Tin Bucket porch decor
    Image: Homebnc.com

    5. Rusty Lantern as Unique Hanging Pot

    Find old lantern. It is better if it is already rusty to give a rustic look for your porch.

    • Replace the bolt inside the lantern.
    • Use the bolt holders as a steady holder for an old transparent small cup.
    • Fill the cup with water and put some bright flowers like wildflowers or dandelions to light up your porch.
    • Hang it onto the edge of the porch roof or the pillar of your front porch.

    Rustic farmhouse porch decor ideas with Rusty Lantern as Unique Hanging Pot

    See also: Rustic Home Decor Sign Ideas

    6. Old Grocery Trolley for Garden Display

    Find an old trolley for grocery.

    • Paint it in black.
    • Fill each shelf with old wooden drawer.
    • Decorate each shelf with some flowers or gardening tools.
    • Place the trolley on the corner of the porch.

    Old Grocery Trolley for Garden Display rustic farmhouse porch decor ideas

    7. Old Train Station Bench

    Go to some used stores to see if they have long broken wooden bench. When you find one, paint the bench in white to give distressed look. Place the bench near your entrance door.

    Old Train Station Bench rustic farmhouse porch decor
    Image: Homebnc.com

    8. Used Milk Container

    Milk container made from steel or iron is also suitable to create a classic look.

    • Choose one container which is old enough and, it would be better if its paint has already peeled off so that you can see some rusty spots on it.
    • Wrap the container with some ropes.
    • Put your favorite plants or flowers into the container.
    • Your used milk container pot is ready to take part as your rustic décor.

    Rustic farmhouse porch decor with old milk container

    The key to create vintage or classic décor style for your porch is to choose used or repurposed items. The rustic look is captured from them. So, are you ready to find some old items for your front porch? Look for them inside your storage. Have fun decorating your porch!

    Originally posted 2020-08-15 08:53:38.

  • How to Properly Clean and Sharpen Kitchen Knives

    How to Properly Clean and Sharpen Kitchen Knives

    Do you like cooking? Or, do you spend most of your time in the kitchen? Then, you must know that an important tool to help you in the kitchen is a simple kitchen knife.

    Basically, you can collect several knives for different cooking purposes in the kitchen or you can just use one kind of knife for everything.

    Let’s do some things. Here are 6 important things to do about using, cleaning, and shining kitchen knives. Check it out.

    Read also: How to Cleaning and Sparkling Glass Stovetop in Minutes

    Kitchen knives handmade custom carvingset st ironwood

    1. Keep the Knife shining

    You can always store and clean your knife correctly. Before using it, you need to hone it with the rod to preserve its sharpness. Once a year, you can sharpen your knife using some kind of special stone.

    If you don’t have this special stone, you can have your knife sharpened by a professional. To always keep your knife sharp, you have to know how to maintain, clean and store it.

    Read also: Quick Simple Tips to Speed Clean Home in Few Minutes

    2. Use the knife carefully

    When you want to use your knife to chop some ingredients or vegetables, make sure to be careful not to cause any accidents.

    • First, always keep your knife sharp before using it since a dull knife can always slip when you cut.
    • When chopping the vegetables, always put your fingers curling. Maintain these curled fingers to steadily hold the vegetables.
    • Slice the vegetables away to keep your fingers safe from the cut in case the knife slips.
    • When you are chopping or mincing, make sure that the knife tip is always on board while you move it ups and downs.
    • Use a chopping board which has a rubber stand. If not, you can keep it steady on place by laying it on the damped towel.
    • Keep the knife away from your children.

    3. Always Maintain the Good Condition of the Knife

    It is possible that cleaning and taking care of the knife will maintain its current condition. It can also minimize the possibility of being damaged or dull. Then, what should you do?

    Store your knife inside a wooden block. You can also keep it in the sheath. Never store your knife inside the kitchen drawer as it can be easily bumped around. It is also possible that you can accidentally hold its sharp tip.

    Don’t leave your knife in your kitchen sink. It can make your knife rusty and damaged. It can also accidently cut someone’s fingers.

    Wash your knife manually with your hands. The dishwasher’s temperature can make your knife dull or blunt. The bumping with other utensils inside the dishwasher can also happen and it can damage your knife.

    Always use a wooden chopping board. It is the most delicate material suitable for your knife. Hard surfaced board can bring damage to it.

    4. Always Check the Sharpness of Your Kitchen Knife

    There is no possibility that the knife which is used regularly can be dull someday. To check if your knife has lost its sharpness, you can always try to do this test.

    Pick one sheet of paper and fold it into two equally. Then, insert your knife inside the folded paper. Try to slice the edge outside.

    When you find your knife can’t slice the paper cleanly, try to steeling it. Try one more time. If the result is still the same, you have to sharpen it.

    Kitchen Knives Storage DIY Homemade

    5. How to Carefully Use Sharpening Steel

    One kind of sharpening steel that you can use to sharpen your knife is the rod made of metal. It uses to hone the knife edge to make it sharper. You can use it when you want to sharpen your dull knife.

    Generally, it only sharpens your knife blade lightly. You can always sharpen your knife with the rod before you use it ever day.

    • Hold the rod handle in vertical position with its tip attached firmly on the even surface. Before starting to use it, make sure to keep the distance for about 15 degree between the rod and the knife blade. Keep the pressure between the rod and the blade lightly as well as the angle between them.
    • Hold your knife with another hand and position it in the opposite side of the rod base, near the rod’s handle with your knife blade pointing to you.
    • Move the blade of the knife up and down along the hone rod with the angle of 15 degree.

    Do this movement to all knife’s sides for several times. You can stop if you think that your knife blade is already sharp and smooth.

    6. How to Use the Whetstone for Knife

    Once in a year, you need to sharpen your knife. You can use sharpen stone or whetstone. Don’t forget to check your knife manuals to correctly apply the sharpening methods.

    • Maintain the angle for sharpening your knife. You can find the suggestion on the manual. It is probably about 10 to 30 degrees.
    • Put the sharpening stone on a piece of towel. Don’t forget to lubricate the stone with special oil as to instructions written on the manual.
    • You can put any angle guide to always keep you knife on the correct angle. It is very difficult to maintain the angle if you don’t use any of it. You can leave it out if you already have a very good eye to maintain the angle as well as a firm hand to draw your knife.
    • Make sure that you have two kinds of grit on the stone, smooth and coarse sides.
    • Move the knife onto the course edge consistently from base to tip. Always maintain the angle.
    • Flip over the knife and do the same thing to its other side.
    • After that, use the smooth side of the stone to keep your knife edge smooth.

    What becomes the issue is whether you always keep your knives in good conditions or not. It is so much better to only use one knife but it is always sharp and in excellent condition.

    If you can take good care of your personal knife, you can always cook happily and easily every day. Cooking won’t become burdensome anymore.

    How to Properly Clean and Sharpen Kitchen Knives. 6 Important things

    Originally posted 2020-08-13 03:38:10.

  • How to Remove Stubborn Carpet Stains with Homemade Cleaners

    How to Remove Stubborn Carpet Stains with Homemade Cleaners

    Rug or carpet is something that being considered as an expensive decoration. Carpet is not cheap, is it?

    That’s why it becomes totally upsetting when you have to throw away your carpet due to some tough stains that can’t be eliminated, right? You can always clean your carpet using some cleaners that you can make at home.

    If you don’t want to spend lots more money to buy a new carpet for your house, you have to make sure that your carpet is always in a clean state. Small stain on your carpet can bring negative effect on your house.

    Although everything is crystal clear, when your carpet is stained, your house will appear dirty. It is better to clean any kind of spillage as soon as it happens, but sometimes you just can’t get rid of it in an instant although you already give your best. Then, you just leave it and it becomes old stains which are hard to clean.

    Read also: How to Clean Dinnerware Quickly.

    When you have kids or pets, it will be very easy to get your carpet stained, whether it is from your kids’ food, crayons, artworks, drinks, or anything. Or, probably your pets pee on it and even leave their hairs. Don’t worry, don’t get frustrated. Everything is going to be okay.

    It is good for you to know how to get rid of old marks from your rug. You don’t have to waste your money just to call some experienced rug cleaning services.

    They are sure not cheap. Wouldn’t it be great if you can learn how to clean all kinds of stains from your favorite rugs by yourself and save lots of money by doing so? Although you are probably won’t be able to make your rug like new again, you can always make it look great after you remove all the tough stains and dirt from it.

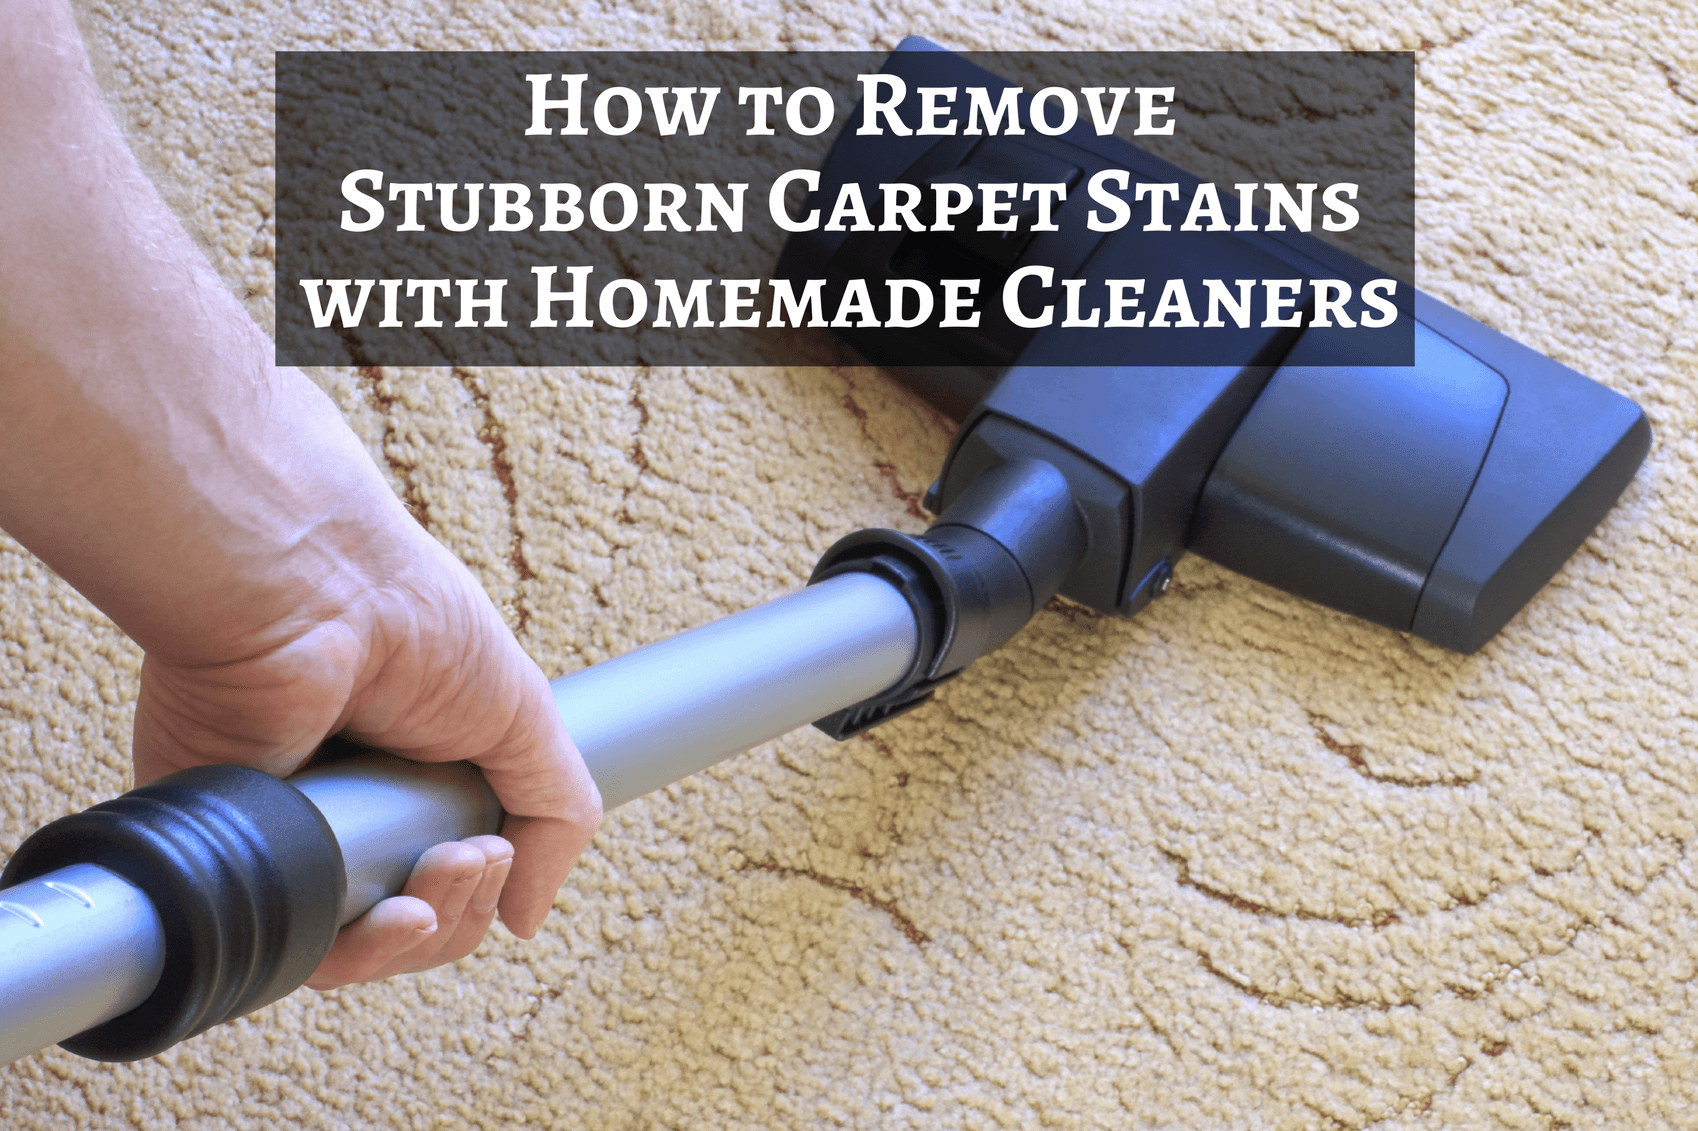
    How to Remove Stubborn Carpet Stains with Homemade Cleaners

    Here are some homemade cleaners that you can try to remove hard stains from your rug. You can try to clean the tough carpet stains using beer, vinegar, ammonia, salt, baking soda, or ice cubes. You can also buy some carpet cleaners. But if you can use what you already have at home, will it save more time and money? So, how do they work?

    1. Beer

    When you accidently spill out your tea or coffee on the rug, you can remove the stains by using beer. You can pour a small amount of beer on the top of the stains. Then, rub it lightly. You need to do it for several times to make the stains disappear completely.

    2. Vinegar

    Always have vinegar at your house since it is very useful in cleaning anything at home. You can use it to clean all kinds of stains from your rug. Here,

    • For light stain: mix ½ cup of vinegar and 2 tablespoons of salt. Rub the stain gently and let it dry. After that, vacuum the rug.
    • For darker or larger stain: the mixture can be added with 2 tablespoons of borax. The instruction is as the same as before.
    • For tough or hard stain: mix 1 tablespoon of cornstarch and 1 tablespoon of vinegar until it becomes a paste. Wipe the paste onto the stains and let it sit for about two days. After two days, vacuum it.
    • For any stains from paints: mix 1 ½ teaspoons of vinegar, two cups of water, and 1 ½ teaspoons of detergent for laundry. Wipe the paints as soon as you can before they are set and then rinse the rug with water.
    • For any stains from fruits including the juice: mix 1 ½ tablespoons of vinegar, 1 tablespoons of laundry detergent and 2 cups of water. Rub the stain with the mixture solution and let it dry.
    • For coffee or tea stain: mix vinegar and water with equal quantity. Rub the stain and let it dry.

    3. Ammonia

    You can use the ammonia solution to remove the stains from your rug. Mix 1 cup of ammonia solution and 2 liters of lukewarm water. Then you can sponge the mixture to the stains. Let it completely dry. Repeat this process for several times until the stains disappear.

    Read also: How to Clean a Bathroom Exhaust Fan in Minutes

    4. Salt

    Here are some ways to make use of salt for carpet stains:

    • For red wine stain: when the spillage is not dry yet, you can pour directly the white wine to reduce its red color. Sponge the stain with cold water. Then, pour some salt on it and let it sit for 10 minutes. After 10 minutes, vacuum it.
    • For fatty food stain: mix slat and rubbing alcohol with ratio 1 : 4. Scrub the mixture onto the stain carefully. Follow the rug nap direction Repeat it several times.
    • For ketchup stain: do it quickly before it becomes dry. Pour little salt on it and let it sit for awhile then vacuum it. Then sponge any leftover salt. Repeat the process several times until the stain totally disappears.

    5. Baking soda

    You can use baking soda to clean the stains of vomit, pet’s urine, and oily food stain.

    • For vomit or pet’s urine: wipe the stain as best as you can. Spread some making soda on the stain. Rub with some paper towels. After that, vacuum it to clean any residues.
    • For oily food stain: mix some baking soda with salt. Pour the mixture on the stain. Use toothbrush to stick the powder onto the stain. Leave it for five to six hours and vacuum it.

    6. Ice cubes

    You can use ice cubes to remove the chewing gum from the carpet. Put the ice cubes inside the plastic bag and place them on the gum to make it frozen. Scrape the gum with a knife.

    Read also: How to Cleaning and Sparkling Glass Stovetop in Minutes

    Pretty easy to do, isn’t it? You can make use of the ingredients in your kitchen to clean the carpet stains. You can also save lots of money by doing it. Remember! Clean the stains as soon as you can. You can make it difficult to remove once the stains dry. Good luck!

    Remove Stubborn Carpet Stains

    Originally posted 2020-08-12 23:13:10.

  • How to Cleaning and Sparkling Glass Stovetop in Minutes

    How to Cleaning and Sparkling Glass Stovetop in Minutes

    Are you a person who directly takes your guest into your kitchen? It is said that a comfortable and enjoyable house can be seen from its kitchen.

    For most people, kitchen is their kingdom. Do you want to boast your cozy and clean kitchen to everybody else? Then, let’s see how to make your cooking tools, especially your glass stove, astounding.

    Is it wonderful to have a clean and beautiful kitchen? If you spend lots of time cooking for your family and relatives, a clean and organized kitchen is a must for you.

    The condition of your kitchen can always determine your cooking mood and also your food taste. Are you comfortable enough to find that your cooking tools are dirty? It is better to keep them all clean after you finish using them, isn’t it?

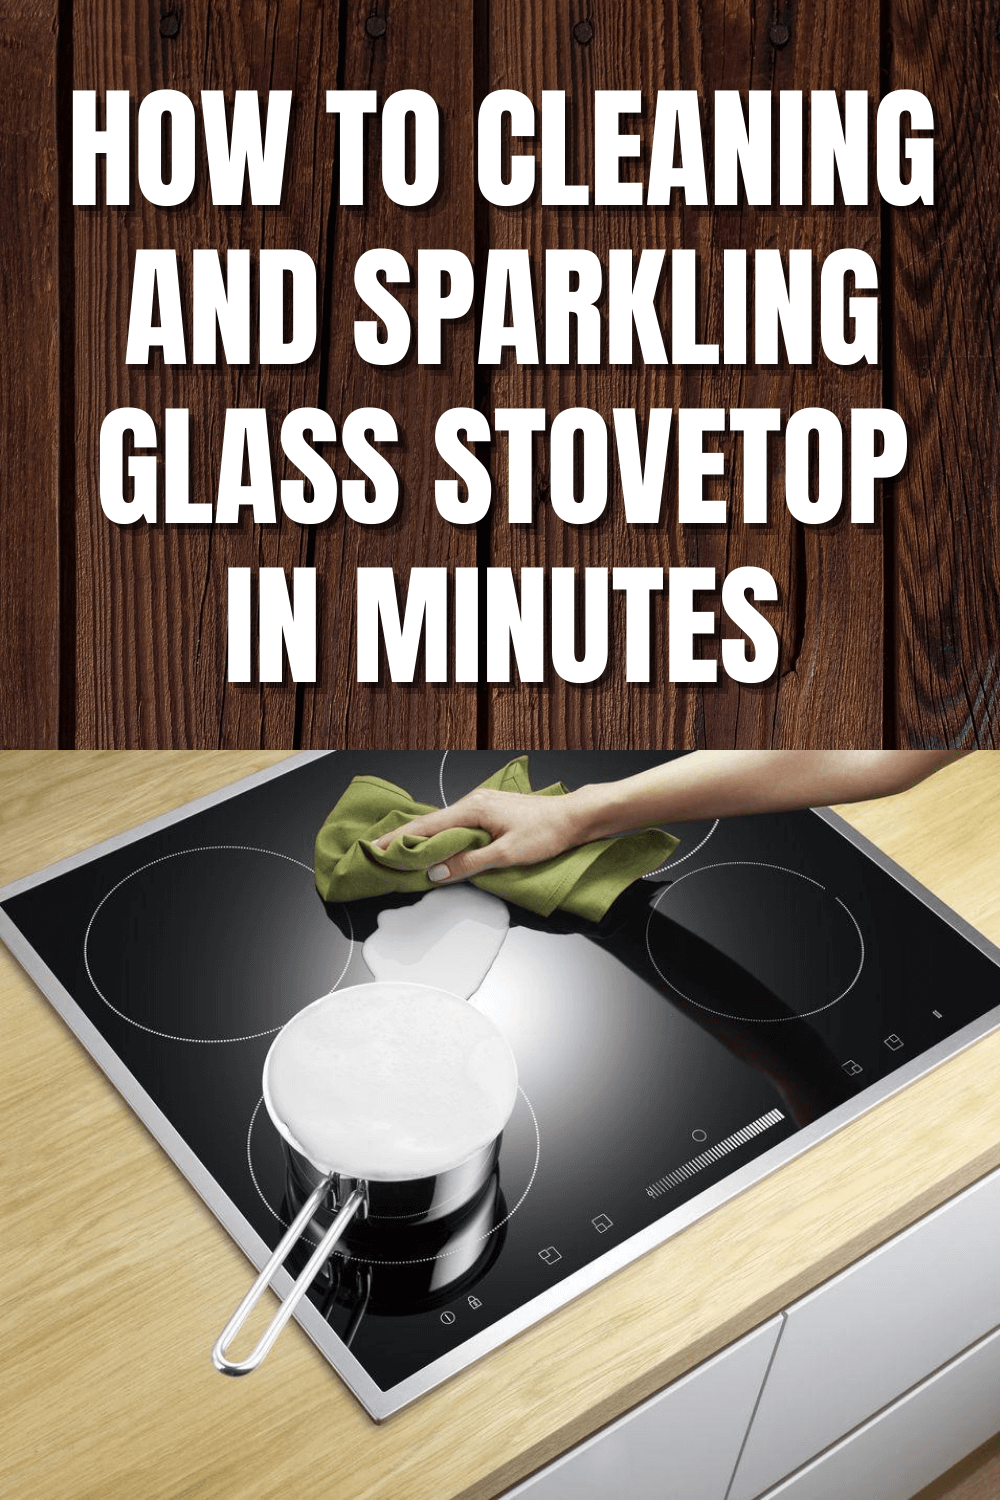
    HOW TO CLEANING AND SPARKLING GLASS STOVETOP IN MINUTES

    Cooking tools are basically easy to clean. But, the problem is on your stovetop. If you happen to have a glass stovetop sitting on your kitchen, then you have to be regularly clean it. The glass surface as part of its cover can really be bothersome sometimes. Slight stain or grease dipping from your pan or your other cooking tools can always be noticeable. If you don’t wipe it soon, it will be accumulated and difficult to handle.

    When your stove has been used frequently but you rarely clean it, there will be a moment when the stains on the glass surface and the burnt rings can’t be cleaned by using sprays or grease. You may need to try some helpful methods on how to clean and spark your glass stovetop just like new. You can make the glass as well as the stove rings clean and sparkling again.

    There is no definite rule on how to clean your stovetop glass. So, you can choose any methods on how to clean and make it shine. Here are some tips that you can use when you want to sparkle your stovetop. Don’t give up when you feel that your method is not working properly. Keep on trying!

    1. Browse Online for the Manufacturer

    Before starting to clean your glass stove, it is advised that you check the company which manufactures your product. Go to their online website and learn about the recommendation for your product. The website provides the materials used to make the glass stove. The information can be used to properly clean without causing any serious problem.

    2. Prepare Cleaner and Tools

    What is difficult to handle is the glass part. It is designed to bear the heavy pans and pots as well as high temperature. If you do improper cleaning on this part, you can make irreparable yet serious damage. Choose appropriate tools as well as cleaner for stovetop.

    When you make wrong choices, you can leave permanent discoloration and scratches on it. Some stovetop cleaners can also be very expensive. But, it doesn’t mean that an expensive cleaner can solve the stains and burns on your stovetop. So, be wise choosing the appropriate cleaner. You don’t want to waste lots of money on it, do you?

    3. Clean after Using Method

    You can always start cleaning your stovetop glass after cooking. This way, you can eliminate the possibility of accumulated stains and burnt chunks on the glass surface. Wait until the stovetop temperature cools down and you can clean it directly. However, hard stains need longer time to dissolve.

    You can also tell other family members to clean the stovetop directly after using it. New stains or burns are generally easy to clean just by wiping them off with damped cloth. You probably need to show them on how to clean it properly. Always use a soft cloth to clean your stovetop.

    Read also:

    4. Shine the Glass Stovetop

    When cleaning the glass, always use a free-abrasive cloth to avoid any scratches on its surface. Whatever cleaning products you use to clean, always follow the manuals. Some cleaners provide multistep stages when dealing with hard stains or burns.

    Most cleaners need a couple minutes to work. They also recommend different methods to wipe off the glass. Some are to wipe with a rubbing motion and some are just to simply wipe the glass. You can test each cleaner to figure out which is the best cleaner for your stovetop. Use small amount of the cleaner over small areas first. Read the manuals carefully.

    5. Clean with Baking Soda

     You can also try cleaning and shining your stovetop glass using baking soda. You can make a solution from three to four tablespoons of it and mix with water until you get a consistent paste. You can spread baking soda paste onto the stain or the burn. Then, cover the stovetop with lukewarm rag. Leave it sit for some time. Lastly, wipe the paste away with free-abrasive cloth.

    Baking soda and hydrogen peroxide can also bring a great chemistry in cleaning and shining your stovetop glass. First, pour some soapy water over your stovetop surface. Pour and spread the hydrogen peroxide. Then, spread the baking soda over the top of the hydrogen peroxide. Mix them together by using a brush and at the same time brush them all over the surface. Put the damped towel or cloth and wipe off the mixture. Tada! It’s clean as new.

    6. Try the Conventional Method

    If you don’t have the stovetop cleaner with you at the moment, you can try this conventional method. You can clean the accumulated stains or burns with some damp sponge or rag. If the stains are hard to clean, put the damped cloth on it and let it sit for awhile. Then, you can wipe it off easily. Or, you can use little elbow grease on hard stains or burns.

    So, have you got any ideas on how to clean your stovetop glass and make it shiny? Then, what are you waiting for? Get up and start working on it. Don’t let the stains and burns sit on your stovetop for any longer. Good luck!

    How to Cleaning and Sparkling Glass Stovetop in Minutes simple tips

    Originally posted 2020-08-11 10:13:29.

  • Quick Simple Tips to Speed Clean Home in Few Minutes

    Quick Simple Tips to Speed Clean Home in Few Minutes

    It is very essential to maintain cleanliness and tidiness all over the house as homeowners expect to be peacefully relaxed in their house after spending long working hours a day.

    You might be really stressful when you find your house is like a shipwreck after coming home. Your dream of relaxing quietly in your house will be wiped away as you have to spend your other precious time cleaning.

    What happens when your things are not organized and spread all over the place? Especially if your kids play with all the things they can reach spreading all over the entire house.

    When it happens, always tell them to put them back to where they belong. Remind them over and over again that they have to be responsible on putting everything back after they finish playing with them.

    QUICK SIMPLE TIPS TO SPEED CLEAN HOME IN FEW MINUTES

    Or, do you sometimes have an unexpected guest visiting your house? One day, when your house is in a mess, your best friend is suddenly calling you and telling you that he or she will visit your house within few minutes.

    It’s really frustrating, isn’t it? Don’t worry, whenever this kind of unpredicted situation happens, you can always speed clean your house within less than an hour or maybe just in less than 15 minutes.

    Read also: Bluestone Table Care, Cleaning, and other Tips

    Whether you have a guest visiting your house or you don’t want to spend most of your valuable time cleaning your house, you can always try some amazing tips on how to speed clean your entire house.

    What becomes the one and only secret is always try to maintain your things clean and in order. Once you have been able to keep them organized and tidy all the time, you can always speed clean your house within few minutes.

    How to speed clean your house within few minutes? Make sure that you always have your cleaning task and simple cleaning routines every day. Try not to skip a day without cleaning.

    An easy daily cleaning habit is really your huge timesaver. Moreover, this habit absolutely brings speed cleaning as an effective and easy way to make your entire house clean in an instant.

    So, are you ready to speed clean your house? Try these simple tips to save your time organizing your house. Follow the tips from number one and the others will follow within the cleaning process.

    Quick Simple Tips to Speed Clean Home in Few Minutes

    1. Prepare Your Cleaning Utensils

    Collect all your cleaning tools altogether inside a container so that you can find the tool you need in an instant. What you need to prepare are feather dusters, lint roller, microfiber cloths, disinfecting cleaner for bathroom, multi-purpose cleaner, cleaning wipes, and mirror cleaner.

    2. Collect All the Clutters

    Before starting speed cleaning your house, get rid of all the clutters from all rooms. Bring two kinds of bags while you are walking to each room; one is garbage bag and another is laundry bag.

    Dust all the garbage, like used papers, plastic, and all kinds of useless things inside the garbage bag and you can easily throw them out into your garbage disposal.

    Put all the relocated items, like toys, books, etc inside the laundry bag. Once you gather them all, you can always ask your kids to organize the relocated items back into their designated locations.

    3. Start Cleaning from the Top

    Always start cleaning your house from the top down. It is to make the dirt or the dust from higher surfaces falls down to lower surfaces which have not been cleaned yet.

    You can clean your ceiling fans first and then you can move to the furniture below it. After all the furniture is being cleaned and wiped, you can clean your floor to get rid of all dust and dirt.

    4. Clean the Dust on the Surface Quickly

    You can use a feather duster to remove the dust on the surfaces quickly. Don’t forget to shake out your duster repeatedly and move rapidly to clean all the noticeable dust.

    5. Wipe the Surface

    After dusting all surfaces, you can wipe them by spraying down hard surfaces like counters, cabinets, tables, sinks, etc and then wipe them with microfiber or disinfecting cloth. When you do all the dusting and wiping as parts of your daily cleaning routine, then it will be just a simple and easy task for you.

    6. Clean the Bathroom

    The most difficult part from cleaning your house is the bathroom. But, if you always clean your bathroom every day, it will be a way less stressful. Relocate several minutes in every bathroom.

    First thing to do is pour a cleaning liquid into each bathroom toilet and let it sit for awhile. During the waiting period, you can clean the bathroom sinks, tubs, and mirrors.

    Don’t forget to replace old towels with the new ones. After finishing all of these tasks, you can start scrubbing and wiping each toilet with flushable cleaner pad.

    7. Clean the Kitchen

    Soak your pans and pots needing for washing in the sink with soapy water for awhile. Use your time to clean the countertops and stovetops with multi-surface cleaner.

    Replace new dish towels and get rid of the old ones. Then, put your dishes inside the dishwasher. While waiting for this task to be completed, you can start cleaning your living room.

    8. Clean the Family Room

    First, fluff your cushions and pillows, organize the magazines inside the rack, and remove the hairs from the surface by using lint roller. Refold your blanket and put them back in the closet.

    9. Clean the Entryway

    Once your rooms clear from clutters, you can start cleaning your entryway. You can shake your entry rug for a few times, then you can use your vacuum to clean all the dusts and hairs stuck on the rug.

    10. Clean the Floor

    Once you finish cleaning all surfaces in each room, your last task is to clean the floor. You can vacuum every corner and low baseboard in each room.

    Yes, you have finished your cleaning. Do you like the look of your house now? Isn’t it great to have a tidy and clean house? After all the hard works that you have done, you can relax yourself and enjoy your clean, fresh and tidy house.

    Originally posted 2020-08-10 02:04:08.

  • Breath-Taking Rustic Home Décor Signs from Wood Charm

    Breath-Taking Rustic Home Décor Signs from Wood Charm

    Wooden signs have become famous decor trends at the moment.

    Many decor options are available at the home stores for your house, whether you are looking for some signs for your front porch or even for your back yard. But, the price can be really outrageous, right?

    It will be really delightful if you can make your own rustic wood signs for your house.

    Related articles:

    RUSTIC HOME DECOR SIGNS FROM WOOD CHARM

    DIY Rustic Wood Signs for Stylist Interiors

    If you are ready to start your DIY wooden signs today, what you need to look for as the main material is some old woods or pallets. You can find these materials at the home stores or any stores with garden centers near your house.

    Ask for old pallet woods as they will have some left out. If you ask them nicely, you can get loads of pallet woods for free.

    Or, if you cannot find old woods, you can purchase some affordable woods and do some treatments to make them look rustic and old. You can make your new woods look alike old woods by soaking them into a mixture of white vinegar and black tea which have been infused with the old steel wool rust.

    Next, you need to decide whether you will make your old wood looks natural or you want to make it distressed. If you want to make it look distressed, you just need to paint the whole plank in white.

    When the wood is ready, you just need to do the lettering on it. You can write anything you want. Any inspirations can be taken from your favorite quotes or sayings, from the home store displays, from magazine, or from the internet.

    For DIY rustic signs, generally, it depends on your creativity as long as you already have the main materials, like woods or planks, paints, brushes, and sandpapers.

    Additional materials are also probably needed. If you want to hang your wooden signs, you need some ropes and also some nails.

    If you want to make some kind of a cabinet door or a cupboard door, you need to prepare some handles or knobs. For the decoration, you can add frames, ribbons, bows, fake flowers, etc depending on your taste.

    Rustic home decor signs wall hangings
    Image: Homebnc.com

    One advantage for making your own pallet signs for your home décor is that it becomes one and only décor in the world. You can decorate your signs just like anything you want.

    You can also spread the signs all over your house for fabulous rustic touch. What you need to do is learn the basic steps you need to make DIY rustic wooden signs. These are eight DIY pallet signs that you can try at home:

    1. A Crafted Welcome Sign

    You can hang your rustic welcome sign on your front door. What you need to do is prepare old pallet with 38 inches width and 10 inches tall. You can paint it to your favorite vinyl color.

    Don’t forget to prepare the frame with dark color to bring contrast with the pallet color. Craft the word carefully with your own writing styles. This vintage DIY sign will surely make your front house more gorgeous.

    Welcome hanging door sign DIY Rustic Decor

    2. A Gorgeous Home Sweet Home Sign

    You can make a home sweet home sign for your living room décor. Prepare three old planks in the same size. To make it more rustic, you can just leave them as they may be, you don’t need to cover them with vinyl.

    Organize them in one row and frame them altogether with small strips of wood. Paint the letters in white to create a fabulous distressed view. One plank, one word.  When ready, you can hang this sign anywhere in the house.

    Rustic Home sweet home hanging sign decor ideas
    Image: Etsy.com

    3. A Distressed Love Sign

    You can hang a love sign inside your bedroom. You can put it above your headboard. To create a distressed look, you just need to paint your plank in white.

    What you need to do next is choose the lettering suited to your taste. You can also add a heart symbol between the lettering to make it warmer and delightful.

    Love Sign wooden home decor rustic design ideas

    4. A Scrap Plank Beach Sign

    To create the beach atmosphere in your house, you can display a scrap plank beach sign on the wall near your front door. You can add arrows to point to your inside house direction.

    You can also add some ropes to add more beach atmosphere. The sign can be made from distressed pallet or plank to create wonderful coastal view.

    Beach signs wooden DIY for Rustic Home Decor
    Image: mylusciouslife.com

    5. A Reclaimed Door Sign

    You can also make your décor sign from reclaimed wood. You can make a rustic cupboard door from it as the look itself seems old. You can write your favorite quote or sayings on it.

    To make it useful as the cupboard door, you need to add some handles or other hardware to make it into gorgeous rustic wood sign décor.

    Reclaimed wood door sign for rustic home decor ideas

    6. A Simple Bathroom Sign

    You can make a simple bathroom sign from some painted planks. You can write your message on them. For example: be clean, be healthy message.

    Additional embellishment like ribbons, ropes or bows can be tied altogether with a nice burlap strip. You can hang your bathroom sign above your sink mirror or elsewhere.

    Bathroom sign rustic barn wood decor ideas
    Image: Etsy.com

    7. A Stylist Slatted Wooden Box Sign

    You can also make a rustic sign for your kitchen from slatted wooden box. You can prepare a large and thin plank for it. You can cover the plank with vinyl if you want.

    Add “Bless the FOOD before us, the FAMILY beside us, and the LOVE between us” sentiments on it. It will be very encouraging to be hung on your kitchen wall to remind everybody how grateful they are.

    Kitchen sign funny for rustic home decor ideas

    You can use the ideas as your references when you want to make DIY projects on rustic wooden signs to decorate your house. The rustic look can make your house looks like a farmhouse. You can bring some rustic and farm-like touches in your house by making use of some old woods.

    Originally posted 2020-08-07 02:49:43.