Category: Bathroom

Bathroom decor and design ideas with right furniture, awesome wall, flooring, organization, and simple tips cleaning.

  • Bathroom Faucets White Porcelain Handles Detail

    Bathroom Faucets White Porcelain Handles Detail

    You had a brand new bathroom faucets white porcelain handles installed just several days ago. If the installation process, you don’t have to think about anything at least weeks ahead.

    When time comes, a slight worry might cross your mind: how to maintain the handle? Is it good enough for your bathroom? Learning today will skip your worry later.

    Read also: How to Clean Bathroom Faucets Gold.

    BATHROOM FAUCETS PORCELAIN HANDLES
    Bathroom Faucets White Porcelain Handles

    Good News from Porcelain Handle Faucet

    1. Beautiful Look

    One thing separates this faucet from the others: combination of porcelain and base material such as chopper or nickel.

    Buyers cannot take their eyes off it glamorous look and will immediately grab one for their bathroom. Also, you could pick a pair of sink and porcelain faucet to get balanced look.

    2. Modern Construction

    In the manual book, you will find the explanation about faucet construction. Since most porcelain faucet has double handle, you could expect either ceramic disc or compression valves.

    Both has the best performance and durability. If you have the single hand one, probably it also has ceramic disc valve installed.

    The ceramic disc valves are the latest technology for water flow inside a faucet.

    It has two disks inside sealed cylinder which control the water flow when you switch the water temperature. There will be almost no leakage, thanks to the neoprene seals at the water inlets.

    Regular Maintenance

    It would be a big lie if you don’t see any gunk or debris on the faucet layer after a month passed. Before it turns into too much work, do regular cleaning at your own schedule.

    1. Wipe Clean

    Use a clean and soft cloth and dry up the porcelain handle. Avoid using steel or iron material to clean the faucet. It may break the outer layer and later on cut your hand.

    2. Soap Cleaning

    For cleaner and more hygiene check, once in a week or maximum once in a month, you need to rinse the spout and handle with soap solution.

    Take a soft sponge or soft brush to clean the area. Don’t forget to pour water and dry up after rinsing. You don’t want a slippery handle, right?

    3. Commercial Product

    It is not fair if the porcelain is the only one that get proper maintenance. Since the handle is not made from 100% porcelain, you need to pay attention to the other material, too.

    Once a while, spray the commercial product to the base material and wipe it clean with soft cloth.

    Simple DIY Repair

    You grab the handle and twist it more than ten times a day. No matter how tough the material is, the screw will get loose.

    Find where the screw is installed, and use a wrench to tighten the grip. If it doesn’t help, then unplug the stem. Wrap the inside with pipe thread tape and put it back to its place.

    Its elegant look and style is probably the first reason for you to install it on the sink with similar pattern. Who knows that there are more great reasons to admire it?

    To get the beauty last for the longest period possible, don’t forget to maintain it. Also, do the bathroom faucets porcelain handles repair yourself when the screw loose.

    Bathroom Faucets porcelain lever handles

    Bathroom Faucets White Porcelain Handles

    Bathroom faucets white porcelain handles are an easy and affordable way to update the look of your bathroom. It has a sleek and simple design that can give your bathroom a modern feel.

    Plus, the white porcelain handles are easy to clean and will complement any bathroom décor. Installation is easy, and this product comes with a lifetime warranty.

    So, if you’re looking for an easy and affordable way to update your bathroom, bathroom faucets white porcelain handles are the perfect solution.

    If you want to find this product, just search for bathroom faucets white porcelain handles on your favorite search engine. You’ll be sure to find a style that fits your bathroom perfectly. So, don’t wait any longer, update your bathroom today with bathroom faucets white porcelain handles.

    The tips for choosing bathroom faucets are:

    1. Try to find a bathroom faucet that has the same finish as your bathroom fixtures. This will help to tie the look of your bathroom together and give it a more polished appearance.
    2. Also, make sure to choose a bathroom faucet that is the right size for your sink. You don’t want a bathroom faucet that is too small or too big for your sink.
    3. Another tip is to make sure that the bathroom faucet you choose has a lifetime warranty. This will help to protect your investment and ensure that you are getting a quality product.

    When you are ready to purchase bathroom faucets white porcelain handles, keep these tips in mind to help you choose the perfect product for your bathroom.

    Bathroom Faucets White Porcelain Handles
    Bathroom Faucets White Porcelain Handles. Image: Etsy

    Originally posted 2022-09-26 01:13:00.

  • Different Ways How to Decorate a Bathroom Wall

    Different Ways How to Decorate a Bathroom Wall

    Are you looking for the bathroom wall decoration ideas? These are actually several ideas that you can use to decorate your bathroom wall in the most effective way.

    These following ideas are for the best relaxing experience you will get in your bathroom. Check this out.

    DIFFERENT WAYS HOW TO DECORATE A BATHROOM WALL

    1. Typography Quote

    Typography is an art of writing and is known to bring elegance and soothing feeling if being put in the right place.

    This decoration can be applied by putting on vinyl stickers on the wall or you can just write it using paintbrush. Make sure that you write a soothing quote that helps your mind to get relaxed.

    The purpose of a bathroom is to give you relaxing feeling while you are cleaning yourself. That’s why the typography is useful in this case; it may give your brain relaxation just by reading it.

    But make sure not to write with big font, keep the writing simple yet soothing.

    Bathroom wall decor with wood shelves
    Image: etsystatic.com

    2. Shelves

    If your bathroom does not have any shelves, start installing one. Why should there be shelved? It is because when you have shelves, it means you can put things that can be useful to increase the soothing feeling in your bathroom.

    For example, you can put artificial white roses or lily, framed pictures or photos, table vintage clock, and incense. You can also roll your towels and put those on the shelves. See? The shelves have many purposes and uses.

    Read also: Best Bathroom Cabinets Wall Mount.

    3. Decorative Letter

    Bathroom wall art ideas decor with letter alphabets

    Decorative letter is a decoration of alphabets. You can buy the word you want to spell separately. For example, if you want to put it on a bathroom wall, you can buy the alphabets of B, A, T, H and hang or install them on the bathroom wall.

    This decoration will give joyful atmosphere to your bathroom. Not only soothing, but a bathroom can also be decorated to increase the joyful experience. Just make sure the font style is not too much; just keep it simple.

    Read also: Bathroom Decor with Plants Ideas You Must Adopt.

    4. Black and White Photography

    This decoration would make the room feel relaxing. There are fewer colors in the picture and it is great for relaxing purposes.

    Photographic pictures are different with normal pictures. Photography pictures have the sense of art in every picture and it is soothing.

    The soothing art mixed with relaxing black and white colors makes this decoration irreplaceable. Just remember to put black, wood frame with white background to give an additional soothing feeling.

    Fish tank in bathroom wall

    5. Install an Aquarium

    Is it weird? No, it is not; it is called anti-mainstream. When other decorations seem usual, installing an aquarium on your wall would be an unusual decoration for your bathroom.

    The first thing you should do is to make a hole on your wall to make sure the size is perfect for the aquarium to be put into.

    Leave a little gap on the top side so that you can feed your fish. After the installation is done, make sure to put in some fish. Don’t put the big ones, small numbers of small fish are the best to keep the relaxing atmosphere.

    These decorations are the best decorations recommended because it would give the bathroom soothing and relaxing feeling. A bathroom has to be soothing and relaxing, that is why you need to know bathroom wall decorations.

    Best bathroom wall decoration and paint
    Image: myhomedecorideas.com

    Originally posted 2022-03-18 10:34:00.

  • Awesome Yellow Bathroom Tile Ideas

    Awesome Yellow Bathroom Tile Ideas

    Bathroom with yellow tile was a hit back then. Somehow, it makes its own way to today’s taste.

    Not only for vintage looking bathroom, a modern-looking bathroom is possible to achieve as well with yellow tiles.

    If you want something different in your bathroom and you need ideas to use yellow tiles, you will like the following ideas.

    Read also: Bathroom Tile Ideas in Grey

    1. Honeycomb Art Yellow Bathroom Tile 

    What is nicer than presenting a honeycomb design with yellow color? It looks just right. To make more creative look, wear honeycomb shaped tiles in yellow on the tub area wall.

    Add a little accent by applying the same tiles in black for the tub wall. The combination of yellow and black never fails.

    However for consistent look, you should use white grouts on the tiles for more defined style. It is completely fine too to wear the same honeycomb black tiles for the entire floor. It makes the yellow color pops more and makes the entire concept works well.

    Honeycomb Art For Yellow bathroom tiles
    Image: mydomaine.com

    2. Bathroom with Yellow Tile and White Mix

    If your bathroom has four walls, wear two of the walls with yellow ceramic tiles. You can arrange the setting like the subway tiles do.

    Then, add white grout for them. It makes a perfect and cheerful combination already. The other two walls should be finished with white tiles in the same arrangement and setting. Instead of white grout as well, they should be enriched with yellow grout.

    Extend the combination with white bathroom amenities and yellow finished fixtures. It gives you enough yellow for summer feeling, yet it keeps thing in balance.

    Yellow and white combination for bathroom wall tiles
    Bathroom with yellow tile

    3. Yellow on Black and White Background Bathroom Tile

    You don’t have to cover the entire bathroom with yellow tiles. Instead, you can focus more in making the yellow focal.

    Let’s start with white tiles with small black squares on it. It should make a perfect floor for the bathroom. Continue to finish the bathroom with these tiles up to half down of the wall.

    Make borders with black slim tiles for strong finish. The yellow tiles should go from the half wall to top.

    Combine the entire concept with white cabinet and black countertop and you find yourself a very creative bathroom with elegant concept.

    Yellow and black bathroom tiles

    4. Yellow and Gray Bathroom Tile Ideas, Yay!

    Let’s get a little more creative in combining. Instead of using black or white or both with yellow, let’s try gray.

    Choose medium squares gray for half of the wall to the floor and then finish it with soft gray border. It makes sure darker shade is on the below part.

    Using the same gray tiles, cover the floor in diagonal setting or other possible patterns you can make.

    Finish the rest of the wall bathroom with yellow tile. To pop the yellow up more, use white and yellow bath rug for décor.

    Black, yellow, and gray bathroom tile ideas
    Image: modwalls.com

    Basically, yellow is still an interesting color for a bathroom. It doesn’t have to be hot if you can select the right combination for it. Be creative in setting up the entire tiles. Yellow is the perfect color for summer and fun feeling. Which idea you will pick?

    Read also: Yellow Bedroom Color Ideas

    Combination color ideas for yellow bathroom tile

    Originally posted 2021-10-03 01:39:00.

  • HOW TO INSTALL BATHROOM SINK PLUMBING STEP BY STEP

    HOW TO INSTALL BATHROOM SINK PLUMBING STEP BY STEP

    Here is about bathroom sink plumbing: the parts, how it’s working, the diagram of assembly, and how to install the plumbing of bathroom sink drain. I hope this information help you. Check it out. 

    Read also: Bathroom Sink Drain Pipe Size

    IMPORTANT PARTS OF BATHROOM SINK PLUMBING

    1. Shutoff Valves

    Shutoff valves is metal or plastic. The size is small. It is located between the supply hoses or tubes (this part is connected with the tailpieces on the sink faucet) and the incoming water supply pipes.

    The shape of the handle shutoff valves in oval or sometimes spherical. The handle is work for open or close the valves. So, this shutoff valves are often called Stop Valves.

    With this part, you no need to shutting off supply the water to the whole house. Because you only need use this shutoff valves to turn off the water supply at the sink only.

    The shutoff valves are pairs. One for hot waters, and one for cold water. The installation is easy, because use compression fittings, so you install onto the water pipes without soldering. But, if you want to replace shutoff valve, you need to turn off the water to the house.

    SHUTOFF VALVES BATHROOM SINK PLUMBING

    2. Supply Tubes

    Usually, supply tubes made of chromed copper, solid plastic (gray), plastic mesh (usually white), or braided wire mesh. For supply tubes position, you can see from the sink faucet tailpieces then down to stop valves.

    Supply tubes connected to shutoff valves and tailpieces with attached nuts. Sometimes, supply tubes fail. If that happen, you need replace it.

    3. Drain Tailpiece

    Drain tailpiece also called sink tailpiece is the straight part of pipe, and it’s connects to the sink drain fitting bottom. If you have pop-up drain sink, you can find on the back tailpiece to check the drain assembly.

    Drain tailpiece using a slip nut to attached with drain fitting. It’s easy to controls. Under the nut you can find a tapered plastic washer that make a watertight seal.

    If you drop item into the drain sink, you can open these slip-nut joints. Then you can take the item.

    DRAIN TAILPIECE BATHROOM SINK PLUMBING


    4. P-Trap

    P-Trap have 2 parts, U-bend and trap arm. These parts make your sink connected to the sewer line. The curved trap allows your sink safety from holds standing water, also prevents the sewer gasses rising up and out to the sink.

    The U-bend bottom always filled with water, so the gasses can not back to sink. If you run water to the drain, you always change the water in the U-bend with new water.

    The P-trap easy to replace because using slip-nut joints to assemble it. But old design using solvent-glued, so better for you to change with trap with slip-nut joint.

    5. Drain Pipe

    This part is connected with the household plumbing system. Drain pipe connects to trap arm with slip-nut joint. So, the sink drain pipe easy to repairs.

    The size of drain pipe is 1½ inch in diameter, but it can be larger or sometimes smaller.

    Related post: Best Tips on How to Decorate a Small Bathroom Sink

    HOW BATHROOM SINK PLUMBING WORKS

    Usually, bathroom sink has 3 fixture holes: 4, 6, or 8 Inch centers. The larger size used to receive a split set faucet that faucet handles and the spout separated. 4 or 6 Inch for a center set faucet or a single lever faucet. The water flow from supply tubes to shutoff valves then to tailpieces on base of faucet.

    Besides that, Pop-up stopper at the drain pipe bathroom sink plumbing that raises and lowers if you pull up or down on knob/handle that located behind the faucet body. The knob is head of lift rod that tied to a clevis (connecting bar).

    Clevis connects to pivot rod and ball assembly, that consist of rod through rubber pivot ball. This part is slightly up to the tailpiece of stopper.

    If you push the knob, the lift rod will down, and it cause pivot rod push the stopper will up. And the opposite will happen, if you pull the knob, you make the stopper down.

    Because some reason, if you want to remove or replace assembly, you can pull it right out. Or, you maybe should to twist it to remove it from the clevis.

    Bathroom sink drain has a flange. With plumber’s putty, the flange was sealed to the sink hole and screwed into drain body. And with a lock nut, it’s tightened to under the sink bowl.

    And then how to P-Trap works, I explained above. Including how water is trapped and hinders the return of gases to the top.

    Then, by observing the following bathroom sink plumbing diagram, it may be easier for you to understand how it works as a whole.

    DIAGRAM OF PLUMBING BATHROOM SINK DRAIN ASSEMBLY

    DIAGRAM OF PLUMBING BATHROOM SINK DRAIN ASSEMBLY
    Image: hometips.com

    HOW TO INSTALL BATHROOM SINK PLUMBING

    Generally, Installing bathroom sink plumbing is need two phases: rough-in and finishing phase. The rough-in is more difficult phase. It depends on the system’s configuration overall.

    Bathroom sink no need high water volumes. So, we must be able to branch the ½ inch supply lines from the tub or shower.

    After that, we can tie the 2-inch drain line into an existing one. Remember too about sink vent. If not, maybe it will not drain properly. We have to raise the 1 ½ or 2-inch vent from the drain within 5 feet of the sink trap. And don’t forget to tie into an existing vent or to the roof.

    1. Installing the Bathroom Sink Plumbing Pipes

    Important to know is the position of the supply tubes and drain pipes. Drain pipes and sink drain should be lined up, and straight between the supply stub outs.

    Uncover the wall to pass the pipe out. The water must be off when the tees soldered onto the pipes.

    The drain slope is ¼ inch per foot toward the sewer, and so does the vent in its incline toward its tie-in point.

    After that, allow the stub-outs lengthwise a few inches from the wall, then close it after you install the sink.

    2. The Stub-Outs Prepare

    Install shutoff valves on the supply stub-outs before hook up the sink. Solder slip-joint valves to pipes or with a wrench, tighten on compression valves.

    Gluing on the valves is the options if you using CPVC plastic pipes instead of copper ones. But, if you don’t glue the P-Trap to the waste pipe, you can glue on a P-Trap adapter.

    3. Connecting the Sink

    Install the faucet and the drain onto the sink before install the sink. It’s will be easier for you. Install tailpiece with same lever as the top of the drain. It’s makes the trap connects easily.

    Connect the faucet supply hoses to the shutoff valves and faucet inlets. Then tighten with adjustable pliers. The connectors must be right at size to fit, so better you check before you buy it. If the pop-up stopper was connected, the sink ready to use.

    Finally, its all of information for you about bathroom sink plumbing. If you want us to discuss further, please write in the comments column below.

    Originally posted 2021-09-24 06:24:00.

  • Bathroom Sink Drain Pipe Size: Guide on Size and Units Connected

    Bathroom Sink Drain Pipe Size: Guide on Size and Units Connected

    Working on your bathroom sink drain pipe is actually a lot simpler than working with ones in the kitchen.

    However, to make sure it is going to be fully functional, you need to understand the entire drain pipe sizes and count the number of pipe units to be connected with it. Check out the following guide for bathroom sink plumbing details.

    Read also: Bathroom Sink Materials Pros and Cons.

    BATHROOM SINK DRAIN PIPE SIZE

    The Standard Bathroom Sink Drain Pipe Size and Setting

    Every state may have different code on plumbing and it may affect the required size of the bathroom sink pipe. However, most of the bathroom sinks use 1 ¼ inch drain pipe. This bathroom sink drain size is precisely the diameter of the pipe instead of the length. For installing the plumbing, You can read in this related article, How to Install Bathroom Sink Plumbing.

    When you visit a real hardware store or plumbing section, the shop assistant will mostly recommend you to use the same size. This size is actually half as big as one on your kitchen sink drain. It is actually an appropriate size for bathroom sink considering that the duty is smaller as well.

    Your plumbing bathroom sink drain will throw away water mostly, or toothpaste and tiny stuffs sometimes. Therefore, bigger diameter of the pipe is actually unnecessary.

    Related post: Best Tips on How to Decorate a Small Bathroom Sink

    Unlike drain pipe on the shower or tub that will be connected to two units, this sink drain pipe will be connected to only one unit on the drain line. Kitchen sink is commonly connected up to two units or three units for one with disposer.

    However with vertical drain stack, this drain pipe size can handle up to two units connection well too. So if you plan to have more than one unit to be connected, stack it vertically.

    Standart bathroom sink waste pipe size

    The Other Bathroom Drain Pipe Size

    Even though the above size is the recommended standard bathroom sink drain size, you are allowed to use other sizes too. There are actually several others alternatives available.

    The first size to consider is 1 ½ inch drain pipe. This is slightly bigger than the standard yet it offers more connections as well. In horizontal stack, this drain pipe serves up to three units connected.

    See also: Cheap Bathroom Cabinet Organizer under Sink Ideas

    Meanwhile in vertical stack, it can work with up to four units connected. It is a custom size on private and public restroom for being practical for two or more sinks.

    The third size is 2 inch drain pipe. This drain pipe can be connected to up to six units in horizontal stack and up to 10 units in vertical stack. This drain pipe is recommended for all models and types of washing machine. So yes, it is perfect for your laundry.

    Related post: How to Unclog Toilet Naturally

    The fourth size is 3 inch drain pipe that can be connected to 20 units in horizontal stack and 30 units in vertical stack. This is the minimum size to use for building sewer or drain pipe that is connected to the toilet.

    The last size is 4 inch drain pipe that can be connected to 160 units in horizontal stack and 240 units in vertical stack. This pipe size is commonly used for sanitary drainage.

    Read also: Bathroom vanity with cooper sink.

    So there are many sizes available. Each offers different ability too. However for bathroom sink, you only need 1 ¼ inch drain pipe or the next size if you insist. Bigger pipe costs your more and it offers abilities you don’t actually need for a bathroom sink.

    Chrome bathroom sink drain smell pipe

    Originally posted 2021-09-24 02:05:00.

  • Amazing Tips on How to Clean a Bathroom Exhaust Fan in 10 Minutes

    Amazing Tips on How to Clean a Bathroom Exhaust Fan in 10 Minutes

    How can you notice whether your bathroom fan is working properly or not? When you finish taking a bath, do you notice that the mirror in your bathroom is foggy?

    When it happens, it indicates that your exhaust fan is not in a good condition. Don’t worry, there are some excellent tips that you can do to clean your bathroom fan.

    An exhaust fan installed in every bathroom is being vented out to the outside and it will be automatically running when you take a bath or shower.

    HOW TO CLEAN A BATHROOM EXHAUST FAN IN 10 MINUTES

    During the time, it is designed to get rid of excess humidity or moisture which can form mildew and mold in your bathroom. That’s why it is very significant to always keep your vent fan clean every day.

    Read also: How to Remove Mold from Bathroom Walls.

    If you left your vent fan to be neglected for so long, it will be resulted to your health issues. It is better to always check and clean your bathroom fan every six months. The dirt is going to accumulate on the cover and its motor as the air is being sucked up through the fan every day. Therefore, you have to clean the fan. By doing so, you can do a great job by removing the accumulated dirt before it becomes a serious problem.

    Related Post: Quick Simple Tips to Speed Clean Home in Few Minutes.

    Before cleaning your fan, prepare some tools and materials needed in the fan cleaning. The tools that you need to prepare are vacuum cleaner, screw driver, scrub brush and ladder. Choose a vacuum cleaner with a hose handle to clean the dust so that it won’t bring you hard time to clean. Then, the materials needed for cleaning your fan are soap and water.

    If you have already got all tools and materials with you, let’s start cleaning your bathroom vent fan. Here are some amazing tips that you can do:

    How to clean a bathroom exhaust fan just in 10 minutes

    1. Make Sure to Turn Off the Vent Fan Power

    Before doing anything else, turn off the fan power to make it stop working until you finish the cleaning process. Generally, most fan models have the power switch installed behind the cover. You just need to open the cover and turn off the switch. Nonetheless, you can also temporarily turn off the bathroom breaker, just to be safe.

    2. Clean the Visible Dirt

    To prevent dirt falling onto the floor inside your bathroom when you try to get rid of the cover of the fan, you can first vacuum the visible dirt accumulated in the cover. By doing so, you will save more time.

    Related Post: Bathroom Vanity Ideas.

    3. Remove the Cover of the Fan 

    There are two types of the cover. One which has screw on it and one which has tiny metal wires. Check the cover on your bathroom fan. Gently pull the cover down on you. This cover is generally being held by some screws or tiny metal wires which make it to be away for about 2 inches but it won’t be completely off.

    If it is attached by two tiny metal wires, usually in two opposite directions, you just need to squeeze them in order to make them off of the ceiling completely. On the other hands, if the cover is attached by some screws, you then need to unscrew them.

    4. Remove the Fan  

    Unscrew the fan from its assembly and remove it gently. Don’t drop your fan or hit it to the fan pipes. The broken fan blades will result to lauder and less effective fan. So, be careful!

    5. Clean the Cover and the Fan 

    First of all, you can vacuum all parts of the fan and the cover thoroughly. Then, you can wipe them with a thin cloth which has been soaked into soapy water. You can just put the cover in your bathroom sink soaked with soapy water for a while. But, wipe the fan by yourself with a thin clothe soaked in soapy water. Do it repeatedly two or three times to make sure that all the dirt have been wiped off.

    6. Clean the Vent Pipe 

    You can use a brush attached on the vacuum to clean the dirt covering the fan pipe. For the part that can’t be reached by the vacuum, you can clean it manually with the scrub brush.

    7. Clean the External Vent Port 

    You can clean the external port of your bathroom fan later on after you finish cleaning the internal part. But, you need to remember that it is also necessary to find the external vent port and clean it. Use the vacuum and the damped cloth to clean it.

    8. Clean the Motor Housing 

    If your fan housing has some kind of plug, make sure not to expose it with water as it will cause an electrocution or shock on the fan when you reinstall it. Just vacuum it and use dry cloth to help you wipe off of the excessive dust.

    9. Reinstall the Fan

    After the fan is completely dry and clean, you can reinstall in on to the fan motor. Don’t forget not to bump it into the pipe. Tighten the fan with the screws. Then, try to spin the fan for a few times to make sure that is doesn’t stroke against anything.

    10. Turn On the Fan Power

    After the fan is safely installed in place, turn on the fan power or bathroom breaker back. When the power is already on, remember that the fan is now back to become dangerous. So, don’t try to clean or wipe anything on it.

    11. Reinstall the Cover of the Fan

    Before reinstalling its cover, check if it is already dry and clean. Plug in the cover into the ceiling by screwing it back or put the metal wires in position. Gently push the cover to the ceiling. Turn on the fan. It should be quieter and flowing more air than before.

    Read also: How to Clean Bathroom Faucets Gold?

    So, it’s an easy task to do, right? You also don’t need lots of time in doing the work. All tips can be finished within 10 minutes. When your vent fan is clean, you can minimize the bathroom odors and also prevent mildew and mold to form. You can also maintain your health by doing so.

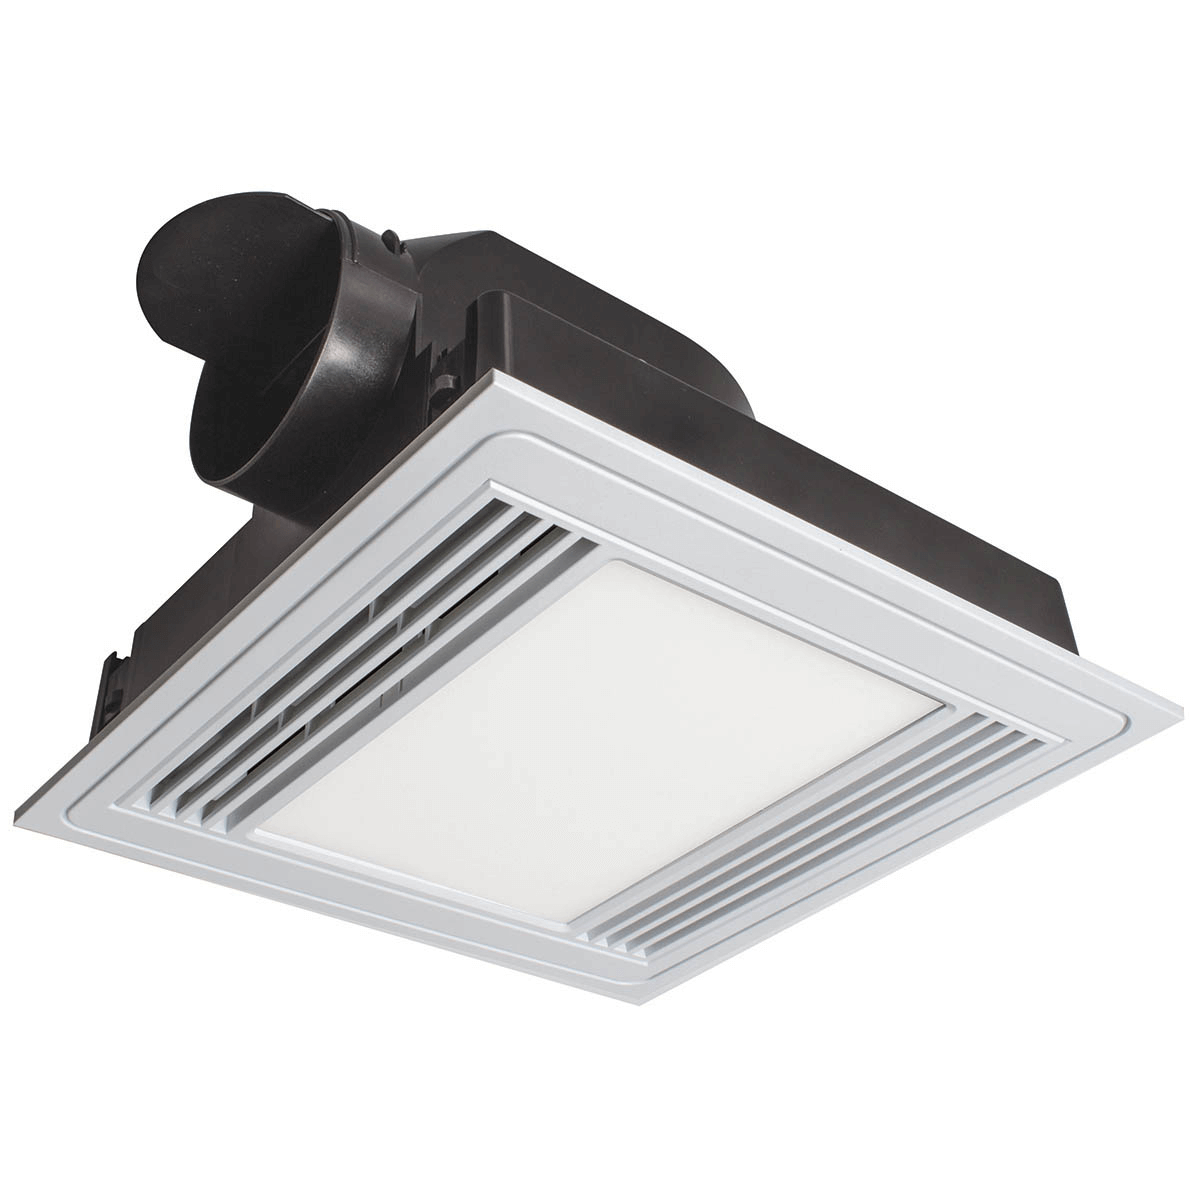
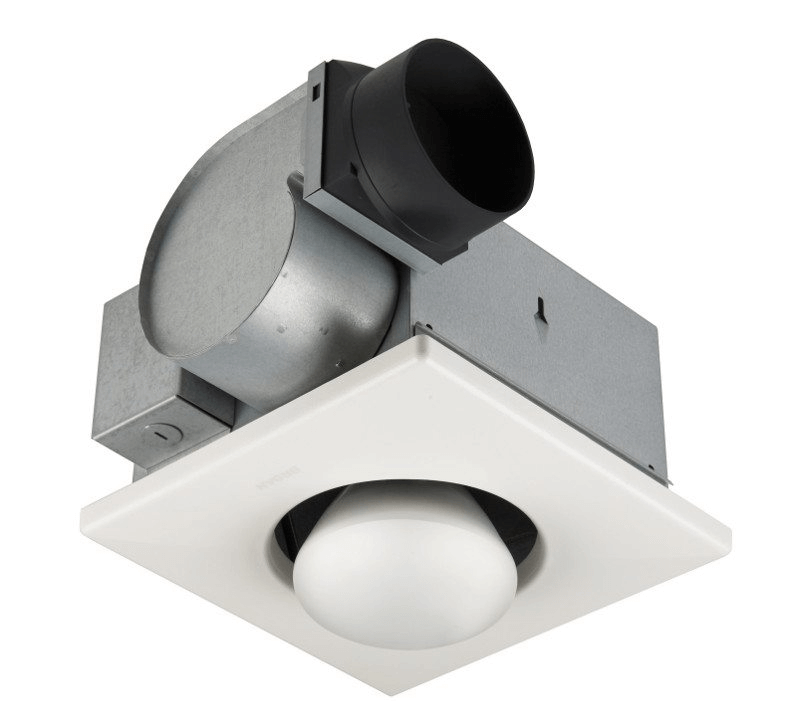
    Most popular bathroom exhaust fan types:

    Originally posted 2021-08-28 04:12:00.

  • How to Decorate Over the Toilet Shelves with Thrift Shop Items

    How to Decorate Over the Toilet Shelves with Thrift Shop Items

    The decoration of a room represents the personality of the house’s owner.

    Toilet space is no exception. For this room, the interior might not have to be as pretty as the other rooms.

    Still, clean and comfortable toilet will not make your guests frown when they come inside. Play with low budget decoration for well ordered toilet totally makes sense.

    HOW TO DECORATE TOILET SHELVES

    1. Old Ladder

    For this item, you might find it in the store room. Ideal ladder should help you to reach higher place. One or two broken ladder steps make it lose its function.

    However, you can still use it as a shelves for the toilet. First, you need to coat it with water resistant solution. It provides extra protection, considering the moderate to high moisture level in the bathroom.

    Cut down two ladder steps on the bottom. Otherwise, the ladder cannot fit into the space. Leave three ladder steps above the removed steps.

    If the ladder is longer than the range of five ladder steps, saw the rest. Put this ladder against the wall. Utilize the ladder steps as the board to put bathroom items. You can arrange heavy to light stuffs on this DIY shelf.

    Over the toilet ladder shelf
    Image: architecturendesign.net

    2. Rattan Box

    Those who loves clear area must have more than enough rattan boxes. Take three of them and nail them above the toilet. Give them enough space from each other.

    Rattan box is quite sturdy, so you could put it facing upwards. You can get extra space to put the toiletries, towels, and more.

    This item is a great option because it is easy to clean and quite durable. Even if you have to buy one, it is cheap and available in second hand shop or supermarkets.

    Read also: How to Decorate Floating Shelves in Living Room?

    3. Towel Holder

    This is a must have item in a bathroom. Instead of holding a single towel, do you ever consider turning it into shelves? You begin with adding hooks on each end. Hang iron wire that holds tiers of boards.

    For longer life time, you can also choose the chopper wire. The color is great and the function is superb! The towel holder could transform into something gorgeous, even upgrading its role. Since the hook will be the pedestal, make sure you pick the thick one.

    4. Old Wooden Box

    It belongs to laundry room, taking the roles of dirty clothes storage. You could also alter its task as a shelf over the toilet.

    The bottom should stick to the wall, leaving the upper part opened and facing you. This is a distinctive style for bathroom interior. It adds accent and also expand the storage area.

    Keep the dry towel and small bathroom items in it. Avoid placing any heavy items such as bottles of shower cream, shampoo or conditioner. This fragile item may fall from its place.

    Decorating should not be intimidating for you and your wallet. The process is fun and could definitely be done on low budget. Altering the old items in your house is also a great choice. When nothing could fit the need, visit a thrift store first and decide whether any item fits the list.

    Decorate over toilet storage with towel bar
    Image: homedit.com

    Originally posted 2021-07-17 05:07:00.

  • How to Decorate Bathroom Shelves for Enhanced Relaxation

    How to Decorate Bathroom Shelves for Enhanced Relaxation

    A bathroom is a place where we should feel relaxed and enjoy our time.

    To enhance the experience of relaxing, you need to put things that can help yourself to feel relaxed.

    In this article, we will discuss about those things that make you feel relaxed as bathroom shelves decorations. These are the things needed to be put in the bathroom:

    AWESOME 4 IDEAS HOW TO DECORATE BATHROOM SHELVES FOR ENHANCED RELAXATION

    1. Play with Towels

    Why towels? Because just by looking at a rolled towel would give the mind calm and soft feeling that can help you feel relaxed.

    To obtain maximum relaxation, choose the thickest yet the softest towels and pile it up like a pyramid of 2 to 3 layers. Or if you have shelves that can only be inserted by one towel only per shelf, be playful on the arrangement. It potentially increases indoor mood and atmosphere.

    If you want to pile up the towels, make sure they have the same colors. If it is divided, you may choose different colors. But you need to be thoughtful in picking the colors; towel colors are based on the most dominant colors in your bathroom.

    For example if your bathroom wall has white color and the shelves are also white, then the towels also have to be white.

    HOW TO DECORATE BATHROOM SHELVES

    2. Add Plastic Green Plants

    You must be questioning this choice. Why does it have to be plastic plants instead of real plants? It is okay to put real plants on your bathroom shelves.

    However, if the dirt gets wet, you will smell it and it won’t get you into relaxation. The other reason why you need to put the plastic ones is because plants will make insects come into your bathroom. You don’t want bees and flies joining your relaxation, do you?

    Read also: Bathroom decor with plants ideas you must adopt

    3. Prefer on White Roses or White Orchid

    Bathroom shelves decor with white orchid flower arrangements
    Image: sandandsisal.com

    After seeing what has written above, you must be questioning how real roses and orchid will make any different from letting the insects to join your relaxation. Yes, this is risky; especially these decorations are real flowers and bees love flowers.

    Actually you can put on the plastic ones, but the smell and the texture of real flowers will help your eyes and nose to realize that you are getting into relaxation.

    In addition to it, the beautiful shape of flowers adds calmness and natural touch in the room. It is perfect as decoration and relaxation accent.

    4. Incense Bowl

    There is no faster way to get into deep relaxation than lighting up incenses. Incense won’t be complete without its bowl. To decorate your shelves, choose an incense bowl with traditional design and texture.

    Even so, don’t choose anything like traditional Chinese with dragon or Chinese engraving or it would be too much for relaxation. To maintain the relaxation in the bathroom, every decoration needs to be simple and has soft textures.

    For recommendation, it is better to choose the one that made of clay. The traditional and simple look with no additional texture will keep the balance of simplicity in your bathroom and enhance the relaxation process.

    Those are the things that can decorate your bathroom shelves. These decorations are not just decorations; they can affect your relaxation in the bathroom. Every decoration must have purposes; whether it is for nuances, atmosphere, or feelings. Now that you have known the decoration ideas for your bathroom shelves, which one do you like most?

    Bathroom shelves decoration ideas with incense bowl ceramic and others

    Originally posted 2021-07-13 09:45:00.

  • Most Popular Paint Colors for Bathrooms: Some of the Unknown Palette

    Most Popular Paint Colors for Bathrooms: Some of the Unknown Palette

    The appearance of the bathroom depends on a lot of factors and elements, including the color.

    Yes, the seemingly unimportant colors can really change the atmosphere and ambiance of a room.

    For instance, red is fiery and full of spirits while green is calming and refreshing. Yellow is cheerful and bright while purple is regal and royal.

    Different effects can be achieved from such a simple color scheme.

    So, which colors should you use for your bathroom and what kind of effect can you expect from it?

    See also: How to Decorate a Country Bathroom: Some Simple but Effective Ideas

    How to decorate a purple bathroom
    Image: digsdigs.com

    1. Some Possible Examples

    There are some great and probably not so ordinary colors that you can try for the bathroom. Here are just some of them:

    • Cobalt tiles. The entire room is covered in azure tiles with a touch of gold. With gold shower head and the porthole like mirror within the area, the bathroom is definitely amazing and different.


    • Soft taupe. You can choose neutral colors and yet you don’t have to worry that they will make your bathroom look dull or boring. The soft taupe will be just perfect when paired with blue, pinks, and light green – which can be represented through the shower curtain, wall décor, and light accessories. This soft color is just perfect to deliver peacefulness and luxury in a small space.


    • Pink pops. No, it doesn’t mean that you should color your bathroom in bright pink. You can combine the bright pink with neutral color like white. Choose a focal point like the shower and use the pink for the shower curtain. The effect is amazing although done in a simple manner. You can add small details like pink wall décor or pinkish countertop accessories to complete the look.

    How to decorate a pink bathroom

    Besides these colors, there are still more not-so-common colors with a mix of refreshed look, such as:

    • Ash gray. Just because you choose gray, it doesn’t mean that it will be dull. Imagine the combination of concrete and granite and put the color scheme in your bathroom. This is the perfect option for a contemporary bathroom. You can match it with dark wooden floors so the overall look isn’t too pale. With dark floor, light wall, and black vanity, your bathroom can be both sophisticated and elegant – and you don’t even need to break a sweat for it.


    • Parchment. The creamy and buttery white color will be perfect if you have a vintage or retro theme. If you want to have a look without turning it into a drab, consider pairing the color with something brighter. A touch of pink for the accessories and metallic accents can really make your bathroom look elegant in the simplest way.
    How to decorate a gray bathroom
    Image: housetohome.co.uk

    2. The Pastel Options

    Pastel colors aren’t always designed for women – it isn’t always associated with femininity. If you want to have the pastel scheme, consider these options:

    • Seafoam green. This soft pastel green looks perfect when matched with white and beige.


    • Sky blue. The soft pastel hue will brighten up the bathroom without overdoing it.


    • Powdery pink. If the pink is soft and pastel, it is okay to use the pink as the main color. You can match it with white vanity and silvery finish and you can create a perfect balance without making the bathroom look too girly.
    How to decorate a red bathroom
    Image: favideas.com
    MOST POPULAR PAINT COLORS FOR BATHROOMS

    Originally posted 2021-06-22 00:40:00.