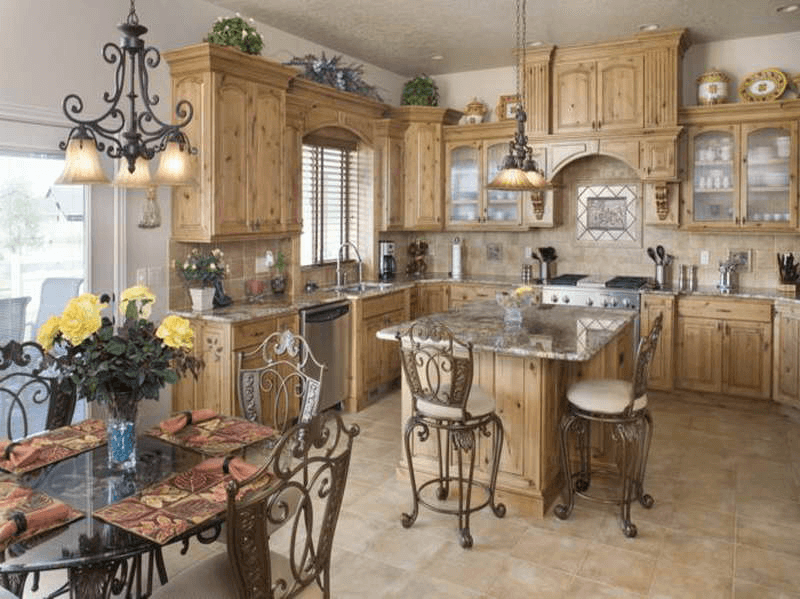
Category: Home tips

  • Most Popular Home Decor Ideas Using Wood

    Most Popular Home Decor Ideas Using Wood

    In decorating our home, we can use so many materials. However, from all materials available, some home owners like to use wood as their main materials.

    They different reasons why they like to use wood. So, if you are one of them, here are some decor ideas using wood that you may try to your home.

    See also: Dining Room Wood Wall Decor Ideas

    1. Calligraphy Quote

    This idea is probably the idea that is mostly used by many people when they decide to use wood for decor.

    Moreover, you can also see calligraphy quote decor in cafe, restaurant or any other similar places. It’s because you will not find it complicated to create such idea. Normally, a calligraphy quote is hung on your most favorite room of your home.

    You can decide whether you will do it by yourself or simply order it from some wood artist. Surely, there are many differences from both ways. If you decide to do it by yourself, then you have to start from looking for the raw materials and do some project to prepare the materials.

    If you decide to order it from some wood artist, you simply choose the design; decide the quote and they will do the work for you. Surely, the cost will be different from both doing it by yourself or simply ask other people. You can decide which way you prefer.

    Wood calligraphy home decor ideas
    Image: Panfan.me

    2. Photo Wall Art

    This idea has the same concept with the previous one. The difference is if calligraphy quote focuses on words or sentences, this idea focuses on photo. Thus, you can say that it’s like a photograph but made of wood. Therefore, unless you have very talented piece of skill, it’s almost impossible for you to create it by yourself.

    Besides, creating a photo wall art made of wood will be much more difficult than creating a calligraphy quote made of wood. You will not only need to create it from raw wood materials but you will also need to have a decent printing machine that can deal with wood. Hence, order it from other people is the best choice in case you are interested to try this idea.

    Wood Photo Wall Art Home Decor Ideas

    See also: DIY Wooden Crate Ideas for Rustic Home Decor

    3. Pieced Wood Arrow

    If the two previous ideas are unlikely to be done by yourself, this idea is much more doable, yet still offer you a nice piece of art. Pieced wood arrows are mostly found and used in cafe or restaurants, to show the customers about some specific places like toilet, cashier, etc. However, it does not mean that you can use it in your home.

    Besides, it’s totally possible for you to create it by your own. A pieced wood arrow is much more doable than a calligraphy quote or photo wall art. The point is you have to look for the suitable types of wood as the materials. Otherwise, you will find it harder in the process if the materials do not suit with the process.

    Basically, creating a pieced wood arrow is almost similar with creating an art work. Hence, the tools you need to prepare will not be as complicated as the tool you need to prepare for the two ideas mentioned previously. Therefore, creating it by yourself is more recommended since it’s doable.

    Pieced Wood Arrow Home Decor Ideas
    Image: homesthetics.net

    4. Handcrafted Jewelry Holder

    This idea is almost similar with the previous one. Moreover, it’s better for you to create it by yourself since the work is actually simple, yet meaningful. What makes you prefer to create it by yourself is the fact that you can also maximize any of your used materials, in this case wood, as the main materials. A handcrafted jewelry holder is not only useful as an art work but also is useful as the place you can hang your jewelry.

    Just like its name, you can express your wild ideas by creating a handcrafted jewelry holder, so that you can hang your beloved jewelry. The only cost you have to pay is probably for the paint, since you need to make it looks as beautiful as possible.

    The best part of creating this handcrafted jewelry holder is that you can utilize your used woods as the main materials. As long as you create it as beautiful as possible, it will look like an expensive art work you just purchased from local store or online.

    Handcrafted Jewelry Holder Wooden Home decor ideas
    Image: littlewoodcreations.com

    5. Wood Shelves

    This idea is not only simple but also affordable. If you have so many books in your home but you run out of space, creating wood shelves seems the best solution. The point is you have to look for the proper raw materials. In this case, you have to look for the thicker wood materials compared to the materials for the pieced wood arrow.

    Since it’s simple and affordable, creating the wood shelves is much more preferable to minimize the cost. Once you have got the proper materials, you don’t have to worry about the rest. As long as you are familiar with shelving works, creating this one is not that complicated. Just make sure that you create it as interesting as possible.

    Wooden shelves home decor ideas

    6. Photo Clipboards

    The last but not the least, you can create photo clipboards made of woods. Moreover, it’s fair to say that this idea is probably the simplest and the cheapest one compared to all the ideas above. The main concept of this idea is displaying your printed photos on wooden boards. Therefore, it’s called photo clipboards.

    Wood Photo Clipboards Home Decor
    Image: coralgardensnews.com

    You just simply print the photos you want to display, and then look for the wooden materials. Your next job is to make sure that all the wooden boards have the same size. Don’t forget to polish the wooden boards before you display your photos on them. The last step is to make sure that the wooden boards can be hung, and then you can choose your most favorite spot in your home.

    Decorating your home does not always need high budget, especially when you decide to use woods as the main materials. As long as you are sure about what to do, decorating your home with wooden materials is not as complicated as you imagine.

    MOST POPULAR HOME DECOR IDEAS USING WOOD

    Originally posted 2020-09-01 03:53:11.

  • Most Popular Tiny House Design

    Most Popular Tiny House Design

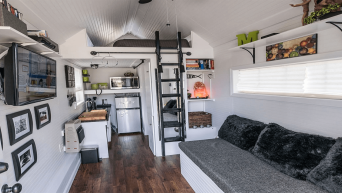
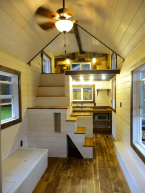
    While the house build on less than 300 meter land is gaining more popularity, some people are afraid of sacrificing their comfort they always dream about.

    Actually, with proper planning, thoughtful design and suitable furniture, tiny house might bring you closer to the family while having comfort zone for yourself.

    Read also: Tiny House Build Cost.

    MOST POPULAR TINY HOUSE DESIGN

    1. Folded Tiny House

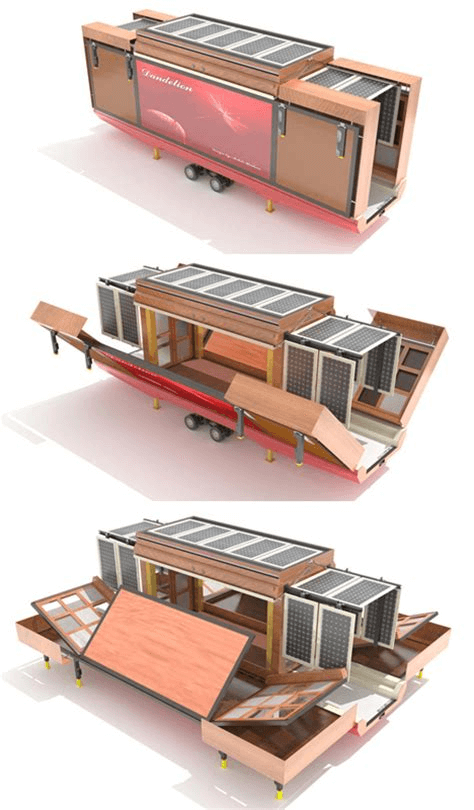
    It is important to learn that most tiny house could be delivered by large truck. Therefore, the house owner should make sure that the house is small enough for transporting but big enough to fit all the family members. While many tiny house developers are happy with the fixed build, there is an option for folded house.

    The dream house could be expanded when it has reached the destined place. The expansion is on the side walls area, so the house won’t exceed the maximum length promised. In total, the width could reach up to 4.6 m, while it only appears as 2.6m box on the truck.  The standard length of the standard house is 8m.

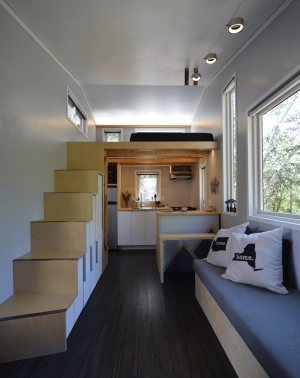
    In total, the available floor space inside the tiny house is around 30 square meters. To compromise with the limited space, you have to put double function furniture inside. Also, maximize the use of ceiling and walls. For example, set the office and bedroom in one corner. At daylight, fold the drop down bed and set the computer table.

    Another corner in the house would serve as the dining area, which is also the living room located close to the mini kitchen. You also has the simple standing shower. For the power, this house uses solar panel. The toilet type is the dry one. You can choose to have the flushing option.

    Folding tiny house design ideas

    2. Cardboard House

    Some people do not take the tiny house for spending the rest of their life with their loved ones. Sometimes, it is only served as weekend cabin or portable office. In this case, the design of the house is quite important. Fortunately, there is a suitable option for you. It is the cardboard house.

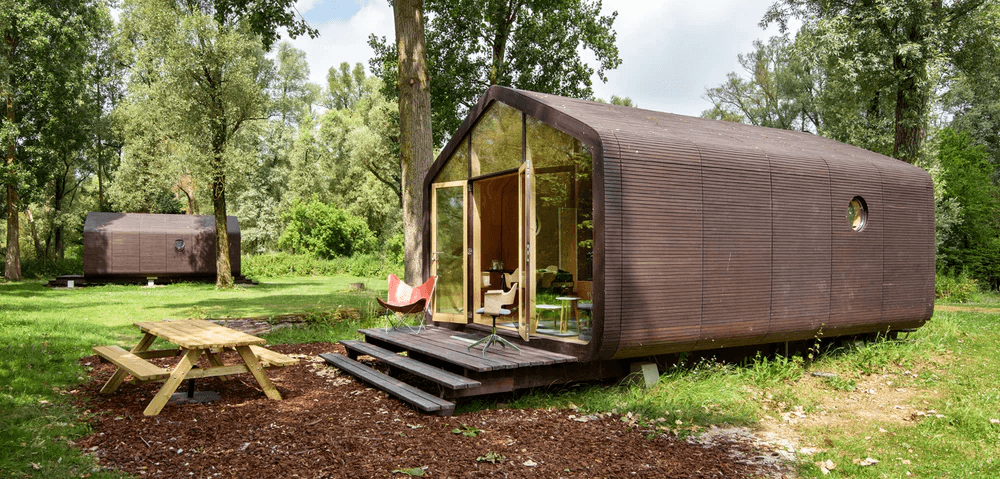
    Originally developed by furniture company, cardboard house gains attention for its unique concept. Cardboard is widely known as packaging materials and the raw supply for helmet and guitar. Considering the finished product, cardboard does have the potential as the house structure. It has durability, flexibility and safety. The company claims that their tiny house could last up to 50 years.

    The stylish tiny house is build by stacking 24 layers of cardboard and wrap them around the mold with house structure. For the finishing part, the company uses waterproof foil and some wood coating. The standard size is five square meters for each house. There are some options for bigger size houses, too.

    The basic design has three segments in it, which is totally fit for a portable office. If you want to make it as a weekend cabin, then ask the developers for five segments house. You will get bigger space for living room, bedroom and kitchen. There is only one bathroom in the house. It is possible to add more features like solar panel and dry toilet. Each additional feature will cost you more fee as well.

    Cardboard Tiny House Design The Wikkelhouse

    3. Luxurious Tiny House

    Another concern from many house owners about owning a tiny house is whether they are able to show grand style with it. This question is understandable, since the limited space inside the house force many designers to reduce the size of the furniture. As the result, the interior beauty goes down to the second priority.

    Thankfully, the other designers are trying to find a solution to get luxurious look in a small house. First, they incorporate a lot of classic styles for the furniture and choice of colors. Instead of closing all the access, the glass wall is installed on some walls, giving the illusion of bigger space. From the outside, you will get elegant look to replace the shabby image of the tiny house.

    The house length is around 10 meter and the width reaches approximately 27 square meters. When you step into the house, the living room already draws the attention. The wall has classic pictures painted on it. Under the stairs, there is another gem; folded dining table. If it is stretched properly, you could invite ten persons to have dinner with you.

    In the kitchen area, the combination of copper details, black and white walls and porcelain counter top delivers another luxurious corner for you. Even the master bedroom has king size beds and the children have their own playroom. For the last touch of grand house, an air conditioner is also installed to keep the cool temperature.

    Luxurious Tiny House Interior Design

    4. The Biggest Tiny House

    Do you think that small house only fit for small family? Think again after reviewing the biggest tiny house available. It has three bedrooms, standard bathroom and the other things any normal house has. This feature is amazing, considering that the house has only one floor. In total, this space is suitable for a family of five.

    The size of this house is quite impressive. It is 10 meters long and 2.5 meter wide. Thanks to the smart layout and design, the total floor space could be expanded to 38 square meters. Taking a look from the outside, the house is covered in board walls and metal roof. The entrance consists of small wooden porch and classic French door. You might be amazed to find that the floor inside the house is made mostly from pine wood.

    The Biggest Tiny House Design

    The living room area is directly connected to the small kitchen in the U corner. It has standard stove with four burners and even a fridge. On the sides, there are lots of cabinets to store multifunctioning equipments. The master bedroom is just across the kitchen. You can stand upright on this area. The other two bedrooms are installed near the ceiling.

    The limited space cannot stop the flow of creativity. Instead of offering repeated designs, many architects ans interior designers come up with brilliant idea to maximize the tiny space. In the end, you will have a private love house that gives comfort to the guests as well. Pick one of the ideas and apply to your tiny house!

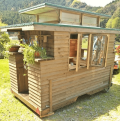
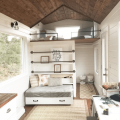
    For get more ideas, maybe you can follow these images below. Hope you get some inspiration before build your own or buy or rent or your another projects.

    Originally posted 2020-08-25 11:22:07.

  • How much does a tiny house cost to build?

    How much does a tiny house cost to build?

    Most of us think that an ideal house is a house with large area and complete stuff.

    However, some people believe that they can have their dream house even with the tiny size. If so, the design and the structure have to be matched with the budget.

    Here are some explanations about the cost you can use as references, in case you are planning of building a tiny house.

    Read also: Tiny House Storage Ideas.

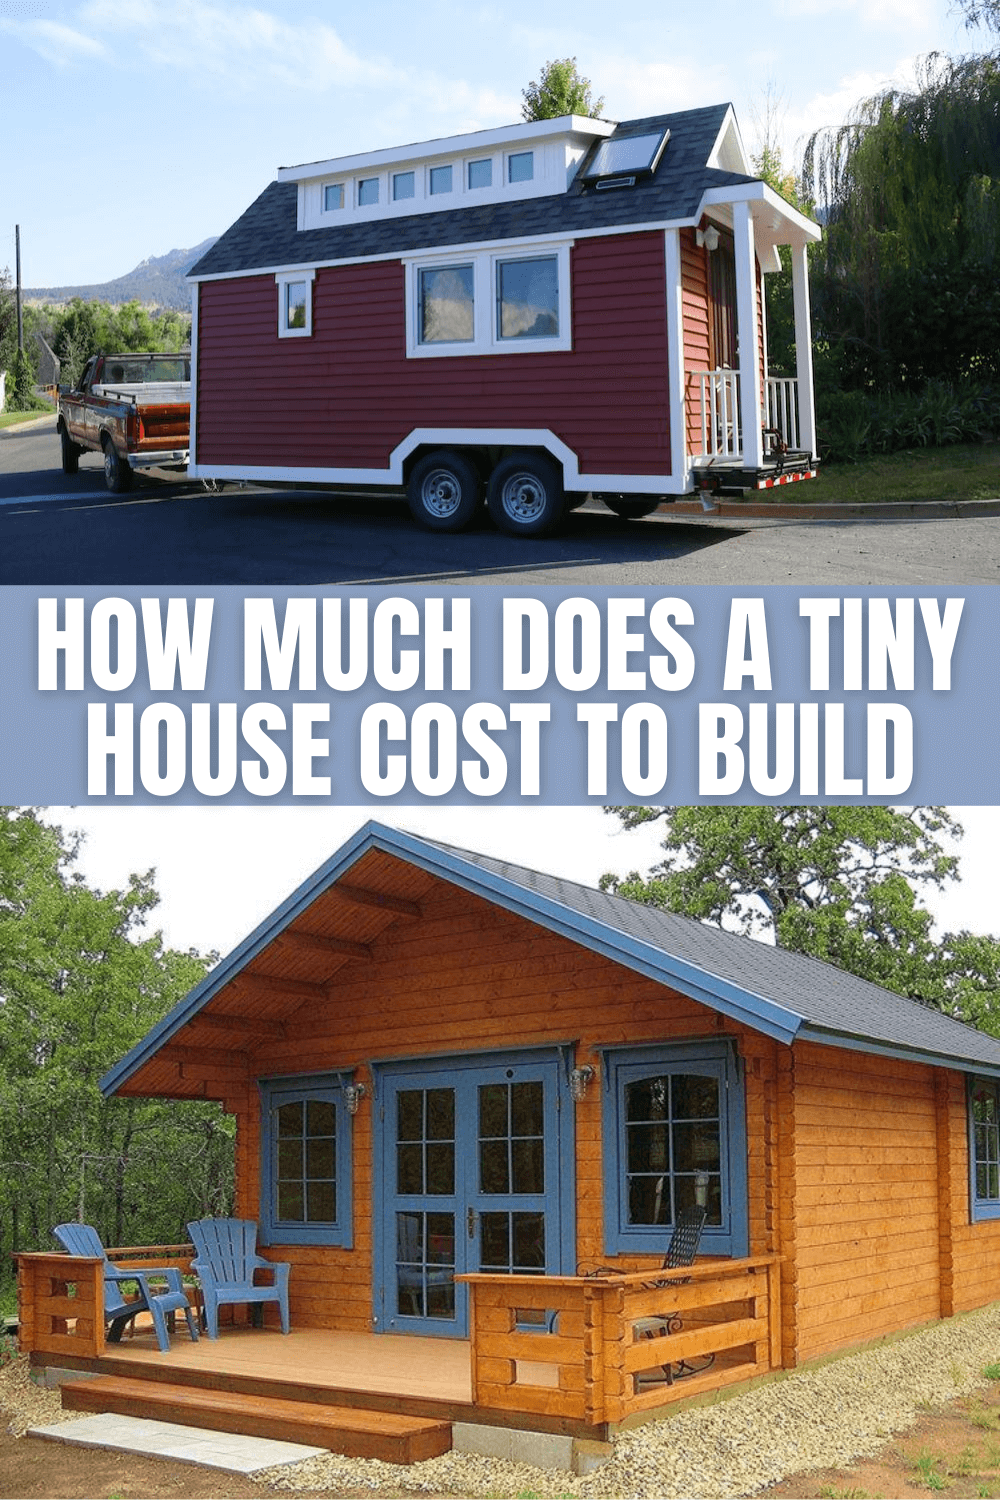
    HOW MUCH DOES A TINY HOUSE COST TO BUILD

    The Possible Options of Types

    Since you are going to build a tiny house, your options are sorted automatically. The choices will not be as many as if you are going to build a large house.

    Therefore, to make your tiny house worth, you have to choose the right type, so that you will not find it strange when your tiny house is done. Here are some options of the types you may choose.

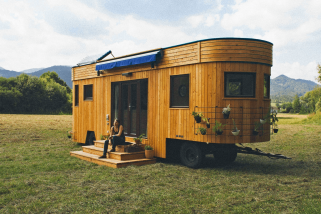
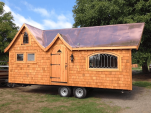
    1. House on Wheels

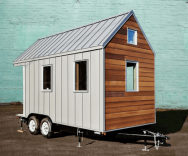
    It’s not a secret that building tiny house on wheels are usually less expensive than any other types of house. However, some people still find it hard to guess how much money they need to build their tiny house on wheels. Basically, whether you are planning to DIY or simply buy it, the cost will surely different. So, let’s start from this kind of house.

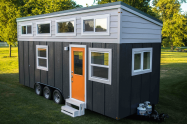
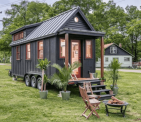
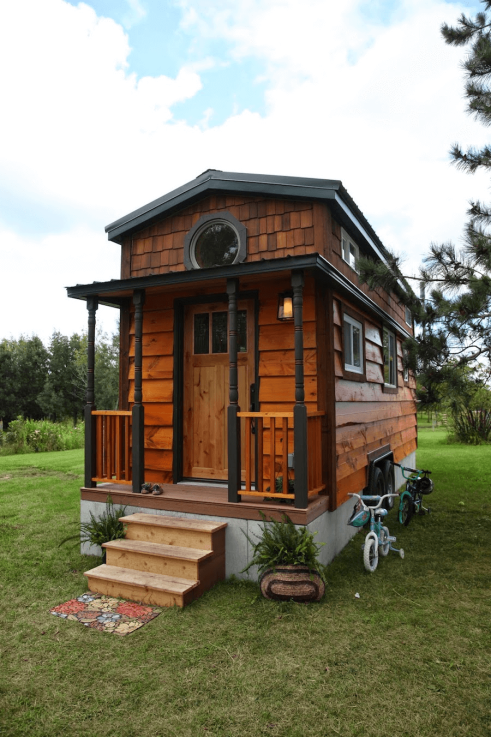
    Basically, building DIY tiny house surely requires not only a piece of skill but also time and money in constructing the house. That is the reason why many people will rarely find built options with professional set up and comfortable needs like shower and toilet for less than $20.000. If you plan to build a house on wheels with comfortable interior, you will at least need to spend around $25.000.

    How much Tiny House on Wheels cost to build
    Image: Tinyhousetalk.com

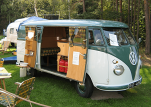
    2. Recreational Vehicle

    When we talk about building a tiny house, we can make the most of everything we find or everything we have, including an old vehicle. For those who like designing or utilizing old things, this idea is worth trying.

    Imagine you start building your own house using an old recreational vehicle. One thing you need to remember if you plan to use this idea is how large the vehicle is.

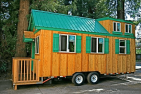
    For building a house from an old vehicle, make sure that the vehicle is large enough. If you don’t have one, you can buy it but don’t spend more than $500. Let’s say that the $500 is the beginning for your whole project. Firstly, you have to deal with the vehicle first.

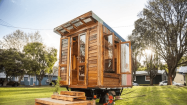
    Clean all the unnecessary parts so that you can start using the vehicle. To make it more affordable, you can also maximizing up cycled materials. The total cost estimated to build this tiny house from an old vehicle is not more than $12.000.

    How much cost to build tiny house recreation vehicles?
    Image: Thewestfalia.com

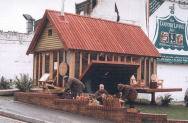
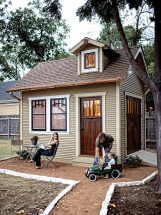
    3. Tiny Vacation House

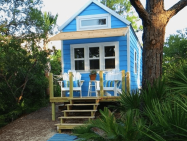
    If you like to build a tiny house with vacation theme, this idea may suit you. Building a tiny vacation house will not need much money. However, building this kind of house will not as simple as building another type of house.

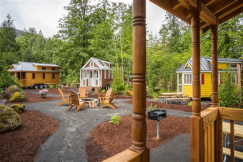
    Make sure that your plan is structured enough to make this one comes true. With the right management, this tiny will not cost not more than $2.900.

    How much tiny vacation house cost to build?
    Image: www.24hplans.com

    The Cost Breakdown

    Now that you have selected the types of your tiny house, you will also need to know the more detail breakdown about the cost you need to build your tiny house. Surely, different types will have different detail of the cost but overall, you are going to pay attention to these factors.

    1. Permission

    No matter how small or how big the house you are going to build, you will always need the permission from the local officers. Therefore, you have to prepare the cost fpr the local building permission. Surely, the number of the cost can be different in any place but the range has to be from hundreds to a thousand dollars.

    To find out the exact number you have to pay for the permission, you can check it online and browse the local area you are living. Usually, there will be the list of the cost for the building permission, so that the officers cannot ask for more money. Going through the legal way is always better than the illegal one.

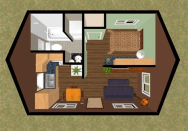
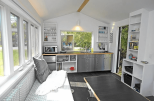
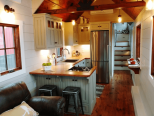
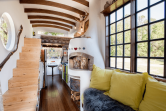
    Tiny house interior design ideas
    Image: Tinyhousetown.net

    2. Materials

    The cost for the materials will definitely depend on the concept of your tiny house. Most people usually like to use the new materials, but it’s also not a rare thing where people prefer to use the recycled one.

    The cost for the new materials is surely more expensive than the cost for the recycled ones. In this case, you will also need to make sure about the quality of the materials.

    For example, the quality of a used counter and a new granite countertop can be different. It’s the quality that sometimes forces you to pay more money for the new materials.

    The difference at the cost between the new and the recycled materials is probably several hundred dollars, but you also have to think about how long they will last.

    3. Labors

    The cost for this one is truly optional. If you think you are able to build your tiny house by your own, then it will save you a lot of money. But if you don’t, hiring labor is your best option.

    In fact, if you decide to build it by your own, you have to make sure that you have calculated and have built the entire house perfectly. Otherwise, you will never know how long your house will last.

    Normally, the cost for a hired labor is for about $10-$15 per hour. It means you have to calculate how many labors you are going to hire if you are sure that you cannot build it by your own. Usually, a tiny house takes 1.500-2.000 hours to be built. Therefore, you can calculate how much you will spend for the labors according to your current design.

    Tiny house lighting ideas

    4. Electricity and Plumbing

    The last important things about your tiny house are the electricity and plumbing. Surely, the cost will depend on whether you are planning to live on or off the grid. Normally, tiny house owners spend around $1.000-$1.500 on plumbing and $300-$500 on wiring.

    Those explanations simply show that you don’t have to build a large house to have your dream house. With the right design, concept and surely right cost, building an ideal tiny house is possible for everyone.

    Originally posted 2020-08-24 05:51:28.

  • Most Popular Tiny Home Storage Ideas

    Most Popular Tiny Home Storage Ideas

    Storage doesn’t have to be large. Sometimes with the right design, you can have a storage that can accommodate all of your stuff, even when you think that your storage is too tiny.

    The problems come when people don’t really know how to make the most of their tiny home. Therefore, follow these ideas if you plan to have a home with tiny storage.

    See also: Small Front Porch Decor.

    MOST POPULAR TINY HOME STORAGE IDEAS

    1. Go Vertical

    You may think that any rooms with vertical space will not be too effective. There will be so many wasted spaces when you plan to go vertical, especially in most of tiny homes.

    However, that way of thinking is not always right. Some home owners are just too smart to maximize the spaces of their tiny homes, to create vertical space storage.

    Another important thing of creating vertical space storage is about how you can make it looks catchy for eyes. You can start it from the simplest one; the color of your storage.

    The color you choose for your storage will take an important part in creating larger atmosphere in your storage. Bright colors can lead your unconscious mind to think that your vertical space storage actually has more spaces.

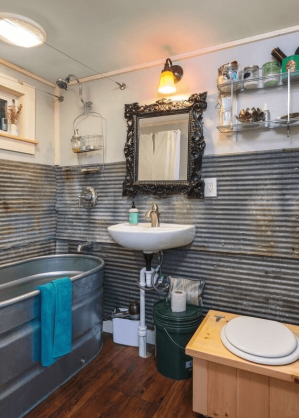
    Bathroom tiny home storage ideas

    2. A New Way to Stash Bed

    Just because you have a tiny home, don’t ever think that you will not be able to store any large stuff to your storage. There is always a way to make the most of your tiny storage, even when you think that it’s not possible.

    This idea will clearly open your mind that you can store almost anything to your storage, including your full-sized bed for two people. It may looks complicated at first but in fact, it’s always possible to be applied in almost all tiny storages. This idea will make you maximize your floor space to store the full-sized bed.

    The full-sized bed will be installed underneath the five-foot to seven-foot your office area. It means you can place your desk right above your bed. Therefore, you have to make sure that the bed will be easily glides in and glides out underneath your desk using locking casters.

    Bed storage tiny house design ideas
    Image: Ana-white.com

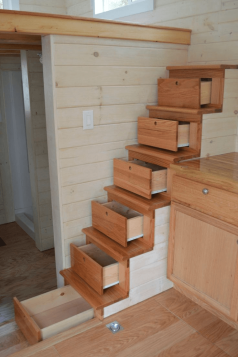
    3. Disappearing Staircase

    This next idea will also bring you to the next level of maximizing your tiny storage. This time, you can build a staircase that can only be seen when it’s used. The concept is almost the same with placing the bed underneath. The difference is you will have a staircase that can glides in and glides out whenever you like.

    What’s the good of this idea? Of course you will have two benefits if you apply this idea. The first one is you still can maximize your wall as your storage since the staircase can glides in or glides out. It means that it will not distract the main function of the wall.

    The second benefit is you can also maximize the space above your storage wall. The flexible staircase has to lead you to another place. In this case, if you have enough space, you can even install your full-sized bed there. So, it feels like you live in a loft, although in fact, it’s the result of making the most of your tiny storage.

    Storage stairs for tiny house

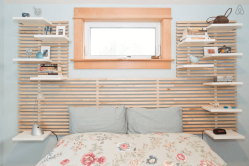
    4. Slat Wall Shelving

    If you have much stuff but it feels like ypu run out of space, probably you can try this idea. This idea offers you to make the most of your wall. Using slat wall panels, you can build a very flexible storage space in your bedroom or any other room. The slat wall will also allow you to build as many shelves as you want. More than that, it will not require you to spend much for the budget.

    What makes this idea flexible is that the slats will secure all those shelves to the wall. Since you don’t use bolts to secure the shelves, you are totally free to add, remove or rearrange the shelving anyway you want. Thus, the shelving will depend on the stuff you will store there. The bigger your stuff, the less the shelves you can install on your slat wall panels.

    Slatwall Panel Tiny house Storage Design Ideas

    Slatwall Shelving ideas for tiny house

    See also: Corner Shelves Decor Ideas

    5. Outdoor Storage

    This idea will be very suitable for those who have a problem with arranging their shoes. If you have an issue with how well you can arrange your shoes, you can simply store your shoes to this outdoor storage. This idea offers you to build stairs in front of your front door; where the shoes are usually disorganized. Inside the stairs, you will be able to arrange your shoes neatly.

    It’s suggested for you to use woods as the main materials since ti will ease you in taking care of it later. You can decide the number of the stairs you are going to build. However, the number of the stairs in front of a front door is normally not too many; except you have a high ground on your front door.

    Trailer Tiny house outdoor storage
    Image: Tinyhousetalk.com

    6. Double Duty Furniture

    This next idea offers you simple yet fascinating double built-in in your storage space. Necessarily, it’s recommended for you to build this idea in your dining area. You can build the double work space to ease you in doing your duty. Build double seat in your dining area so you can enjoy your meal while finishing your duty. As an addition, you can also install stow stuff, behind or underneath each seat.

    Double duty furniture space saving for tiny house or small space

    7. Under Floor Storage

    This idea may seem ordinary but it’s actually effective. If you think you have no space to store your stuff, why don’t you build it under floor? Storing your stuff under the floor will not only help you in hiding your important belongings but will also help you to make your home looks more arranged, since you don’t have to think about how to arrange the stuff properly if you store them under the floor.

    Under floor storage tiny homes design ideas
    Image: inhabitat.com

    Having a tiny home should not be a problem when you want to have an interesting storage inside it. With the right execution for those ideas, you can always have your storage you are dreaming about.

    Interesting Most Popular Tiny House Storage Design Ideas

    Originally posted 2020-08-23 03:25:45.

  • Most Popular Rustic Italian Decor Ideas For Your House

    Most Popular Rustic Italian Decor Ideas For Your House

    Rustic concept calls for a lot of descriptions: farm barn, wooden decoration, and even Italian design. Each person thus has different preference for their own rustic concept.

    Among the three options, Italian rustic concept is the most eccentric one. It has several patron and rules to obey. Without these points, the decoration will not have the French vibe.

    The Basic Rules

    Italian decoration is popular for its simplicity and elegance. Although some patterns are often included, they are usually related to the nature: flower, animals, etc.

    If you are interested in Italian style decorations, it would be great to learn about how the local citizen decorate their own home.

    Living Room Rustic Italian Decor Ideas
    Image: customconcreteguys.com

    At least, you have the chance to learn about the standard dos and dont’s.

    1. The wall should be painted with white based colors to give off the Italian vibe. Another color option is pastel earth tone: apricot, ivory, etc. No vibrant color in interior walls.
    2. Those who love pattern could also have it on the walls. The most popular patterns are floral and abstract. Want some fancy touch? Then go for stenciled walls. The silvery shine would improve the wall look.
    3. Italians are mostly Catholic. That is why, a framed santa picture has become an important part of the decoration. It looks like blurred mosaic from afar, but actually has various colors on it.
    4. For the textile, Italian homes love white cotton cloth. It is not suggested to put the silk cloth, even though you are going after extravagant concept. In summer, the colors are slightly vibrant: cream and yellow. As in the winter, Italians love to create warm atmosphere. The cloth decoration will change into dark oranges and brick red tone.
    5. It is quite difficult to be elegant with color only. The local people decorates the edges of their clothes with hand embroidery or crochet lace in pale tone close to white.
    6. Local people loves for crochet can be seen in almost any house ornaments. It is on the table runners, table cloth, bed cover, and even the sofa!
    7. One of the unique characteristic of Italian houses is the windows. They are slim, tall and installed in many places. There is also shutters covering the window. Usually, the covers are opened on both sides, giving access for the wind to enter.
    8. Italy is famous for its heat, especially in the afternoon. Therefore, every house must have a veranda and pergola to take a nap. It is basically an open air space with thin curtains, lazy bench and coffee table.
    9. The furniture is mostly made from woods. Instead of covering the wood pattern with paint, the original Italian style loves the unfinished product with dark coating. However, the Tuscan and Calabrian country prefer to have the straw furniture.
    10. Especially for the kitchen area, the flooring is made from stone. The locals produce this item and sell it as a large or cut slab. Another option is fired clay. It has terracotta style, meaning that the clay doesn’t have glaze yet.
    11. The other rooms in the house have either ceramic tiles or terrazzo. The ceramic tiles usually represent Renaissance design. Terrazzo, on the other hand, is composed of marble cuts, which give abstract look on the floor.
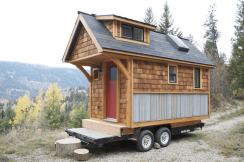
    Wall and Entry Tuscan Flavor Rustic Italian Decor Ideas
    Image: Decoist.com

    Decoration Ideas

    After you learning about the basic rules of Italian design, it is time to put the knowledge into practice. You don’t have to remodel the whole room and also the furniture. Start the project from simple decorations first.

    1. The Entryway
    Take the tall wooden door as the entrance door. For realistic effect, pick the door made from oat woods. Don’t forget about the iron knocker, rod and handle. All of them are rustic black.
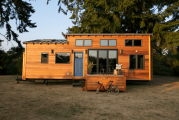
    Entryway Door Rustic Italian Decor Ideas

    2. Window Shutters

    For this decoration, you will need metal track installed on the ceiling or above the window area. The tall wooden shutter here is replacing the function of the curtain. The track will help you to fold and unfold the window for light adjustment.

    Window Shutters Rustic Italian decor ideas
    Image: oneloveidaho.com

    3. Hallway Setting

    If you happen to have a hallway at home, it would be a perfect area to show the Italian feels. On the T-junction wall, put a framed oil painting. Create an illusion of white brick wall as well. On the sides, add short table with a desk lamp on it.

    Hallway Rustic Italian Design Decor Ideas
    Image: architectureartdesigns.com

    4. Bar

    In the past, Italian kitchen serves as the place to cook meals, having dinner and family room. Copying this concept, you could have a bar as a part of the family area. Make sure to stack the wines on the wall and put a lot of wood elements for the bar furniture.

    Kitchen Bar Rustic Italian Decor Ideas

    5. Curved Arch

    There is a way to add Italian touch to the kitchen. Make a curved arch on the wall instead of the solid square hole. Trim the arch to mimic the brick shape, then paint them with red brick color.

    Curved Arch Kitchen Brick Wall Rustic Italian Style

    6. Powder Room

    In modern day, it is the small area in the bathroom with mirror and sink. For the ladies, this is a perfect space to do their hair and makeup. The sink must have the stone feel, covered in white tone and paired with vintage faucet. The mirror is placed behind Italian classic window grille.

    Bathroom Powder Room Rustic Italian Design

    7. Bedroom

    The heart of Italian bedroom is the wood beam. It should be the star of the room. The other decorations must not overpower the eccentric ceiling. There is no need for curtain covered bed. Having the wood ceiling is more than enough.

    Stunning Bedroom Rustic Italian Decor Ideas

    8. Stairway

    Having two stories house? Then the Italian design might be a great inspiration. It uses hand forged iron with thin bars as the balusters. The steps have stone structure with a nice trimming at the edge.

    Stairway Rustic Italian Decor Ideas

    Read also: How to Decorate a Small Front Porch?

    How could you tell Italian rustic and the warm barn concept? French style is basically the combination of mustard yellow, earth color and red. If you want to incorporate patterns, the most popular ones are farm animals, floral and tapestries. For more tips about French vibe decoration, refer to the details above.

    MOST POPULAR RUSTIC ITALIAN DECOR IDEAS

    Originally posted 2020-08-22 04:16:58.

  • DIY Wooden Crate Ideas for Rustic Home Decor

    DIY Wooden Crate Ideas for Rustic Home Decor

    Why so many people are obsessed with crate DIY projects? First, it could literally turn into any house furniture or decoration.

    In the other words, unused crate is a perfect object for creative exploration.

    It also has lower price compared to the newly bought one. In addition, making some of the furniture by yourself could give personal touch.

    DIY WOODEN CRATE IDEAS FOR RUSTIC HOME DECOR

    1. Crate Farmhouse Bench

    What could you think of when having crates for the DIY project? Most people will think of storage space, since it has perfect square shape and quite big space capacity.

    What about a farmhouse bench? It shares similar shape, but crate could make it special. It gives the European vibe with pastel color. You can even get the industrial look. All you have to do is painting it with dark tones.

    For this project you have to build the bench first. Make sure to give enough space for the crate to slip in. The bench feet should be white, the seat is dark brown, and aged green for the crate.

    It will look even more antique if you could find a spot with brick pattern. To complete the bench, provide several colorful cushions on the top. Cushion with solid color shouts elegance, while patterns gives festive atmosphere to the bench.

    Crate Farmhouse Bench for rustic home decoration ideas
    Image: Lifestorage.com

    2. Crate Lockers

    Thanks to the built, crate could fit to limited space without reducing the storage space in it. Thus, the crate is mostly used as the alternative storage. Many people simply re-paint the crate but you could make something fancier: the crate lockers. The idea is to have mini locked cabinet. To see what’s inside, all you have to do is peeking to the side. Fancy, isn’t it?

    To start the project, you have to purchase at least three crates. After rinsing and sanding them, you need to paint them. One layer won’t be enough, so apply several layer to get solid look. Allow the crate to dry before adding another layer. Then, add support piece to the crate. It is especially important if you want the vertical cabinet.

    Drill the corners to install the screws. For the plywood door, attach it using hinges. To make the cabinet prettier, you can vary the colors or add accessories such as plate numbers on the door.

    How to build Unique DIY Crate Lockers
    Image: littlehouseoffour.com

    3. Outdoor Bar Table

    Do you like spending your time outdoors? If yes, then you must be familiar with the hassle of having outdoor activities. It takes a lot of effort to clean up and then clean up the dirty plates after. Now you could have a multipurpose outdoor bar table, made from crates!

    Go to the second hand store and take twelve of their best crates. You will also need some deck boards for the top cover. Don’t forget to stock outdoor paints (in some shops they call it garden paint), castor wheel, plated bracket, and screws.

    The first step to do is painting the crates to solid color. If needed, you could clean the crates before coating it. After the crates dried completely, stack three of them horizontally and screw them together. At the back, screw the back plate on the connected joint. Bring two stacked crates together and screw them from the inner part. Repeat the process for the wings part. Then, add the top base. Paint it with darker color.

    Crate Outdoor Bar Table Sets

    Read also: Rustic Farmhouse Porch Decor Ideas

    4. Kids Organizers

    Teachers who work with kids at school has similar challenge to the parents at home. They love to explore things, have a lot of toys and stationery. In the end of the day, the room would be extremely messy because of their things. To deal with this problem, you could make kids organizers. They will help the kids to keep their toys safe.

    For starters, it is suggested to take six crates. Paint them all white. During this process, you have to be patient. Give enough time for the paint to dry before moving to the next step. When the outer side has been painted, it is time to coat the inner part. Choose bright, vibrant colors that the kids love: pink, mint green, sky blue, etc. If possible, apply different shade to each crate.

    Stack the crates horizontally. Make sure that the opened side is facing forward. Apply glue on the connected sides. Let them dry. You can also use screws for stronger bond. Voila! Your storage is ready to use!

    Crate Kids Organizers Pottery Barn

    See also: Bathroom Cabinet Organizer Under Sink

    5. Book Shelves For Limited Space

    Many houses have that empty space behind the door. It is too small for normal cabinet, so most of the times this space has no function at all. Then you look at the books and magazine scattered on the floor. Isn’t it a great idea to have hidden book shelves for the room?

    For this project, you literally need one crate only. It will be divided into two symmetrical parts. You could make it smaller if the space behind your door is smaller than the crate cuts. It is important to measure the height of the crate as well the distance of the crates. Make sure the distance is reachable for kids.

    Paint the crate with any color or pattern you want. If you want to go classic, then pick either solid or pastel color. Pattern painting will make grand appearance when the room is already dominated with plain tone. Now install the crate shelf on the wall. Use screws or metal plate to support the shelves.

    Crate Bookshelf DIY ideas

    6. Coffee Mug Display

    Another smart way to use crates is making coffee mug display. The process only takes a day. You don’t even need to paint the whole crates. The work that requires painting is only letter block on the top which says “coffee”. The important aid for this project is hook. You are going to need a lot of them to hang the mug.

    Crate Coffee Mug Display DIY for Rustic Home Decoration
    Image: onelittlebirdblog.com

    When people are discussing about rustic house ideas, your imaginations might bring to the warm memories; barn, brown, black, white and wood. Since each person has different ideas about “rustic”, it might be difficult to find suitable pair in the store. So, why don’t you try to make one?

    Originally posted 2020-08-20 06:34:51.

  • How to Remove Stubborn Carpet Stains with Homemade Cleaners

    How to Remove Stubborn Carpet Stains with Homemade Cleaners

    Rug or carpet is something that being considered as an expensive decoration. Carpet is not cheap, is it?

    That’s why it becomes totally upsetting when you have to throw away your carpet due to some tough stains that can’t be eliminated, right? You can always clean your carpet using some cleaners that you can make at home.

    If you don’t want to spend lots more money to buy a new carpet for your house, you have to make sure that your carpet is always in a clean state. Small stain on your carpet can bring negative effect on your house.

    Although everything is crystal clear, when your carpet is stained, your house will appear dirty. It is better to clean any kind of spillage as soon as it happens, but sometimes you just can’t get rid of it in an instant although you already give your best. Then, you just leave it and it becomes old stains which are hard to clean.

    Read also: How to Clean Dinnerware Quickly.

    When you have kids or pets, it will be very easy to get your carpet stained, whether it is from your kids’ food, crayons, artworks, drinks, or anything. Or, probably your pets pee on it and even leave their hairs. Don’t worry, don’t get frustrated. Everything is going to be okay.

    It is good for you to know how to get rid of old marks from your rug. You don’t have to waste your money just to call some experienced rug cleaning services.

    They are sure not cheap. Wouldn’t it be great if you can learn how to clean all kinds of stains from your favorite rugs by yourself and save lots of money by doing so? Although you are probably won’t be able to make your rug like new again, you can always make it look great after you remove all the tough stains and dirt from it.

    How to Remove Stubborn Carpet Stains with Homemade Cleaners

    Here are some homemade cleaners that you can try to remove hard stains from your rug. You can try to clean the tough carpet stains using beer, vinegar, ammonia, salt, baking soda, or ice cubes. You can also buy some carpet cleaners. But if you can use what you already have at home, will it save more time and money? So, how do they work?

    1. Beer

    When you accidently spill out your tea or coffee on the rug, you can remove the stains by using beer. You can pour a small amount of beer on the top of the stains. Then, rub it lightly. You need to do it for several times to make the stains disappear completely.

    2. Vinegar

    Always have vinegar at your house since it is very useful in cleaning anything at home. You can use it to clean all kinds of stains from your rug. Here,

    • For light stain: mix ½ cup of vinegar and 2 tablespoons of salt. Rub the stain gently and let it dry. After that, vacuum the rug.
    • For darker or larger stain: the mixture can be added with 2 tablespoons of borax. The instruction is as the same as before.
    • For tough or hard stain: mix 1 tablespoon of cornstarch and 1 tablespoon of vinegar until it becomes a paste. Wipe the paste onto the stains and let it sit for about two days. After two days, vacuum it.
    • For any stains from paints: mix 1 ½ teaspoons of vinegar, two cups of water, and 1 ½ teaspoons of detergent for laundry. Wipe the paints as soon as you can before they are set and then rinse the rug with water.
    • For any stains from fruits including the juice: mix 1 ½ tablespoons of vinegar, 1 tablespoons of laundry detergent and 2 cups of water. Rub the stain with the mixture solution and let it dry.
    • For coffee or tea stain: mix vinegar and water with equal quantity. Rub the stain and let it dry.

    3. Ammonia

    You can use the ammonia solution to remove the stains from your rug. Mix 1 cup of ammonia solution and 2 liters of lukewarm water. Then you can sponge the mixture to the stains. Let it completely dry. Repeat this process for several times until the stains disappear.

    Read also: How to Clean a Bathroom Exhaust Fan in Minutes

    4. Salt

    Here are some ways to make use of salt for carpet stains:

    • For red wine stain: when the spillage is not dry yet, you can pour directly the white wine to reduce its red color. Sponge the stain with cold water. Then, pour some salt on it and let it sit for 10 minutes. After 10 minutes, vacuum it.
    • For fatty food stain: mix slat and rubbing alcohol with ratio 1 : 4. Scrub the mixture onto the stain carefully. Follow the rug nap direction Repeat it several times.
    • For ketchup stain: do it quickly before it becomes dry. Pour little salt on it and let it sit for awhile then vacuum it. Then sponge any leftover salt. Repeat the process several times until the stain totally disappears.

    5. Baking soda

    You can use baking soda to clean the stains of vomit, pet’s urine, and oily food stain.

    • For vomit or pet’s urine: wipe the stain as best as you can. Spread some making soda on the stain. Rub with some paper towels. After that, vacuum it to clean any residues.
    • For oily food stain: mix some baking soda with salt. Pour the mixture on the stain. Use toothbrush to stick the powder onto the stain. Leave it for five to six hours and vacuum it.

    6. Ice cubes

    You can use ice cubes to remove the chewing gum from the carpet. Put the ice cubes inside the plastic bag and place them on the gum to make it frozen. Scrape the gum with a knife.

    Read also: How to Cleaning and Sparkling Glass Stovetop in Minutes

    Pretty easy to do, isn’t it? You can make use of the ingredients in your kitchen to clean the carpet stains. You can also save lots of money by doing it. Remember! Clean the stains as soon as you can. You can make it difficult to remove once the stains dry. Good luck!

    Remove Stubborn Carpet Stains

    Originally posted 2020-08-12 23:13:10.

  • Quick Simple Tips to Speed Clean Home in Few Minutes

    Quick Simple Tips to Speed Clean Home in Few Minutes

    It is very essential to maintain cleanliness and tidiness all over the house as homeowners expect to be peacefully relaxed in their house after spending long working hours a day.

    You might be really stressful when you find your house is like a shipwreck after coming home. Your dream of relaxing quietly in your house will be wiped away as you have to spend your other precious time cleaning.

    What happens when your things are not organized and spread all over the place? Especially if your kids play with all the things they can reach spreading all over the entire house.

    When it happens, always tell them to put them back to where they belong. Remind them over and over again that they have to be responsible on putting everything back after they finish playing with them.

    QUICK SIMPLE TIPS TO SPEED CLEAN HOME IN FEW MINUTES

    Or, do you sometimes have an unexpected guest visiting your house? One day, when your house is in a mess, your best friend is suddenly calling you and telling you that he or she will visit your house within few minutes.

    It’s really frustrating, isn’t it? Don’t worry, whenever this kind of unpredicted situation happens, you can always speed clean your house within less than an hour or maybe just in less than 15 minutes.

    Read also: Bluestone Table Care, Cleaning, and other Tips

    Whether you have a guest visiting your house or you don’t want to spend most of your valuable time cleaning your house, you can always try some amazing tips on how to speed clean your entire house.

    What becomes the one and only secret is always try to maintain your things clean and in order. Once you have been able to keep them organized and tidy all the time, you can always speed clean your house within few minutes.

    How to speed clean your house within few minutes? Make sure that you always have your cleaning task and simple cleaning routines every day. Try not to skip a day without cleaning.

    An easy daily cleaning habit is really your huge timesaver. Moreover, this habit absolutely brings speed cleaning as an effective and easy way to make your entire house clean in an instant.

    So, are you ready to speed clean your house? Try these simple tips to save your time organizing your house. Follow the tips from number one and the others will follow within the cleaning process.

    Quick Simple Tips to Speed Clean Home in Few Minutes

    1. Prepare Your Cleaning Utensils

    Collect all your cleaning tools altogether inside a container so that you can find the tool you need in an instant. What you need to prepare are feather dusters, lint roller, microfiber cloths, disinfecting cleaner for bathroom, multi-purpose cleaner, cleaning wipes, and mirror cleaner.

    2. Collect All the Clutters

    Before starting speed cleaning your house, get rid of all the clutters from all rooms. Bring two kinds of bags while you are walking to each room; one is garbage bag and another is laundry bag.

    Dust all the garbage, like used papers, plastic, and all kinds of useless things inside the garbage bag and you can easily throw them out into your garbage disposal.

    Put all the relocated items, like toys, books, etc inside the laundry bag. Once you gather them all, you can always ask your kids to organize the relocated items back into their designated locations.

    3. Start Cleaning from the Top

    Always start cleaning your house from the top down. It is to make the dirt or the dust from higher surfaces falls down to lower surfaces which have not been cleaned yet.

    You can clean your ceiling fans first and then you can move to the furniture below it. After all the furniture is being cleaned and wiped, you can clean your floor to get rid of all dust and dirt.

    4. Clean the Dust on the Surface Quickly

    You can use a feather duster to remove the dust on the surfaces quickly. Don’t forget to shake out your duster repeatedly and move rapidly to clean all the noticeable dust.

    5. Wipe the Surface

    After dusting all surfaces, you can wipe them by spraying down hard surfaces like counters, cabinets, tables, sinks, etc and then wipe them with microfiber or disinfecting cloth. When you do all the dusting and wiping as parts of your daily cleaning routine, then it will be just a simple and easy task for you.

    6. Clean the Bathroom

    The most difficult part from cleaning your house is the bathroom. But, if you always clean your bathroom every day, it will be a way less stressful. Relocate several minutes in every bathroom.

    First thing to do is pour a cleaning liquid into each bathroom toilet and let it sit for awhile. During the waiting period, you can clean the bathroom sinks, tubs, and mirrors.

    Don’t forget to replace old towels with the new ones. After finishing all of these tasks, you can start scrubbing and wiping each toilet with flushable cleaner pad.

    7. Clean the Kitchen

    Soak your pans and pots needing for washing in the sink with soapy water for awhile. Use your time to clean the countertops and stovetops with multi-surface cleaner.

    Replace new dish towels and get rid of the old ones. Then, put your dishes inside the dishwasher. While waiting for this task to be completed, you can start cleaning your living room.

    8. Clean the Family Room

    First, fluff your cushions and pillows, organize the magazines inside the rack, and remove the hairs from the surface by using lint roller. Refold your blanket and put them back in the closet.

    9. Clean the Entryway

    Once your rooms clear from clutters, you can start cleaning your entryway. You can shake your entry rug for a few times, then you can use your vacuum to clean all the dusts and hairs stuck on the rug.

    10. Clean the Floor

    Once you finish cleaning all surfaces in each room, your last task is to clean the floor. You can vacuum every corner and low baseboard in each room.

    Yes, you have finished your cleaning. Do you like the look of your house now? Isn’t it great to have a tidy and clean house? After all the hard works that you have done, you can relax yourself and enjoy your clean, fresh and tidy house.

    Originally posted 2020-08-10 02:04:08.

  • Breath-Taking Rustic Home Décor Signs from Wood Charm

    Breath-Taking Rustic Home Décor Signs from Wood Charm

    Wooden signs have become famous decor trends at the moment.

    Many decor options are available at the home stores for your house, whether you are looking for some signs for your front porch or even for your back yard. But, the price can be really outrageous, right?

    It will be really delightful if you can make your own rustic wood signs for your house.

    Related articles:

    RUSTIC HOME DECOR SIGNS FROM WOOD CHARM

    DIY Rustic Wood Signs for Stylist Interiors

    If you are ready to start your DIY wooden signs today, what you need to look for as the main material is some old woods or pallets. You can find these materials at the home stores or any stores with garden centers near your house.

    Ask for old pallet woods as they will have some left out. If you ask them nicely, you can get loads of pallet woods for free.

    Or, if you cannot find old woods, you can purchase some affordable woods and do some treatments to make them look rustic and old. You can make your new woods look alike old woods by soaking them into a mixture of white vinegar and black tea which have been infused with the old steel wool rust.

    Next, you need to decide whether you will make your old wood looks natural or you want to make it distressed. If you want to make it look distressed, you just need to paint the whole plank in white.

    When the wood is ready, you just need to do the lettering on it. You can write anything you want. Any inspirations can be taken from your favorite quotes or sayings, from the home store displays, from magazine, or from the internet.

    For DIY rustic signs, generally, it depends on your creativity as long as you already have the main materials, like woods or planks, paints, brushes, and sandpapers.

    Additional materials are also probably needed. If you want to hang your wooden signs, you need some ropes and also some nails.

    If you want to make some kind of a cabinet door or a cupboard door, you need to prepare some handles or knobs. For the decoration, you can add frames, ribbons, bows, fake flowers, etc depending on your taste.

    Rustic home decor signs wall hangings
    Image: Homebnc.com

    One advantage for making your own pallet signs for your home décor is that it becomes one and only décor in the world. You can decorate your signs just like anything you want.

    You can also spread the signs all over your house for fabulous rustic touch. What you need to do is learn the basic steps you need to make DIY rustic wooden signs. These are eight DIY pallet signs that you can try at home:

    1. A Crafted Welcome Sign

    You can hang your rustic welcome sign on your front door. What you need to do is prepare old pallet with 38 inches width and 10 inches tall. You can paint it to your favorite vinyl color.

    Don’t forget to prepare the frame with dark color to bring contrast with the pallet color. Craft the word carefully with your own writing styles. This vintage DIY sign will surely make your front house more gorgeous.

    Welcome hanging door sign DIY Rustic Decor

    2. A Gorgeous Home Sweet Home Sign

    You can make a home sweet home sign for your living room décor. Prepare three old planks in the same size. To make it more rustic, you can just leave them as they may be, you don’t need to cover them with vinyl.

    Organize them in one row and frame them altogether with small strips of wood. Paint the letters in white to create a fabulous distressed view. One plank, one word.  When ready, you can hang this sign anywhere in the house.

    Rustic Home sweet home hanging sign decor ideas
    Image: Etsy.com

    3. A Distressed Love Sign

    You can hang a love sign inside your bedroom. You can put it above your headboard. To create a distressed look, you just need to paint your plank in white.

    What you need to do next is choose the lettering suited to your taste. You can also add a heart symbol between the lettering to make it warmer and delightful.

    Love Sign wooden home decor rustic design ideas

    4. A Scrap Plank Beach Sign

    To create the beach atmosphere in your house, you can display a scrap plank beach sign on the wall near your front door. You can add arrows to point to your inside house direction.

    You can also add some ropes to add more beach atmosphere. The sign can be made from distressed pallet or plank to create wonderful coastal view.

    Beach signs wooden DIY for Rustic Home Decor
    Image: mylusciouslife.com

    5. A Reclaimed Door Sign

    You can also make your décor sign from reclaimed wood. You can make a rustic cupboard door from it as the look itself seems old. You can write your favorite quote or sayings on it.

    To make it useful as the cupboard door, you need to add some handles or other hardware to make it into gorgeous rustic wood sign décor.

    Reclaimed wood door sign for rustic home decor ideas

    6. A Simple Bathroom Sign

    You can make a simple bathroom sign from some painted planks. You can write your message on them. For example: be clean, be healthy message.

    Additional embellishment like ribbons, ropes or bows can be tied altogether with a nice burlap strip. You can hang your bathroom sign above your sink mirror or elsewhere.

    Bathroom sign rustic barn wood decor ideas
    Image: Etsy.com

    7. A Stylist Slatted Wooden Box Sign

    You can also make a rustic sign for your kitchen from slatted wooden box. You can prepare a large and thin plank for it. You can cover the plank with vinyl if you want.

    Add “Bless the FOOD before us, the FAMILY beside us, and the LOVE between us” sentiments on it. It will be very encouraging to be hung on your kitchen wall to remind everybody how grateful they are.

    Kitchen sign funny for rustic home decor ideas

    You can use the ideas as your references when you want to make DIY projects on rustic wooden signs to decorate your house. The rustic look can make your house looks like a farmhouse. You can bring some rustic and farm-like touches in your house by making use of some old woods.

    Originally posted 2020-08-07 02:49:43.