This method is useful to clean up spills in some spots in the epoxy floor. You can use paper towels or soft cloth to clean up.
It can suffice for all stains except the greasiest ones. Clean up the stains as soon as possible to make it easy to remove. If stains are difficult to remove, you may use another way.
Mix two gallons of hot water with one cup (237 ml) of vinegar in the bucket. Then, use brush or kitchen sponge to rub the stains. The floor will be clean and shiny as usual.
2. Cleaning the Whole Floor
Cleaning the whole floor from any tenacious stains is not difficult as thought. By following these instructions, you may clean the epoxy floor with ease.
Remove any obstructions, such as furniture, tools, vehicles, and other objects on the floor that you want to clean.
Sweep the whole floor by a dust mop. Make sure that the floor is ust mop. and other objectsnstructions, you may clean the epoxy floor easily. as possible to make itclean from any dirt, dust, etc.
Mix a gallon of hot water with four ounces (118 ml) of ammonia in the bucket. If it has already mixed properly, pour it into the spray bottle.
Spray the whole floor with the ammonia mixture and mop it by using hard foam mop (do not use string mops because it is not effective to clean up the stains).
After several minutes, rinse the floor by using water. You can hose down the floor or use a bucket of water to splash the floor. Mop once more to make sure the stains on the floor are gone.
3. Keeping the Floors Pristine
The final step in maintaining the epoxy floor is keeping the floors pristine. This is important to prevent tenacious stains that are difficult to clean back in soiling the floor in the house.
The common thing to do is keeping a walk-off mat near the entrance. It will allow people to scrub off shoes and boots before entering the house.
If it happens on the floors in your garage, you can place a cardboard under each tire of your vehicles or put a mouse pad under the motorcycle’s kickstand.
These two things will help you in protecting floors from stains that are attached to tires or the motorcycle’s kickstand. Moreover, it will also keep the floor from any damage that is caused by them.
Cleaning up the epoxy floor is simple and easy to do. By using the common stuffs that are available at your house or that can be obtained easily at nearest store, epoxy floors will be clean and shiny again. Follow these steps above correctly to attain the best results.
Oil or grease stains make your garage floor look bad. Moreover, its stickiness to the floor yet slippery on the top texture may also cause falls and hard to clean tracks into your house, and ruin your shoes.
Cleaning and coating the floor are the step that must be done to make the garage look better. Nevertheless, how to clean it effectively and at an affordable cost?
Here are the ways that actually work to clean oil of from your garage floor.
Using this way is not too dangerous as you think if it is done correctly. Mix one cup of ammonia to one gallon of water.
Then, scrub the stains using the mixture of ammonia until it is removed. Rinse the floor after all the steps are completed.
2. Spray the Oven Cleaner
Because it has the same function in cleaning the oil stain, the oven cleaner can also be used in removing the oil droppings on the garage floor. Spray the oven cleaner to the spot and let it settle for ten minutes.
After that, scrub the mess with a bristle broom and rinse it off. If you have a severe stain problem, it will require a second application to clean it.
Soda can also be used in cleaning the nasty oil stains on the garage floor. You only need a few cans of soda. Then, you also need to prepare these following tools: a small bag of cat litter, laundry detergent, bleach, a stiff bristle broom, bucket, rubber gloves, and eye protection.
The steps are easy to be followed. First, you need to cover the floor with a thin layer of cat litter. Brush it with evenly distributed motion.
Then, clean up the litter and pour the cola on that spot. Flatten it by using the bristle broom and leave the cola for about 20-30 minutes.
While waiting for the cola works, mix ¼ cup of laundry detergent and ¼ cup of bleach into 1 gallon of warm water. Finally, clean the mess by the laundry detergent mix and mop it up.
4. Pour the Mixture of Baking Soda
This way can be done easily because the tools are easy to find in your house. Mix the baking soda with the laundry detergent.
Then, add a little water to make it easy in applying to the stains. Scrub the stains with the mixture and let it settle for 20 minutes. After that, brush it with bristle broom and rinse it with clean water.
5. Spray the WD-40
WD-40 is usually used for motor oils. This penetrating and water-displacing oil can also be used to clean oil stains on your garage floor. It is simple to be done. Just spray the oil stain spots and brush as necessary. Then, hose it down by water to remove the dirt remains. The garage floor will be perfectly clean.
So, what do you think? Do not make your housework harder. By using these simple ways to clean the oil stains off, you will get your garage looks better and faster. In addition, the ways above only use tools that are easy to obtain and they solve your problem at an affordable cost.
First, you need to make a dish soap solution. Squeeze the bottle for a few drops of the dish and mix them with two cups of water.
Soak the cleaning cloth in it. Now here comes the scientific part. Crayon is made from wax. Thus, the best way to ease your cleaning is by heating it.
The max will melt and automatically drip from the wall. The next thing to do is wipe clean the melted crayon by using wet clothes you have prepared before.
2. Commercial Adhesive Removal
If you to the store and ask for this product, the staff might offer several options: the original, the gel spray, and the wipes. For crayon marks, the original works best. Get your paper towel and pour a few drops of the product.
Use the wet paper towel to wipe the marks. Repeat the process until the wall is clean. Usually after cleaning, you will get oily surface. Eliminate the grease with a wet clothes, dipped in dish soap solution.
3. Ammonia-based Glass Cleaner
When you have this product in your stock, make use of it. Not only glass, your wall could also get its bright color back. Spray the cleaner to the walls and let it sit for several minutes. Scrub the wall with dry cloth.
Do it gently, otherwise the wall color will fade. Repeat the process if your first try is not clean enough. You can also do immediate cleaning after spreading the glass cleaner. However, it will require more time.
4. Bicycle Lubricant
There is one famous brand of bicycle lubricant which surprisingly does double function as a cleaner. Usually it is equipped with tiny long straw to reach difficult part in the chain.
While cleaning the wall, this tool helps to control the liquid amount. Grab the handle and apply the liquid on the crayon mark. Wipe it with paper towel. You can also put the liquid on the paper first.
The bad news is this product stinks and leave greasier surface than the adhesive removal. If you are not bothered with the smell, then there should be no problem to clean the grease with dish soap liquid.
5. Baking Soda and Water Paste
To make the mixture, keep in mind that the proportion should be 1:1. It means one spoon of baking soda should be mixed with one spoon of water. Take the sponge and dab it to the paste. Rub the crayon marks. Baking soda residue on the wall could be cleaned with soapy water.
Almost all parents have this one problem with toddlers: doodle! It happens in minutes. Although the activity makes them happy, you have to do the hardest part: cleaning the wall. Now you don’t need to worry about this matter. At least you know what to grab. Happy scrubbing!
Cleaning our kitchen is a must whether it is daily, weekly, or monthly. A clean kitchen makes you are comfort to do stuff there. Plus, a clean or dirty kitchen provides the impression of the owner. Of course you will not want to be ashamed if your family or your friends visit your kitchen. A clean kitchen will decrease the infection probability too.
Daily Kitchen checklist Chores
According to those reasons, here are several chores you have to do to clean your kitchen. Your first daily chores in the kitchen are washing and cleaning up your dishes. Pots, pans, and other kitchen set have to be washed after cooking or having a meal. If you have a dishwasher and you do not want to be tired of washing your dishes, run your dishwasher as needed. Do not forget to clean and empty your dishwasher or sink after using.
After cooking, wipe down your top of stove, kitchen counters, and table. Spray it with disinfect, wipe it down with a wet towel. Food remnants are very annoying if they are crusted and hard to be cleaned. Then you have to vanish it when it is still not crusted.
Empty your trash can every day. Do not wait for it to be full. The trash can in the kitchen usually is used to patch organic rubbishes. It will not smell good and annoy you. Thus, if there is any spills in your table or floor, wipe it up immediately. In addition, sweep your kitchen floor and change out your kitchen towels with a clean one every day.
Weekly Kitchen checklist Chores
Not only daily chores of kitchen cleaning, but weekly chores are also a must. By cleaning several stuffs every week in your kitchen, there will be no much bacteria infect you. Besides, keeps everything clean is not bad, right? Here are several stuffs you have to do.
You have to clean out the refrigerator and freezer from any older food. Remove the ice from the freezer and wipe it with a wet towel. After that, it is time to clean other areas. You should mop your kitchen floor by disinfectant. Thoroughly disinfect the sink and clean faucets and sanitize sponges. Then, check the cleaning supplies, and restock it as necessary, such as towel, soap, etc. By any chance, if you have a microwave, clean it.
You will need some supplies to clean your kitchen. So, make sure you always restock it. Save a box or bag to collect clutter, microfiber cloths, glass cleaner, mop, floor cleaner, broom or vacuum, scrubbing cleanser, etc. These following steps are the chores you must do.
Make the clutter to be neat; throw any rubbish in the trash, make everything stay in their original place.
Remove the dust at any areas; by using a long-handled duster, clean the ceiling fan, tops of your fridge, lighting, window trim, and any other areas.
Wipe all of your kitchen down; by using a microfiber cloth and a spray bottle of all-purpose cleanser, clean and wipe the dirt everywhere. Wipe the stove top, spills off the floor and the oven. Wipe down the small appliances, light switches and door knobs.
Make your microwave to be clean and any crusts are vanished.
Wash and disinfect your sink; the kitchen sink is dirtier than the toilet Wash it with hot water and bleaching.
Sweeping and mop
Image: decoist.com
Monthly Kitchen checklist Chores
Other important chores of kitchen cleaning are monthly chores. By cleaning several stuffs every month in your kitchen, you will make sure your kitchen is really clean. You do not need to be ashamed of your kitchen more. The following steps you must do are written here.
Clean everything you have not touched to be cleaned in a long time. Clean any machine such as cleaning your coffee maker, cleaning your dishwasher inside and out, cleaning your oven, but consider how many times you use it. A kitchen sink is good to be cleaned with vinegar, baking soda and boiling water. Clean inside of the refrigerator and freezer too.
Besides, you must clean the trash can. Wipe it outside and other kitchen appliances. Restock your pantry inventory and freezer inventory. Straighten your cabinets and drawers, make it repaired if anything is wrong. Those are several chores you should do monthly.
Quarterly Kitchen checklist for cleaning and other tips
Now, here are some tips to clean other things in your kitchen that you maybe forget. Do not forget to clean your refrigerator coils. Unplug it first so that you will not be in danger. Clean under the refrigerator too. You can read the safety step in the manual instructions. Do the same thing to clean the oven, dishwasher, and any other machine.
Make your kitchen to be neat by sort through and organize all of cooking utensils, pans, etc. Get rid of anything broken and throw anything unused in the trash can. Look at your inventory of spices and supplements, check the expired date, and restock of what needs restocked.
Kitchen Cleaning Checklist for Your Company Ready House
If you want to aim a company ready house, you must have a cleaned kitchen. Several guests offer to help in the kitchen. The cleaner the kitchen will make them relaxed and comfortable. Do not forget for welcoming your guests. Make it simple, but unforgettable.
It is described above if the kitchen is something important to be cleaned. By any chance, if you want making a party or your in-laws will be visiting you, you have to get your home in the best condition as possible. One of the steps is cleaning your kitchen. Daily chores have to be done before cleaning your kitchen. Put your plate, pan, and any other cleaned goods in your kitchen to other clean place.
Vanishing any dust.
Dust the light fixtures. Wipe down the tops of the cabinets and fridge. Wipe down any areas in your kitchen to by a wet towel and any disinfectant.
Wipe down cabinets, walls, back-splash, and other areas.
Things splatter and grease floats through the air are landing on every surface. It will make your kitchen dirty for a long time. You can spot-wipe or thoroughly scrub it all. Since dishwashing liquid is effective to remove grease, use it. Scrub the top of the vent above the stove. By doing a spot-wiping, your kitchen will look cleaner.
Clean the oven, microwave, and any other machine.
To clean your oven and microwave, put a bowl of hot water and add it with a tablespoon of lemon juice or vinegar or citric acid, run it for two minutes. The steam of the water will make wiping out the microwave easier.
Scrub the counters, sink, and stove burners with a soapy towel.
A soapy towel will make cleaning your sink easier. If there is a crust, try to sprinkle a tablespoon of baking soda and run it for 5 minutes. It will make you easy to scrub it too.
Clean out the fridge and the freezer.
Throw away any unused liquid in your fridge. Wipe down the handles and other smudges. Then vanish the ice flower in your freezer.
Wipe down the trashcan by splash it with soapy water and dry it.
Do sweep and mop.
Do sweep first, then mop.
Put all of your serving utensils together.
It doesn’t matter where, as long as you can give a specific location when someone asks for a serving spoon. Even though, on a random Tuesday, it may not bother you to open three or four drawers to find what you need to serve the mashed potatoes, it might bother you to have to do it in front of your guests.
Put your plates, pans, and other to their original place.
After cleaning all of spot in your kitchen, put everything back to their original place. Put it neatly so that it does not look messy. A good placement will provide a good impression too.
Restock all of your necessary.
Restock your salt, sugar, tea, coffee, pepper, and any other kitchen set. Place them in a pot, then arrange them in a tray or basket. Place them in a place you can take it easily. Restock your hand soap, dishwashing liquid, and a clean washcloth that is all out at the sink. Change your towel if it’s too wet to be used. Restock your refrigerator too with vegetables, meats, fruits, etc.
The cleanness of your kitchen is one of the most important things when you welcome your guests into your home. To make it easier, do the daily chores so that you will not be overwhelmed. Take a day off so you can take your time and be more thorough. But do not forget to have a plan first. Write anything you have to do to clean your kitchen before execute it. Happy cleaning!.
Despite of the fierce competition between furniture materials, wood still keeps its charm. For this reason, many people still look for wood furniture. Many house owners treasure their wood items and try hard to make it last as long as possible. How to make wooden furniture more durable?
How to make wooden furniture more durable
DUSTING
Even though you rarely use the wood furniture, there is good chance for it to get dusty. The air that circulates inside the house might bring fine dust particle, which then drops on the wood surface. After some times, these dusts will pile up and pull blind on the wood shine.
Make sure to dust the wood surface at least three times per week. Also, pay attention to the cleaning item. Some of you might choose feather duster or soft cloth to prevent any scratch on the surface. While they serve this purpose, they merely move the dust to the air. Pick lamb-wool duster or terry cloth instead.
CLEANING SPILL IMMEDIATELY
Just because your wood furniture has been polished, it doesn’t mean that the furniture cannot be stained! Wood finish will improve the resistance of stain. However, letting the spill sits on the furniture for a long time is not recommended either. To keep the shine, it is suggested to clean the spill as soon as it drops on the surface.
What should you use to clean this spill? Wiping with bare hands still leave some tiny drops of water. Safest option would be a soft cloth dipped in warm and soapy water. Gently wipe the surface with spilled water. Repeat the process twice to make sure the water is cleaned properly.
If this simple solution is not enough, you could apply cleaning product. Be careful while reading the purpose of the product. Don’t play safe with all-purpose cleaning product. Spend some time to read the labels meticulously.
Put back any cleaning products containing ammonia or silicone. They will ruin the polish faster. Find products that are created specifically for wood and certain finishing. Even after applying this cleaning product, you still have to dab soapy water on the wood surface. Otherwise, the residue might pile up and call for another cleaning time.
SHIELDING FROM CHANGING WEATHER
One thing you will learn as the owner of wood furniture is the respond to weather. This is part of science, taught to you in middle school. When the weather gets too hot, the wood will expand. On the other hand, it goes smaller during cold season. With this constant change, wood would easily crack without any protection.
It is important to be able to control humidity. Inside the house, the ideal temperature should be around 60 to 80 degree while the humidity hangs between 30 to 45 percent. You should also think hard about the furniture placement. Avoid direct sun, as it will alter the chemical compound in finishing layer.
HOW TO MAKE WOODEN FURNITURE MORE DURABLE
REPAIRING QUICKLY
Unlike the other alternative materials, you could repair broken wood furniture many times before enlisting it for sale. Those who own sofa made from wood and fabric combination could replace the fabric three to five times before asking for new wood frame. It is possible as long as you don’t forget one important rule: repair any damage immediately!
RINGS
Do you ever find the culprit for several white rings on the wood surface? It is easy. Remember the last time you put hot or cold beverage on it? Both heat and cold could seep into the finishing layer. This is the source of your rings.
Thankfully, there are plenty remedies. You might try to heat the area with hair dryer. Still not working? Then apply car wax or toothpaste on the affected surface. Rub in circular motion while applying light pressure. Then, wipe with damp cloth.
INK STAIN
So, someone accidentally spill ink on your wood area. Easy, you could remove this trouble stain. For furniture without finishing layer, make a mix of water and baking soda. Rub the paste on the ink stained area only. For furniture with finishing layer, mix water and dish washing liquid. This solution works better.
CHEWING GUM
You need to look under the table or hidden corner to spot the chewed gum. It is sticky, dirty and definitely could ruin your wood furniture. Surely, the gum had stuck in that particular spot for a while before you notice. Remove as many gums as you can. For the residue, apply cold compress for ten minutes. Then, scrape with blunt object such as butter knife.
SCRATCH
Define your scratch first. Is it big or small? For small scratch, the best available option is marker or drawing pen. Bigger scratch could be covered with shoe polish or coffee ground. Pick either one and start working. Don’t forget to find the closest colour to the wood surface. Also, follow the scratch’s direction while applying the remedy.
PROVIDING COVER
From the previous explanation, you could conclude that wood furniture is the most vulnerable to stains. Thus, prevention steps are important. One thing you could do is providing covers. Wood table should have tablecloth, dining table should be covered in plastic layer, etc.
This step is particularly important during holiday season or gathering occasion. You never know what, when and who could spill something on the wood surface. The cover will prevent the spill to touch the wood surface directly, acting as barrier.
Not all of you buy new wood furniture. In many cases, second hand store has pretty items for cheap price. Who cloud resist such offer? If you belong to this group, then make sure to apply extra protection. Wood furniture sold in second hand store must have marks or scratch. Displaying them won’t be good.
You have two options; paint them or apply another finishing layer. Neither is hard work. Before you start the project, lightly sand the surface. It helps the wood furniture to absorb solution better. After applying paint or finishing layer, dry your furniture thoroughly. Now look at the result; isn’t is worth all the time and work?
How to make wood furniture more durable with extra protection. Image
Why you need Zep Grout Cleaner? Grout somehow can be very irritating when it comes to the thinking of cleaning it. However, it is true that grout plays an important role in our house.
Its main function to fill up the spaces among the tiles in countertops, showers, floors, and many other surfaces cannot take into granted.
Zep Grout Cleaner
1. The Grout Cleaning
Although it has an essential role in your house, grout can be very painful to clean and to keep them clean all the time. You may know it very well that this little ridges and grooves can be the perfect place for mildew, grime, or dirt to be trapped and make your grout looking very grungy.
We all agree that the grout stains can be very gross to see. They can also become the places for mold, mildew, dirt, germs that you don’t want to be staying there and you definitely don’t want to spend your whole weekend just to clean the grout.
The good news is that there are grout cleaners out there which are able to remove the stains away from your grouts. These cleaners are even able to prevent the forming of dirt, mold and germs from your grouts from the beginning.
These grout cleaners are vary and one of them which is very famous among the grout cleaning products is Zep Grout cleaner and whitener.
As mentioned previously, Zep grout cleaner and whitener is one brand of grout cleaners that is very famous and almost being popped up everywhere. What is it actually? Let’s find out!
Product Information Zep Grout Cleaner
The name of the product is Zep Grout Cleaner and Whitener. It is considered as manufacturing strength-old invention. It is liquid. The manufacturer is Zep Inc located at 1420 Seaboard Industrial Boulevard, Atlanta. You can get the more detailed information on this product from its official company website.
As mentioned previously, Zep grout cleaner and whitener is an acid based liquid. It is a detergent. The acids which are contained in the product are hydrogen chloride and hydrochloric acid. The product comes with 32 ounce or 1 quart per bottle. Each bottle is designed with the applicator nozzle located on the top.
Pros
This Zep grout cleaner and whitener is basically a cleaner made of acid. The main function of this product is that you can use it to clean the grout effectively by using minimal scrubbing. This product is very powerful if you want to clean the tile floors in your showers or bathrooms especially if you want to get rid of any stubborn grout that require some serious care.
You can use this product if you want to make your white grout to become brighter. This cleaner consists of a formula for both cleaning and whitening the grout. You can get your grout as white as you can just in a couple minutes.
The good news is you don’t need to scrub the grout. This product is bleach-free meaning that you can use the cleaner to all colored grout as it will not cause any discoloration on the colored grout.
Many customers say that this product is able to work much better than their expectation. It doesn’t create any overpowering aroma or scent. Furthermore, the price is quite reasonable if being compared to other grout cleaning products.
Cons
Despite its pros, Zep grout cleaner and whitener is somehow is not suitable for any metal, marble, stone, or Corian tiles. If you happen to have granite or marble tiles, it is better to find some specialized grout cleaners.
In any case, if you happen to get some of the cleaners on metal accidently and any location besides the grout that you clean, you can rinse the cleaner directly using clean and fresh water as soon as possible to avoid any unexpected impacts.
Directions of Usage Zep Grout Cleaner
Before applying the product to clean your grout, it is best if you read the directions of usage first. It is very important and you need to pay attention to it. However, the general instructions on how to use this product are as follows:
It is recommended to wear any rubber gloves and also safety goggles. As this product contains acidic formula, you need to protect your eyes, skins and also clothes.
You need to apply the cleaner only on the grout. As the bottle is completed with a nozzle on top, you can easily direct it onto the grout. You need to remember to do it steadily and slowly as the bottle is considered to be quite heavy and large. You can also transfer the content of the bottle into some other small bottles to use it easily.
Start applying the liquid on small area such as 2×2 square and the move to 5×5 tile or 10×10 one after you feel confident in using this product.
Leave the liquid to set on the grout for some time, like 2 or 3 minutes.
The acidic liquid will consume the grout’s tiny surface and make the mold, grime and dirt loosen up.
You can scrub the grout surface lightly to get rid of such stubborn stains by using the grout brushes.
Then, wipe off the cleaner from the grout using any grout sponge or damp cloth.
After that, you can mop all area using the fresh water to get rid any of remaining product.
Product Analysis Zep Grout Cleaner
This product contains acid so that it can’t be used for bleaching. It means that this product is very safe if you want to use it for any colored grout. It also doesn’t contain any overpowering aroma so that it is quite pleasant to use.
Zep grout cleaner and whitener is also considered as a strong cleaning product just like any other chemical product, you need to handle it with extra care. If you want to apply the product, make sure that you have enough ventilation and keep in mind to have some breaks so that you will not exert yourself.
People who have used this product mostly give positive comments or reviews. They simply like this product because it is easy to use. You just need to pour the product and then wipe it off. The cleaning result is also satisfying. So, do you want to try it?
Bluestone table is probably one of the most durable tables you can have.
However being made of bluestones, this table has porous surface which requires immediate stain removal and careful care to keep the color and to prevent damage to the table.
If you are still novice in this thing, you are reading the right guide.
There are several ways you can apply in order to clean the table. You can follow the direction below in the same order.
#1 First
To clean debris, dust, and dirt, use a soft and dry cloth and wipe the table surface. Make sure you do it slowly to prevent scratch, and thoroughly so it is perfectly clean later.
This dry step is necessary to do at least once every day to prevent debris and dust from piling up.
#2 Second
To remove fresh stains and spills, you are going to need to use a dampen cloth. Use a clean and soft cloth and damp it into the water. Use the wet cloth to wipe your table surface.
It is recommended to do this as soon as you get the stains or spills. It prevents them from being absorbed into the stones and leave permanent marks.
#3 Third
For weekly care, you are going to need to use additional help. Mix four drops of mild dishwashing solution with one gallon of clean water. Take a soft and clean cloth and damp it into the mixture.
Wring the excessive moisture and use the cloth to wipe out your table. It is effective to remove staying debris and the odors sticks on your bluestone table.
#4 Fourth
To remove moisture from your table surface, take a soft and clean cloth and damp it in water. Use the cloth to wipe the table then immediately wipe the table with dry and soft clean cloth. This will prevent lingering moisture that can damage the coloring.
In addition to those care steps above, you also need to pay attention on the following factors. It helps in preventing further damage and discoloring on your bluestone table.
Immediately clean stains and spills so it doesn’t leave permanent stains or cause discoloring.
Never use detergent or soaps with harsh formula. Use the mild one if you want to or prefer for a solution specially formulated to maintain bluestone surface.
Never put things with excessive heat on your bluestone table surface. This will damage the smooth surface not to mention change on the color and patterns over time.
Never drag the table. Instead, lift the table from both ends to move it around.
Don’t use too heavy and sharp objects on the bluestone surface. If it is get chipped, keep the pieces and give it to professional for some fixing.
In short, it isn’t very complicated to maintain and care the bluestone table. If you are a new owner, the guide above will help you out. Read carefully and apply as instructed to clean and maintain it without causing additional issues. Good luck.
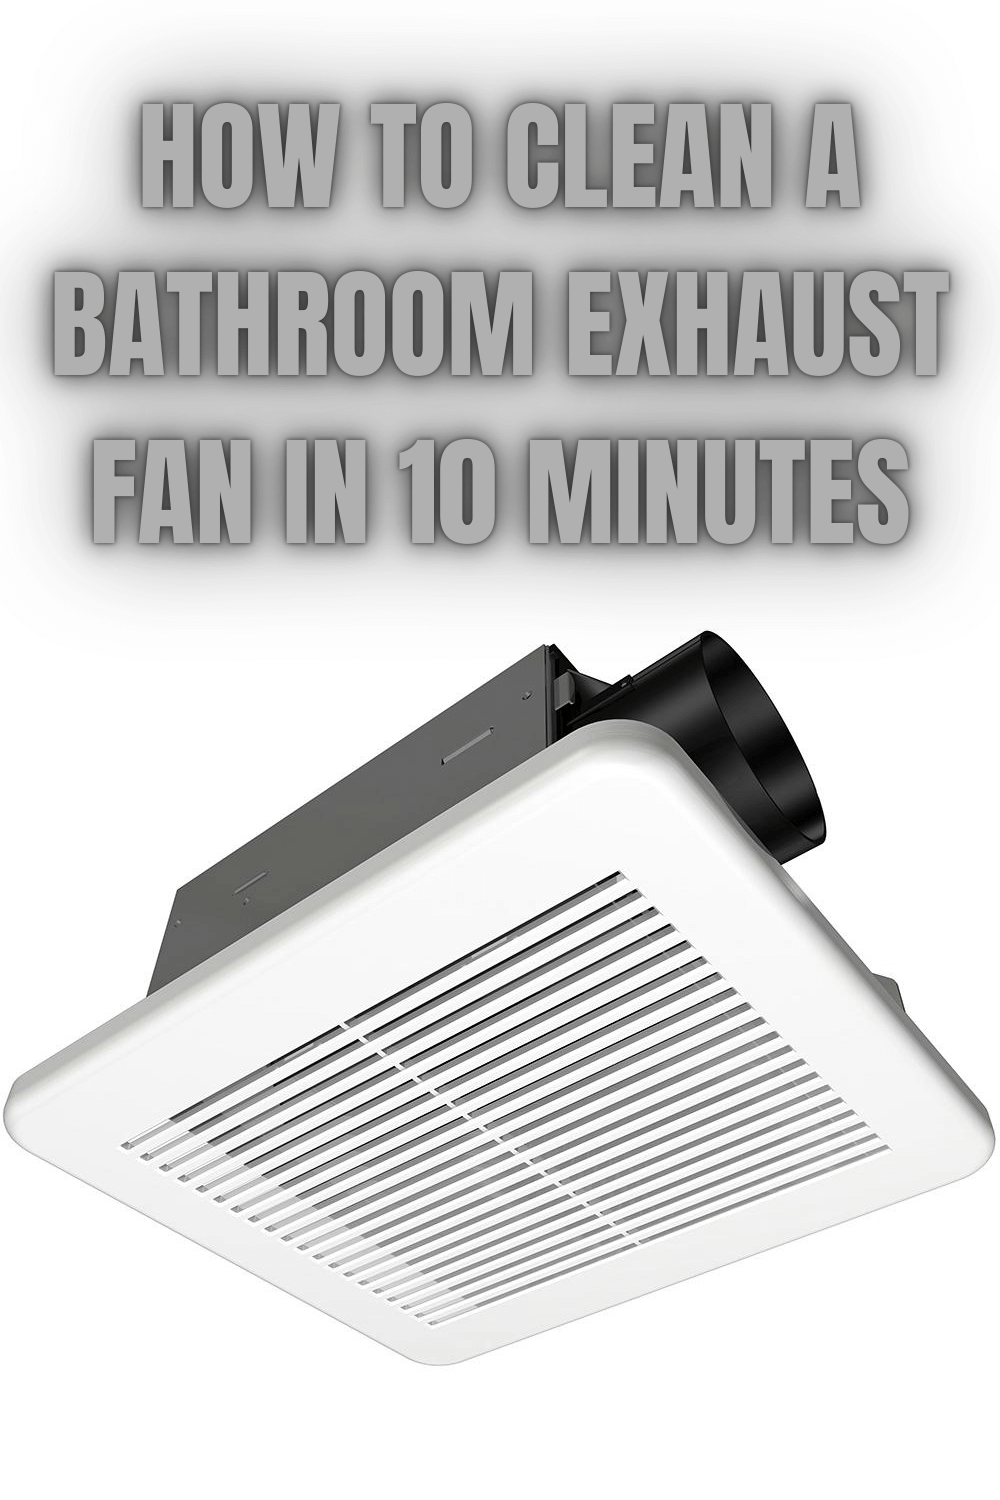
How can you notice whether your bathroom fan is working properly or not? When you finish taking a bath, do you notice that the mirror in your bathroom is foggy?
When it happens, it indicates that your exhaust fan is not in a good condition. Don’t worry, there are some excellent tips that you can do to clean your bathroom fan.
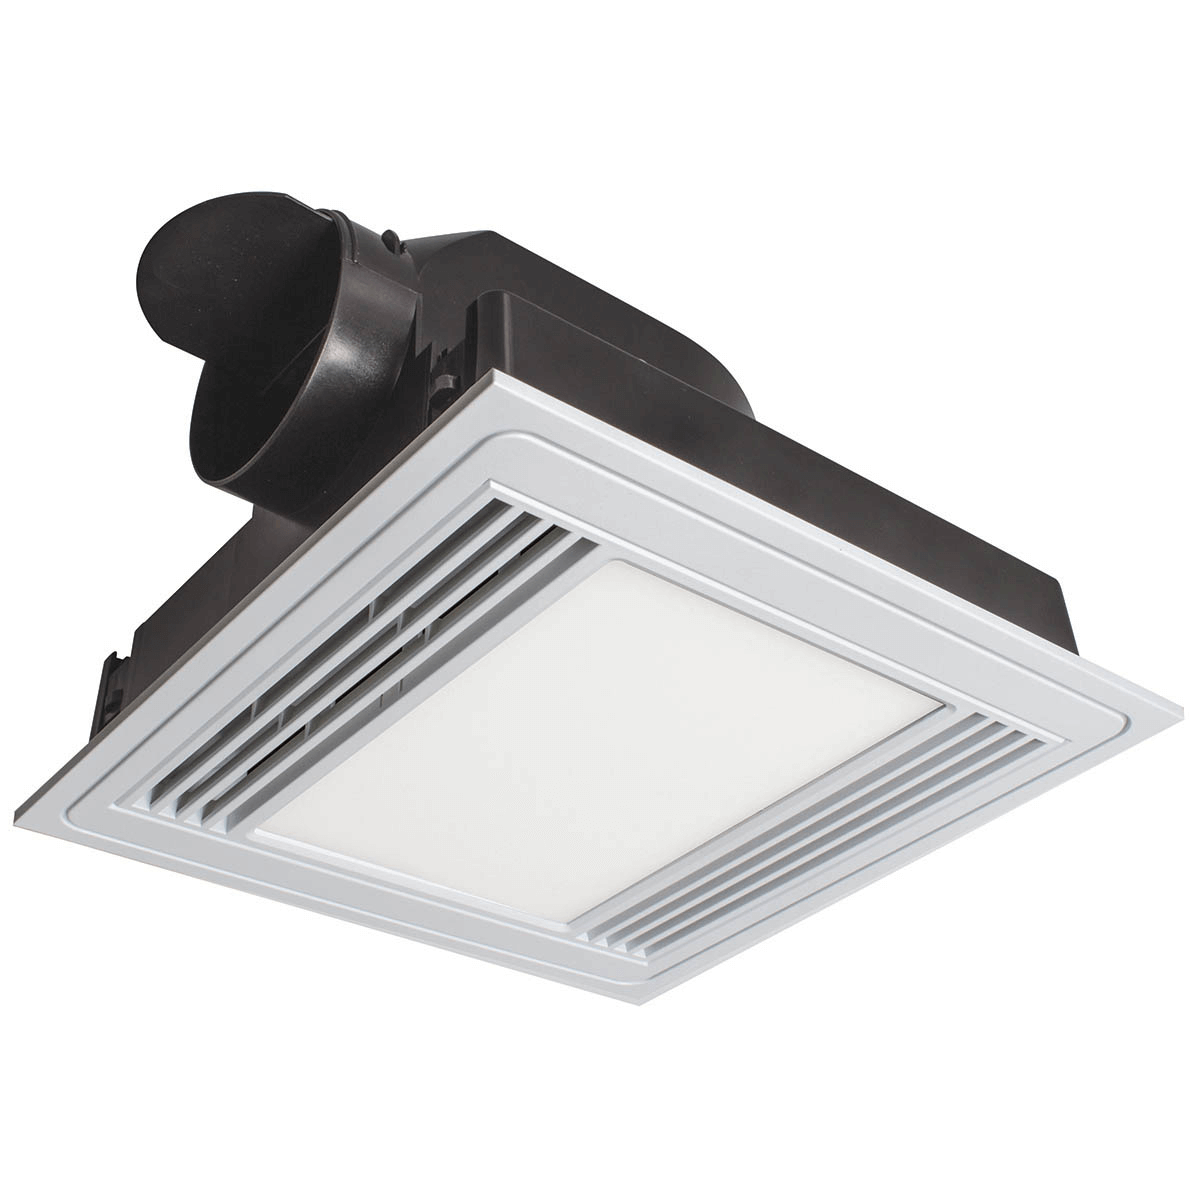
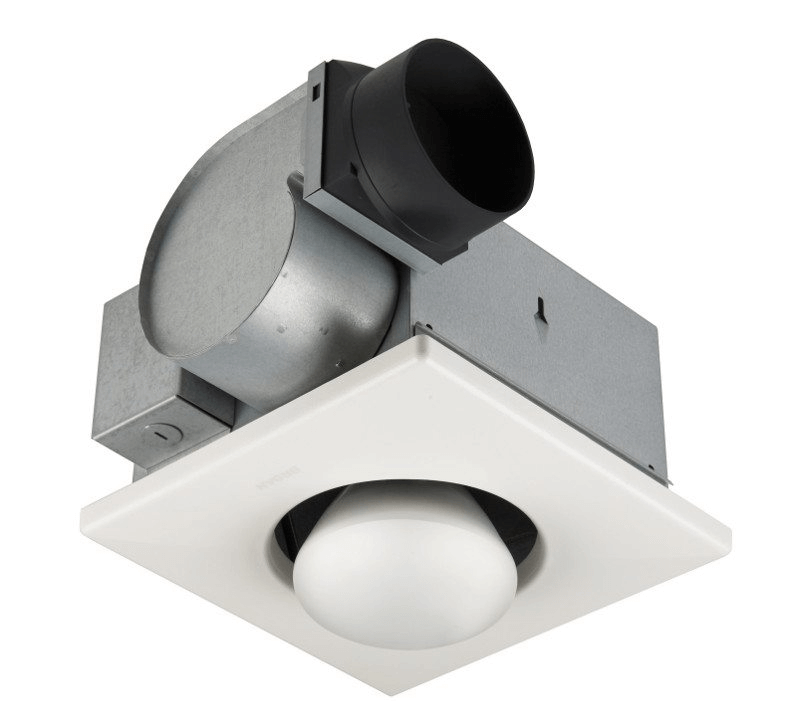
An exhaust fan installed in every bathroom is being vented out to the outside and it will be automatically running when you take a bath or shower.
During the time, it is designed to get rid of excess humidity or moisture which can form mildew and mold in your bathroom. That’s why it is very significant to always keep your vent fan clean every day.
If you left your vent fan to be neglected for so long, it will be resulted to your health issues. It is better to always check and clean your bathroom fan every six months. The dirt is going to accumulate on the cover and its motor as the air is being sucked up through the fan every day. Therefore, you have to clean the fan. By doing so, you can do a great job by removing the accumulated dirt before it becomes a serious problem.
Before cleaning your fan, prepare some tools and materials needed in the fan cleaning. The tools that you need to prepare are vacuum cleaner, screw driver, scrub brush and ladder. Choose a vacuum cleaner with a hose handle to clean the dust so that it won’t bring you hard time to clean. Then, the materials needed for cleaning your fan are soap and water.
If you have already got all tools and materials with you, let’s start cleaning your bathroom vent fan. Here are some amazing tips that you can do:
1. Make Sure to Turn Off the Vent Fan Power
Before doing anything else, turn off the fan power to make it stop working until you finish the cleaning process. Generally, most fan models have the power switch installed behind the cover. You just need to open the cover and turn off the switch. Nonetheless, you can also temporarily turn off the bathroom breaker, just to be safe.
2. Clean the Visible Dirt
To prevent dirt falling onto the floor inside your bathroom when you try to get rid of the cover of the fan, you can first vacuum the visible dirt accumulated in the cover. By doing so, you will save more time.
There are two types of the cover. One which has screw on it and one which has tiny metal wires. Check the cover on your bathroom fan. Gently pull the cover down on you. This cover is generally being held by some screws or tiny metal wires which make it to be away for about 2 inches but it won’t be completely off.
If it is attached by two tiny metal wires, usually in two opposite directions, you just need to squeeze them in order to make them off of the ceiling completely. On the other hands, if the cover is attached by some screws, you then need to unscrew them.
4. Remove the Fan
Unscrew the fan from its assembly and remove it gently. Don’t drop your fan or hit it to the fan pipes. The broken fan blades will result to lauder and less effective fan. So, be careful!
5. Clean the Cover and the Fan
First of all, you can vacuum all parts of the fan and the cover thoroughly. Then, you can wipe them with a thin cloth which has been soaked into soapy water. You can just put the cover in your bathroom sink soaked with soapy water for a while. But, wipe the fan by yourself with a thin clothe soaked in soapy water. Do it repeatedly two or three times to make sure that all the dirt have been wiped off.
6. Clean the Vent Pipe
You can use a brush attached on the vacuum to clean the dirt covering the fan pipe. For the part that can’t be reached by the vacuum, you can clean it manually with the scrub brush.
7. Clean the External Vent Port
You can clean the external port of your bathroom fan later on after you finish cleaning the internal part. But, you need to remember that it is also necessary to find the external vent port and clean it. Use the vacuum and the damped cloth to clean it.
8. Clean the Motor Housing
If your fan housing has some kind of plug, make sure not to expose it with water as it will cause an electrocution or shock on the fan when you reinstall it. Just vacuum it and use dry cloth to help you wipe off of the excessive dust.
9. Reinstall the Fan
After the fan is completely dry and clean, you can reinstall in on to the fan motor. Don’t forget not to bump it into the pipe. Tighten the fan with the screws. Then, try to spin the fan for a few times to make sure that is doesn’t stroke against anything.
10. Turn On the Fan Power
After the fan is safely installed in place, turn on the fan power or bathroom breaker back. When the power is already on, remember that the fan is now back to become dangerous. So, don’t try to clean or wipe anything on it.
11. Reinstall the Cover of the Fan
Before reinstalling its cover, check if it is already dry and clean. Plug in the cover into the ceiling by screwing it back or put the metal wires in position. Gently push the cover to the ceiling. Turn on the fan. It should be quieter and flowing more air than before.
So, it’s an easy task to do, right? You also don’t need lots of time in doing the work. All tips can be finished within 10 minutes. When your vent fan is clean, you can minimize the bathroom odors and also prevent mildew and mold to form. You can also maintain your health by doing so.
The following steps are the way to clean the instant pot after you use it every time.
1. Wash the Inner Pot First
This is the first part of the pot that you need to clean. Simply remove the inner pot from the hardware and toss it into your sink. If it has burnt food on the bottom, make sure to soak it in water first. It helps in removing the sticking.
When it is ready, wash the pot as usual. Use the dishwashing liquid to clean the entire surface of the inner pot, both inside and outside part. Then, rinse with water to clean the detergent. Put it on the rack to dry.
2. Wipe the Inner Pot Clean
When it is dry, take a clean cloth and wipe the inner pot. Make sure to use soft cloth so you don’t scratch the inner pot surface. Scratched surface of the pot can be dangerous for your health if you use it for cooking. Wipe the inside and outside of the inner pot before storing or setting it up again.
3. Wash the Sealing Ring
In addition to the function, the sealing ring tends to absorb your food color and odor through time. The only way to preventing from happen, you need to remove and wash it as well. It can be a little tricky to remove the sealing ring, but it is possible. Simply use your finger to take it out.
Then, wash the silicon ring as usual. Use the liquid dishwashing soap, and wash it. Rub a little so it shows back its original color, which is a little transparent. Put it on the rack to dry and make sure not to lose it because it is pretty small.
4. Wipe the Inside Lid Too
The inner pot has a lid attach to your instant pot cover. You can remove it and wash it as you wash the inner pot. Do the same procedure and make sure you get to remove the entire food remaining on it.
It can be surprising for you, but the lid can be the part that gets the dirtiest. It is also recommended to soak it in water first if the remaining food stick and it is too dry.
If you like cooking and you use your instant pot pretty frequently, it is suggested to deep clean it every month at least. It prevents the pot from clogging. It also prevents smelling and stubborn food residue as well.
1. Don’t Forget to Unplug First
It is extremely important to do. You need to make sure your instant pot has been unplugged before. If you just used it for cooking, it is also important to let it cool for awhile. The inner pot is hot when you are just done cooking. You can harm your skin if you insist cleaning it right away. Unplug the entire cable so it doesn’t have a tail anymore when you wash it.
In some cases, there are instant pots that are completed with permanent cable for power. You can’t remove it without ruining it. In this case, don’t unplug the tip that sticks to the pan. Just unplug the one that gets into the socket.
2. Start with the Housing
When cleaning the housing unit, we don’t need the dishwashing liquid or other products. We only need a clean cloth and some clean water to keep the cloth damp. When you are ready, wipe the entire unit slowly. If you get sticky residue somewhere on the unit, wipe and wipe again. The moisture will helps solving the sticking.
It is important to keep the cloth damp, not wet. Several part of the house is connected to electrical panel, which can be ruined by water. Reach tricky corner and nook to make sure all surface is clean.
You also need to clean the bottom part. This time, use a brush. A brush allows you to reach sneaky nooks and corners. If you get sticky food residue on it, use the damp cloth to help.
3. Let’s Wash the Inner Pot Lid
The inner pot lid is often the first part to get the dirtiest, as mentioned before. Therefore, it is important to wash it. It prevents sticky food residue from sticking there permanently, and bed smell when you cook
Simply wash the lid with warm soap water and sponge. Wipe with sponge when washing and you are basically done. Leave it on the rack to dry.
4. Clean the Smaller Parts
You commonly have extra of small parts when you buy the instant pot. It includes the quick and release handle, the shield, and condensation collection cup on the side. They tend to get the food residue and create bad smell.
Remove them from the place and wash them with warm soap water and rinse clean. If you still have the extras, replace these with the extras.
5. Wash the Silicon Ring
This silicon ring is a part of the sealing. It often gets the food residue and odor as well. In this case, remove the silicon ring from its position and wash it in regular way. IF you get stubborn residue, try steam cleaning. This method should help in removing possible odors remained as well. If there is crack, replace with a new one you can buy online or at local store.
6. Don’t Forget the Inner Pot and Its Accessories
Gather your inner pot as well as the entire accessories you often use for cooking. Then wash them as usual. Most products make inner pots and accessories that are safe for dishwasher, but manual washing is easy too. Rinse and let it dry.
For extra touch, wiping them with clean cloth and vinegar will remove remaining detergent and it keeps them shine.
7. Assemble!
Finally, you are done washing your instant pot. Now, assemble the entire part as it is originally. Make sure to wipe it clean and dry first.
Originally posted 2021-06-12 04:06:00.
Manage Cookie Consent
To provide the best experiences, we use technologies like cookies to store and/or access device information. Consenting to these technologies will allow us to process data such as browsing behavior or unique IDs on this site. Not consenting or withdrawing consent, may adversely affect certain features and functions.
Functional
Always active
The technical storage or access is strictly necessary for the legitimate purpose of enabling the use of a specific service explicitly requested by the subscriber or user, or for the sole purpose of carrying out the transmission of a communication over an electronic communications network.
Preferences
The technical storage or access is necessary for the legitimate purpose of storing preferences that are not requested by the subscriber or user.
Statistics
The technical storage or access that is used exclusively for statistical purposes.The technical storage or access that is used exclusively for anonymous statistical purposes. Without a subpoena, voluntary compliance on the part of your Internet Service Provider, or additional records from a third party, information stored or retrieved for this purpose alone cannot usually be used to identify you.
Marketing
The technical storage or access is required to create user profiles to send advertising, or to track the user on a website or across several websites for similar marketing purposes.