Tag: Furniture

  • 8 Steps How to Paint Kitchen Cabinets without Sanding

    8 Steps How to Paint Kitchen Cabinets without Sanding

    The older the age of your kitchen is, the more scratches and corrosion you will find.

    There are so many things you can do to make your kitchen bright again. One of them is by painting it. Usually we need to do the sanding before start painting. It will surely spend much time.

    Therefore, here are some tips to paint the kitchen without sanding.

    Read also: Kitchen Countertop Paint Color Ideas.

    HOW TO PAINT KITCHEN CABINET WITHOUT SANDING

    1. Removing All Hardware

    You are going need to remove all hardware in your kitchen to make your job easier. Put them in some place near your kitchen, so you can easily reach them whenever you need during the process.

    2. Removing Doors and Drawers

    If you want to paint your entire kitchen, you need to remove your doors and drawers. They will be painted separately outside the kitchen.

    You also have to empty the drawers to keep everything inside it clean, but everything can stay inside the cabinets since the glass will protect them from the paint droplets.

    3. Paint Your Hinges

    Again, if you want to paint the entire kitchen, you need to go until the hinges. You can spray paint the hinges rather than buying new ones. It will save your money. You can also choose the color you want if you spray paint them by yourself.

    4. Patching Any Holes

    It is better for you to patch all holes that you think you are not going to use anymore using spackle appropriately.

    5. Wiping Down

    Before you start painting, wipe down all drawers, doors and cabinet first to remove any grime and dirt. It is recommended that you use Lysol wipes to make it more effective.

    After that, wipe again all the drawers, doors and cabinets liquid glosser. Do not scrub the old finish on your cabinets because it will not look any different after the wiping.

    6. Do the Painting

    If you finish with the wiping, it is time to do the painting. When you already decided the product of the paint, prepare the equipment. Use a paint brush to paint any detail and small parts.

    Then for larger surfaces, it will be more effective if you use a dense foam roller. Make sure that you do not miss every single part of your kitchen.

    7. Applying the Coat

    If you think that your painting is dry enough after some time, it is time to add a high performance coat to all surfaces of your doors, drawers and cabinets. It will make them look brighter. Then after putting the coats, replace your drawers and re-hang your doors once everything is dry.

    8. Attach the Hardware

    Finally the last step is attaching your hardware that you remove at the first step. Put them back in the position and do the last cleaning in your kitchen.

    Read also: How to Stain Wood Cabinet without Sanding.

    Actually, sanding process in painting should not be avoided, but some people just like to paint their kitchen without sanding. Those are the steps that you can try to apply to your kitchen. It will not need any sanding, so you can save your time for another activity.

    How to Paint Kitchen Cabinets without Sanding

    Originally posted 2019-09-15 13:15:44.

  • DIY Kitchen Island Drop Leaf

    DIY Kitchen Island Drop Leaf

    Moving to a new property is sure thrilling and exciting! As you might learn from your past experiences, having a portable and foldable item would bring a great benefit for many occasions.

    You could set out a bigger table when holding a house warming party. Then, you could also make it big enough to fit the corner space and provide adequate spaces for personal dinner.

    Island kitchen drop leaf sounds just great. What about making one?

    Read also: How to Build 2 Tier Kitchen Island.

    The Materials

    Before jumping into the pleasure moment of cutting and installing, you need to pay a visit to the store and purchase several things: 144 inches of poplars, 212 inches of pine pieces, 612 inches of pine slabs, and 98 inches of three inches pine.

    For the finishing touch, you might also need wood conditioner and stain. Don’t forget to buy a corner bracket and screws to support the folding function.

    Add the sandpaper and adhesive glue to your shopping list. You will need them later to attach and remove sharp edges.

    White Kitchen island with drop leaf breakfast bar

    The Procedure

    In the table making, you only need to cut, assemble and paint the prepared materials. Each steps is explained further in the following section.

    1. Cutting

    Start off with cutting the 144 inches poplars into four pillars. Each of them should measure 36 inches. The 212 inches one is divided into two pieces: four items with 36 inches size, and another four cuts with 17 inches size.

    The 612 inches slab should be equal 17 inches cut. If you do it right, the final product should count to thirty six pieces. The 98 inches pine is cut into 4 pieces: two of them is ten inches wide, and the rest is thirty nine inches.

    You could use saw to cut the thin pieces, and the electric saw if you need more power to divide the thicker wood. After you finish cutting, eliminate any sharp edges with the sandpaper. The final product should have smooth surface.

    2. Assembly

    The first part to put together is the frame. Create two squares with thirty six times seventeen inches. These rectangles would fill the bars inside the leaf table. Attach them together with glue and apply pressure for several minutes to let the glue works.

    Then, take the seventeen inches wide pine to make the bars. One rectangle could fit up to eighteen pines. Next, you can start assembly the rest of the poplars for a standing frame. Then, you can assembly the wood to fit the countertops and side skirts.

    Attach the top butcher with long screws to the frame. The drop leaf wings are then screwed to this main frame with shorter screw. Don’t forget to install the drop bracket under the main countertop.

    3. Paint and Stain

    Here comes the most fun part. You could pick any colors you want, but never forget the layer to prevent any termite. This layer should come first, before applying the layer of vibrant colors.

    The most favored color is dark brown: it emits the natural beauty of the wood itself. Also, it suits in any wall decorations. You might have to give several layers to the wood to get the right shade.

    Read also: Kitchen Island with Cooktop.

    In most cases, things you see in online shop do not fit your personal imagination of a practical item. Instead of remodeling things, it would be less problematic to build one from scratch! The materials are easy to find, and you only need to borrow few architect trick to finish the project. So, what are you waiting for?

    Kitchen island with wheels and drop leaf

    Kitchen island with drop leaf gallery:

    HOW TO BUILD DIY KITCHEN ISLAND DROP LEAF

    Originally posted 2019-09-08 01:28:05.

  • Know It Better: Kitchen Island Butcher Block

    Know It Better: Kitchen Island Butcher Block

    Butcher block kitchen island is a practical solution for a multi function tops. It serves best as a regular display table, but could perform its greatest endurance during hard slicing job.

    As people start leaving the “specialized” furniture type, this product is earning special place in costumers’ mind.

    If you are new to kitchen stuff, the following information would be a great read to start.

    Read also: How to Install Kitchen Island Hood.

    The Definition

    It is basically a combination of wooden blocks, cut straight, then attached to a thick granite or slab. Then, it turns into sturdy and immovable working space in the kitchen.

    You can use it to prepare meat and veggies, serve your dishes to guest, or simply as kitchen counter. Depending on your purposes, you might want to keep it unsealed, or seal it.

    There are two things you should consider. First, unsealed butcher blocks are preferable for cutting board, while the sealed not. Second, none of these finished blocks are heat resistant. Always provide several layers on top of the butchers before placing hot pan.

    Teak kitchen island butcher block top with sink and seating

    The Types

    Based on how costumer might use it, there are three models of kitchen island butcher blocks. They are end grain, face grain and edge grain.

    The end grains have slightly protruding end, hanging a few centimeters on the drawers. It produces the least sound when placing a glass and has the softest colors to fit vintage concept.

    It is made of several wooden blocks, adding the artistic view from the product. End grain butcher block is suitable for cutting board, as it could hide knife mark.

    If you want to take the most durable one, let it be the edge grain. It is the strongest, most stable and the affordable one among the others.

    The appearance is simple: several long blocks of woods glued together without any joint or nails on the surface. Face grain, on the other hand, is often labeled as the doppelganger of long grain one.

    They do look similar in a quick glance. But if you look closely, the line is not as bold as the long grains. It is more like a streamline.

    Even though it belongs to block butcher, it could not perform its job well. Any cutting will leave clear mark on its surface.

    Black leg kitchen island butcher block top with cart in small design

    The Maintenance

    The most important thing is oiling. It is best to do the routine once every six months, to keep the wood shining and well protected.

    Remember that you cannot just buy any kind of oil for this purpose. Different wood materials call for certain oil. Thus, you are suggested to keep your manual instruction well.

    Never rub cooking oil on the surface, as it will make the wood crack and dull looking. The intensity of exploring the block as cutting board might shorten the maintenance period.

    Read also: How to Maintain Kitchen Island Marble Top.

    Considering its function, butcher block is totally useful in for kitchen area. You could also choose three types of edges based on your need.

    The various function and flexible choice come with a consequence: you are required to do regular maintenance to make sure that the aging process goes naturally. Anytime you are ready, the butcher block is waiting to be picked.

    Nice kitchen island pictures gallery:

    SIMPLE TIPS ABOUT KITCHEN ISLAND BUTCHER BLOCK

    Originally posted 2019-09-07 00:47:50.

  • Kitchen Island with Cooktop

    Kitchen Island with Cooktop

    Lately, multifunction space is becoming popular. This trick is particularly helpful for limited space kitchen.

    However, the owner of spacious kitchen starts to copy this concept into their own, leaving more spaces for the other cooking equipment to line up.

    The simple yet functional theme attracts more people to dig a little but further.

    Related article: Rustic Kitchen Island on Wheels.

    The Definition

    Kitchen island is originally the centerpiece of almost all modern kitchens. In its early debut, this item has less built-in features, allowing the owner to have abundant dishes and table decoration on the top.

    Then, some bar stools were installed, and thus pioneering the upgraded version of a kitchen island.

    Many manufacturers believe that a cooktop is the perfect pair for this item. The final product will commonly have four burners, and usually calls for a sink on the side, also microwave and oven in the drawer.

    With this setting, you can cook the dishes without turning your back to the guest. Choosing the kitchen island with cooktop implicitly shows how much you appreciate both cooking and the guests.

    Kitchen island with cooktop and oven

    Gas or Electric Stove?

    Now that you know the definition, the next thing to discuss is the common mental battle an owner will face. The type of stove affects not only the installation, but also your electric plan.

    Among these two, the most popular choice is a gas stove. Just like how the chef in a big restaurant like it, the heat from gas stove could be controlled.

    You can get various ranges of flame for different cooking purposes: simmering with low heat or searing with high heat.  Another plus point is its affordable price and environment friendly features.

    However, sloppy installation sometimes puts the gas wire or the gas tube too close to the burner. As the result, the cook has a high risk of burning.

    For your comparison, electric stove is loved for its low maintenance. Also, no open fire would be found, and you can simply hit the on/off button to light it up.

    This design is totally favorable for those who cook lightly. For those who enjoys gathering with colleagues or families during holidays, then electric stove would be a turn down.

    Imagine cooking in a big pot, and you spill some of the soup into the inner stove. The next day you will be busy dealing with the cables inside. As long as you manage to hold everything on the smooth surface, cleaning chores will be few to none.

    Kitchen island with cooktop and seating

    The Island Setting

    Infusing a lot of great equipment into one piece is not as easy as it may look. To be able to cook conveniently, there are some rules to follow. The sink, for example, should not be too far or too close to the stove.

    Don’t forget to consider the distance to your refrigerator and kitchen utensils. To tackle this problem, you could either re-arrange things or install a special drawer for the utensils.

    When you want to own something simple, but perform several tasks at the same time, you should be ready for the consequences. Yes, it brings everything closer, within your reach.

    The problem is the complicated installation and maintenance. The pipes for gas, waste water and electricity must be neatly arranged. If you are ready for these, then go and install one.

    Kitchen island Cooktop and seating gallery:

    SIMPLE TIPS FOR KITCHEN ISLAND WITH COOKTOP

    Originally posted 2019-09-06 01:03:52.

  • Applying Kitchen Island Hanging Lights

    Applying Kitchen Island Hanging Lights

    As we all know, we use kitchen not only at daylight, but also evening. When days turn into evening, you are going to need some lights to support any activities in your kitchen.

    A proper lighting will make your kitchen look more elegant and becomes more inviting.

    One of lighting ideas you need to try is hanging lights and here are some tips about it.

    Read also: How to Get an Ideal Kitchen Island Overhang.

    1. Chandeliers

    People will normally hang the chandeliers on top rather than putting it on the kitchen table. That is why you can’t hang it too close to your kitchen tables.

    Provide enough space so that you will need to stand on the tip of your toe to touch it at least. In addition to it, please add any shield to your chandelier to prevent it melting down to your kitchen table.

    Chandeliers over kitchen islands hanging lights

    2. Vintage Lamp

    If you like anything about vintage, hanging vintage lamp in your kitchen is worth a try. Bring back your old memories by choosing a vintage style for your lamps.

    It will smoothly match with your kitchen island as long as you design your lamp as antique as possible. You can pick any Italian lamp design for various choices of vintage lamp. It will look complete when you let your shelving opened.

    Vintage lighting for kitchen island

    3. Track Hanging Light

    You can apply this style of lighting in almost all styles of kitchen set because track lighting is actually a flexible type of lighting. To make it look more inviting, you need some improvement in adapting track lighting.

    Proper placing will take a part in building friendlier situation. Pick some spots that you think need more light than other spots. Then set the track light to shine on those spots.

    You also need to consider about what the track lighting is made of. Choose the material of the track lighting based on the concept that you already have in your kitchen island.

    Track lighting over kitchen island
    Image: decoist.com

    4. Pendant Light

    Another hanging light that is commonly used is pendant light. This kind of lighting is also well known to add modern and decorative feel to your kitchen.

    Again, like the previous hanging lights, you need to be careful about the height of the hanging. Wrong height can bring you terrible look, not to mention the possible accidents to happen.

    Pendant lights should be hanged at 70 inches up from the floor, which is at normal adult eye level. If your tier is 42 inches high, place the lights 28 inches above the tier to get the best look.

    Kitchen island pendant lights

    5. Apply Proper Colors

    The last but not least is the color of the light itself. No matter how good you hang your lamp, it will still look awful if you use the wrong color. Use the size of your kitchen as a consideration in picking the color.

    Try to apply brighter colors, especially when you have a small-sized kitchen. You will need colors that can reflect light, so dark colors and shades must be avoided.

    Read also: Kitchen Island Pendant Lighting Ideas.

    Applying hanging lights is actually not really that complicated. Well decorated kitchen and proper design will really helpful for your hanging light concept. Applying the hanging lights concept that already matches with your kitchen island will minimize your job.

    Long Kitchen island pendant lights modern design ideas

    Other kitchen island hanging light pictures gallery: 

    MOST POPULAR IDEAS KITCHEN ISLAND HANGING LIGHTS

    Originally posted 2019-09-05 20:54:15.

  • How to Install Kitchen Island Hood

    How to Install Kitchen Island Hood

    If you want to apply an extraordinary idea to your house, having a kitchen island hood can be the one.

    This type of kitchen island will not only give you brilliant look, but also give you some new fresh atmosphere.

    Before starting to install the hood, it will be better for you to follow these simple steps.

    Read also: How to Build 2 Tier Kitchen Island?

    1. Tools You Need

    Since creating the hood in your kitchen island will requires some complicated steps, it is understandable if you are forced to get these tools to support the process.

    Before you start, make sure you have a drill, wood screws, clamp, safety glasses, tape measure, level, hammer, drywall sandpaper, drywall knife, putty knife, cat’s claw and duct sealant tape with you. Those things are going to be needed during the process.

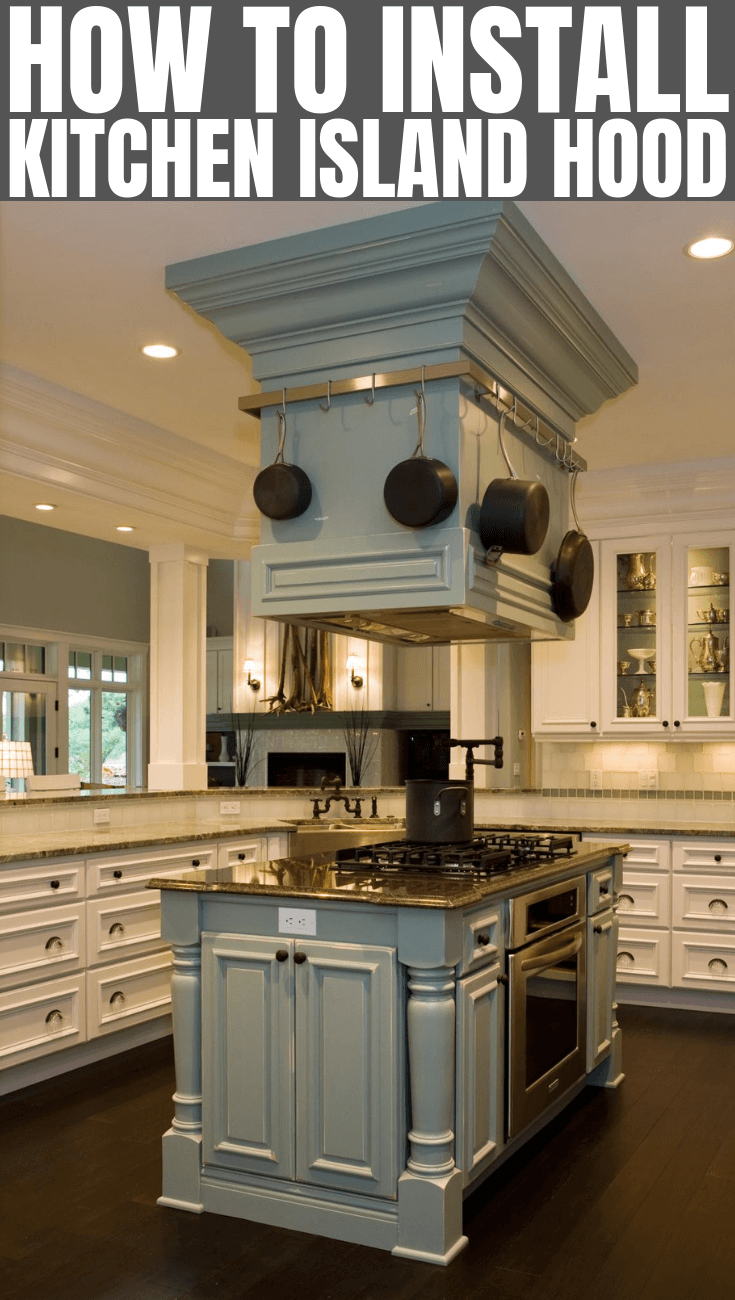
    Some pictures as ideas for kitchen island hood design:

    2. Removing Unnecessary Things

    To begin the process, make a mark at the opening duct in the ceiling where you want to install the hood. To maximize the air flow, make sure that the marking is aligned with the cooking surface.

    To prevent dust from entering your home, put plastic drop cloths over the doorways and put it also on the floor. Avoid any tripping accidents by taping the plastic drop cloths on the floor correctly.

    With your drywall knife, cut the opened ceiling that is connected directly with ductwork. This is why you need safety glasses to keep your eyes safe from drywall dust.

    Remove the sheathing and house bind from the exterior of your house which connects directly to the vent hole with hammer and cat’s claw.

    It is because the island hood ductwork and the vent hole are connected. Make sure that you remove exterior wall and all insulation on the ceiling where you locate the holes.

    Kitchen island hood vent

    3. Start the Installation

    The first thing you need to do is to screw the vent hangers with a drill. It will be good if you invite a professional to accompany you in measuring and calculating every step you take.

    You can also ask their help to connect the electrical wiring and do the electrical work in case you are not able to handle the electrical installations.

    When the electrical installation is done, connect the ductwork from the outside of the vent to the vent in the ceiling.

    Make sure that they slip into each other easily, and then tape all seams using duct sealant tape to close that connection. Use screws to lock the frame of the island that is connected to the vent hangers.

    While you are straightening the frame with the vent hangers, ask someone or the professional you call to hold up the island hood. There will be no gaps needed between drywall compound and the island hood.

    Use putty knife to spread the drywall compound until it is smooth and flat. Put sand into the compound using drywall sandpaper when it is dry. To make it complete, paint the surfaces of the adhered areas with any color you want.

    Installing a kitchen island hood is not that hard when you really understand how to apply the materials and tools correctly. It is also better to ask some professional workers to help you in installing the hood to avoid any unexpected things.

    Wooden brown Kitchen Island Hood
    Image: pgtcabinets.com

    HOW TO INSTALL KITCHEN ISLAND HOOD

    Originally posted 2019-09-04 01:25:21.

  • How to Get an Ideal Kitchen Island Overhang

    How to Get an Ideal Kitchen Island Overhang

    Having a kitchen island overhang can be a great idea if you can execute it well. It will give you a new style of the kitchen that some people don’t apply yet.

    More than just about style, it will also create a better atmosphere in your kitchen.

    However, before you decide to apply kitchen island overhang, it will be better for you to consider these tips.

    Read also: Kitchen Island with Wine Storage.

    1. Use Proper Measurement

    Basically, there are so many concepts that can be applied in a kitchen. Each concept requires different types of rooms too.

    For standard types of room, it is better for you to apply basic dimension of typical bar overhang with 12 inches space. You can rest the stools under the counter if you apply this dimension.

    When you can spare up to 18 inches space, you will provide knee room into the aisle space without pulling the stools too far. Sketch everything on a graph paper to work out the floor plan of the island and its dimension.

    kitchen island with overhang on two sides
    Image: houzz.com

    2. Explore the Size of Your Kitchen Island

    Sometimes you need to improve what you can do in your kitchen, especially when you do not want to stick with your kitchen size.

    It is always okay to have some improvement as long as it is applicable and it will not ruin the overall kitchen design.

    For common kitchen, 4-foot concept might not be applicable. That is why you can improve it by applying 3-foot concept.

    It will give you clearance around the end of your kitchen island in case the end has no doors or drawers to open.

    If you have a very large kitchen, a 30-inch wide overhang can be a good idea to accommodate bigger upholstered kitchen stools with arms.

    However, an 18-inch wide overhang will also look too slim with larger stools.

    3. Use Appropriate Stools

    Using appropriate stools will significantly affect the look of your kitchen island. Especially for narrow overhang, you need to be careful in choosing the stools.

    Make a narrow overhang depth only if you already have specific stools in your mind. Include a 12-inch overhang if it is possible.

    If you are thinking about basic stools, it might be good if you apply a typical 30-inch high kitchen with a short one-foot overhang.

    That kind of kitchen with a narrow overhang will possibly work for assembling food. Leaning toward the counter space and eating at a narrow balcony can bring you back problems.

    Brown Kitchen island with overhang granite countertop and nice decoration

    4. Overhang As a Matter of Look

    Since overhang is actually a matter of look, you can also use bead board paneling that will expose shelving underneath to enclose the island.

    Without aiming any other purpose, an overhang can simply balance the look of your kitchen island. An overhang is made to keep foot traffic from a usual base of your kitchen island.

    Now you can start creating an overhang in your kitchen island. It is going to need some serious measurement and calculation to get the best result of overhang.

    Even overhang is a matter of look at the end, you as the kitchen owner have to create comfortable atmosphere for people who visit your kitchen.

    Kitchen island overhang gallery:

    SIMPLE TIPS HOW TO GET AN IDEAL KITCHEN ISLAND OVERHANG

    Originally posted 2019-09-03 10:41:30.

  • How to Build 2 Tier Kitchen Island

    How to Build 2 Tier Kitchen Island

    Kitchen island is a place that we usually use to prepare meal for all family members or visitors. Thus, it needs to be designed as well as possible.

    Some people are comfortable having kitchen island with one tier. While in other condition, some people prefer to apply 2 tiers for kitchen in their house.

    For those who like using 2 tiers, here are some tips you can apply to your kitchen island.

    Read also: Modern Kitchen Island Chairs Design.

    1. Materials and Tools You Will Need

    These tips will be useful especially for those who use wood as their main material in designing the kitchen island. First of all, you are going to need lot pieces of wood or plywood in any various dimensions.

    To make it simple for you, here is the list of materials and tools you need to prepare.

    • Jig Saw
    • Framing Square
    • Wood Glue
    • 2D Box Nails
    • 4D Finishing Nails
    • Corrugated Fasteners
    • Hinges
    • 3 Wood Shelf Supports
    • Wood and Plywood in any dimensions

    White 2 tier kitchen island design with seating

    2. Building the Box

    The first step you need to do is to make two 35×23 3/4×1/4-inch pieces of plywood, and then make a 4 inch mark from one edge near the corner. Do the same thing to the other edge at the same corner.

    After that, draw lines to make a 4-inch square at the corner of the plywood using framing square, and then cut it using the jigsaw.

    Make four 4×19-inch pieces of plywood, then use the wood glue to stick them with the 2D box nails. Make sure those materials are nailed strongly as you will use it as the cleats.

    Next, make a 23×34 ½-inch piece of plywood and put it on the top of the cleats, and then secure it through the end panels with 4D finished nails.

    2 Tier Kitchen Island design with granite counter top and seating build pros

    3. Building the Face and Tops

    In making the face and tops, you need to start with two 2×32-inch pieces of plywood. Put them into a form of frame that is 32-36 inches tall, and secure them with the corrugated fasteners as the face frame.

    After that, apply the wood glue to the front side of ¾-inch edge of the cabinet and secure it with the 4D finished nails.

    Apply the wood glue again to the all sides of 3 wood shelf support and secure the end panels and the backside of framing face with the 4D finished nails.

    To make the doors, make two 17 ½x29-inch pieces of plywood and use the hinges on them as you will attach the doors to the cabinet. Finally, make a 36×12-inch piece of plywood to the top of your second tier supports with the 4D finished nails.

    Read also: Rustic Kitchen Island on Wheels.

    A kitchen island with 2 tiers will surely allow you to do many things. You will have more space to cook, and to prepare or serve the meal. Having 2 tier kitchen island also needs more maintenance as there will be more mess caused by the meal on the tier. Once you decide to have 2 tier kitchen island, make sure you are also ready with the maintenance.

    2 tier kitchen island picture gallery:

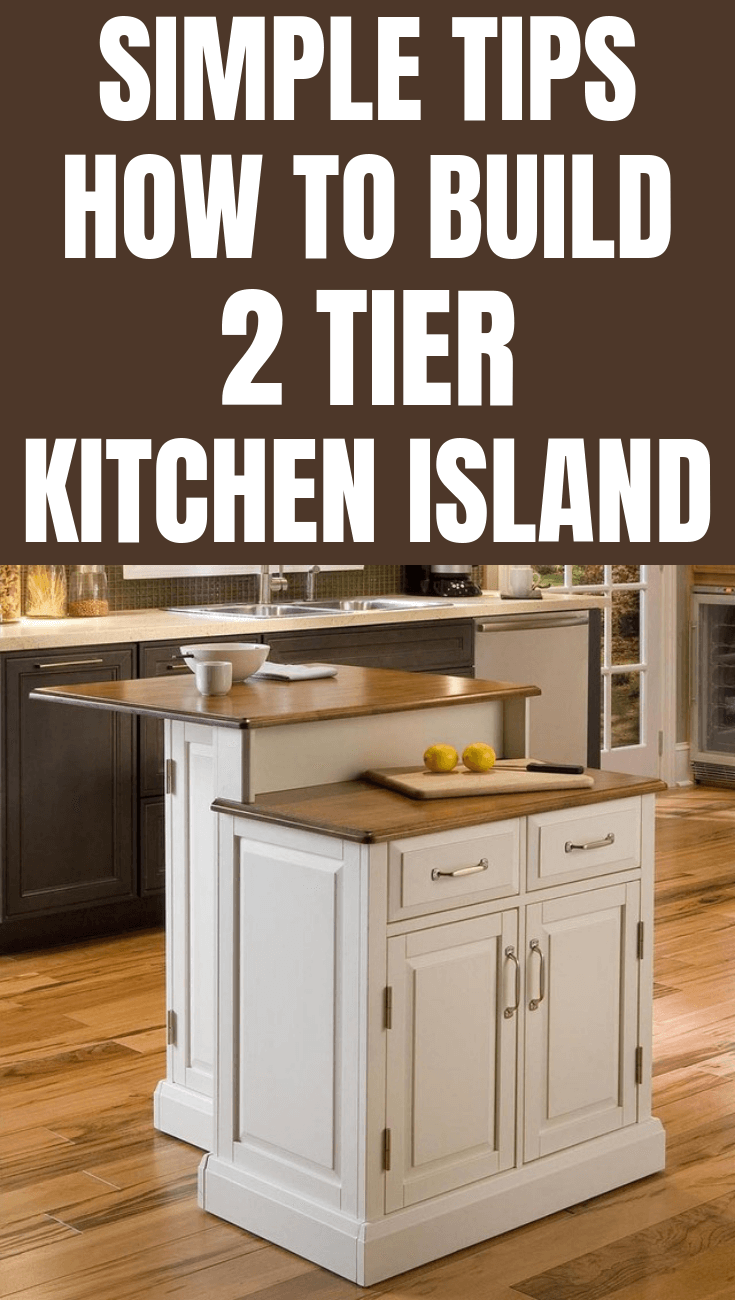
    SIMPLE TIPS HOW TO BUILD 2 TIER KITCHEN ISLAND

    Originally posted 2019-09-03 01:37:08.

  • How to Maintain Kitchen Island Marble Top

    How to Maintain Kitchen Island Marble Top

    It is totally understandable if you find your kitchen as the dirtiest place in your house, especially when you have kids who go around it every day.

    The problem is most of us do not really understand how to clean it correctly. Different material will need different treatment in cleaning it.

    Here are some tips to maintain your kitchen marble top.

    Read also: How to Decorate a Marble Top Dining Table.

    1. Sealing the Marble

    This step is quite simple to be done. It will also guarantee you glorious marble top looks. All you need to do is use a top quality and a trusted penetrating sealer.

    Consider your marble top as your investment, so you can manage how much money you will spend for buying a top quality penetrating sealer.

    When actually not all marble tops need to be sealed, you still need to try this step if you want your marble tops to shine sparkly and protected.

    2. Clean Any Spills Immediately

    Marble is a sensitive material, much more sensitive than granite with acidic substances like tomato sauce, coffee, wine, soda, fruit juice and toiletry products that can etch and stain the surface.

    Clean it as soon as you see there are any spills on your marble tops. Do not let the acidic substances stay any longer on your marble tops because the longer it stays, the more etching it can produce.

    White kitchen island with marble top

    3. Use Sponge and Soft Cloth

    You are going to need hot water and some formulated marble cleaner for your regular basis as the cleaning tools. Dip the sponge and soft cloth to the hot water and formulated marble cleaner and dust it on your marble tops.

    Note that you are not suggested to add any soap combination because it can be harmful for some types of stone.

    4. Use Complete Equipments

    Since it is almost impossible to prevent your marble tops from etching, you can use cutting boards to protect your marble tops against scratching and direct contact any other acidic substances. Avoid scratches or possible scorching by using trivets under hot pans.

    When you notice that acidic drinks from cans, bottles and glasses can slowly damage the surface or scrape the polish, you will need to use coasters under those things.

    French kitchen island marble top traditional wooden cabinets and chairs

    5. Use Table Cloth

    This last step is suggested if you fail or cannot deal well enough with the first 4 steps. By using table cloth, you will automatically prevent any acidic substances or harmful materials reaching your marble tops.

    The next thing you need to think if you want to apply any table cloth is how it will look. Putting a table cloth on your marble tops will indirectly ruin the whole theme of your kitchen. That is why this last step is optional.

    When you decide to use marble as the main material of your table or top, you have to be ready with the maintenance too. Avoid any expensive marble polishing by treating it like fine wood furniture. Having marble tops in your kitchen is a long time investment.

    Kitchen island marble top and granite top gallery:

    SIMPLE TIPS HOW TO MAINTAIN KITCHEN ISLAND MARBLE TOP

    Originally posted 2019-09-02 05:40:51.