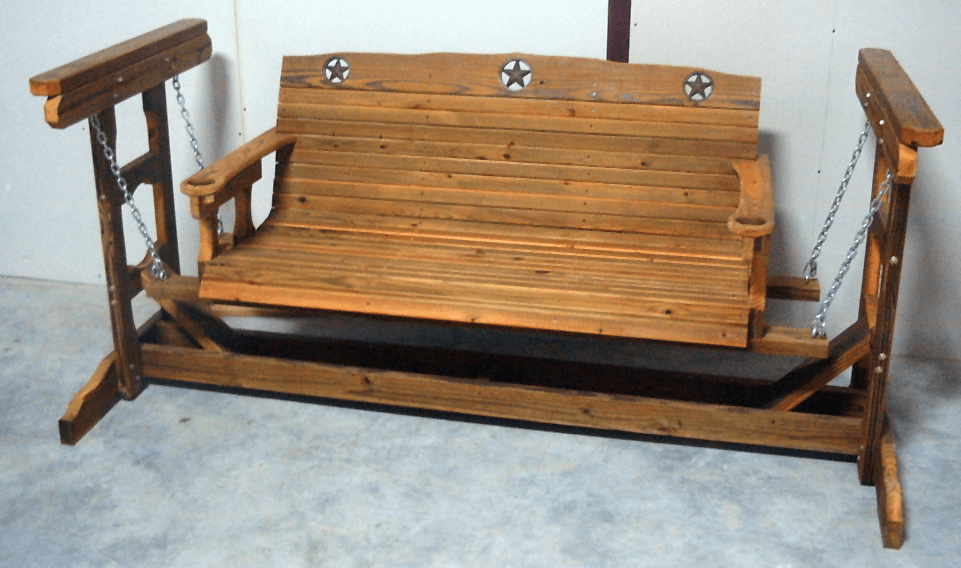
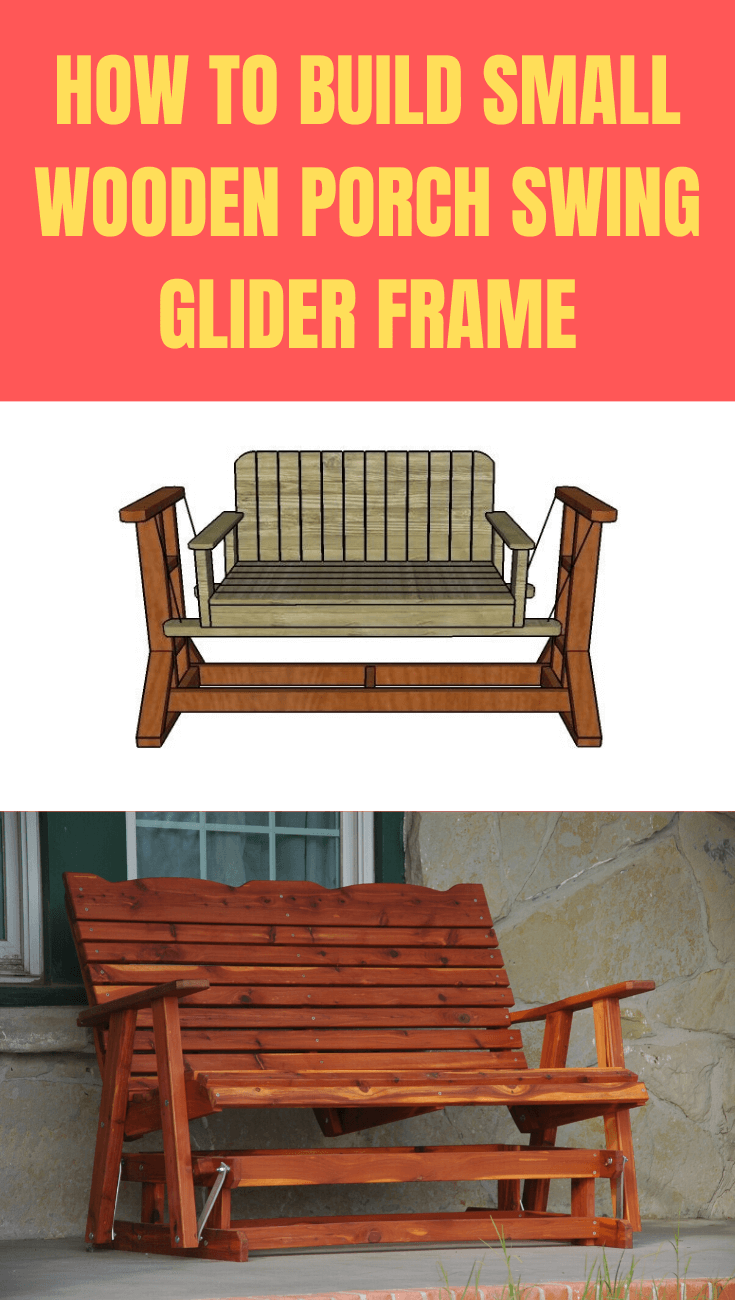
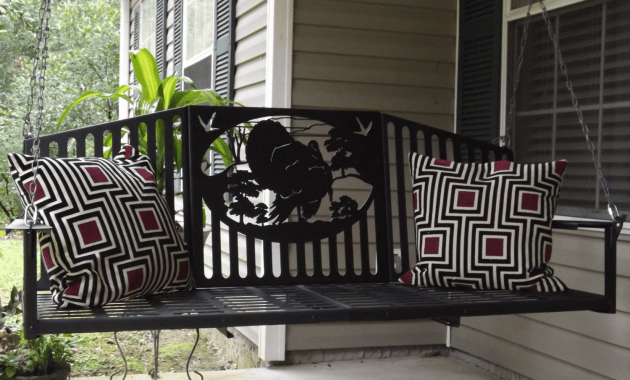
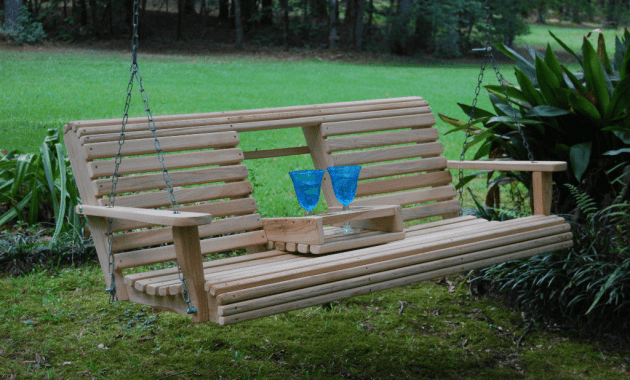
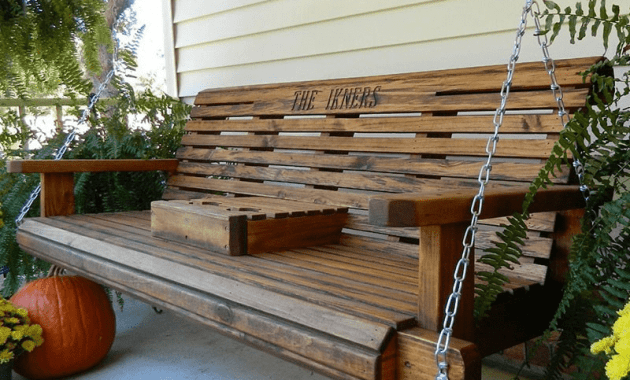
Before building the glider frame, there are some materials that you need to prepare. They are:
4 pieces of 3×4 lumber with 32 ¼” long for the legs.
2 pieces of 2×4 lumber with 22 ¼” long and 2 pieces with 30 ¼” log for the frame.
4 pieces of 2×4 lumber with 14 1/4” long and 2 pieces with 5 ¾” long for the braces.
2 pieces of 2×4 lumber with 70” long for the supports.
100 pieces of 2 ½” screws.
After preparing the materials, you need some tools to work with. The tools are sledgehammer, measuring tape, post hole miner, level, four-sided framing, drill machinery, screwdriver, sander, miter saw, concrete mixer, safety glasses and gloves. In making this porch swing glider frame, you will need a day to finish it.
2. Steps on Building the Porch Swing Glider Frame
After preparing the materials and the tools. You are now ready to start the building process. Here are the steps on building the porch sing glider frame.
The first step is to build the top and bottom components for the side of the frames. You may round both of the side frames with jigsaw if you want to develop the look of the components. Then, smooth the edges of the frame with sandpaper. After that, use the damp cloth to remove the residues.
For the second step, build the vertical support for the frame with 2×4 lumbers. Then, drill the holes through the bottom and top supports. Next, insert the 2 ½” screw to the vertical component. Bring into line the edges or you can try to drill the holes at the vertical components both ends, and then insert the 2 ½” screws to the supports.
Then, build braces use the 2×4 lumber. After that, cut the end of the brace at the 45 degrees.
The next step is to fit the braces to the both of frame sides. Then, align the edges and drill the pilot holes. Insert the 2 1/1” screws so that the braces lock into the proper place.
After that, you have to fit the bottom braces to assemble the stand. Cut the components with the proper dimension (based on your swing bench) and then lock it to the vertical components by using 2 ½” screws. Then, drill the pilot holes so that the wood will not be split.
The next procedure is you have to make sure that both of the frame sides are plumb. You also need to check whether the corners are square or not.
The last step is to take care the finishing touch. Thus, fill the pilot holes with the wood putty and then make it smooth with 120-150 grit sandpaper.
So, you can build your own porch swing glider frame if you do not want to ask the professional to do it. However, make sure that you really work on it because it needs a whole day to spend and many materials to prepare.
You’ve got your cauldron, you’ve got your Halloween spirit, now you just need some spooktacular ideas to put that big pot of yours to good use! This Halloween, ditch the standard punch bowl or chip bowl routine and get cooking up some frightfully fun treats and decor with your cauldron. Whether you’re hosting a spooky soiree, trick-or-treating with friends, or just looking to creep it up at home, these cauldron crafts and recipes are sure to cast a spell over your guests. Bubble, bubble, toil and trouble, whip up some Halloween magic with your cauldron this October! Read on, witches and ghouls, as we explore cauldron craze and all the spooky new ways to use cauldrons for your Halloween haunt.
Intro to Cauldrons: A Halloween Staple
Cauldrons are a spooky staple of any Halloween party worth its salt. This year, why not take your cauldron game to the next level with some delightfully creepy new ideas?
Brew up a witch’s brew.
Channel your inner witch or wizard and concoct a mysterious potion. Bubble up a brew of dry ice, water, and food coloring for an ominous smoking effect. Add creepy plastic bugs, eyeballs, or fingers for ghoulish fun. Your guests will be spellbound!
Chow down on creepy cuisine.
Use your cauldron as the serving vessel for frightful fare. Fill it with candy apples, caramel popcorn, or chocolate frogs. For a savory option, ladle out chili, stew, or punch from your cauldron. Label each dish with a spooky name for extra flair. Your guests will eat it up!
Set a spooky scene.
Place a cauldron as the centerpiece of a delightfully eerie vignette. Surround it with black candles, cobwebs, potion bottles, spell books, and other witchy accessories. You can even add a fog machine for misty ambiance. The perfect potion for setting a spooky mood!
This Halloween, embrace your spooky side and put cauldrons to creepy and creative new uses. With the right accouterments and a dash of imagination, your cauldron will become the hottest accessory at any Halloween bash. Now, let the spookiness commence!
Fill Your Cauldron With Creepy-Crawly Snacks
A cauldron is the perfect vessel for a creepy Halloween snack station! Fill it with treats that look like creepy creatures for a spooky surprise your guests will love.
2. Fill Your Cauldron With Creepy-Crawly Snacks
Drop in some gummy worms, chocolate covered ants, and candy spiders for a deliciously frightening snack mix. Place a ladle in the cauldron so guests can serve themselves—if they dare!
For an interactive treat, make Rice Krispies Treats shaped like spiders, frogs or bats. Skewer them with sticks so people can grab them right from the cauldron. Your guests will have a frightfully fun time choosing their creepy snacks!
Don’t forget to add a fog effect for extra spookiness. Place dry ice in the bottom of the cauldron and as it melts, a thick fog will billow out. Your guests will shriek with delight as they dip their hands into the icy mist!
For a sweet surprise, fill plastic spiders, rats, and bugs with candy like M&Ms, Reese’s Pieces or mini marshmallows. Then dump them into the cauldron along with small boxes of raisins (disguised as beetles) and yogurt covered pretzels (masquerading as larva). Your guests will have a blast discovering all the creepy treats hiding in the fog.
A cauldron full of spooky snacks is sure to make your Halloween party a screaming success. Your guests will cackle with glee as they pluck frosted spiders and candy critters from their foggy fate! A foul and frightening feast they’ll never forget.
Brew Up Wicked Witches Brew in Your Cauldron
Brew Up Wicked Witches Brew in Your Cauldron
This Halloween, why not whip up a spooky witches brew to delight your party guests? A bubbling cauldron full of a mysterious concoction is sure to inspire chills and thrills!
To get started, gather ingredients that a witch would covet – newt’s eye (aka raisins), frog’s breath (dry ice), lizard’s leg (cinnamon sticks), wolf’s bane (wormwood), and of course a pinch of magic (food coloring). You’ll also want a ladle for stirring, cups for serving, and a fire source to keep that potion simmering.
Once you have your ingredients assembled, it’s time to cast a spell over your cauldron! Turn on a fog machine or drop in some dry ice to get that authentic steaming effect. Add a few inches of water or fruit punch to your cauldron and toss in the dry ice, being very careful to avoid direct contact with the fog. The bubbling and fog will make your brew appear to be magically boiling on its own!
Toss in your spooky ingredients one by one, chanting spells and stirring vigorously with your ladle after each addition. Say something like “Eye of newt and tongue of toad, make this magic potion glow!” Add a few drops of food coloring for an eerie hue. Your guests will squeal with delight seeing all the gross bits you’re throwing in!
Once your ingredients have been added, dim the lights, light some candles, and ladle your brew into cups for your guests. Encourage them to drink up – it may give them mysterious powers! But warn them – too much of the witch’s potion could turn them into toads!
This spooky activity is perfect for a Halloween bash. Your bubbling cauldron of witch’s brew is sure to inspire frightful fun and memories to last until next Halloween! Double, double toil and trouble, fire burn and cauldron bubble!
Use Your Cauldron as a Centerpiece
A cauldron makes for a spooktacular centerpiece at any Halloween party. Fill your cauldron with an assortment of creepy-crawly decorations for a frightfully fun focal point your guests will love.
Spider Infestation
Fill the bottom of your cauldron with crumpled brown paper to look like dirt or mulch. Add plastic spiders, spider webs, and eggs sacs. You can find spiderweb doilies or make your own using white string or yarn. Pile the spiders and webs up over the edge of the cauldron for an overrun, infested look. Your guests will shriek with delight at this spooky sight!
Bubbling Brew
Add water, dry ice or a fog machine filled with fog juice to create a simmering, smoky potion. The dry ice will bubble and fog will billow out for an extra creepy effect. You can also add food coloring to the water to make different colored brews. Label your concoctions with ominous names like “witch’s curse” or “eye of newt” for a little extra spookiness.
Spooky Specimens
Raid your nature collection or craft store for creepy-looking sticks, dried flowers, seed pods, and other curiosities. Add plastic body parts, eyeballs, fingers, and critters for a gruesome potion ingredient assortment. Your guests will have fun inspecting all the strange specimens in your bubbling brew.
Flickering Flames
Add LED or electric lights, especially in Halloween colors of orange and red, below your cauldron decorations. The flickering glow will make your centerpiece look like a fire is simmering beneath, casting a spooky glow over your tablescape. You can also add fabric, tissue paper or cellophane in red, yellow and orange over the lights for a fiery, flickering effect.
A cauldron centerpiece is an easy, dramatic way to set the mood for your Halloween soiree. Fill it with spiders, brews, spooky specimens or flickering lights for a frightful focal point your guests will love. Choose one or combine multiple ideas for a centerpiece that’s spooktacularly stunning. Your bewitching cauldron creation is sure to cast a spell over everyone at your party!
Float Candles in Your Cauldron for Mood Lighting
Float Candles in Your Cauldron for Mood Lighting
For a spooky yet whimsical twist, fill your cauldron with water and float candles on top for the perfect Halloween mood lighting! The flickering glow will create an enchanting ambiance for your haunted bash.
Start by grabbing a bag of tealight candles, votives, or small pillar candles. For extra drama, look for ones in spooky colors like black, orange, or deep red. You’ll also want to pick up some waterproof matches or a lighter to easily light the candles.
Next, fill your cauldron about two-thirds full with water. For stability, place the cauldron on a sturdy surface, table, or plant stand. You don’t want this toppling over once the candles are lit!
Carefully place your candles in the water, spacing them a few inches apart. Group a few together for a dramatic glow or scatter them randomly for a more natural look. Make sure the wicks are not submerged for the best results.
Once your floating candles are arranged perfectly, use your matches to gently light the wicks. Watch in delight as the soft glow illuminates your cauldron and creates flickering reflections on the water. Your haunted guests will be mesmerized by this bewitching sight!
For extra spookiness, you can also add some black glitter, cobwebs, or plastic spiders to your cauldron. The possibilities for this magical Halloween decoration are endless. Your cauldron of floating candles is sure to cast a spell on everyone at your party!
Make Your Cauldron a Punch Bowl
Make Your Cauldron a Punch Bowl
Why not turn your cauldron into a spooky punch bowl? Your guests will love ladling out a chilling concoction from an authentic-looking cauldron.
To get started, give your cauldron a good scrub to remove any dust or residue. Then, create an eerie punch to fill it with. A foggy, bubbling brew with dry ice is always a crowd pleaser. You can also make a creepy punch using black cherry Kool-Aid, ginger ale and lime sherbet. For extra spookiness, add plastic spiders, eyeballs or a fog machine!
Once you have your punch made, fill your cauldron and place it on a sturdy table where guests can easily access it. You’ll want to provide a ladle so people can serve themselves. You may also want to include cups, or let people drink straight from the ladle for an authentic experience!
For decoration around the cauldron, scatter fake spiders, bats, bones and other Halloween props. Dim lighting with jack-o’-lanterns or string lights will set the mood. You can even dress up as a witch or wizard to stir the cauldron and cackle menacingly as people take a drink!
A bubbling cauldron of punch is a Halloween party must-have. Your guests are sure to be completely spellbound by this spooky spectacle. Just be sure to keep the cauldron filled so the punch doesn’t run dry! People will be coming back for more all night.
Using a cauldron as a punch bowl is an easy, dramatic way to decorate for your Halloween gathering. With an ominous brew, creepy lighting and props and a dash of costumes, your party is sure to be a wicked success!
Get Creative With Cauldron Crafts
Get Creative With Cauldron Crafts
Painted Cauldrons
Get spooky and artsy by painting creepy designs and imagery on your cauldron. Skulls, spiders, bats, and moons are classic Halloween motifs that will transform your cauldron into festive décor.
You’ll need:
Acrylic paint in black, orange, purple, green
Paintbrushes in various sizes
Stencils (optional)
Clear sealant (optional)
Paint your cauldron and seal it to make it weather-resistant for outdoor use. Get friends or family together for a cauldron painting party—it’s a fun, easy craft for all ages. Display your spooky cauldron on your front porch, use it as a planter, or fill it with treats for trick-or-treaters.
Cauldron Planters
Your cauldron makes the perfect container for spooky plants and flowers. Fill it with potting soil and plant orange marigolds, black petunias, purple shamrocks or ‘Dracula’ orchids. For extra creepiness, add a few fake spiders, rats or snakes peeking out from the plants.
Serving Bowls
Your cauldron isn’t just for witches’ brews—use it to serve up spooky treats at your Halloween party! Fill it with candy corn, mini pumpkin pies, spider web Rice Krispies treats or monster eyeballs (olives stuffed with almonds). For a creepy dip, melt cheese, spinach and artichoke dip or chili in your cauldron over a sterno flame. Your guests will love the spooky presentation.
With a little creativity, your cauldron can serve up frightful fun all season long. Paint it, plant it or serve spooky treats in it—your cauldron possibilities are endless! Use these ideas to get started, then tweak them to match your own spooktacular style.
Safety Tips for Using Cauldrons
Safety should always come before spooky fun! When using cauldrons, especially around open flames, there are a few precautions to keep in mind. Follow these tips to ensure your cauldron craze is frightfully fun but hazard-free.
•Choose a fire-safe cauldron. Only use cauldrons specifically designed for fires and cooking, made of cast iron, stainless steel or enamel-coated metal. Avoid plastic, ceramic or wooden cauldrons which can melt, crack or catch fire.
•Place on a fireproof surface. Set your cauldron on concrete, stone, brick or a fireproof pad. Never place directly on wood, vinyl or flammable flooring. The bottom can remain extremely hot after use and may damage the surface or start a fire.
•Keep away from flammables. Position the cauldron a safe distance from overhanging decorations, branches or other flammable objects that could potentially catch fire from the heat or sparks.
•Use proper firewood and fuel. Only burn dry, seasoned hardwoods that are approved for fires. Never use treated wood, plywood, leaves or trash which release toxic fumes and excessive smoke. Use fire-approved fuel gels, coal or propane according to directions.
•Exercise caution around the fire. Never leave a lit cauldron unattended. Keep a fire extinguisher, sand, water or fire blanket nearby in case of emergencies. Wear protective gloves when handling the cauldron or stoking the fire.
•Supervise children and pets. Little ones love gathering around a spooky fire but remain vigilant. Set clear rules for fire safety and enforce them. Keep pets away from the open flames to avoid singed fur or tails!
•Extinguish fully before leaving. Pour water, sand or use a fire extinguisher to completely douse all flames and embers before leaving the area. The cauldron and surrounding ground should be cold to the touch — safety first!
Following these frightfully important tips will ensure your cauldron creates spooky memories, not scary accidents or injuries. Use your cauldron craze wisely and you’ll be casting spells for years to come. Happy haunting!
FAQ – Answering Common Cauldron Questions
So you’ve got yourself an awesome cauldron and you’re ready to put it to spooky use this Halloween! You probably have some burning questions about how to get the most out of your cauldron. Let’s dive right in and get this party started!
What can I actually cook in a cauldron?
The options are endless! Cauldrons are perfect for simmering spooky soups, stews and potions. Try witch’s brew chili, pumpkin soup, or lizard tail stew. You can also use a cauldron to keep treats warm like caramel apples, pumpkin spice lattes, or mulled wine.
How do I keep the fire going?
To keep your cauldron cozy, use firewood, charcoal or even gel fuel canisters designed for chafing dishes and buffet servers. Make sure you have a fire poker, lid, and heat-resistant mitts. Never leave a cauldron fire unattended.
Where do I find cauldron accessories?
Check out witchcraft supply stores or medieval reenactment retailers for extras like ladles, hooks, spell books, eye of newt, and witch hats. You can also find many cauldron accessories on Etsy, eBay and other craft sites.
How do I create the perfect spooky ambiance?
Dim the lights, light some jack-o’-lanterns or cauldron candles and play eerie music. Add cobwebs, potion bottles, brooms, black cats and other Halloween decorations. You can also use a fog machine to create a spooky mist around the cauldron.
Are cauldrons safe to use?
Cauldrons can be safe if used properly with adult supervision. Never leave a fire unattended. Make sure cauldrons are placed on a fireproof surface away from flammable objects. Exercise caution and common sense. Avoid direct contact with the cauldron which will be extremely hot. Always supervise children and ensure proper safety gear like heat-resistant gloves are worn.
By following these tips, you’ll be well on your way to cooking up a spooktacular Halloween cauldron party! Let the spooky fun begin!
Conclusion
This Halloween, don’t leave your cauldron sitting empty in the corner collecting cobwebs. Put that spooky black pot to good use and get creative with these cauldron craze ideas. Whether brewing up a wicked witch’s brew for a costume party or using it as an epic trick-or-treat candy bowl, a cauldron is the perfect prop to take your Halloween celebrations to a whole new level of spooktacular. So grab your cauldron, whip up some magic, and get ready for a frightfully fun Halloween you’ll never forget! The possibilities are endless if you just let your imagination bubble over. Now go forth, you crafty cauldron conjurers, and make this Halloween one for the spellbooks!
Nothing will make you more relax than your own porch. As a place that most people use to relax, porch can be described or can be designed with so many stuffs in it, including a porch swing.
Choosing a porch swing also need some consideration to make it works maximally, so here are those consideration.
1. Material
The very first thing you need to consider is about from what materials your porch swing is made of. Porches swings can be made of various materials like wrought iron, plastic, wicker and of course wood.
For example, durable recycled plastic can produce a brown or white patio swing that will bring and old fashion brick home or the modern one which features an opened patio.
A wooden porch that is made of wood is more recommended if you want to bring classic touch to your front house. Wooden swings made of ash or oak produces contrast view against a house with dark siding or bricks.
If the swings are made of cherry wood, maple or teak will add the dept to a pastel or classic white colored home.
The next thing that you have to consider in choosing porches swings is the climate in your area. This factor becomes important since each type of porch swing is designed for different situation.
For example, plastic swings are the best choice if you live in an area that receives too much snow and rain, since this type of swing is easy to withstand and clean a lot of wear.
Another type of swings that is sturdy and heavy enough to withstand snow is an iron swing.
If you live in wet climate but you really want to apply wooden swings, you can always cover them with any waterproof sealants to make the wooden swings become more water-resistant.
Then if you live in warm climate, a classic white wicker is the best option since this type of swings will stretch and become deformed if it gets too wet.
3. Style
Then if you already deal with the previous factors, you can think about the style or type of the porches swing. Designed for two or more seats, porches swings come in various sizes and styles nowadays.
It can be made for individual artisans or the mass crafted or market. The one thing that most people consider in looking for swings is the size of the porch or the area where the swing will be placed. You can also consider about having a DIY porch swing projects.
Surely it will save the cost since you can recycle ant materials, depend on the style you want to have. DIY porch swing will also allow you to express yourself since you really make it from nothing.
Since porches swings provide any additional coziness, people can have different reason for having porches swings in their house. It can be for having fond memories, having interest in vintage appeal, or simply looking for enjoyable outdoor seating. Whatever the reasons, there are always things that need to be considered.
Porch Swing Hanging Kit Gallery:
Adirondack Porch Swing porch swing hanging kit with Cup Holders
Halloween is just around the corner, and what better way to get into the spooky spirit than with some DIY Halloween cauldron decoration ideas? Cauldrons have always been a symbol of witchcraft and magic, making them a perfect centerpiece for your Halloween decor. In this article, we’ll explore some creative and unique ways to transform ordinary cauldrons into eerie masterpieces. So, grab your crafting tools and let’s dive in! 🧙♀️
1. The Basics of Choosing a Cauldron 🛍️
When starting with your DIY Halloween cauldron decoration ideas, the first step is selecting the right cauldron. Cauldrons come in various sizes and materials, each offering a unique look and feel.
Different Sizes and Materials: From small tabletop cauldrons to large outdoor ones, there’s a size for every need. Materials range from plastic to metal, with each offering a distinct aesthetic.
Where to Purchase or Repurpose: While many stores sell Halloween cauldrons, consider repurposing an old pot or container. It’s eco-friendly and adds a personal touch!
Important Note: Always ensure that the cauldron material is suitable for any additional decorations or effects you plan to add, especially if using heat or liquid.
2. Glowing Cauldron ✨
Illuminate your Halloween night with a cauldron that glows eerily in the dark. This idea is sure to be a hit with both kids and adults!
Using Glow-in-the-Dark Paint: Apply a generous coat of glow-in-the-dark paint to your cauldron. Let it charge under a light source, and watch it glow when the lights go out!
Incorporating LED Lights: Place LED lights inside the cauldron for a consistent glow. Opt for colored lights like green or purple for a more mystical effect.
3. Witch’s Brew Cauldron 🌫️
Nothing screams Halloween more than a cauldron bubbling with a mysterious brew. This decoration is both spooky and fun!
Using Dry Ice: Add dry ice to water inside the cauldron, creating a smoky, bubbling effect. Ensure there’s adequate ventilation, and always handle dry ice with gloves.
Adding Plastic Creepy Crawlies: Enhance the brew by adding plastic spiders, worms, or eyeballs. It’ll look like a real witch’s potion!
Important Note: Never consume any liquid in contact with dry ice.
4. Golden Cauldron 🌟
Transform your cauldron into a piece of art with a luxurious golden touch. This idea adds elegance to the spooky season.
Spray Painting Techniques: Use gold spray paint for a shiny, metallic finish. Apply in even strokes and let it dry completely.
Incorporating Jewels and Gems: Adorn your golden cauldron with faux jewels and gems. They’ll catch the light and add a touch of glamour.
5. Haunted Forest Cauldron 🌲
Create a mystical forest scene right inside your cauldron. This decoration transports viewers to a magical world.
Adding Miniature Trees and Moss: Place miniature trees inside the cauldron and surround them with moss for a forest floor feel.
Incorporating Fairy Lights: Weave fairy lights among the trees for a magical glow. Opt for battery-operated lights for flexibility.
6. Candy Holder Cauldron 🍬
Treat the trick-or-treaters with a cauldron filled with candies. This functional decoration is a Halloween must-have!
Designing a Cauldron to Hold Halloween Treats: Ensure the cauldron is clean and suitable for holding food. Fill it up with a variety of Halloween candies.
Decorative Ideas: Add a sign saying “Witch’s Treats” or drape the cauldron with faux spider webs for added spookiness.
Candy Ideas
Why They’re Spooky
Gummy Worms
They’re slimy and wriggly!
Chocolate Eyeballs
They’re watching you!
Candy Corn
A Halloween classic!
7. Floating Cauldron 🕸️
Defy gravity with a cauldron that seems to float in mid-air. This decoration is sure to intrigue and amaze your guests.
Using Strings or Invisible Threads: Suspend the cauldron using strong strings or invisible threads. Ensure it’s secure to prevent accidents.
Incorporating it into a Larger Halloween Scene: Place the floating cauldron as a centerpiece and surround it with other floating decorations like ghosts or bats.
8. Potion Ingredient Display 🍶
Every witch needs her potion ingredients, and displaying them alongside your cauldron can add an authentic touch to your Halloween setup.
Labeling Fictional Potion Ingredients: Fill jars with colored liquids, dried herbs, or other mysterious-looking items. Label them with names like “Dragon’s Blood” or “Mermaid Scales” for added effect.
Arranging Around the Cauldron: Place the jars around your cauldron, perhaps on a wooden board or draped with a dark cloth, to create a potion-making scene.
Important Note: Ensure all “ingredients” are safe and out of reach if they’re not edible or could be harmful.
9. Cauldron with Animated Hands 🖐️
Give your cauldron a life of its own by adding animated hands that seem to emerge from its depths.
Attaching Plastic Hands: Purchase plastic hands from a craft store and attach them to the rim of the cauldron, making them appear as if they’re trying to escape.
Making the Hands Move: Use simple mechanics, like a battery-operated motor, to give the hands a slight movement, enhancing the eerie effect.
10. Cauldron Garden 🌿
Blend the spooky with the natural by turning your cauldron into a mini garden filled with eerie plants.
Planting Spooky Plants: Opt for plants like Venus flytraps, black roses, or ferns to create a mystical garden vibe.
Incorporating Garden Decor: Add miniature skeletons, tombstones, or garden gnomes dressed as witches or ghosts to elevate the Halloween feel.
11. Cauldron Fountain 💧
Water features always add a touch of magic, and a cauldron fountain can be both mesmerizing and spooky.
Turning the Cauldron into a Water Feature: Use a small pump to circulate water, creating a fountain effect from the cauldron.
Adding Red Dye: For a more sinister look, add a few drops of red dye to the water, making it resemble blood.
Important Note: Ensure the pump’s electrical components are safely away from water and children.
12. Cauldron Candle Holder 🕯️
Illuminate your space with a cauldron that holds candles, casting eerie shadows and providing a warm glow.
Safe Ways to Incorporate Candles: If using real candles, ensure the cauldron is fireproof and place the candles securely. Always monitor open flames.
Using Scented Candles: Opt for autumnal or spooky scents like pumpkin spice or smoky wood to add a multi-sensory experience to your decor.
13. Spider’s Nest Cauldron 🕷️
Turn your cauldron into a creepy spider’s nest, perfect for sending shivers down anyone’s spine.
Using Cotton or Webbing Materials: Stretch out cotton wool or purchase fake spider web material to create the web effect inside and around the cauldron.
Incorporating Plastic Spiders: Place plastic spiders of varying sizes on the web, making it look like they’re crawling all over the cauldron.
14. Zombie Cauldron 💀
Imagine zombies rising from the depths of your cauldron, creating a scene straight out of a horror movie.
Making It Look Like Zombies Are Emerging: Use plastic zombie hands and heads, attaching them to the cauldron’s rim. Add some green or red LED lights inside for an eerie glow.
Adding Sound Effects: Incorporate a sound box with moaning or growling sounds to make the scene even more realistic.
15. Cauldron with Sound Effects 🔊
Amplify the spooky atmosphere with a cauldron that not only looks eerie but sounds it too.
Incorporating Sound Boxes or Speakers: Hide a small sound box or speaker inside or behind the cauldron. Play sounds like bubbling potions, eerie whispers, or distant thunder.
Ideas for Spooky Soundtracks: Look for soundtracks online that fit the Halloween theme. There are many free resources available with a range of chilling effects.
Important Note: Ensure the sound isn’t too loud to avoid startling guests or trick-or-treaters.
16. Interactive Cauldron 🎲
Engage your guests with a cauldron that’s not just for show but also offers interactive fun.
Making the Cauldron Part of a Game: Use it as a prop for games like “Guess the Potion Ingredient” or a spooky version of “Bobbing for Apples.”
Activity Ideas: Fill the cauldron with slime and hide small toys inside. Have guests reach in and try to identify the items by touch alone.
17. Cauldron Art Installation 🎨
Elevate your Halloween decor by turning your cauldron into a captivating art piece.
Turning the Cauldron into a Centerpiece: Place it in a prominent location and surround it with other complementary art elements, such as paintings of witches or 3D sculptures of mythical creatures.
Incorporating Other Art Elements: Use lights, projections, or even fog machines to create a dynamic and immersive art installation.
18. Recycling and Sustainability ♻️
In today’s world, being eco-friendly is crucial. Incorporate sustainability into your DIY Halloween cauldron decoration ideas.
Using Recycled Materials: Before buying new, see if you can repurpose old items. An old pot, bowl, or container can be transformed into a cauldron with some creativity.
Tips for Eco-friendly Decorations: Opt for biodegradable or reusable decorations. Avoid single-use plastics and consider natural decor like pumpkins, leaves, or twigs.
Conclusion 🌟
Halloween is a time for creativity, fun, and a touch of the supernatural. With these DIY Halloween cauldron decoration ideas, you’re well on your way to creating a memorable and spooky atmosphere. Whether you opt for a glowing cauldron, a bubbling witch’s brew, or an interactive game, the key is to let your imagination run wild. So, embrace the spirit of Halloween, and happy decorating! 🎃👻
Plants and natural stones usually dominate the decoration in the backyard. What about a swing? Just like how fun it is to make the planting plants, you can try your lumber skill by making it by yourself.
Take wood as the basic material (Read also Types of porch swing), as it is one of the easiest and safest items to work with. Prevent any errors by learning the simple trick.
1. Ensure Enough Space
Usually this problem won’t be noticed until you have done half of the process. The empty space for the swing is not enough for swaying back and forth.
It only accommodates the swing to stand still. Even though this kind of mistake is normal for any first-timer, restarting the process from the beginning is not favored at all.
So, before starting the building project, make sure the space is at least 6 feet or more from any fixed exteriors.
To make it easier, mark the measured territory with a stake and string. Take a few steps back and run the demonstration in your mind. When you already set the position, begin the process.
2. Choose Ground Level
In the end, you want to install the swing on the ground. Could you imagine how awkward it is when the swing is bouncing?
Stay away from this possibility by setting the swing on a level ground. Invest several minutes to check the level and dig reinforcement holes.
If you got nothing but a sloping area, cover it with concrete. Later on, the swing’s legs will be buried with cement to the concrete.
The area for a great swing is ideally placed below the shades of a tree. Remember, all day exposure to sunlight may burn the iron or wooden seating.
3. Store The Parts Separately
When you buy a full set of swing to assembly or even cutting boards to build the swing yourself, you must have realized that this simple entertaining item has a lot of parts.
To make sure you will not lost them in the middle of the process, you will need a lot of boxes to store them. Put the boards for frame in a box and the boards for the seat in another box.
It also applies for the screws. This tiny item could make you go crazy if lost. Therefore, it is better to put them inside a labeled small container, sorted by the size. Lastly, read the instruction carefully and assemble your very own swing!
Every DIY instruction will say that the steps provided are the simplest and easiest one. While it is part of the truth, you cannot deny that there are tons of simple instruction. Doing it by yourself will take at least two days, without any rest! Getting a hand would be better.
While building the swing, put one person in command. This person should be able to read the instructions well and prepare the materials needed.
The rest of the team will do the cutting and assembling. By dividing the jobs, you would be able to finish the job within a day.
A swing in a chilly afternoon would be the best place for you to have a “me time”. But before you could actually sway on the swing, invest your time to build one by your own.
During the process, you don’t need special skills of a lumber. Having experience with cutting and following the tips above would be enough. Now grab your materials and start working on the project!.
Decorating front porch with decorative and DIY front porch should be fun things to do.
Therefore, every homeowner must agree that these six awesome ideas of front lights will give more decorative, attractive, and unique environment on the front porch.
If you have several empty tin cans, do not throw them away. Instead, turn those empty tin cans into beautiful tin cans lantern. What you need to do is gathering some empty tin cans, and then makes lots of holes on them.
Do not forget to spray them with paint or just leave them plain. Then, fill the tin cans with candle or light bulb and hang them in front of your porch.
2. Have Glowing Orbs to Illuminate the Front Porch
If you have a porch with a small garden in it, then you should try this idea to make glowing orbs to illuminate the front porch and of course making your porch looks more attractive and beautiful.
Bring together some old Christmas lights and thrift store globe shades. Stuff the Christmas lights inside the globe shades, and then plug them in with an outdoor-rated extension cord.
3. Torch from Wine Bottle? Why Not?
Instead of having your front porch being illuminated with some light bulbs, you can actually make some torches from wine bottles. Just bring together a few supplies from a hardware store and some recycled wine bottles. Open flames will create amazing ambience and keep bugs away.
4. Try These Illuminated Paper Bags
Do you want to create lighting sources for your front porch in a creative way? Then, this illuminated paper bags will do the trick. What you need to do is to prepare some unused lunch paper bags, and then make some patterned small holes on each side of the paper bags. Fill the paper bags with a heaping cup of sand and set a medium-sized candle inside. Then, light the candles up!.
5. Hang These Doilies and Candles on Your Front Porch
Another way to decorate your front porch is to hang some doilies and candles. This idea will surely make your front porch looks more attractive and romantic as well. Just gather some clean glass jars and a lace doily. Spray the doily with adhesive and place it onto the glass jar. Wrap the rim with twine or ribbon. Do not forget to set up a tea light and lit it up.
6. Make the Front Porch Colorful with Full Color Glass Jar Lantern
Create a kaleidoscope of color around your front porch with full color glass jar lantern. All you need to do is to cut colored tissue paper into different small shapes, then attach them onto a glass jar. Stuff the candle into the glass jar and lit it up. Then, just sit back and enjoy the marvelous colorful ambience of your front porch!.
There are many ways you can do in order to make your front porch looks more attractive, decorative, and even romantic. Therefore, trying those ideas above will totally change the look of your front porch ambience at night. Just give a try to one of these ideas of front porch lights and enjoy the change of your front porch.
Repairing screened in porch will require a skill which is not easy. Porch screen is one of the structures at home that can take a lot of abuse over the years.
It has a great durability, but those abuses can eventually cause the porch screen to stretch and wear.
So, how do you repair the porch screen? Here are things you need to know.
It is better to patch the rip or damaged screened porch rather than replacing the existing porch screen with a new one. The tutorial is explained below.
First, you have to determine what the screen material is made of. Simply grab the screen and feel it. For metal screening, the loose strands are wire and of course it feels metallic. Fiberglass screening itself feels more flexible, smoother, and similar to plastic.
Then, measure the hole or rip using a tape measure in the damaged screen. You may want to pay attention to the largest rip or hole if there are several rip in the existing screen.
Cut a square or rectangular piece of screening for at least 1 to 2 inches larger than the rip. The size of the fresh piece you use as a patch will be determined by how large the rip is.
You will need to unravel the screening material then pull some strands. Pull the vertical strands off the sides and do the same thing to the horizontal ones to the top and bottom of the ripped area. Then, bend the remaining strands to face the existing screen.
The last thing you should do is to apply a pressure to the angled strands over the torn area, then stoop the strands onto the side of the screen in order to make sure that the patch is secured on the original screen.
Furthermore, there are some tips that may be useful for you. Here are some tips related to repairing or patching the screen porch:
Portions of window screening are available at many hardware stores. So, consider to buy a little extra of them and save it for future use.
If the length of the rip on your screen is more than three inches long, or if the rip is close to the door or window frame in area that cannot be patched, then considering to replace the entire screen will be a better option.
Make sure to match the patch material to the original screen material whenever possible. For example, if the original one is made of metal, use a metal screen patch as well.
It is better to check on your screened porch regularly to make sure that it is not damaged or to know whether the porch screen is about to be repaired.
In conclusion, there are things you need to do in order to repair the damaged screened porch. The repairing activities will need your handy skill, so you have to be careful if it is your first repairing something. Rather, if you are in doubt of repairing it by yourself then you can call a professional to do the job.
What is your favorite material for your porch? There are so many options that you can choose. You have to choose the materials that fit best to your need. If you want the materials with many benefits, aluminum and fiberglass are the best choice.
You can choose aluminum materials to install as your screen. Aluminum screen is practical. It can easily bend. You can use various tools to cut the aluminum screens. It is also dependable. You can get it in market easily and it is cheap.
Aluminum screen is a strong material to apply on your porch. It is resistant to corrosion. It lasts long so that you can use it in the permanent house.
If you want to protect your house against bugs, just use fiberglass screen. It has small holes, therefore it can helps in keeping the bugs out. Besides that, it doesn’t scratch easily. It can also create an ecstatic sense because fiberglass doesn’t stain, rust, or corrode.
Fiberglass is a flexible material. It is more flexible than aluminum. It comes with many colors. More colors to choose means more style to apply. This screen also gives you the easy maintenance. Once you apply this screen, you get protection for your house.
2. The Best Colors to Choose
Colors are a focal point when you install the screen materials. The right colors will give the best view for the porch. Maximize the beauty of the porch by choosing the perfect colors for it.
If you use the aluminum screen, there are three main colors that you can choose. You can choose black, charcoal, or silver colors. It is highly recommended if you choose the black or charcoal colors instead of silver colors. Why? It is because the silver color tends to produce light during the sunny day.
Image:fortikur.com
If you do not like monochrome colors, you can use fiberglass. Fiberglass will give you more colors to choose. It offers bronze, sand, and also white colors.
3. Choosing the best screen style
The materials are highly connected with the needs. Pay attention to what you need, and choose the material which suits well for it.
If you want privacy, just use the dark screen. The dark colors will cover the house. It will create shaded porch while the light will reflect from the surface and shielding the home.
If you want protection from the pet, you can install the fiberglass screen. The fiberglass is well known of the protection against animal. Do not worry. The thicker fiberglass screen is able to hold pet’s scratch.
Applying the screen for you porch is not an easy things. There are many things to consider. You have to consider the screen materials, the colors, and also its benefits. Therefore, choose the best screen to apply and create a beautiful yet safe house for your family.
By choosing this style, you can save your money because it is low cost and it can be installed easily. However, screening for larger opening is quite difficult. If you want to repair it, you have to replace the entire frame and put it all back together.
2. Inserted Screen
It is also called removable screen. You can choose various storm panels such as wood, acrylic, or acrylic knee walls. Choosing this kind of screen requires careful and good measurement so it is quite difficult to be put on.
However, it will be more convenient in the long time because you don’t need to remove everything when it needs to be repaired. If you want to use this design, it will be better if you ask the professional to do it.
3. Installing the Screen Porch Windows
Sliding panel screen windows can be chosen as the screening for the porch. It can transform your porch into a three season room. Besides, it also fits for any opening just by using the existing framing.
You don’t have to use more screen during winter. Although it is quite expensive, it is easy to be maintained while it remains pleasing as well.
It uses Velcro strips as the screen holder. Some of the strips are available in clear plastic so that you can change the screen for plastic when it gets cooler. Frameless screen is easy to be installed and removed. In addition, it is also effective when it comes to budget and cost.
5. Screen Tight
It is designed to remove the old method of nails, staples, paint, and wooden lattice. Screen tight provides free maintenance with a method of spline screening which adapts to wooden porch. It can be done by yourself or professional workers. Screen tight is good for new construction or remodeling.
You can choose fiberglass screen because it works the best for screen tight. Meanwhile, you can also choose aluminum screen wire. Screen tight is durable and easy to install.
6. Framing for Screen Room
The screen is connected to the frame and it is easy to get replace. This is one of the easiest do it yourself projects for the screening. You can use the aluminum with construct frame and spline grooves for the framing. Choosing this design requires low budget.
Designing the screen for the porch panels doesn’t always require high cost. There are some ideas that only need low budget. Therefore, you can choose your best choice based on your need and budget.
Originally posted 2019-11-08 02:49:56.
Manage Cookie Consent
To provide the best experiences, we use technologies like cookies to store and/or access device information. Consenting to these technologies will allow us to process data such as browsing behavior or unique IDs on this site. Not consenting or withdrawing consent, may adversely affect certain features and functions.
Functional
Always active
The technical storage or access is strictly necessary for the legitimate purpose of enabling the use of a specific service explicitly requested by the subscriber or user, or for the sole purpose of carrying out the transmission of a communication over an electronic communications network.
Preferences
The technical storage or access is necessary for the legitimate purpose of storing preferences that are not requested by the subscriber or user.
Statistics
The technical storage or access that is used exclusively for statistical purposes.The technical storage or access that is used exclusively for anonymous statistical purposes. Without a subpoena, voluntary compliance on the part of your Internet Service Provider, or additional records from a third party, information stored or retrieved for this purpose alone cannot usually be used to identify you.
Marketing
The technical storage or access is required to create user profiles to send advertising, or to track the user on a website or across several websites for similar marketing purposes.