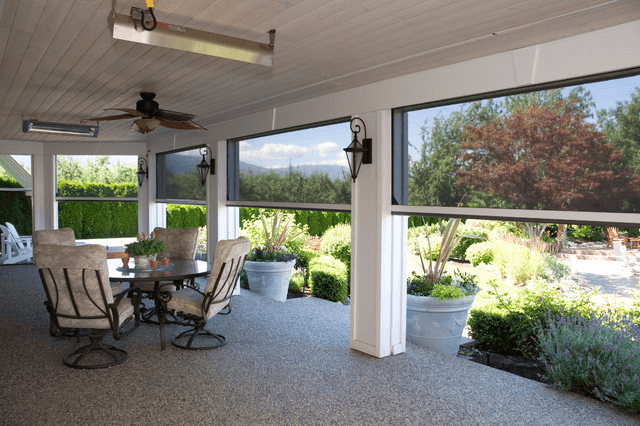
Nothing will make you more relax than your own porch. As a place that most people use to relax, porch can be described or can be designed with so many stuffs in it, including a porch swing.
Choosing a porch swing also need some consideration to make it works maximally, so here are those consideration.
1. Material
The very first thing you need to consider is about from what materials your porch swing is made of. Porches swings can be made of various materials like wrought iron, plastic, wicker and of course wood.
For example, durable recycled plastic can produce a brown or white patio swing that will bring and old fashion brick home or the modern one which features an opened patio.
A wooden porch that is made of wood is more recommended if you want to bring classic touch to your front house. Wooden swings made of ash or oak produces contrast view against a house with dark siding or bricks.
If the swings are made of cherry wood, maple or teak will add the dept to a pastel or classic white colored home.
The next thing that you have to consider in choosing porches swings is the climate in your area. This factor becomes important since each type of porch swing is designed for different situation.
For example, plastic swings are the best choice if you live in an area that receives too much snow and rain, since this type of swing is easy to withstand and clean a lot of wear.
Another type of swings that is sturdy and heavy enough to withstand snow is an iron swing.
If you live in wet climate but you really want to apply wooden swings, you can always cover them with any waterproof sealants to make the wooden swings become more water-resistant.
Then if you live in warm climate, a classic white wicker is the best option since this type of swings will stretch and become deformed if it gets too wet.
3. Style
Then if you already deal with the previous factors, you can think about the style or type of the porches swing. Designed for two or more seats, porches swings come in various sizes and styles nowadays.
It can be made for individual artisans or the mass crafted or market. The one thing that most people consider in looking for swings is the size of the porch or the area where the swing will be placed. You can also consider about having a DIY porch swing projects.
Surely it will save the cost since you can recycle ant materials, depend on the style you want to have. DIY porch swing will also allow you to express yourself since you really make it from nothing.
Since porches swings provide any additional coziness, people can have different reason for having porches swings in their house. It can be for having fond memories, having interest in vintage appeal, or simply looking for enjoyable outdoor seating. Whatever the reasons, there are always things that need to be considered.
Porch Swing Hanging Kit Gallery:
Adirondack Porch Swing porch swing hanging kit with Cup Holders
Halloween is just around the corner, and what better way to get into the spooky spirit than with some DIY Halloween cauldron decoration ideas? Cauldrons have always been a symbol of witchcraft and magic, making them a perfect centerpiece for your Halloween decor. In this article, we’ll explore some creative and unique ways to transform ordinary cauldrons into eerie masterpieces. So, grab your crafting tools and let’s dive in! 🧙♀️
1. The Basics of Choosing a Cauldron 🛍️
When starting with your DIY Halloween cauldron decoration ideas, the first step is selecting the right cauldron. Cauldrons come in various sizes and materials, each offering a unique look and feel.
Different Sizes and Materials: From small tabletop cauldrons to large outdoor ones, there’s a size for every need. Materials range from plastic to metal, with each offering a distinct aesthetic.
Where to Purchase or Repurpose: While many stores sell Halloween cauldrons, consider repurposing an old pot or container. It’s eco-friendly and adds a personal touch!
Important Note: Always ensure that the cauldron material is suitable for any additional decorations or effects you plan to add, especially if using heat or liquid.
2. Glowing Cauldron ✨
Illuminate your Halloween night with a cauldron that glows eerily in the dark. This idea is sure to be a hit with both kids and adults!
Using Glow-in-the-Dark Paint: Apply a generous coat of glow-in-the-dark paint to your cauldron. Let it charge under a light source, and watch it glow when the lights go out!
Incorporating LED Lights: Place LED lights inside the cauldron for a consistent glow. Opt for colored lights like green or purple for a more mystical effect.
3. Witch’s Brew Cauldron 🌫️
Nothing screams Halloween more than a cauldron bubbling with a mysterious brew. This decoration is both spooky and fun!
Using Dry Ice: Add dry ice to water inside the cauldron, creating a smoky, bubbling effect. Ensure there’s adequate ventilation, and always handle dry ice with gloves.
Adding Plastic Creepy Crawlies: Enhance the brew by adding plastic spiders, worms, or eyeballs. It’ll look like a real witch’s potion!
Important Note: Never consume any liquid in contact with dry ice.
4. Golden Cauldron 🌟
Transform your cauldron into a piece of art with a luxurious golden touch. This idea adds elegance to the spooky season.
Spray Painting Techniques: Use gold spray paint for a shiny, metallic finish. Apply in even strokes and let it dry completely.
Incorporating Jewels and Gems: Adorn your golden cauldron with faux jewels and gems. They’ll catch the light and add a touch of glamour.
5. Haunted Forest Cauldron 🌲
Create a mystical forest scene right inside your cauldron. This decoration transports viewers to a magical world.
Adding Miniature Trees and Moss: Place miniature trees inside the cauldron and surround them with moss for a forest floor feel.
Incorporating Fairy Lights: Weave fairy lights among the trees for a magical glow. Opt for battery-operated lights for flexibility.
6. Candy Holder Cauldron 🍬
Treat the trick-or-treaters with a cauldron filled with candies. This functional decoration is a Halloween must-have!
Designing a Cauldron to Hold Halloween Treats: Ensure the cauldron is clean and suitable for holding food. Fill it up with a variety of Halloween candies.
Decorative Ideas: Add a sign saying “Witch’s Treats” or drape the cauldron with faux spider webs for added spookiness.
Candy Ideas
Why They’re Spooky
Gummy Worms
They’re slimy and wriggly!
Chocolate Eyeballs
They’re watching you!
Candy Corn
A Halloween classic!
7. Floating Cauldron 🕸️
Defy gravity with a cauldron that seems to float in mid-air. This decoration is sure to intrigue and amaze your guests.
Using Strings or Invisible Threads: Suspend the cauldron using strong strings or invisible threads. Ensure it’s secure to prevent accidents.
Incorporating it into a Larger Halloween Scene: Place the floating cauldron as a centerpiece and surround it with other floating decorations like ghosts or bats.
8. Potion Ingredient Display 🍶
Every witch needs her potion ingredients, and displaying them alongside your cauldron can add an authentic touch to your Halloween setup.
Labeling Fictional Potion Ingredients: Fill jars with colored liquids, dried herbs, or other mysterious-looking items. Label them with names like “Dragon’s Blood” or “Mermaid Scales” for added effect.
Arranging Around the Cauldron: Place the jars around your cauldron, perhaps on a wooden board or draped with a dark cloth, to create a potion-making scene.
Important Note: Ensure all “ingredients” are safe and out of reach if they’re not edible or could be harmful.
9. Cauldron with Animated Hands 🖐️
Give your cauldron a life of its own by adding animated hands that seem to emerge from its depths.
Attaching Plastic Hands: Purchase plastic hands from a craft store and attach them to the rim of the cauldron, making them appear as if they’re trying to escape.
Making the Hands Move: Use simple mechanics, like a battery-operated motor, to give the hands a slight movement, enhancing the eerie effect.
10. Cauldron Garden 🌿
Blend the spooky with the natural by turning your cauldron into a mini garden filled with eerie plants.
Planting Spooky Plants: Opt for plants like Venus flytraps, black roses, or ferns to create a mystical garden vibe.
Incorporating Garden Decor: Add miniature skeletons, tombstones, or garden gnomes dressed as witches or ghosts to elevate the Halloween feel.
11. Cauldron Fountain 💧
Water features always add a touch of magic, and a cauldron fountain can be both mesmerizing and spooky.
Turning the Cauldron into a Water Feature: Use a small pump to circulate water, creating a fountain effect from the cauldron.
Adding Red Dye: For a more sinister look, add a few drops of red dye to the water, making it resemble blood.
Important Note: Ensure the pump’s electrical components are safely away from water and children.
12. Cauldron Candle Holder 🕯️
Illuminate your space with a cauldron that holds candles, casting eerie shadows and providing a warm glow.
Safe Ways to Incorporate Candles: If using real candles, ensure the cauldron is fireproof and place the candles securely. Always monitor open flames.
Using Scented Candles: Opt for autumnal or spooky scents like pumpkin spice or smoky wood to add a multi-sensory experience to your decor.
13. Spider’s Nest Cauldron 🕷️
Turn your cauldron into a creepy spider’s nest, perfect for sending shivers down anyone’s spine.
Using Cotton or Webbing Materials: Stretch out cotton wool or purchase fake spider web material to create the web effect inside and around the cauldron.
Incorporating Plastic Spiders: Place plastic spiders of varying sizes on the web, making it look like they’re crawling all over the cauldron.
14. Zombie Cauldron 💀
Imagine zombies rising from the depths of your cauldron, creating a scene straight out of a horror movie.
Making It Look Like Zombies Are Emerging: Use plastic zombie hands and heads, attaching them to the cauldron’s rim. Add some green or red LED lights inside for an eerie glow.
Adding Sound Effects: Incorporate a sound box with moaning or growling sounds to make the scene even more realistic.
15. Cauldron with Sound Effects 🔊
Amplify the spooky atmosphere with a cauldron that not only looks eerie but sounds it too.
Incorporating Sound Boxes or Speakers: Hide a small sound box or speaker inside or behind the cauldron. Play sounds like bubbling potions, eerie whispers, or distant thunder.
Ideas for Spooky Soundtracks: Look for soundtracks online that fit the Halloween theme. There are many free resources available with a range of chilling effects.
Important Note: Ensure the sound isn’t too loud to avoid startling guests or trick-or-treaters.
16. Interactive Cauldron 🎲
Engage your guests with a cauldron that’s not just for show but also offers interactive fun.
Making the Cauldron Part of a Game: Use it as a prop for games like “Guess the Potion Ingredient” or a spooky version of “Bobbing for Apples.”
Activity Ideas: Fill the cauldron with slime and hide small toys inside. Have guests reach in and try to identify the items by touch alone.
17. Cauldron Art Installation 🎨
Elevate your Halloween decor by turning your cauldron into a captivating art piece.
Turning the Cauldron into a Centerpiece: Place it in a prominent location and surround it with other complementary art elements, such as paintings of witches or 3D sculptures of mythical creatures.
Incorporating Other Art Elements: Use lights, projections, or even fog machines to create a dynamic and immersive art installation.
18. Recycling and Sustainability ♻️
In today’s world, being eco-friendly is crucial. Incorporate sustainability into your DIY Halloween cauldron decoration ideas.
Using Recycled Materials: Before buying new, see if you can repurpose old items. An old pot, bowl, or container can be transformed into a cauldron with some creativity.
Tips for Eco-friendly Decorations: Opt for biodegradable or reusable decorations. Avoid single-use plastics and consider natural decor like pumpkins, leaves, or twigs.
Conclusion 🌟
Halloween is a time for creativity, fun, and a touch of the supernatural. With these DIY Halloween cauldron decoration ideas, you’re well on your way to creating a memorable and spooky atmosphere. Whether you opt for a glowing cauldron, a bubbling witch’s brew, or an interactive game, the key is to let your imagination run wild. So, embrace the spirit of Halloween, and happy decorating! 🎃👻
Plants and natural stones usually dominate the decoration in the backyard. What about a swing? Just like how fun it is to make the planting plants, you can try your lumber skill by making it by yourself.
Take wood as the basic material (Read also Types of porch swing), as it is one of the easiest and safest items to work with. Prevent any errors by learning the simple trick.
1. Ensure Enough Space
Usually this problem won’t be noticed until you have done half of the process. The empty space for the swing is not enough for swaying back and forth.
It only accommodates the swing to stand still. Even though this kind of mistake is normal for any first-timer, restarting the process from the beginning is not favored at all.
So, before starting the building project, make sure the space is at least 6 feet or more from any fixed exteriors.
To make it easier, mark the measured territory with a stake and string. Take a few steps back and run the demonstration in your mind. When you already set the position, begin the process.
2. Choose Ground Level
In the end, you want to install the swing on the ground. Could you imagine how awkward it is when the swing is bouncing?
Stay away from this possibility by setting the swing on a level ground. Invest several minutes to check the level and dig reinforcement holes.
If you got nothing but a sloping area, cover it with concrete. Later on, the swing’s legs will be buried with cement to the concrete.
The area for a great swing is ideally placed below the shades of a tree. Remember, all day exposure to sunlight may burn the iron or wooden seating.
3. Store The Parts Separately
When you buy a full set of swing to assembly or even cutting boards to build the swing yourself, you must have realized that this simple entertaining item has a lot of parts.
To make sure you will not lost them in the middle of the process, you will need a lot of boxes to store them. Put the boards for frame in a box and the boards for the seat in another box.
It also applies for the screws. This tiny item could make you go crazy if lost. Therefore, it is better to put them inside a labeled small container, sorted by the size. Lastly, read the instruction carefully and assemble your very own swing!
Every DIY instruction will say that the steps provided are the simplest and easiest one. While it is part of the truth, you cannot deny that there are tons of simple instruction. Doing it by yourself will take at least two days, without any rest! Getting a hand would be better.
While building the swing, put one person in command. This person should be able to read the instructions well and prepare the materials needed.
The rest of the team will do the cutting and assembling. By dividing the jobs, you would be able to finish the job within a day.
A swing in a chilly afternoon would be the best place for you to have a “me time”. But before you could actually sway on the swing, invest your time to build one by your own.
During the process, you don’t need special skills of a lumber. Having experience with cutting and following the tips above would be enough. Now grab your materials and start working on the project!.
Decorating front porch with decorative and DIY front porch should be fun things to do.
Therefore, every homeowner must agree that these six awesome ideas of front lights will give more decorative, attractive, and unique environment on the front porch.
If you have several empty tin cans, do not throw them away. Instead, turn those empty tin cans into beautiful tin cans lantern. What you need to do is gathering some empty tin cans, and then makes lots of holes on them.
Do not forget to spray them with paint or just leave them plain. Then, fill the tin cans with candle or light bulb and hang them in front of your porch.
2. Have Glowing Orbs to Illuminate the Front Porch
If you have a porch with a small garden in it, then you should try this idea to make glowing orbs to illuminate the front porch and of course making your porch looks more attractive and beautiful.
Bring together some old Christmas lights and thrift store globe shades. Stuff the Christmas lights inside the globe shades, and then plug them in with an outdoor-rated extension cord.
3. Torch from Wine Bottle? Why Not?
Instead of having your front porch being illuminated with some light bulbs, you can actually make some torches from wine bottles. Just bring together a few supplies from a hardware store and some recycled wine bottles. Open flames will create amazing ambience and keep bugs away.
4. Try These Illuminated Paper Bags
Do you want to create lighting sources for your front porch in a creative way? Then, this illuminated paper bags will do the trick. What you need to do is to prepare some unused lunch paper bags, and then make some patterned small holes on each side of the paper bags. Fill the paper bags with a heaping cup of sand and set a medium-sized candle inside. Then, light the candles up!.
5. Hang These Doilies and Candles on Your Front Porch
Another way to decorate your front porch is to hang some doilies and candles. This idea will surely make your front porch looks more attractive and romantic as well. Just gather some clean glass jars and a lace doily. Spray the doily with adhesive and place it onto the glass jar. Wrap the rim with twine or ribbon. Do not forget to set up a tea light and lit it up.
6. Make the Front Porch Colorful with Full Color Glass Jar Lantern
Create a kaleidoscope of color around your front porch with full color glass jar lantern. All you need to do is to cut colored tissue paper into different small shapes, then attach them onto a glass jar. Stuff the candle into the glass jar and lit it up. Then, just sit back and enjoy the marvelous colorful ambience of your front porch!.
There are many ways you can do in order to make your front porch looks more attractive, decorative, and even romantic. Therefore, trying those ideas above will totally change the look of your front porch ambience at night. Just give a try to one of these ideas of front porch lights and enjoy the change of your front porch.
Repairing screened in porch will require a skill which is not easy. Porch screen is one of the structures at home that can take a lot of abuse over the years.
It has a great durability, but those abuses can eventually cause the porch screen to stretch and wear.
So, how do you repair the porch screen? Here are things you need to know.
It is better to patch the rip or damaged screened porch rather than replacing the existing porch screen with a new one. The tutorial is explained below.
First, you have to determine what the screen material is made of. Simply grab the screen and feel it. For metal screening, the loose strands are wire and of course it feels metallic. Fiberglass screening itself feels more flexible, smoother, and similar to plastic.
Then, measure the hole or rip using a tape measure in the damaged screen. You may want to pay attention to the largest rip or hole if there are several rip in the existing screen.
Cut a square or rectangular piece of screening for at least 1 to 2 inches larger than the rip. The size of the fresh piece you use as a patch will be determined by how large the rip is.
You will need to unravel the screening material then pull some strands. Pull the vertical strands off the sides and do the same thing to the horizontal ones to the top and bottom of the ripped area. Then, bend the remaining strands to face the existing screen.
The last thing you should do is to apply a pressure to the angled strands over the torn area, then stoop the strands onto the side of the screen in order to make sure that the patch is secured on the original screen.
Furthermore, there are some tips that may be useful for you. Here are some tips related to repairing or patching the screen porch:
Portions of window screening are available at many hardware stores. So, consider to buy a little extra of them and save it for future use.
If the length of the rip on your screen is more than three inches long, or if the rip is close to the door or window frame in area that cannot be patched, then considering to replace the entire screen will be a better option.
Make sure to match the patch material to the original screen material whenever possible. For example, if the original one is made of metal, use a metal screen patch as well.
It is better to check on your screened porch regularly to make sure that it is not damaged or to know whether the porch screen is about to be repaired.
In conclusion, there are things you need to do in order to repair the damaged screened porch. The repairing activities will need your handy skill, so you have to be careful if it is your first repairing something. Rather, if you are in doubt of repairing it by yourself then you can call a professional to do the job.
What is your favorite material for your porch? There are so many options that you can choose. You have to choose the materials that fit best to your need. If you want the materials with many benefits, aluminum and fiberglass are the best choice.
You can choose aluminum materials to install as your screen. Aluminum screen is practical. It can easily bend. You can use various tools to cut the aluminum screens. It is also dependable. You can get it in market easily and it is cheap.
Aluminum screen is a strong material to apply on your porch. It is resistant to corrosion. It lasts long so that you can use it in the permanent house.
If you want to protect your house against bugs, just use fiberglass screen. It has small holes, therefore it can helps in keeping the bugs out. Besides that, it doesn’t scratch easily. It can also create an ecstatic sense because fiberglass doesn’t stain, rust, or corrode.
Fiberglass is a flexible material. It is more flexible than aluminum. It comes with many colors. More colors to choose means more style to apply. This screen also gives you the easy maintenance. Once you apply this screen, you get protection for your house.
2. The Best Colors to Choose
Colors are a focal point when you install the screen materials. The right colors will give the best view for the porch. Maximize the beauty of the porch by choosing the perfect colors for it.
If you use the aluminum screen, there are three main colors that you can choose. You can choose black, charcoal, or silver colors. It is highly recommended if you choose the black or charcoal colors instead of silver colors. Why? It is because the silver color tends to produce light during the sunny day.
Image:fortikur.com
If you do not like monochrome colors, you can use fiberglass. Fiberglass will give you more colors to choose. It offers bronze, sand, and also white colors.
3. Choosing the best screen style
The materials are highly connected with the needs. Pay attention to what you need, and choose the material which suits well for it.
If you want privacy, just use the dark screen. The dark colors will cover the house. It will create shaded porch while the light will reflect from the surface and shielding the home.
If you want protection from the pet, you can install the fiberglass screen. The fiberglass is well known of the protection against animal. Do not worry. The thicker fiberglass screen is able to hold pet’s scratch.
Applying the screen for you porch is not an easy things. There are many things to consider. You have to consider the screen materials, the colors, and also its benefits. Therefore, choose the best screen to apply and create a beautiful yet safe house for your family.
By choosing this style, you can save your money because it is low cost and it can be installed easily. However, screening for larger opening is quite difficult. If you want to repair it, you have to replace the entire frame and put it all back together.
2. Inserted Screen
It is also called removable screen. You can choose various storm panels such as wood, acrylic, or acrylic knee walls. Choosing this kind of screen requires careful and good measurement so it is quite difficult to be put on.
However, it will be more convenient in the long time because you don’t need to remove everything when it needs to be repaired. If you want to use this design, it will be better if you ask the professional to do it.
3. Installing the Screen Porch Windows
Sliding panel screen windows can be chosen as the screening for the porch. It can transform your porch into a three season room. Besides, it also fits for any opening just by using the existing framing.
You don’t have to use more screen during winter. Although it is quite expensive, it is easy to be maintained while it remains pleasing as well.
It uses Velcro strips as the screen holder. Some of the strips are available in clear plastic so that you can change the screen for plastic when it gets cooler. Frameless screen is easy to be installed and removed. In addition, it is also effective when it comes to budget and cost.
5. Screen Tight
It is designed to remove the old method of nails, staples, paint, and wooden lattice. Screen tight provides free maintenance with a method of spline screening which adapts to wooden porch. It can be done by yourself or professional workers. Screen tight is good for new construction or remodeling.
You can choose fiberglass screen because it works the best for screen tight. Meanwhile, you can also choose aluminum screen wire. Screen tight is durable and easy to install.
6. Framing for Screen Room
The screen is connected to the frame and it is easy to get replace. This is one of the easiest do it yourself projects for the screening. You can use the aluminum with construct frame and spline grooves for the framing. Choosing this design requires low budget.
Designing the screen for the porch panels doesn’t always require high cost. There are some ideas that only need low budget. Therefore, you can choose your best choice based on your need and budget.
Having porch under deck in your backyard is a good idea for an outdoor spot in a small space. You can use it for storage and even entertainment area as well.
Porch under deck is useful for many things and you can spend your time with your family there.
One of the ideas about under deck porch is having screen on it.
Having screen in the porch is a good option for those who want to have flexible outdoor space. It is commonly named as three season room in which the porch is closed off from the backyard.
By choosing screens instead of full walls, you can still feel the breeze of the weather while you get enough protection from bugs and rains.
By having screens for under deck porch, you can keep the best of having the outdoor and indoor worlds.
II. Screening for Porch under Deck Ideas
There are two choices of screen options depending on the budget and the flexibility that you want. Both of the options create different feeling in the porch.
1. Permanent screens
It is a very common choice of screened in porch under deck. It uses permanent screens as the walls which mean that the screen is built in the frame and cannot be removed easily.
This screen can be chosen if you have low budget because it is cheaper. Having permanent screen transforms your porch into a sunroom that is separated from the backyard itself.
2. Retractable screens
Retractable screen is more flexible than the permanent screen. It is suitable for room or open porch. This screen is installed with motor which wrenches the screens into the track that they do not use.
By using this screen, you are able to create a new spot. However, if you want to have extra protection you may pull down the screen. Meanwhile, if you want to have an outdoor party, you can pull it up again.
Image: houzz.com
III. Screened in Porch Lighting
After having the screen for the porch, you need a lighting to make the right ambience for the porch. You can choose attached lighting or standing lighting, depending on your need. Here are some lighting options that you can choose for the screened porch.
It is a string light that is waterproof and UV resistant, so it already has its own lighting protection. Although it is stand-built design, it can be wrapped surrounding the railing.
2. Wall Sconces
It has variety styles of light fixtures that are suitable for any decoration. The wall sconces are not attached to the porch exterior wall.
IV. Screened in Porch Furnishings
You can put any furnishing to make your porch as a comfortable place to spend in. These are some ideas about the furniture in your screened under deck porch.
1. Seating
If you want to make your porch as a living room, seating is the most important aspect for the furniture. Wicker furniture is a good choice if you want to have traditional style of porch. Otherwise, having combination of chairs and cushions is the best.
2. Tables
Having some kind of tables is a good choice, especially if you want to make the porch as an entertaining spot. You may put coffee tables and extra surfaces.
There are many ideas that you can apply to your screened porch under deck. Having screened porch under deck is good to have yourself a spot to spend time with your family. Therefore, creating your best screened porch is a must.
If you decide to apply screened-in porch in your house, you know you will have other additional things to do to keep it maintained.
There are many things that may break or at least scrape your screened-in windows. One of them is rain.
So here are some things you may try to keep rain out of your screened-in windows.
1. Installing Awnings
The first that you can try is installing awnings around the perimeter of the screened-in porch. It provides downward and sloped roofs extension which will supply a shield from rain for the screened porch.
The awnings are available in retractable or fixed design in many assorted fabric color options. Retractable awnings can be used as either manual or motorized device to open or close them.
Meanwhile, fixed awnings can be attached to your screened porch and it will remain in permanent open position. That is why retractable awnings tend to be more expensive than the fixed ones.
Image: pycawnings.com
2. Attaching Weather-Resistant Window Shades
The next thing you may try is attaching weather-resistant window shades around the exterior of the screened-in porch. This kind of shades is typically made of durable fabric which was designed to restrain any outdoor elements.
The good points of fabric are it resists mildew, rot and rain. While being installed outside, the outdoor shades are available in various colors, conveniently roll up when it is not used, quick to dry and of course easy to clean.
Secure the bottom of the shades of screened porch by snapping or attaching other covers.
After that, you can also install jalousie windows around your screened-in porch perimeter. All glass louvers in the windows give you the possibility to adjust the amount of opened space between each louver easily.
Close them tightly when heavy rainstorms come, to keep out the pounding rain. Then jalousie windows also make you able in providing fresh air from ventilation while it is holding the outdoor view and resisting the raindrops from outside.
More than that, fading louvers detain a clear view and surely give you a bit of privacy while it keeps allowing natural light brighten your screened porch.
Image: retrorenovation.com
4. Adding Window Enclosure Systems
The last thing you probably want to try is adding any window enclosure systems. These are available in the interchangeable or self-storing style.
Constructed with glass and permanent screen stored within the enclosure, you can freely lower and raise the window pane over the screen whenever you like using the self-storing enclosure.
The interchangeable enclosure allows you to pop out the screens then replace them with glass windows or vice versa. The screens and windows are not in one place at the same time, either the screen or window glass requires storage space.
Keeping your screened-in porch windows maintain is the next job you must do when you have decided to build it in your house. It won’t be that complicated to be done if you follow those steps correctly.
Originally posted 2019-11-04 13:15:23.
Manage Cookie Consent
To provide the best experiences, we use technologies like cookies to store and/or access device information. Consenting to these technologies will allow us to process data such as browsing behavior or unique IDs on this site. Not consenting or withdrawing consent, may adversely affect certain features and functions.
Functional
Always active
The technical storage or access is strictly necessary for the legitimate purpose of enabling the use of a specific service explicitly requested by the subscriber or user, or for the sole purpose of carrying out the transmission of a communication over an electronic communications network.
Preferences
The technical storage or access is necessary for the legitimate purpose of storing preferences that are not requested by the subscriber or user.
Statistics
The technical storage or access that is used exclusively for statistical purposes.The technical storage or access that is used exclusively for anonymous statistical purposes. Without a subpoena, voluntary compliance on the part of your Internet Service Provider, or additional records from a third party, information stored or retrieved for this purpose alone cannot usually be used to identify you.
Marketing
The technical storage or access is required to create user profiles to send advertising, or to track the user on a website or across several websites for similar marketing purposes.