Tag: Cleaning

  • Bluestone Table Care, Cleaning, and other Tips

    Bluestone Table Care, Cleaning, and other Tips

    Bluestone table is probably one of the most durable tables you can have.

    However being made of bluestones, this table has porous surface which requires immediate stain removal and careful care to keep the color and to prevent damage to the table.

    If you are still novice in this thing, you are reading the right guide.

    Read also:

    How to Protect Wood Table Surface from Hot Materials. 

    BLUESTONE TABLE CARE, CLEANING, AND OTHER TIPS

    How to Clean the Bluestone Table

    There are several ways you can apply in order to clean the table. You can follow the direction below in the same order.

    #1 First

    To clean debris, dust, and dirt, use a soft and dry cloth and wipe the table surface. Make sure you do it slowly to prevent scratch, and thoroughly so it is perfectly clean later.

    This dry step is necessary to do at least once every day to prevent debris and dust from piling up.

    #2 Second

    To remove fresh stains and spills, you are going to need to use a dampen cloth. Use a clean and soft cloth and damp it into the water. Use the wet cloth to wipe your table surface.

    Read also: How To Protect Wood Table Surface From Hot Materials

    It is recommended to do this as soon as you get the stains or spills. It prevents them from being absorbed into the stones and leave permanent marks.

    #3 Third

    For weekly care, you are going to need to use additional help. Mix four drops of mild dishwashing solution with one gallon of clean water. Take a soft and clean cloth and damp it into the mixture.

    Wring the excessive moisture and use the cloth to wipe out your table. It is effective to remove staying debris and the odors sticks on your bluestone table.

    #4 Fourth

    To remove moisture from your table surface, take a soft and clean cloth and damp it in water. Use the cloth to wipe the table then immediately wipe the table with dry and soft clean cloth. This will prevent lingering moisture that can damage the coloring.

    Read also: How to Clean Bluestone Table in One Touch Only

    Dining bluestone table and chairs set
    Image: furnituredealer.net

    Additional BlueStone Table Care and Tips

    In addition to those care steps above, you also need to pay attention on the following factors. It helps in preventing further damage and discoloring on your bluestone table.

    1. Immediately clean stains and spills so it doesn’t leave permanent stains or cause discoloring.
    2. Never use detergent or soaps with harsh formula. Use the mild one if you want to or prefer for a solution specially formulated to maintain bluestone surface.
    3. Never put things with excessive heat on your bluestone table surface. This will damage the smooth surface not to mention change on the color and patterns over time.
    4. Never drag the table. Instead, lift the table from both ends to move it around.
    5. Don’t use too heavy and sharp objects on the bluestone surface. If it is get chipped, keep the pieces and give it to professional for some fixing.

    In short, it isn’t very complicated to maintain and care the bluestone table. If you are a new owner, the guide above will help you out. Read carefully and apply as instructed to clean and maintain it without causing additional issues. Good luck.

    Related Post: How to Clean Concrete Table Top that Easy to Follow

    Bluestone Table Care, Cleaning, and other Tips

    Originally posted 2021-09-09 01:27:00.

  • Amazing Tips on How to Clean a Bathroom Exhaust Fan in 10 Minutes

    Amazing Tips on How to Clean a Bathroom Exhaust Fan in 10 Minutes

    How can you notice whether your bathroom fan is working properly or not? When you finish taking a bath, do you notice that the mirror in your bathroom is foggy?

    When it happens, it indicates that your exhaust fan is not in a good condition. Don’t worry, there are some excellent tips that you can do to clean your bathroom fan.

    An exhaust fan installed in every bathroom is being vented out to the outside and it will be automatically running when you take a bath or shower.

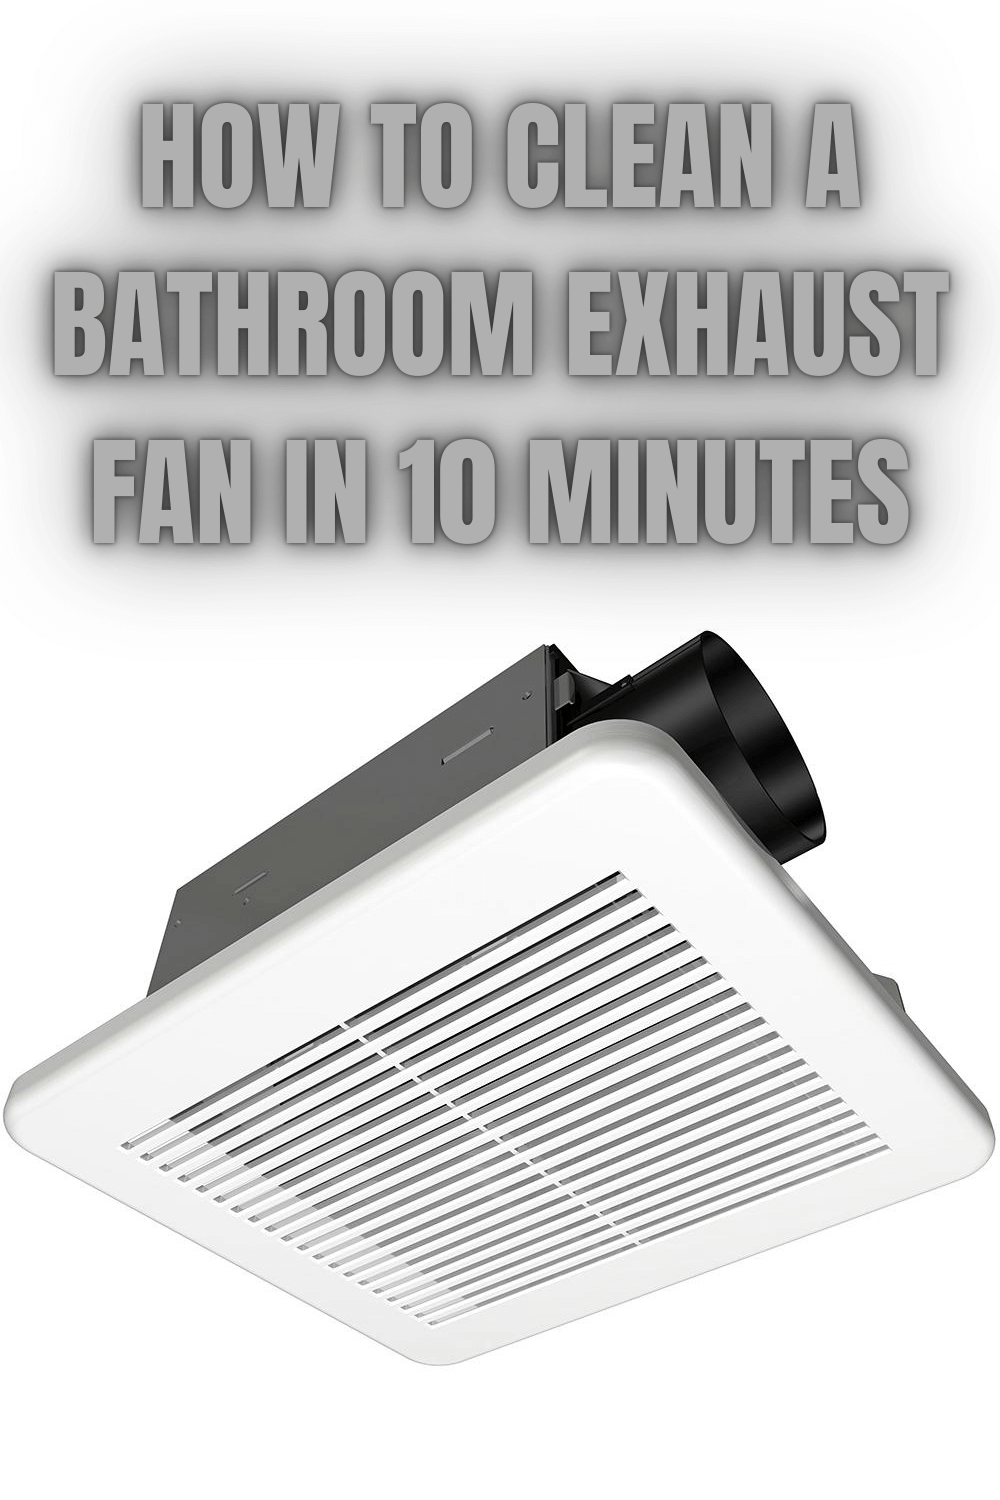
    HOW TO CLEAN A BATHROOM EXHAUST FAN IN 10 MINUTES

    During the time, it is designed to get rid of excess humidity or moisture which can form mildew and mold in your bathroom. That’s why it is very significant to always keep your vent fan clean every day.

    Read also: How to Remove Mold from Bathroom Walls.

    If you left your vent fan to be neglected for so long, it will be resulted to your health issues. It is better to always check and clean your bathroom fan every six months. The dirt is going to accumulate on the cover and its motor as the air is being sucked up through the fan every day. Therefore, you have to clean the fan. By doing so, you can do a great job by removing the accumulated dirt before it becomes a serious problem.

    Related Post: Quick Simple Tips to Speed Clean Home in Few Minutes.

    Before cleaning your fan, prepare some tools and materials needed in the fan cleaning. The tools that you need to prepare are vacuum cleaner, screw driver, scrub brush and ladder. Choose a vacuum cleaner with a hose handle to clean the dust so that it won’t bring you hard time to clean. Then, the materials needed for cleaning your fan are soap and water.

    If you have already got all tools and materials with you, let’s start cleaning your bathroom vent fan. Here are some amazing tips that you can do:

    How to clean a bathroom exhaust fan just in 10 minutes

    1. Make Sure to Turn Off the Vent Fan Power

    Before doing anything else, turn off the fan power to make it stop working until you finish the cleaning process. Generally, most fan models have the power switch installed behind the cover. You just need to open the cover and turn off the switch. Nonetheless, you can also temporarily turn off the bathroom breaker, just to be safe.

    2. Clean the Visible Dirt

    To prevent dirt falling onto the floor inside your bathroom when you try to get rid of the cover of the fan, you can first vacuum the visible dirt accumulated in the cover. By doing so, you will save more time.

    Related Post: Bathroom Vanity Ideas.

    3. Remove the Cover of the Fan 

    There are two types of the cover. One which has screw on it and one which has tiny metal wires. Check the cover on your bathroom fan. Gently pull the cover down on you. This cover is generally being held by some screws or tiny metal wires which make it to be away for about 2 inches but it won’t be completely off.

    If it is attached by two tiny metal wires, usually in two opposite directions, you just need to squeeze them in order to make them off of the ceiling completely. On the other hands, if the cover is attached by some screws, you then need to unscrew them.

    4. Remove the Fan  

    Unscrew the fan from its assembly and remove it gently. Don’t drop your fan or hit it to the fan pipes. The broken fan blades will result to lauder and less effective fan. So, be careful!

    5. Clean the Cover and the Fan 

    First of all, you can vacuum all parts of the fan and the cover thoroughly. Then, you can wipe them with a thin cloth which has been soaked into soapy water. You can just put the cover in your bathroom sink soaked with soapy water for a while. But, wipe the fan by yourself with a thin clothe soaked in soapy water. Do it repeatedly two or three times to make sure that all the dirt have been wiped off.

    6. Clean the Vent Pipe 

    You can use a brush attached on the vacuum to clean the dirt covering the fan pipe. For the part that can’t be reached by the vacuum, you can clean it manually with the scrub brush.

    7. Clean the External Vent Port 

    You can clean the external port of your bathroom fan later on after you finish cleaning the internal part. But, you need to remember that it is also necessary to find the external vent port and clean it. Use the vacuum and the damped cloth to clean it.

    8. Clean the Motor Housing 

    If your fan housing has some kind of plug, make sure not to expose it with water as it will cause an electrocution or shock on the fan when you reinstall it. Just vacuum it and use dry cloth to help you wipe off of the excessive dust.

    9. Reinstall the Fan

    After the fan is completely dry and clean, you can reinstall in on to the fan motor. Don’t forget not to bump it into the pipe. Tighten the fan with the screws. Then, try to spin the fan for a few times to make sure that is doesn’t stroke against anything.

    10. Turn On the Fan Power

    After the fan is safely installed in place, turn on the fan power or bathroom breaker back. When the power is already on, remember that the fan is now back to become dangerous. So, don’t try to clean or wipe anything on it.

    11. Reinstall the Cover of the Fan

    Before reinstalling its cover, check if it is already dry and clean. Plug in the cover into the ceiling by screwing it back or put the metal wires in position. Gently push the cover to the ceiling. Turn on the fan. It should be quieter and flowing more air than before.

    Read also: How to Clean Bathroom Faucets Gold?

    So, it’s an easy task to do, right? You also don’t need lots of time in doing the work. All tips can be finished within 10 minutes. When your vent fan is clean, you can minimize the bathroom odors and also prevent mildew and mold to form. You can also maintain your health by doing so.

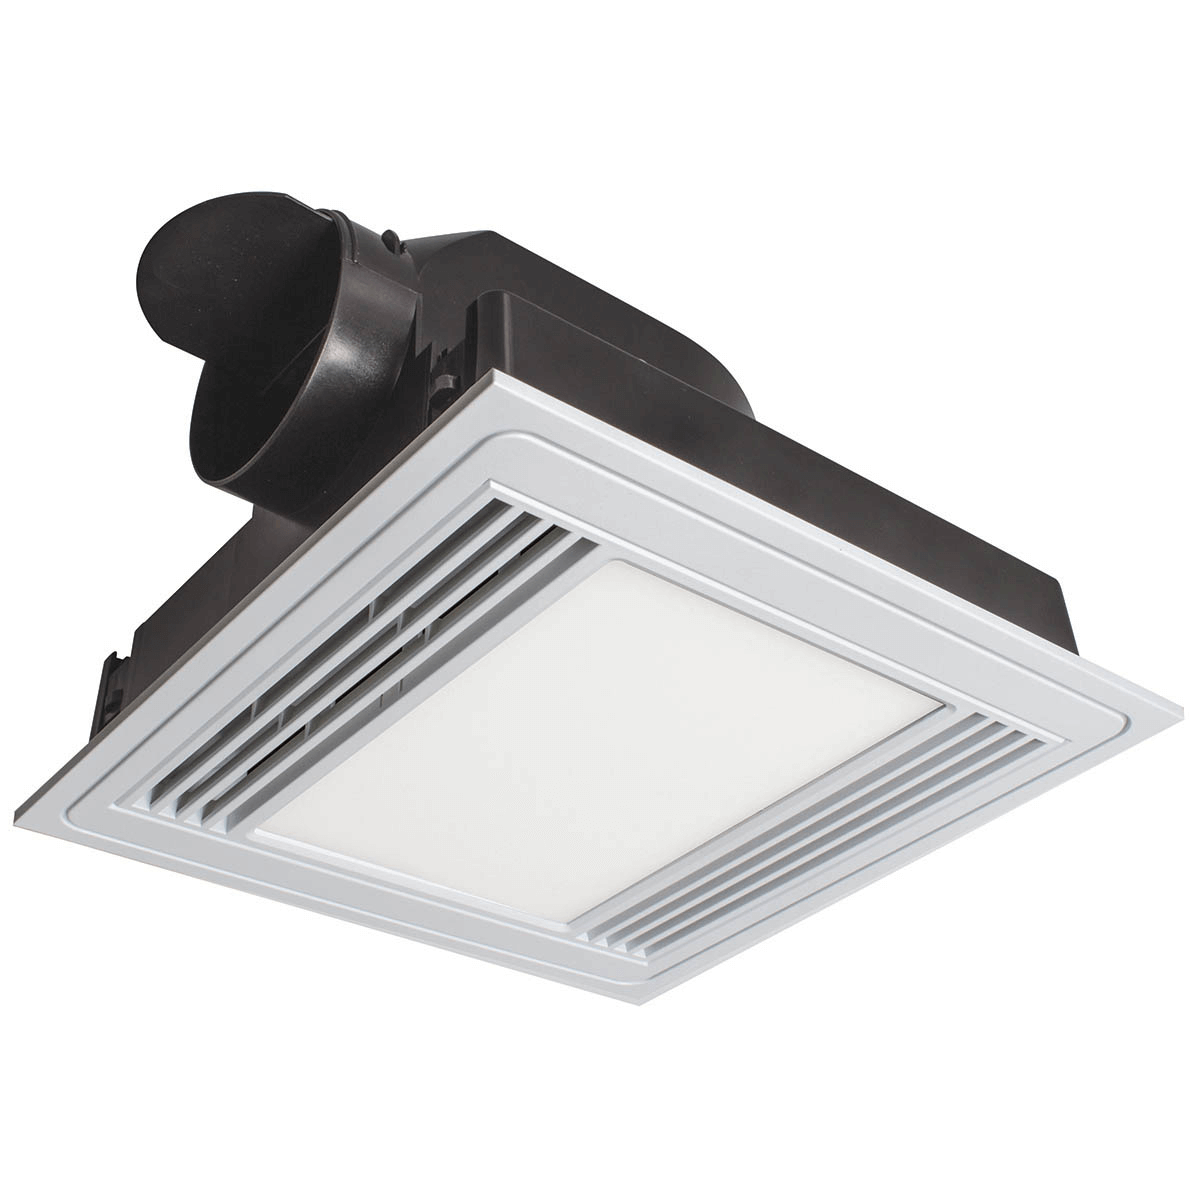
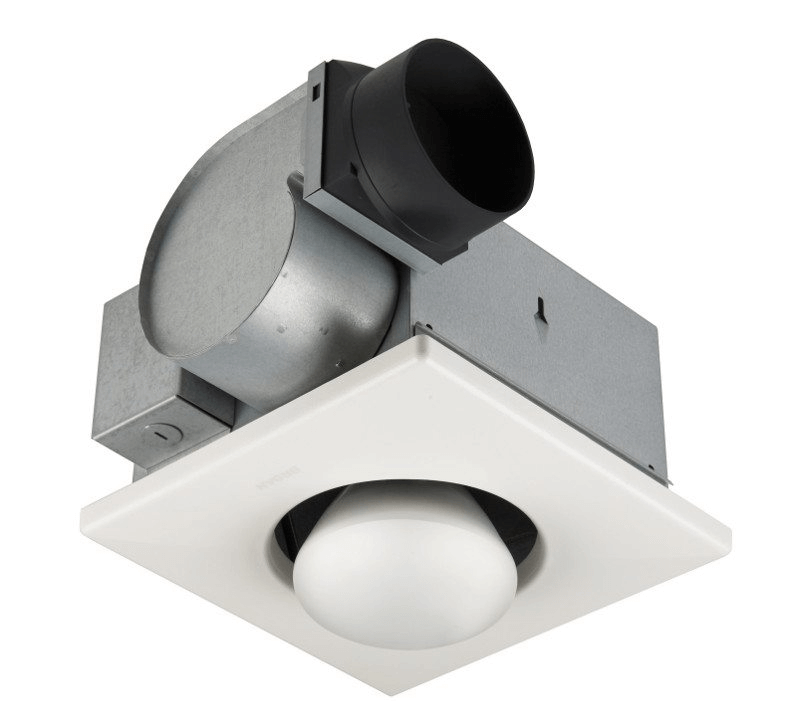
    Most popular bathroom exhaust fan types:

    Originally posted 2021-08-28 04:12:00.

  • How to Clean Instant Pot the Thorough Way

    How to Clean Instant Pot the Thorough Way

    Instant pot can bring a lot of use for everyone especially during the holiday.

    However, after using a lot of time, it is time for your pot to get a little cleaning touch.

    Here, you will find out how to keep it clean for everyday use. You will also learn how to deep clean it too. Check out here.

    Read also: How to Clean Oven Quickly and Easily?

    HOW TO CLEAN INSTANT POT THE THOROUGH WAY

    A. How to Clean Instant Pot Every Day

    The following steps are the way to clean the instant pot after you use it every time.

    1. Wash the Inner Pot First

    This is the first part of the pot that you need to clean. Simply remove the inner pot from the hardware and toss it into your sink. If it has burnt food on the bottom, make sure to soak it in water first. It helps in removing the sticking.

    When it is ready, wash the pot as usual. Use the dishwashing liquid to clean the entire surface of the inner pot, both inside and outside part. Then, rinse with water to clean the detergent. Put it on the rack to dry.

    2. Wipe the Inner Pot Clean

    When it is dry, take a clean cloth and wipe the inner pot. Make sure to use soft cloth so you don’t scratch the inner pot surface. Scratched surface of the pot can be dangerous for your health if you use it for cooking. Wipe the inside and outside of the inner pot before storing or setting it up again.

    3. Wash the Sealing Ring

    In addition to the function, the sealing ring tends to absorb your food color and odor through time. The only way to preventing from happen, you need to remove and wash it as well. It can be a little tricky to remove the sealing ring, but it is possible. Simply use your finger to take it out.

    Then, wash the silicon ring as usual. Use the liquid dishwashing soap, and wash it. Rub a little so it shows back its original color, which is a little transparent. Put it on the rack to dry and make sure not to lose it because it is pretty small.

    4. Wipe the Inside Lid Too

    The inner pot has a lid attach to your instant pot cover.  You can remove it and wash it as you wash the inner pot. Do the same procedure and make sure you get to remove the entire food remaining on it.

    It can be surprising for you, but the lid can be the part that gets the dirtiest. It is also recommended to soak it in water first if the remaining food stick and it is too dry.

    Related article: How to Clean a Burnt Pressure Cooker Pot Without Scrubbing?

    B. How to Clean Instant Pot Deeply

    If you like cooking and you use your instant pot pretty frequently, it is suggested to deep clean it every month at least. It prevents the pot from clogging. It also prevents smelling and stubborn food residue as well.

    1. Don’t Forget to Unplug First

    It is extremely important to do. You need to make sure your instant pot has been unplugged before. If you just used it for cooking, it is also important to let it cool for awhile. The inner pot is hot when you are just done cooking. You can harm your skin if you insist cleaning it right away. Unplug the entire cable so it doesn’t have a tail anymore when you wash it.

    In some cases, there are instant pots that are completed with permanent cable for power. You can’t remove it without ruining it. In this case, don’t unplug the tip that sticks to the pan. Just unplug the one that gets into the socket.

    2. Start with the Housing

    When cleaning the housing unit, we don’t need the dishwashing liquid or other products. We only need a clean cloth and some clean water to keep the cloth damp. When you are ready, wipe the entire unit slowly. If you get sticky residue somewhere on the unit, wipe and wipe again. The moisture will helps solving the sticking.

    It is important to keep the cloth damp, not wet. Several part of the house is connected to electrical panel, which can be ruined by water. Reach tricky corner and nook to make sure all surface is clean.

    You also need to clean the bottom part. This time, use a brush. A brush allows you to reach sneaky nooks and corners. If you get sticky food residue on it, use the damp cloth to help.

    3. Let’s Wash the Inner Pot Lid

    The inner pot lid is often the first part to get the dirtiest, as mentioned before. Therefore, it is important to wash it. It prevents sticky food residue from sticking there permanently, and bed smell when you cook

    Simply wash the lid with warm soap water and sponge. Wipe with sponge when washing and you are basically done. Leave it on the rack to dry.

    4. Clean the Smaller Parts

    You commonly have extra of small parts when you buy the instant pot. It includes the quick and release handle, the shield, and condensation collection cup on the side. They tend to get the food residue and create bad smell.

    Remove them from the place and wash them with warm soap water and rinse clean. If you still have the extras, replace these with the extras.

    5. Wash the Silicon Ring

    This silicon ring is a part of the sealing. It often gets the food residue and odor as well. In this case, remove the silicon ring from its position and wash it in regular way. IF you get stubborn residue, try steam cleaning. This method should help in removing possible odors remained as well. If there is crack, replace with a new one you can buy online or at local store.

    6. Don’t Forget the Inner Pot and Its Accessories

    Gather your inner pot as well as the entire accessories you often use for cooking. Then wash them as usual. Most products make inner pots and accessories that are safe for dishwasher, but manual washing is easy too. Rinse and let it dry.

    For extra touch, wiping them with clean cloth and vinegar will remove remaining detergent and it keeps them shine.

    7. Assemble!

    Finally, you are done washing your instant pot. Now, assemble the entire part as it is originally. Make sure to wipe it clean and dry first.

    How to Clean Instant Pot the Thorough Way

    Originally posted 2021-06-12 04:06:00.

  • How to Clean Oven Quickly and Easily

    How to Clean Oven Quickly and Easily

    Cleaning oven is one of the hard chores to do. The dirt and gunk make the work harder and time-consuming.

    However, it is still a must to clean the oven since the dirty oven will be dangerous for your health.

    Not only dangerous for your health, but it will also make your food taste different when you cook it with the dirty oven.

    But, you don’t need to worry since you can quickly clean your oven with these hacks.

    Read also: How to clean a burnt pressure cooker pot without scrubbing?

    HOW TO CLEAN OVEN QUICKLY AND EASILY

    1. Clean the Oven with Baking Soda and Vinegar

    Baking soda is the basic kitchen ingredient that is used in making a cake. Baking soda contains sodium carbonate that will make the dough rise. Baking soda is not only useful for baking the delicious cakes, but it can also useful for cleaning your oven.

    If your oven has tough stains or oil debris, using the baking soda mixture will really help and it will remove the bad smell as well. With the help of vinegar, your oven will be as clean as new since vinegar helps in dissolving the alkalis.

    • To clean the oven, you need first need to remove the racks and if they are also dirty, you can clean them separately. To avoid the possible danger, you need to make sure that the cable is unplugged before you do your work.
    • Create the baking soda paste by mixing a half cup of baking soda and a few tablespoons of water. You need to adjust the amount of baking soda and water to create the spreadable consistency.
    • Wear your gloves to and spread the paste using a brush in the interior surface of your oven, except the heating elements. Don’t forget to spread it on the oven racks and you can use an old toothbrush for it. Spread the paste evenly in every corner of your oven. You don’t need to worry if the baking soda paste turns into brown color since it means that it is working.
    • After you have done coating the oven, you need to let it sit for overnight or at least 12 hours.
    • After 12 hours, you need to prepare a damp cloth to wipe the dried paste. If you find it hard to remove the dried paste, you can use silicone or plastic spatula, especially to reach the difficult corner.
    • Spray the vinegar to remove the remaining residue of the baking soda and use a damp cloth to wipe the oven clean. You can repeat this step until the oven is completely clean.

    How to clean oven with vinegar and baking soda

    Read also: How to clean grout with vinegar and baking soda?

    2. Use Vegetable Oil

    If your oven has stubborn oil that is hard to remove, you can fight it with the common kitchen ingredient, vegetable oil.

    The vegetable oil will help in removing the greasy part of the oven and it will make the future cleaning easier. As a bonus, the vegetable oil is perfectly safe to use without any harsh chemicals that will endanger your life.

    • You just need to prepare a clean cloth and the vegetable oil to clean the stubborn oil grease in your oven.
    • Put a couple drops of the vegetable oil to the cloth.
    • Use the cloth to wipe the oily area in your oven and you will see the oil greases disappear. Repeat this step until all of the oil grease slide off, change the cloth if necessary.

    How to Use Vegetable Oil for Clean Dirty Oven

    3. Get Rid of Bad Smells with Oil Essence

    Cooking a delicious meal comes at a high price. Yes, the bad smell that can linger for days in your oven. Sometimes, cleaning the oven alone won’t really help in removing the bad smell.

    If you don’t quickly come up with the solution, the bad smell will affect the taste of your meal. But, you don’t need to worry since you can use a few drops of essential oil to banish the bad smell.

    • Prepare the ovenproof bowl and the essential oil you like, can be the citrus or vanilla essence.
    • Fill the bowl with water and add a few drops of the essential oil you want to use.
    • Place the bowl in the oven and slowly heat it for an hour. By doing so, you can say goodbye to the bad smell and you will have a lovely smell in your oven.

    4. Remove Oil Dirt with Lemon

    Lemon is very rich with vitamins that will maintain your health. But, lemon can also help to maintain your health by using it as your oven cleaner.

    Lemon works best to remove the oil grease and it is also very safe since it doesn’t have dangerous or toxic chemicals. Plus, it is very easy to do and the rest of the ingredients might already be on your cupboard.

    • Prepare the ingredients and tools, such as two lemons, baking dish, water, and a scouring pad.
    • Cut the lemons in half and squeeze them to get the juice. Place the juice as well as the lemon in the baking dish.
    • Add 1/3 part of the baking dish with water and place the mixture in the oven.
    • Bake the mixture in the oven for 30 minutes at 250 degrees. By doing so, the mixture will heat up and it will make the grease in the oven easy to remove.
    • After 30 minutes, remove the mixture from the oven and let the oven cool down a little bit before you clean it. Use the scouring pad to clean the interior of the oven. For the more stubborn dirt, you can use a spatula to remove it.
    • To make your oven cleaner, you can use the remaining mixture to wipe the interior of the oven. Repeat this step until the oven is completely clean, then wipe it dry using a clean towel. During this process, the oven will produce a smoke. But, you don’t need to worry and you need to make sure to open your door or turn the oven fan during this process.

    By using those ingredients, you will be able to clean the oven quickly and easily. Plus, you will avoid using harsh chemicals that will be dangerous for your health.

    HOW TO CLEAN OVEN EASY

    Originally posted 2021-05-15 10:32:00.

  • 3 Tips on How to Get Rid of Mold on Clothes in Closet

    3 Tips on How to Get Rid of Mold on Clothes in Closet

    Cloth is the best place for mold growth. When mold stays on your clothes, it can cause some problems for you, such as an unpleasant smell from your clothes, rot your clothes, and even make you itch.

    Don’t worry, here are several easy ways you can follow to prevent and remove mold which is growing on your clothes.

    Read also: How to get rid of smell in fridge?

    HOW TO GET RID OF MOLD ON CLOTHES IN CLOSET

    1. Vinegar

    Vinegar is easy to find and it is also effective for removing mold on your clothes. You only need to pour ¾ cup of white vinegar to the washing clothes water.

    The vinegar will remove the mold effectively. You can repeat this process several times until the mold is totally gone. After that, use detergent to rinse your clothes.

    Remove mold with vinegar

    2. Old fashion cleaning

    There are several steps to remove mold using the old fashion cleaning. Check this out.

    • Brush off loose mold growth

    This way is also simple, you only need to prepare a brush, and then choose your clothes which are infected with mold. After that, brush off the all mold growth on your clothes. Do this process several times to make sure that the mold is already gone.

    It is also effective for preventing mold spores which can spread inside your home. Remember, you have to use a mask and gloves when doing this process to keep your body safe from mold contamination.

    • Set out in the sun to dry

    Direct sunlight is very useful and effective for removing mold on your clothes. It can help you to kill the mold and mold spore, so they will not infect your clothes anymore. You’d better hang your clothes outside after brushing process to get the best result.

    • Presoak in cold water

    It is better to soak your clothes in cold water before you wash them in hot water and use detergent. This process can help you to kill the mold and mold spore.

    • Launder, rinse, and dry

    The last step in this process is launder, rinse, and dry. This is the traditional way of washing clothes. You only need to put detergent and rinse for several times, then you have to dry those clothes outside to get the direct sunlight.

    White mold on clothes in closet

    3. Use of ‘Mildicides’

    Mildicide is a product which is used for dealing with the contamination of mold or mildew. Remember, you need to read the label first if you decide to use Mildicide to remove the mold on your clothes because it is a chemical and maybe harmful for your body.

    The first thing you do is choose the clothes which are infected with mold and making sure that nobody is inside the room.

    Then, spray that product on your clothes and leave them for 10 minutes. After that, dry the infected area with a fan or just hanging them outside. Then, wash your clothes as usual.

    Those are the tips that you need to consider when you have to remove mold on your clothes. Let’s try those tips to keep your clothes stay beautiful!.

    How to remove mold on clothes in closet

    Originally posted 2021-04-19 03:16:00.

  • How to Remove Mold and Mildew from Shower Stall

    How to Remove Mold and Mildew from Shower Stall

    Do you ever have cold shiver on your back when you find mold and mildew on your shower stall?

    Fight these dangerous fungi by doing these steps below.

    Read also: How to remove mold and mildew from carpet?

    The Types of Shower Mold and Mildew

    Basically, mold and mildew refer to the same fungi. Mildew is the “younger” mold. Thus, identifying mildew and get rid of it immediately is equal to removing the mold itself.

    HOW TO REMOVE MOLD AND MILDEW FROM SHOWER STALL EASILY

    There are several mold colors, which represents the toxic or non-toxic substance as well as the danger.

    1. Pink Mold

    When mold is a fungi, pink mold actually belongs to bacteria category. It spreads in bathroom area such as shower head and bathroom floor.

    This bacteria could bring health problems for those who inhale it. The common cases are respiratory problem in senior patients and urinary tract infection in adults.

    2. Green Mold

    This mold belongs to “toxic” category. It could grow in an area with a steady level of high humidity. In most cases, green mold forms colony with green and blackish in color.

    You can recognize this colony as green mold in various growth stages. This colony spreads fast due to the damp environment. Inhaling large amount of green mold sponges may cause bad condition to lungs or usually called as Aspergillosis.

    3. White Mold

    If you see something similar to powder attached to your shower stall, then it is the white mold. People can notice it easily when the mold had grown big and have long fur. It may even worse because of the color.

    White mold can put itself into disguise among the white bathroom walls. This mold can cause eye and respiratory problems, nausea and headache.

    How to Clean Mold and Mildew from Shower Stall

    How to clean shower mold and mildew

    1. Save yourself and the family

    As mentioned above, mold is dangerous if you inhaled it. Therefore, you have to wear mask, goggle and gloves also. Make sure that any of your pets and family members have been relocated to a room far from the bathroom.

    The cleaning solutions and the mold will release dangerous substances into the air. Of course, you do not want them to inhale such harmful thing.

    2. Make the mold cleaning solutions

    You can choose either the nature-friendly or the hard solution. If you have toddlers or younger children, it is suggested to choose the nature-friendly solution. For the hard solution, you have to mix 1 cup of bleach and 1 cup of water into the spray bottle.

    This solution is not preferred because of the fumes produced after dissolving in water. However, it is the most effective option for severe mold.

    For the nature-friendly solution, you can choose between white vinegar or baking soda. Make the solution by putting a half cup of white vinegar or baking soda into a cup of water.

    The next step is to spray the solution to shower stall. Let the mixture does it work for five to fifteen minutes. Scrub the area by using an old brush or stiff bristle. Rinse thoroughly by using clean running water.

    3. Let the room dry

    Keep the room ventilated and close the faucet or shower head. Let the shower head dry completely before use.

    Slimy substance in the shower stall may be mold. Considering the harmful disease it may cause, immediate action is needed. Follow the steps above to clean your shower stall.

    Shower stall designs small bathrooms
    Image: kellybranan.com

    Originally posted 2021-04-18 10:28:00.

  • How to Remove Mold from Kitchen Cabinets

    How to Remove Mold from Kitchen Cabinets

    If people notice a dark green to gray colored mold, they will automatically ask, “how to remove this thing?”.

    Here are the most commonly used methods to clean these fungi.

    Read also: Kitchen Cabinets Refacing Before and After and the Cost

    How to Remove Mold?

    Mold could spread on damp areas in just one night. It also triggers several health problems, included asthma and respiratory diseases.

    Therefore, it is suggested to remove molds immediately. Here are some instructions to do it.

    1. Safety first

    Make sure you have a mask and gloves with you. Use them to cover your hands, mouth and nose area. Molds release certain harmful substance. By wearing masks, you will not directly inhale the substance.

    The gloves are essential to protect your hands. Exposing your hand to the cleaning solution may cause skin irritation. Also, prepare clean dry towel to help you minimizing the wet area after cleaning.

    2. Mixing the solution

    Make the mold cleaning solution by mixing water and mold remover. Bleach and white vinegar which may available in your kitchen can also clean mold.

    However, it is better to choose the cleaners that are specifically designed to remove molds. They are available in stores. The solution should consist of 1 part of water and 1 part of the mold cleaner.

    Cleaning kitchen cabinets with vinegar

    3. Starting the mold-cleaning

    Spread the necessary amount of solution on the areas covered by mold. Pouring to much solution will change the color of your cabinet.

    Use old toothbrush to scrub the mold away from the cabinet. You can use cloth, stiff bristle or paper towels instead. Make sure to immediately throw them away after the cleaning.

    4. Cleaning the surface

    Rinse the cleaned areas with clean water and dry them by using a towel. Keep the cabinet door opened and let them dry for six to eight hours. The last step aims to wash away the excess solution as well as the mold.

    There may be some molds left after the first cleaning. If that is the case, repeat the cleaning until the mold completely disappear.

    Unique kitchen cabinet designs for small spaces

    Useful Tips

    Cleaning mold should be done carefully. Doing it carelessly may harm the cleaner, as both the mold and the anti-mold solution contain the harmful substance for the body.

    Following the steps mentioned above will reduce the risk. If you also apply these simple tips, it will make the mold cleaning process perfect.

    1. Let the air in

    During the cleaning process, open all the windows and doors in kitchen area. It will allow the air to flow inside the area. Thus, it will provide more ventilation and reduce the humidity level.

    2. Eye protection

    Because molds’ substance spread through the air, it will be better if you also protect your eyes. Wearing goggles or eye glasses are the simplest option available.

    3. Use spray bottle

    You may use bowls or cup to mix the mold cleaning solution. However, spray bottle would be the preferred option. It could reach the corner and also the surface of the cabinet.

    4. For wooden cabinets

    In the explanation above, you are expected to make the solution by using 1:1 portion. For the wooden cabinet, mix a half cup of cleaner and 1 cup of water.

    5. Let the solution works

    After spreading the mold cleaning solution, let it do its work for five minutes. By doing this, the kitchen surface can absorb the cleaning solution and dissolve the mold.

    High humidity and damp air made the ideal place for mold to grow. Since this mold threats family’s health, this grayish thing should be eliminated at once.

    U shaped kitchen cabinet design
    U shaped kitchen cabinet design, image: bloombety.com

    HOW TO REMOVE MOLD FROM KITCHEN CABINETS STEP BY STEP

    Originally posted 2021-04-15 10:21:00.

  • Tips on How to Remove Mold and Mildew from Carpet

    Tips on How to Remove Mold and Mildew from Carpet

    Many people are asking about how to remove mold and mildew from carpet?.

    It is very annoying because they can cause wheezing in asthma sufferers, produce unpleasant odor, and harm your carpet.

    To prevent those effects, you’d better check your carpet regularly. If mold and mildew have reached your carpet, you have to follow these tips to keep your carpet comfortable.

    Read also: How to Get Slime Out of Carpet

    How to Remove Mold and Mildew from Carpet Step by Step

    1. Inspect the carpet

    You have to inspect your carpet regularly to prevent mold and mildew infect your carpet. If the mold and mildew have reached the base of your favorite carpet, you have to do some actions to remove those molds and mildew.

    You may hire the professional carpet cleaner or clean by yourself. If the mold and mildew already infected almost the whole of your carpet, you need to buy the new one.

    2. Ventilate the room

    Good ventilation is really important to keep your room stay healthy and to reduce humidity inside your room. If your room is a bit moist, it can invite mold and mildew to infect your carpet.

    To prevent that case, you have to open all windows and doors in the room where you keep your moldy carpet. If you decide to use chemical cleaning products, good ventilation will help you reduce the irritation of your eyes and even lungs.

    Read also: How to remove stubborn carpet stains with homemade cleaners?

    3. Sun the carpet

    To keep your carpet free from mold and mildew, you need to hang your carpet outside to get the direct sunlight.

    Hanging your carpet outside for 1-2 days can help to kill the mold and mildew spores and it can remove the moist as well.

    If your carpet has been infected by the mold and mildew, you need to hang your carpet longer and it may take several days.

    4. Remove moisture with baking soda

    Carpet cleaning with baking soda

    Baking soda is also helpful for removing mold and mildew because it can reduce the unpleasant odor and absorb the moist.

    You need to spread the baking soda in the affected area, leave that carpet for a night, and vacuum it. Besides baking soda, you may use baby powder also for removing the mold and mildew.

    5. Scrub with white vinegar

    Vinegar can be used for removing several types of molds and mildews. This step is cheap and effective for you who are very busy. You only put vinegar in a bottle, then spread it in the infected area.

    Next, you need to blow dry the carpet or hang that carpet to get the direct sunlight.

    Carpet cleaning with vinegar and water

    6. Use an anti-mold treatment

    You can get anti-mold sprays in drugstores and supermarkets. Remember that you need to check the label provided for the instructions. Ensure that the substances are safe for your carpet. Don’t choose the product that can discolor or damage your carpet.

    Those are the tips that you need to consider when you have to remove mold and mildew on your carpet. Let’s try those tips to keep your carpet comfortable and stay longer!

    Flor carpet tiles design ideas for kids room with large size window
    Clean carpet for make good health and perfect decoration for your room. Image by: artdecorationsdesign.com

    Originally posted 2021-04-12 10:07:00.

  • 6 Tips on How to Remove Mold from Hardwood Floors

    6 Tips on How to Remove Mold from Hardwood Floors

    Mold on hardwood floors are annoying. It’s caused by moist and even food that you eat.

    This mold can spread on the below surface and causes the worse the effect.

    To prevent the problem, you need to remove those molds. Here are the tips:

    Read also: Want to Get Rid of Your Ugly Floor Tiles? Paint It!

    1. Find mold on floors

    There are several ways to know whether your hardwood floors are infected with mold or not.

    The first thing you need to do is pay attention on the symptoms you may have, for example, you have a headache, breathing problem, or itchy eyes. Those kinds of symptoms are maybe affected by molds on your hardwood floors.

    Second, do you smell any unpleasant outdoor on your room? That smell, maybe comes from the molds on your floor. Check your floor carefully then.

    The last is warping of your hardwood floor. If you find a sign of warping on your hardwood, your mold problem is pretty serious. You need to start working on it soon.

    HOW TO REMOVE MOLD FROM HARDWOOD FLOORS STEP BY STEP

    2. Dispose of ingrained mold

    You need a special tool which can be used for cleaning some ingrained molds. It is more difficult than removing surface mold and you need to ensure that you take the necessary precautions when doing this.

    Read also: How to remove mold and mildew from carpet?

    3. Pressing with screwdriver

    Besides using screwdriver, you may use sharpened tool for pressing the hardwood floor. There are several things that you need to pay attention when doing this step.

    First, if the spots are soft you can remove the molds, but if the spots are quite hard you need to try another way.

    Second, if the woods are spongy or if they crumble, this wood maybe rotten and you cannot safe your wood.

    The last, you need to call a professional if you find any ingrained molds that cannot be repaired. You need an expert to fix this problem.

    Removing mold from hardwood floors

    4. Dry out the floors using heaters or fans

    You need to dry out your room for several hours to prevent the molds getting worse because ingrained molds need to be dried before you fix it.

    Besides, you need to keep your room well-ventilated so that you will not inhale any mold particles which are harmful for your body.

    Related: How to remove mold from kitchen cabinets?

    5. Remove the top layers of the mold

    You can use appropriate grit of sandpaper so you do not damage any other side of woods. You need 100 grits of sandpaper to remove molds on normal amount.

    However, if your woods are infected by the large size of molds, you need to use 220 grits of sandpaper.

    6. Finish the wood

    Find a wood finish that will cover your hardwood floors. Hopefully, it can make your wood floors back to normal.

    Remember that you need to apply a wood finish which matches the original finish. You may also add some protections like polyurethane to against moisture in the future.

    Those are the tips that you need to consider when you have to remove mold from hardwood floors. Let’s try those tips to keep your woods stay longer!

    Dark hardwood floors in bedroom
    Dark hardwood floors in bedroom, image: homedit.com

    Originally posted 2021-04-10 07:41:00.