Tag: Furniture

  • Portable Kitchen Island with Seating for 4

    Portable Kitchen Island with Seating for 4

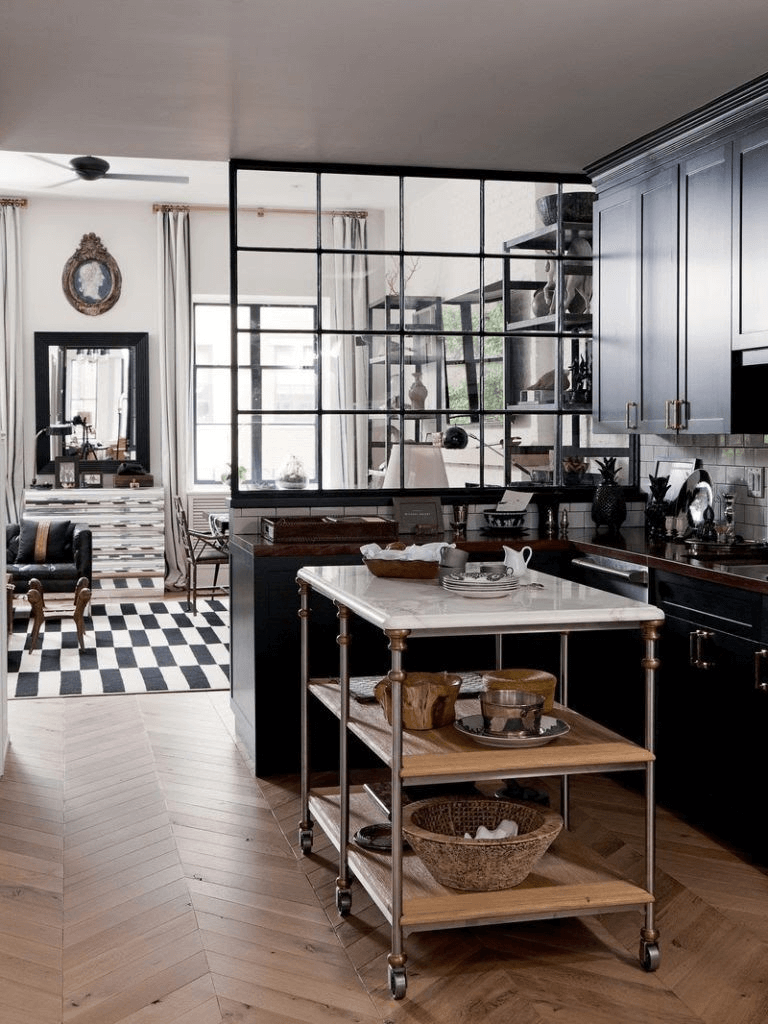
    A kitchen island is a must-have property in most homes. However, for those who want to design their kitchen with portable kitchen island with seating for 4 should consider these following recommendations.

    These recommendations are taken from most popular portable kitchen islands. Therefore, they will not disappoint you because of their gorgeous and attractive looks.

    Read also: Kitchen Island Design Ideas For Small Spaces

    PORTABLE KITCHEN ISLAND WITH SEATING FOR 4

    Things to Know about Portable Kitchen Island with Seating

    First of all, having a portable kitchen island equipped with seating is a must-have or considered as essential in new and remodeled kitchens. For those who still questions why it is considered as a must-have thing is because it commonly boost up the cantilevered countertops that are supported by table legs.

    Therefore, it would make your time preparing and serving meals faster and your family can enjoy the cooking’s action while waiting for the meals to be served.

    Additional tips:

    If it does not allow you to place a chair/seat, you can choose a small kitchen island without chairs. Here is recommended portable/movable kitchen island without seating for small space kitchen.

    movable small kitchen island without seating Goplus Rolling Wood Kitchen Trolley Cart Island

    Buy this item Goplus Rolling Wood Kitchen Trolley Cart Island Shelf with Storage Drawers Baskets with free shipping, HERE

    Things to Consider on Designing Kitchen Island with Seating

    If you want to design or build a kitchen island that consists four seating, then you must consider the size of the island, its location within the work triangle, and the other functions of it. Check out these following basic measurements that are worth considering when designing the kitchen island with seating.

    1. The Aisles

    The first thing to measure is the aisles on each side of the island. The ideal measurement of the aisles is at least 42 inches. However, if you plan to have two cooking stations in your kitchen, then the preferred size is at least 48 inches wide. This measurement should be enough to make sure that the area around the island should be spacious enough for moves and traffic.

    2. The Seats

    The next step is to choose the seats that allow at least enough space. For the knee space, 12 inches is adequate while it remains suitable to table height. For examples, dining chairs and low stools will fit beneath table top height counters with 30 inches high. Meanwhile, common bar stools usually fit just well under 42 to 46 inches of breakfast bar height. The counter stools, on the other way, commonly fit well on a 36 inch high kitchen island.

    Read also: how about chair ideas for kitchen island countertop here

    3. The Countertop

    When you are designing and building a kitchen island that consists seating, then you should consider about whether you want an island with multiple levels, which is meant to manage a different task or an uninterrupted span of countertop.

    How to decide one of those options? First, you may need to block the view on those cooking clutters that mess around the countertops. This can be done by setting breakfast bar countertop in a tall setting. In alternative, you can position a higher or lower add-on table at the island’s outer end. You can amplify interest by using varying finishes as well.

    White Portable kitchen island with seating for 4 or more and flower decoration ideas
    Image: homedit.com

    Additional Tips on Designing Portable Kitchen Island with Seating

    There are several additional tips that you may want to consider related to your plan on designing a kitchen island with seating. Firstly, many worktable kitchen islands, mostly have room for seating. The center section will be open for appliances and storage and the longer sides will be accessible for cooking station.

    Breakfast bars that have curve design provide a bit more seating space than their straight counterparts. Secondly, Whatever your configuration of the kitchen island, make sure that the seating is easily accessed by those who enter the kitchen through various doorways and walkways.

    Designing the coziest and most suitable portable kitchen island will take a lot of considerations. Therefore, these tips and recommendations will ease your mind to get an instant inspiration in order to get the most suitable portable kitchen island with seating.

    Movable kitchen island with seating

    Originally posted 2021-01-28 05:21:00.

  • Most Popular Kitchen Countertop Decorations

    Most Popular Kitchen Countertop Decorations

    Undoubtedly, the countertop is a part of the kitchen that can attract our attention the most, compared with any other parts of kitchen.

    Some people usually judge other person’s kitchen just by watching on the countertop. That is why cannot randomly decor your countertop.

    To make it easier for you, here are some examples of kitchen countertop decorations you may try.

    Read also:

    MOST POPULAR KITCHEN COUNTERTOP DECORATIONS

    1. Applying Quartz

    You can use quartz as the materials in case granite is not affordable for you. This type of material will give you durable and strong looking of kitchen cabinet. Quartz is not only affordable but also is easy to get. Unlike when you use granite, quartz has no porous.

    It means you do not have to worry about any liquids like wine, water or oil since they will not cause any staining to your countertop. Quartz is also considered as one of the most hygienic countertop options for kitchen. It is also highly resistant against staining since this material is really strong, so you are guaranteed of its charming look.

    White Quartz Countertops images
    Image: countertopguides.com

    2. Getting Thinner Countertops

    If you are a fond of modern style with low profile design, thinner countertop is suitable for you. Commonly, countertop has for about ¾ inches thick. The maximum thickness of common countertop that usually used is around 1 ¼ inches.

    For recent years, most people like to apply until ½ inches slimmer countertop. Undoubtedly, slimmer countertop looks more urban, trendy and cooler nowadays. It will also increase perceived space as the effect. For the combination, you can also involve thick slabs in your slim countertop. Slimmer countertop will match perfectly with small kitchen.

    White Slim countertop with flower pot and grey kitchen cabinet

    3. Countertops with Patterns and Veining

    Since we are living in the 21st century, it will not be really hard to create such a creative design for your countertop. Now you can choose and decide what character you want to apply to your countertop.

    Unlike countertop in past years, which only had plain style, countertop nowadays comes with so many varieties of patterns.

    Today’s technology can also create vein in stylish pattern that swirls around your countertop. Countertops with patterns and veining will also match with other kitchen elements like its cabinetry, walls and flooring. Create a great visual background for your kitchen activities by applying patterns and veining to your countertop.

    Antique pattern wood countertop decoration

    4. Integrated Concept

    Another trend for kitchen countertop is the integrated sinks. Basically, it is made of the same materials as the countertop, so both the countertop and the sink will blend perfectly.

    You will not need to worry about food bits or dirty liquids that get stuck in the space between the sink and the countertop as a quick wipe will clean all stains or marks on the countertop. The good news is this concept will also work with any kitchen style. You can apply this concept in both modern and traditional kitchen design.

    Decorating a good-looking kitchen countertop does not always cost much money. With right and effective execution, all kinds of decoration will work well in your kitchen. At the end, make sure that your budget supports your plan in decorating your countertop.

    Tuscan modern and traditional combination style decoration
    Image: diaryofane.com

    5. Decorating kitchen countertops with fruit and flowers

    A healthy lifestyle is very much needed by modern people. By decorating kitchen area according to this lifestyle, this make easier to be done.

    You can plan and put the fruit and flower pot according to your own desires and creativity. This picture can be good example for your ideas.

    Flower and fruit for kitchen countertop decorations

    6. Farmhouse Countertop Decorations

    This is also one of the decoration ideas that many people are interested in. You can put kitchen utensils from unpainted wood. This ideas makes a natural rural impression. Happiness in life is art. You can create an artistic atmosphere, even in your kitchen. Good luck.

    Farmhouse kitchen countertops decor ideas

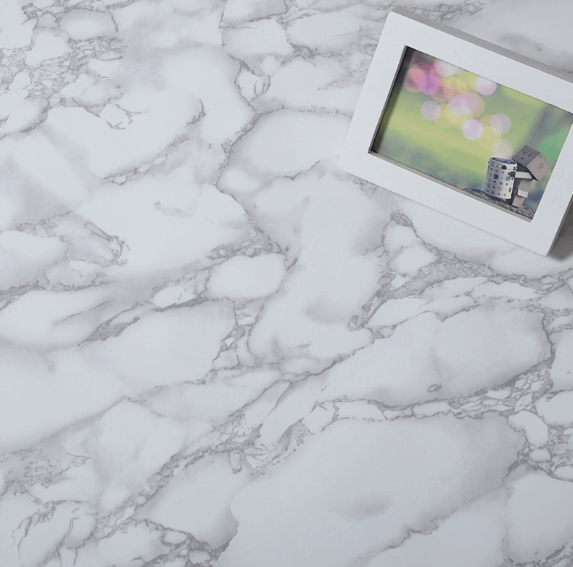
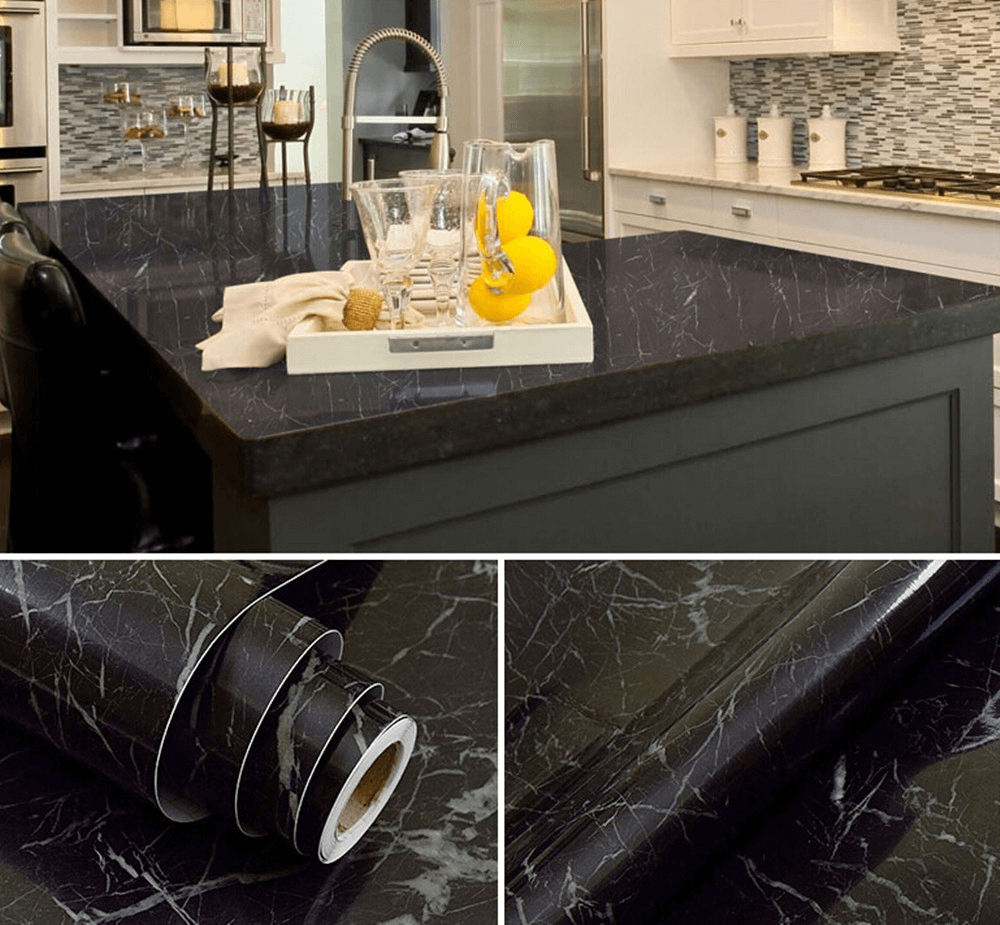
    7. Instant decoration ideas with marble sticker countertops

    This is an easy and fast way. Change the look of the surface of your countertop, as well as interesting decorating ideas.

    Especially if you like the look of marble in your kitchen cabinet and countertop. Use this, thickening marble kitchen cabinet countertop PVC material self adhesive marble sticker.

    If you are serious about choosing this method, you can buy this wallpaper HERE. The picture below are some examples of marble sticker designs for decorating your countertop.

    Marble sticker countertops decoration ideas

    Countertops decor ideas with marble stickers

    Nice countertops with marble stickers decoration ideas

    Originally posted 2021-01-27 03:35:00.

  • How to Stain Wood Cabinets without Sanding

    How to Stain Wood Cabinets without Sanding

    Staining a cabinet after sanding it will take a lot of time. Many people simply can’t wait for the process when they try to do it themselves.

    Meanwhile, it takes a lot of time to do it properly. The fact is you don’t need to always sand your cabinet before staining it.

    Several wood cabinets with no serious scratches or dents don’t need sanding step actually.

    So if you plan to stain it, follow these steps:

    Read also: How to Clean Faux Marble Table Top of Stains Without Find Any Difficulties.

    HOW TO STAIN WOOD CABINETS WITHOUT SANDING

    Step 1: Check and Prepare the Cabinet

    First, you need to make sure that you don’t really need sanding process. As mentioned before, your cabinet may not need sanding if you can’t find major scratches or even dents on it. If the surface is still fine and it looks ready to stain, you are ready. This applies to both used and new wooden cabinets.

    Then, prepare the area where you are going to stain. It is suggested to cover the floor with cloth or old newspaper so the stain won’t get everywhere.  Put the cabinet in the middle to make it convenient. It is also best to stain the cabinet first before hanging it if you plan to. While it will be easier to stain, it also allows you to stain the entire surface.

    If the cabinet is already hung before staining, you should consider removing the cabinet doors using screwdriver and cover the wall and countertop with newspaper and paint tape. It prevents the stain from ruining other surface during the process and allows you to stain perfectly.

    Step 2: Clean the Cabinet

    Before we start staining, it is important to clean the cabinet. Debris and dust will affect the staining result, which is never great. For cleaning, it is recommended to wipe it with tack cloth. If the cabinet already stayed in the garage for some times, it may have serious debris on it.

    The best way to clean it is vacuuming it. It will remove the entire debris and the surface should look cleaner. Then, continue cleaning using duster. It will remove the dust, which isn’t wanted for staining process. Last, you can wipe it with tack cloth as recommended before.

    This cleaning also applies for new cabinet with factory sanding on it. It makes sure the surface is sleek enough, ready for the next process.

    Step 3: Removing the Old Stain

    This step is needed if your cabinet is already have stain or paint on it.

    Before you add new color on your wooden cabinet, it is recommended to remove the previous staining. While it allows you to apply the paint a lot easier later, it also gives you the ultimate result especially the paint shade. The old paint can be removed quite easily.

    First, you need the paint stripper. It is available on store where you can purchase the paint as well. Second, when you are ready, apply the paint stripper on the cabinet. Make sure to cover the entire surface of the old paint you want to remove. Then, follow the instruction on the label of the stain stripper.

    Commonly, you are required to wait for several minutes or more. When it is time, scrape the stripper. You will need the scrapper tool to remove them effectively. As you remove the stripper, the old paint will be removed as well.

    Of course, there will be several parts that are hard to remove. Simply repeat the steps until your cabinet is naked and clean, ready for new stain on the surface. This process may take some times, so it is fine for planning to stain it the other day.

    Step 4: Re-Clean the Wooden Cabinet

    Now as the old paint is all removed, we need to re-clean the cabinet to make it ready. First, make sure that you clean the cabinet face as well as doors. It is recommended to use special cleaning solution to do this. Wood cleaner product is the best recommendation.

    Wood cleaner will not only make sure the wood is ready and smooth enough for the staining later, but also clean the de-glosser on the cabinet. When you are done using the wood cleaner, wipe the cabinet with a rag until clean. Wiping it will make sure the entire remaining paint and chemical from the cleaner is removed.

    Step 5: Staining It

    Now, we are about to stain the cabinet. First, we need to wait until the wood cleaner dry. You may already wipe it, but it takes several minutes for it to get fully dry. When it is dry, prepare the stain you want to apply and a clean rag or cloth. Dip the rag in the stain and then apply it on the entire surface of the cabinet.

    You may need to use small paint brush to reach tricky corners and joints. For the best staining result, you should apply the stain in circular motion. It creates even color and the same shade on the entire surface of the wooden cabinet. Don’t forget to stain the doors that you detach previously too.

    Step 6: Another Layer

    When you are done applying the stain and you like it, leave it overnight to dry. It allows the stain to get the ultimate look perfectly. The next day, it is suggested to apply another layer on the cabinet. You should do the same method, but this time, please use a new rag for the same great result.

    When you are done, leave it overnight before you decide to do other things. You should see if it reaches the expected color or not the next day. If you are satisfied, you can continue the process.

    Step 7: Reassemble the Cabinet

    The entire staining process is already done, so you are allowed to reassemble the parts now. Make sure to use the appropriate tool to attach the doors and everything. Don’t do it in a rush. Using the appropriate tools, methods, and taking time prevents you from scratching the new stain on the cabinet. When you are done, your new looking cabinet is ready to use.

    How to Stain Wood Cabinets without Sanding. Easy Tips

    Originally posted 2020-12-22 22:47:00.
  • How to Clean Leather Couch DIY

    How to Clean Leather Couch DIY

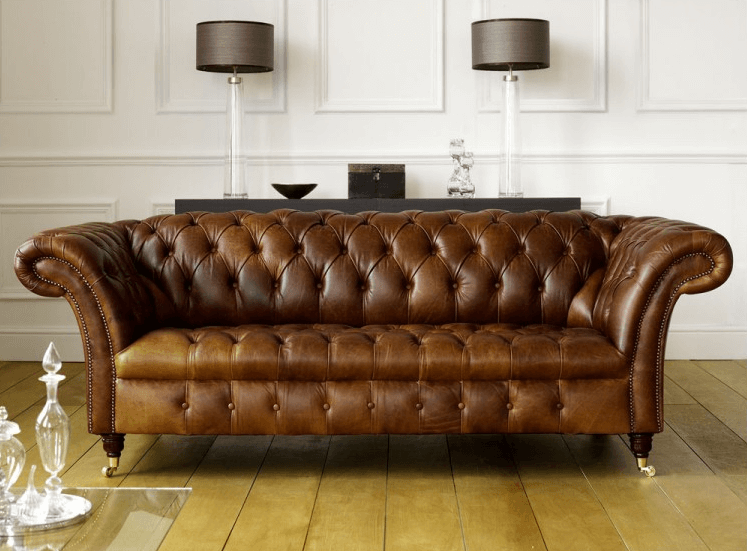
    Leather couch looks good and luxurious but it needs special method of maintenance and care as well.

    Many people prefer to call the professional and spend a lot of bucks for the service. Meanwhile, there are tools and products you can buy and use today.

    Here is a little guide on how to clean it by yourself.

    Read also: How to Clean Bluestone Table in One Touch Only.

    HOW TO CLEAN LEATHER COUCH DIY

    1. How to Remove Debris

    Removing the debris seems simple. However, you need to know that some debris is too hard and harsh for leather.

    If you just swipe it, you may hurt the leather and create some kind of scars. This is the moment when you regret treating carelessly.

    Instead of ruining your couch, try the following steps:

    • The simplest way is to use the vacuum. In order to reach even the smallest debris, it is highly recommended to use the hand tool instead of the big one you usually use for the rugs and carpet. It allows you to reach more in the couch. Make sure to reach on the folds and creases.
    • When you are done using the hand tool, you should consider repeating using the brush. Attach the brush on the hand tool to replace the previous tool, and start brushing the leather couch slowly. It allows you to vacuum the remaining smaller debris without scratching the leather surface. This time, please make sure to reach on folds as well as creases again.
    • Now, this is the last touch. As we already remove the debris, it should be safe to dust the couch. Microfiber or feather dusters are highly recommended as they work effectively while being soft to the leather. Make sure to use the duster only after you are done vacuuming the debris.

    How to Clean Leather Couch DIY Easy

    2. How to Treat Stains

    Now this is trouble. Stain can change the leather look while several more dangerous stains can ruin it. The thing is you need different method to clean different stain. It is because each stain can be caused by different properties and each property is different. Check out the following suggestions for cleaning your couch from stains.

    • Cleaning the Grease Stain

    Grease stain is commonly caused by food, beauty products, or your hair. Cleaning it is actually pretty simple. It is important to clean the grease as soon as your couch gets it. Use the leather cleaning solution and soft cloth to wipe it out. If there is still stain remains, spread cornstarch or baking soda on top of it. Leave it for several hours before brushing it clean.

    • Cleaning the Ink Stain

    Ink stain can be a little tough but there is a trick. First, take a cotton ball and dip it into rubbing alcohol. Make sure to dip it right, not too soaked. Second, blot the stain with the cotton ball. Make sure to blot it, not rubbing it as it spreads the ink. In addition to it, don’t soak the leather. The alcohol will ruin it. Third, dry the area with a damp rag as the stain goes away, and then wipe again with other dry rag.

    • Cleaning Liquid Stain

    Liquid stain is mainly caused by spilled red wine, coffee, or tea. When they are spilled, make sure to immediately wipe the liquid. Use an absorbent and clean cloth to wipe it and make sure not to give pressure while wiping. Once the liquid is wiped, get the leather cleaning solution and clean the area with it. When you are done, dry the area with clean and dry rag.

    • Cleaning Darker Stain

    If you leather is fairer than the stain, you need to make special potion to really clean the stain. Mix cream of tartar and lemon. Make sure both are on the same measurement. Then, apply the mixture on the stain and leave it for around 10 minutes. Last, wipe it clean using damp cloth and dry the area using dry rag. If the stain remains, repeat this treatment as needed.

    3. How to Do Routine Cleaning

    Routine cleaning is as essential as the previous treatments. It is what makes your couch stays fit and pretty. This cleaning isn’t that complicated as well actually. Try to apply these steps:

    • Take a small bowl or bucket, and add white vinegar and water in equal parts in it. For the water, it is recommended to use the room temperature water instead. It is also suggested not to use tap water as it may contain chemicals that can ruin the couch leather.

    If you don’t feel like making this solution, you can buy leather cleaning solution in alternative. You only need to read the label to make sure you know the proper use.

    • Take a clean rag and dip it into the solution you just made. Then, wring it until it is damp. It is important not to use drench rag as the dripping can ruin the leather.
    • Then using the damp rag, wipe the couch slowly and softly. You can work it down for best result. Remember, you don’t have to give it a pressure so you don’t ruin the leather. When you need to repeat, dip the rag into the solution again. Give it several strokes and then wring it before using again.
    • After you are done wiping, you need to take a fresh dry cloth and wipe the couch dry.

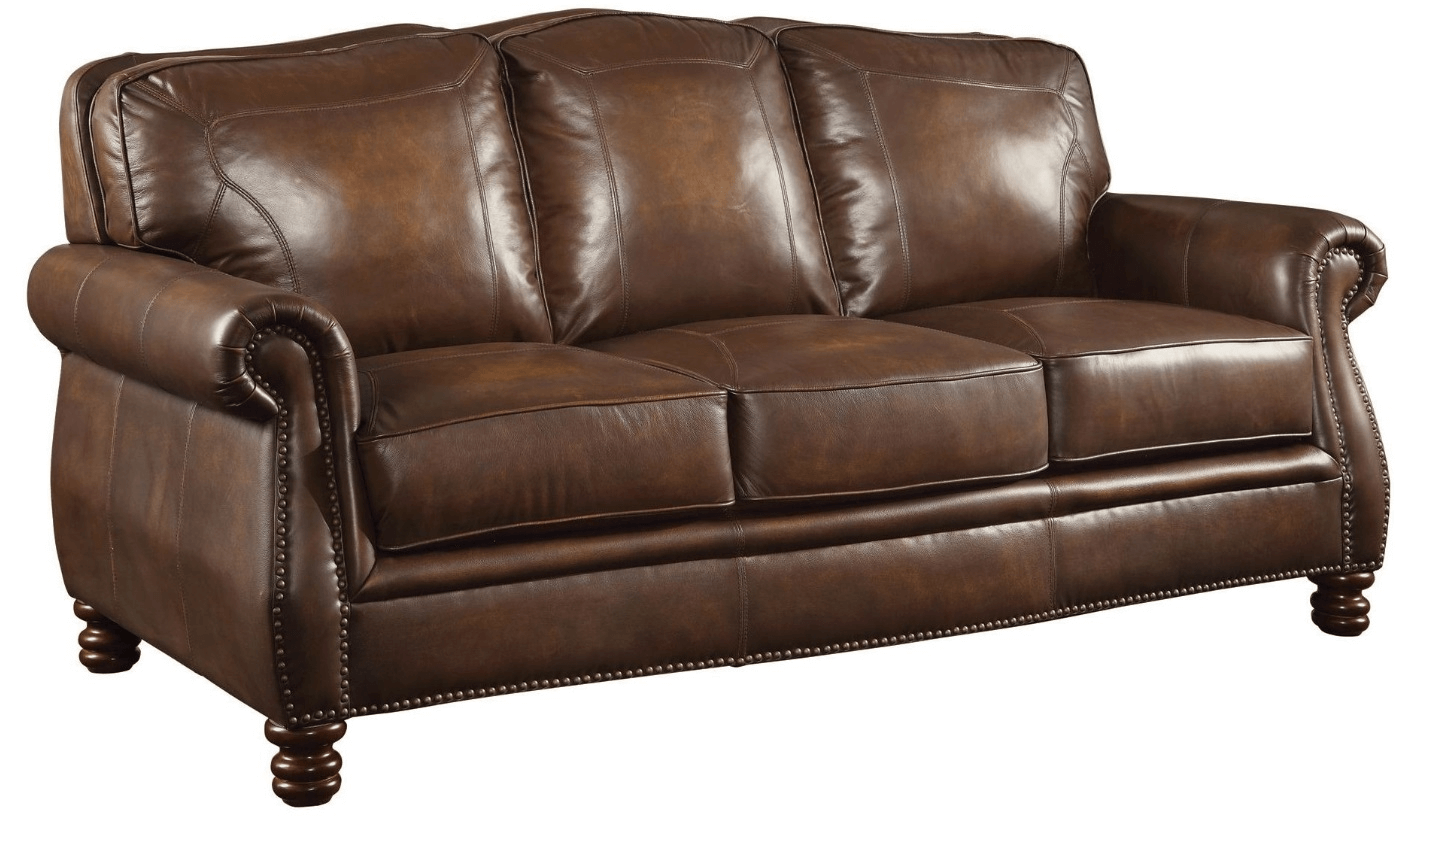
    Barrington leather sofa

    4. How to Condition the Couch

    Conditioning the couch is actually needed as well. It is recommended to do it every six to twelve months. It keeps the color, the leather condition, and the entire details, making sure they stay. Try the following tricks to keep the couch awesome.

    • Take a small bowl and mix two cups of white vinegar and 10-15 drops of tea tree oil or lemon. Mix them well until all are dissolved. Then, take a soft and clean cloth or rag and dip it into the solution. Give it several strokes and then wring it until it is damp.
    • Use the cloth or rag to wipe the entire couch. Make sure to reach the corners and folds to really clean it. Then, dry the couch with dry cloth.

    Originally posted 2020-12-21 22:46:00.

  • Top Modern Wooden garage Doors Ideas

    Top Modern Wooden garage Doors Ideas

    Are you currently in need of finding a perfect garage door for modern homes of yours?

    We’ve got lots of design ideas of favorite modern wooden garage door that will surely suit your modern homes best.

    When it comes to choosing the right garage doors, it is very important to pick the one that can resemble your home design.

    Read also: Creative Garage Design Ideas for Your House

    AWESOME MODERN WOODEN GARAGE DOOR DESIGN IDEAS

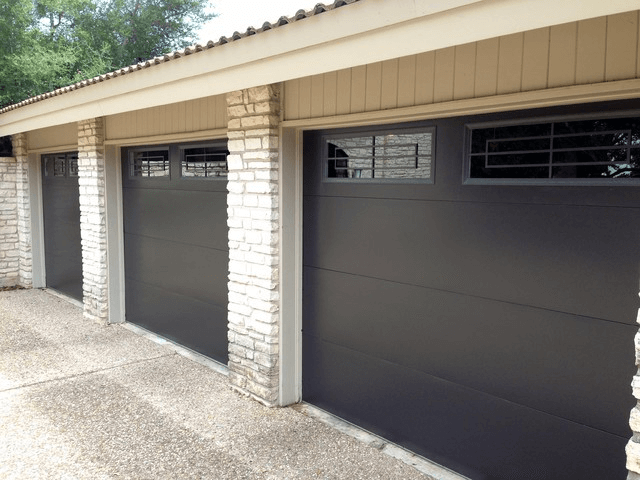
    1. Cowart Door – Full View Garage Door with Mahogany Frame

    Loving furniture from mahogany? You need to try this Cowart garage door then! This Cowart door comes with full-view style and a frame made from mahogany. This garage door is a great idea from Designer Doors, Inc. This garage door is able to provide you with a very distinctive feel than the garage door with aluminum frame.

    In short, this full-view garage door has a frame made from mahogany that comes with dark finishing. This garage door occupies glass in sea-blue tone that really complements the tone color of the frame. This garage door even looks “wow” when the color of the glass is in the same tone with the color of the garage floor tile.

    For the walls of the garage, it is suggested that homeowners use pastel colors like soft grey. This garage door simply makes the vibe of the front part of the house softer and way more sophisticated.

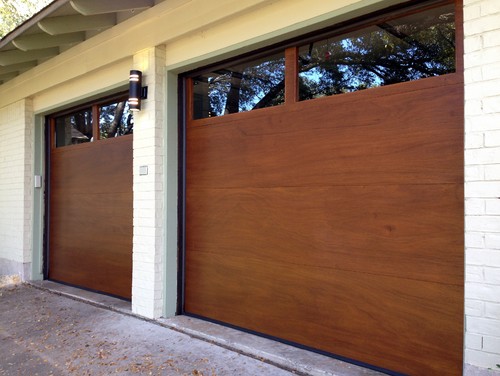
    2. Cowart Door – Modern Wood Garage Door

    Here comes another modern wooden garage door ideas made from mahogany. If you don’t really like full-view-styled garage door, opt for this one. This Cowart door is a customized wood garage that is made from Sapele mahogany.

    What makes this garage door different from the previous one is that this garage door occupies flooring joint T & G boards of horizontal flush. The T&G boards are able to create a furniture comes in high elegance. Using this kind of garage door will surely make you reminisce the fine dining table from the 18th century.

    To even give more elegance feel, this garage door is stained with Sikkens Cetol 1/23. Besides, the door is also stain system in Teak color. The finishing of this garage door effortlessly makes the garage door simply elegant and modern.

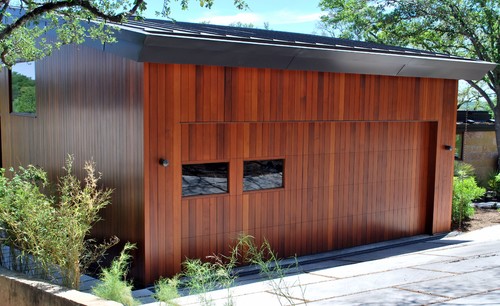
    3. Cowart Door – Custom Wood Garage Door

    This garage door employs a layer of Groove and Tongue boards. This door is made with flush joins as well as a “dime gap”. The gap and the joints are surely the key elements that make this garage door both subtle and also sophisticated.

    The design of the garage door is actually simple. However, the dark finishing of this garage door along with the subtle gray paint on the garage wall really create a modern and contemporary vibe to the front part of the house. Another great color choice for the garage wall paint can also be subtle brown that is still in the same color family with the finishing tone of the garage door.

    The element of the garage door mingles perfectly with the garage wall. To make some contrast, it is suggested that homeowners use bright floor tile. Don’t use dark floor tile so that the feel around the garage won’t be too dark.

    4. Cowart Door – Garage Door from Quarter Sawn White Oak

    Are you fans of sawn white oak or simply oak? You must try this garage door then! This garage door is made from sawn white oak. The wood simply makes the garage door the prominent feature that catches big attention in the front part of the house.

    The garage door comes with many features: horizontal T&G boards, quarter sawn white oak, and flush join in “dime gap”. Quarter sawn oak is one type of wood that has been favored for architectural trim and furniture for more than 100 years in both Europe and the US.

    What makes quarter sawn oak great for a garage door is the sophisticated and unique look that is enhanced by the finishing from Sikkens. This garage door can even look more perfect when it is blended with traditional materials and a modern interpretation.

    5. Cowart Door – Modern Wood Garage Doors with “Dime Gap”

    Here comes another great garage door idea made from Sapele Mahogany. This time, the Sapele Mahogany is crafted in contemporary horizontal design that is complemented with a “dime gap”. This garage door also features two vertical stiles that are inlaid perfectly.

    To complement the Mahogany wood soffit and the wood features of this garage door, the stain finishing from Sikkens is used. All those features along with the finishing mingle together to create beautiful front part of the house. To complement the look of the garage door, give the garage door dark frame and to give some contrast, choose light floor tile.

    What is so unique about this garage door is the apparent absence that can be seen in the horizontal breaks in between door sections. This garage door is located only twenty feet or so from the street. It enables the garage doors to show off its sophisticated details of its wood grain to its casual viewers.

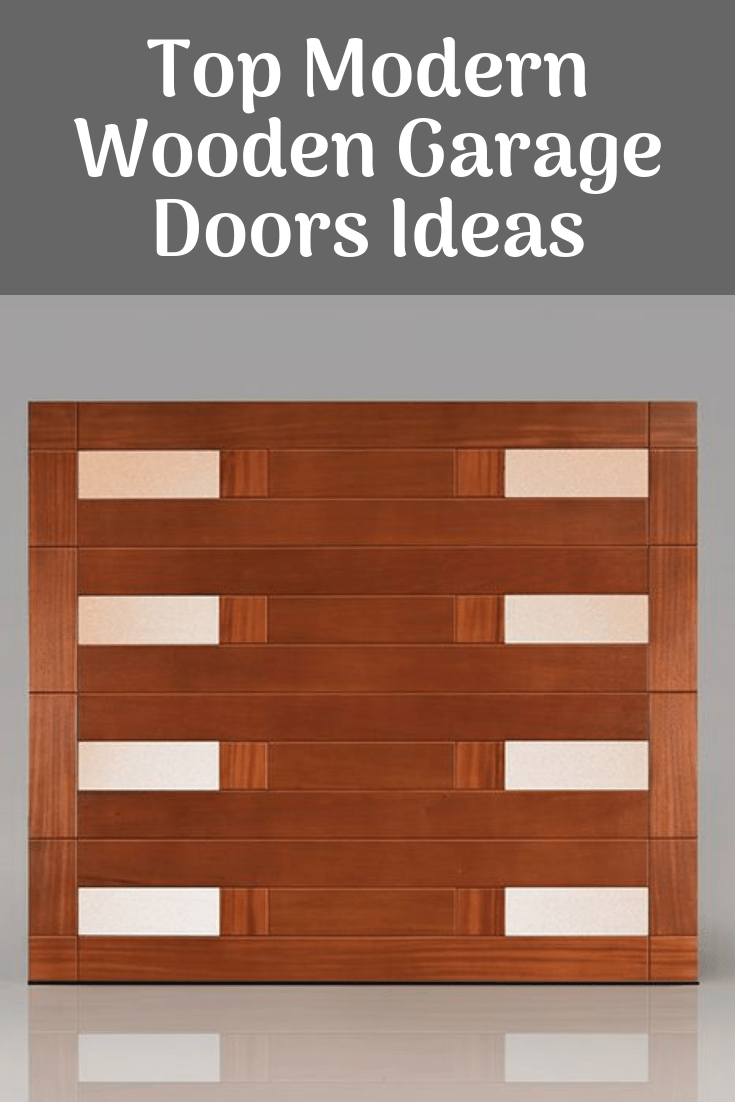
    6. Cowart Door – Modern Wood Garage Door with Clopay Model

    Last but not least, check this modern wood garage door that comes with two Clopay Model 33 Flush Luans that is made from mahogany wood. This garage door has some unique features that boost its modern vibe.

    One of the features is the Long Panel windows that are installed in the upper part of the garage door, making it less boring and more contemporary. Those windows are also able to provide sleek upgrade and warmth to the modern house.

    To complement the modern and contemporary vibe of the garage door, the finishing from Sikkens Cetol 1/23 + Stain system are chosen to enhance the elegance of the door and to make sure that the doors are long lasting for years.

    You surely have plenty choices of modern wooden garage door. All you need to do to choose the right garage door is to understand the style of your modern house, your preference, and the vibe you want to have in the front part of your home.

    Top Modern Wooden garage Doors Ideas

    Originally posted 2020-12-12 01:59:00.

  • Window Shutters Indoor for Any Room of Your House

    Window Shutters Indoor for Any Room of Your House

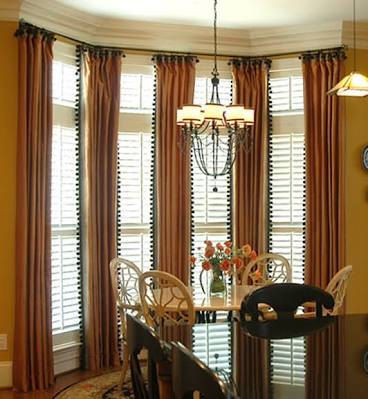
    Windows now also function a lot in the interior design. That’s why, lots of interior designers want to dress windows not with curtains only.

    They want the windows to be unique so that it can boost the beauty of the interior design.

    One of the ways to beautify windows are adding window shutters indoor. Here are some ideas:

    WINDOW SHUTTERS INDOOR IDEAS FOR ANY ROOM OF YOUR HOUSE

    1. A Crisp Shutters Windows for Your Bathroom

    Bathroom is a relaxing place. So, make sure you have the best comfort in the room. Do you have a bathroom whose windows showing the view outside? That’s a perfect fit for adding a crisp window shutter.

    If you have bathroom that is dominated with white color, opt for white paint as well for the bathroom’s shutters windows. You can place the shutters by your bath tub.

    Later, when you are enjoying your bath, you can enjoy the natural view outside as well as what outside can offer to you while bathing. Crack the shutters during day time to give bathroom some natural and beautiful lighting.

    Half window indoor shutters for bathroom
    Image: apartmentapothecary.com

    2. A Café Accent Shutter

    Next idea for indoor window shutters is the ones with café accent. Unfortunately, such shutters will only work perfectly if you favor a playful and fun accent.

    Besides, the windows shutters will work great if you do not like any distracting or bulky furniture pieces take away from your favorite room.

    Remember! If you like less fun vibe in your room, don’t opt for this café accent window shutters. Instead, go for the next ideas of window shutters below.

    Café Accent Shutter window indoors
    Image: perfectblinds.co.uk

    3. Rustic Compliment

    Next up is window shutters for home owners who favor rustic touch a lot. The next idea for interior window shutter is rustic compliment. You can always have shutters that are not yet finished or unfinished ones.

    Interior shutters are not necessarily coming with finishing. If you have unfinished shutter windows, you will be able to create a rustic and cozy center to the room. Yet, with such touch of shutters, you will not be able to have preppy or vintage appeal.

    Such style will be perfect for your living room. Infuse more rustic vibe to your living room by decorating your windows with rustic shutters.

    Rustic indoor window shutters
    Image: Hometalk.com

    4. Playful Prep for Window Shutters Indoor

    Serious vibe is somewhat boring, especially if that is used for a room in our house that is for chilling or for meeting our favorite people. That’s why; you need to know playful prep style for interior window shutter.

    What is great about this style of window shutter is that your interior windows shutter can also play a role of topping off a preppy yet playful room that are designed with nautical touches and chic lines.

    To complement the style of the shutter windows, create a vibe that includes Cape Cod and beachy style and touch to the room. Such room with such vibe will be great to be a guest room.

    Blue Neutical window shutters indoor wooden playful living room

    5. Wall Extension

    Your shutter windows can also play more roles to the room. Your shutter windows can also be a wall extension. How can it be so? Well, shutter windows can be in cottage and charming style, but they can also be an extension for your walls if they are painted using similar shades.

    So, if you want your shutters to be wall extension, don’t forget to paint them with the same shades you use for painting the walls. You definitely could see the shutters’ texture. Yet, the shutters will not take away the room’s overall beauty. This kind of shutters is usually great for bedroom.

    Bedroom Window Shutters Indoor
    Image: Homedit.com

    6. Windows Shutters in Barn Wood

    Barn wood may not be your first choice when it comes to the materials of creating window shutters. You may also think that shutters made of barn wood will not be appealing.

    But wait! When you have a bathroom with wood roof, white walls, bath tub in dark wood color, wood bench, and is dominated with rustic style, window shutters from barn wood is the best fit! Such bathroom will surely turn your bathroom to be the one in fairy tale. Yup! Window shutters made of barn wood will do rustic-styled bathroom the best.

    Barn Wood Window Shutter Indoors
    Image: homedit.com

    7. Window Shutters from DIY Addition

    Are you getting bored of all choices of window shutters in the internet? Well, why don’t you occupy your creativity? You can always make windows shutters that suit your style preference.

    To make DIY window shutters are simple! You only need some pieces of wood and hinges. To make it, you simply need to hold all the woods by the hinges.

    Then, paint the wood shutters with the colors of your choice. Match the color of your window shutter with the color harmony of the entire room. Then, see how the window shutters transform the room into the room of your choice.

    Wooden window shutters interior diy
    Window shutters Design ideas by Anne. Image: designdreamsbyanne.blogspot.com

    8. Tall and Big Window Shutters

    Tall and big window shutters can also do something great to your favorite room! Get your window shutters customized by having the shutters with single frame. Such window shutters could really widen and brighten the room.

    Moreover, window shutters with this style could maintain the contemporary touch in the room. To infuse even more contemporary feel in the room, decorate the window shutters with traditional curtains. Such window shutters are usually great for your family room. Go contemporary!

    Tall and big window shutters indoor

    9. Rainbow Bright Window Shutters

    Do you like something unique and different? Why don’t you try this rainbow window shutter? Such window shutters will be great addition to the room of your loved ones. Simply paint the window shutters with the colors of rainbow. You can paint the shutters by yourself or you can have them painted and customized for you. Such rainbow-lit window shutters will surely be an incredible addition to the interior design of you children’s bedroom.

    Rainbow painting window shutters indoor
    Rainbow shutters window interior bedroom

    Have you chosen your favorite style of window shutters? Make sure you understand the style of the room first and also your preferable style before installing the window shutters. Window shutter is more than just a way from which lighting come. Window shutter can even boost another feeling to your favorite room.

    Originally posted 2020-11-20 00:21:34.

  • Kitchen Island Design Ideas For Small Spaces

    Kitchen Island Design Ideas For Small Spaces

    One good reason to add an island in the middle of the kitchen is its functionality. Not only being the area for cooking preparation, the island could also be used as the serving table.

    Bring some chairs and it turns into mini dining table. For these reasons, even small kitchen should somehow slip an island.

    KITCHEN ISLAND DESIGN IDEAS FOR SMALL SPACES

    1. The Restaurant Feel

    Those who have visited professional restaurant will see that the working space in the building is not as big as it seems.

    Then the question is: how could all the equipment and even an island fit into the tight space?

    To get the answer, you have to visit the department store that sells restaurant equipment. Tell the staff you want to get an industrial work table.

    The staff later on will show the way to a stainless work table. The materials are wood and stainless, created in different sizes. Worry about the prices? Don’t back up yet. Even though the product is often used in professional kitchen, the price is not too high.

    In fact, it has the good price for high quality item. Pay attention to the bars and open shelves on the bottom. They are important if you want to utilize the maximum use of the kitchen island.

    Mini dining table kitchen island design for small spaces
    Image: hgtv.com

    See also: Small Kitchen Island with Sink and Dishwasher

    2. The Utilitarian Style

    Get bored of the commercial kitchen island product? Probably the utilitarian style could be an alternative. Instead of buying the combination table, you can always choose the pure stainless steel work table. It is suitable for the cooks who don’t do many cuttings and serve mostly hot pot menus. The table could be more edgy with a black surface on the top.

    Another advantage of having the stainless steel table is the light weight. It doesn’t take too much effort to move the table. If the wooden stainless steel table is cheap, this product is even cheaper! However, in the end you might have to spend similar amount, since the steel work table should be paired with suitable rug. Otherwise, it will leave scratches on the floor.

    The Utilitarian Style kitchen island design for small spaces

    3. The Butcher Block

    Some individuals master the cooking styles with lots of ingredients preparation. As the result, they need something sturdier to handle all the cutting that will come. Usually, the table is made for the cutting purpose. Otherwise, there will be lots of unwanted scratches on the surface. Make sure to check the information to the staff. If possible, ask for the butcher block with great coating.

    Form interior point of view, butcher block is more suitable to a kitchen with classic or rustic concept. The color of the product is not varied. They are only light and dark brown. It is quite difficult to find white butcher block table. When it is not used as the preparation table, you can put some snack jars or flowers on its top.

    The Butcher Block Kitchen island for small spaces
    Image: ana-white.com

    Read also: Know it Better: Kitchen Island Butcher Block

    4. Repurposed Furniture

    The idea of repurposed furniture is using the unused items as the kitchen island. The initial function of the furniture should be ignored. In short, there will be a new use of the furniture in the kitchen. Before choosing the products, it is important to consider the size. Make sure it will fit to the small space, give a lot of storage area and provide room for walking around.

    a. Sofa Table

    This is probably the kind of furniture that is made to fit in any small spaces. Sofa table is usually placed close to the wall or behind the sofa to put several photo frames and vases. Put the decorations on the coffee table, instead.

    The sofa table could be placed in the kitchen, next to the kitchen counter. The size of the table is great for serving dishes. The height is not too high or too low, so you can prepare the ingredients in ease.

    Sofa table kitchen island for small spaces
    Image: freshome.com

    b. Cabinet

    Not all cabinets sold in huge size, even though many houses prefer to have this kind. Several factories make the small sizes cabinet. It is commonly placed inside the dressing room. Next time you want to reorganize the clothes, probably one of the cabinet could be used as the kitchen island. The drawers could be a perfect place to line up the kitchen utensils.

    Tiny dining table kitchen island for small spaces
    Image: Freshome.com

    c. The Tiny Dining Table

    Remember the sofa table mentioned previously? Some of them have taller size than the others. However, it doesn’t mean that the table cannot be used in the kitchen. You just need to make several adjustment.

    For preparation, do it while standing. Since the surface is not wide enough, do one job at a time. While serving the dish, don’t forget to pull two bar chairs. Voila! You get a classy tiny dining table.

    Tiny dining table kitchen island for small spaces

    5. The Folded Table

    Another available option for limited space kitchen is the folded table. Some people are more familiar to the term “drop leaf kitchen island”. Both of them are referring to one product only. The name drop leaf comes from the joint installed on the table. When you need a wide space, simply pull up the sides and hook it.

    For dining purpose, take the hooks out. The table size will be smaller. Many people love this style, as they could change the size of the table as they pleased.

    The Folded Table Kitchen island for small spaces

    6. Floating Island

    Some kitchens are far too small compared to the others. They technically don’t have any more space to put anything. The only space is used to walk around. In this case, you can pick the floating island. It is installed to the wall. You need to pull it down every time the island is needed. Maybe, you can get ideas for this simple floating wall kitchen island.

    Simple wall floating kitchen island ideas
    Image: Freshome.com

    7. Storable Cabinet

    This is one creative way to have an island. Instead of having fixed cabinet under the kitchen island, you could make some space for storable cabinet. The idea is to pull out one cabinet and modify its surface. Instead of wood, put stainless or block butcher.

    Storable cabinet kitchen island for small spaces

    Before shouting out loud that you will skip the island in the kitchen, think again. Never use “limited space” as the reason. The ideas mentioned above is a proof that the island could be added using certain tricks. For those who still have time to change the design, do it!

    Originally posted 2020-11-07 06:05:20.

  • All the Reasons Why You Will Love White Bedroom Furniture Sets

    All the Reasons Why You Will Love White Bedroom Furniture Sets

    Be it contemporary, vintage, or classing, choosing the color of fresh snow in a bedroom will make the room simple and clean.

    Moreover, the color of white helps large pieces in the bedroom such as chests of drawers and beds to feel not obtrusive.

    Look at the following reasons to why you will love white bedroom furniture sets:

    Read also:

    THE REASON WHY USING WHITE BEDROOM FURNITURE SETS

    1. From the Headboard

    Let’s see the reason to why you’ll love white coat in your bedroom from a headboard. For this piece of furniture, you can choose a bespoke one that is buttoned in the shade of glacial white.

    Such headboard will seriously add glam feel to the pale space of your bed. Also, the headboard will create a real impact, making a style statement that is so strong it dominates the scheme.

    White Headboard Bedroom Furniture

    2. From a Bedside

    Moving on, let’s how white color does the job to your bedside. The color of white can steer the style around your bedside to be simple. This simplicity, when it comes to the furniture of bedside, is often considered the best, especially if your bed is dressed with some colorful bedding.

    Next to your bed, you can put drawers to give you space for your bedtime essentials. You may need to store and put reading glasses or book or to leave the surface for providing a space for your favorite decorative pieces or a lamp. To get the best harmony, try choosing decorative pieces whose colors are in the same tone with your pillow cushions or your bedding.

    Pink wall and white bedroom furniture sets

    3. From a Console

    Do you have a console in your bedroom? Great then! Not only is a white console a nice addition to your bedroom, it is also a useful piece in the room. To make the console have more function, you can add a mirror to it so that it can also function as your dressing table.

    However, if you feel like you want to keep the space of the console simple, you can try displaying some decorative pieces of your favorite. You can also occupy the space of the console as storage or a place to rest a tray or a book.

    A console can also function as a small desk. But a console is not meant to be a place of working for a full day. A console is more to be a place for doodling on a tablet or for writing a diary.

    To make the console along with the decorative pieces and the chair in a good harmony with the other colors in your bedroom, you can pick furniture and decorative items in the same tone with your pillow case, for instance.

    So, if you select dark blue for your cushion pillow and other decorative items on your drawers’ surface, try choosing lighter blue shade for the chairs for the console.

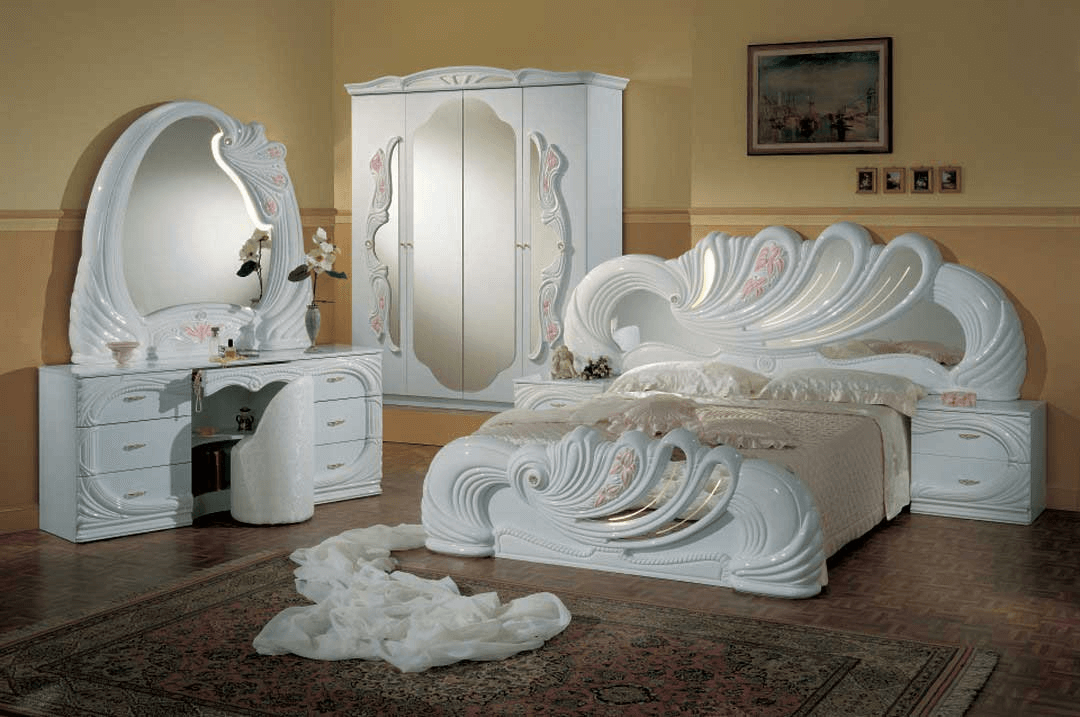
    Vanity white Italian Classic lacquer bedroom furniture sets

    4. From a Hanging Seat

    If your bedroom is spacious and you still have empty space to occupy, try to add a hanging seat. This hanging seat in your bedroom will be a superb addition. It will turn your sleeping area to be a room that is more multi-functional. Also, a hanging seat added to your bedroom can bring a playful touch to your room.

    To harmonize the color of the hanging seat with the other white furniture in your bedroom, you can choose a hanging seat in the same color with the color of your wall paint. You can also pick a hanging seat whose color suits the color of your bedding.

    White Egg Chairs or hanging seat for bedroom

    5. From a Four-Poster Bed

    If you like to go classic, you can consider purchasing four-poster bed instead of the common bed. This kind of bed will reinvent down those decades to reflect your taste of contemporariness. Choosing four-poster bed will also carry a design that looks simple but that is simple to suit your bedroom’s current scheme.

    Meanwhile, four-poster bed will also gently bring you to reference the past time. The crisp white of the four-poster bed will spark a glamorous look.

    However, the white color will not dominate the space. When using this kind of bed, you can infuse another color to your bed area. Pick soft pink or peach for your pillow cushions. That shade will mingle with the crisp white perfectly.

    Interesting Four-Poster Bed for Classic Bedroom Design and Decoration

    6. From a Concealed Bed

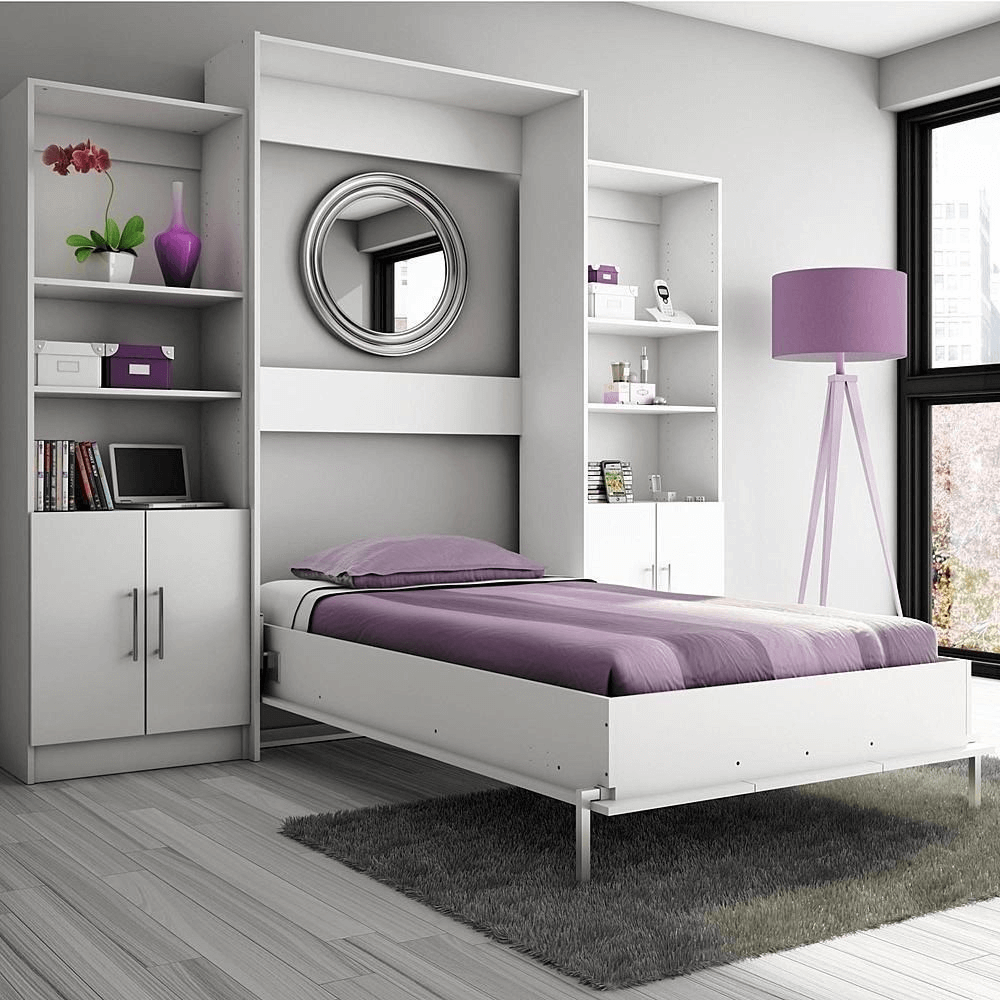
    Does your tiny bedroom not allow you to have four-poster bed or just like those commons bed with queen size? Well, that’s fine. You still have another choice of bed which is a concealed bed.

    A concealed bed, that usually needs pulling down from wall, suits best a bedroom that is tight and that requires the owner to multi task in the room. But, don’t worry! This kind of bed can still work great with all white furniture in your bedroom.

    If you are currently planning on build such bed, try to conceal it behind a door that is not only white but also simple. While trying to do so, make sure you also maintain the scheme color of pale and also help the concealed bed to really disappear when it is not being used.

    White Concealed Bed Furniture sets design and decor ideas

    7. From Bedside Drawers or Chest

    Last but not least, let’s see how white can play a great touch to your bedroom through bedside drawers or chest. Additional drawers or a chest or a small table can be a conventional option for your bedside furniture. But if you want to go with something different, you can use something different for the bedside furniture.

    You can occupy a ladder or a low stepstool to be your bedside furniture. This new addition next to your bed can be an additional storage for you to store your specs, books, or a water glass. Moreover, the use of a ladder of a low stepstool next to your bed can add a touch of welcome personality too.

    In choosing the ladder or the stepstool, choose the one with white color and whose design looks airy and light. This will prevent the space from looking cramped. At the same time, such design will also function as a great home of a couple of two-clip on sleeping lights.

    White can play a lot of roles for your bedroom furniture sets. Be it the headboard, the bed itself, the bedding, and all the furniture in the room. Every piece of furniture set that comes in white color can add their own special touch to your bedroom.

    White Bedside Drawers Bedroom Furniture sets

    Originally posted 2020-11-05 05:54:35.

  • Most Popular Rustic Bedroom Furniture Ideas

    Most Popular Rustic Bedroom Furniture Ideas

    Rustic can be one of top choices in interior design and home decoration. Nowadays, it seems that many homeowners are more attracted to barnyard, cottage, or country styled house.

    That is actually not a surprise, knowing that rustic design brings more relaxing feeling. It’ll surely benefit your if you have a rustic touch to your bedroom furniture.

    That being said, here are most popular ideas for rustic bedroom furniture. Check it out.

    Read also:

    MOST POPULAR RUSTIC BEDROOM FURNITURE IDEAS

    1. Barn Style Sliding Doors

    Planning the right furniture for your rustic bedroom is not merely about the bed, the bedside furniture, or any other furniture in the room. You can also infuse the touch of rustic from your bedroom’s door. Do not know where to start? Easy! Go with a sliding door with barn style.

    To give you some reference, you can check a barn-styled sliding door made by one of the top interior designers of Canada called Jennifer Worts. The design of the sliding door will not disappoint you. The door is made from a couple of plank woods that are finished in dark brown furnish.

    This sliding door with such design can be a great addition to your bedroom that has airy and clean space. To perfect the overall look of your bedroom’s interior design, add an upholstered bed frame and walls that are in crisp shiplap. The one element that can seal the deal is that barn-styled sliding door that can even be crafted from reclaimed wood.

    Rustic bedroom furniture set with Barn Style Sliding Doors
    Image: Decoist.com

    2. Reclaimed Wood for Rustic Bedroom Walls

    If you are not really sure how to infuse the rustic touch to your bedroom, you can simply go with the design of your bedroom’s wall. Pick one side of your bedroom’s wall to be designed with rustic decoration. All you need are simply reclaimed woods.

    This idea of making reclaimed wood wall comes from a modern lodge design of an architectural firm from Kansas City, Missouri called Kem Studio. The reclaimed wood bedroom all will give inviting and clean look to the overall look of your bedroom.

    Choosing reclaimed wood to be wall decoration can be a great choice for your master bedroom. The reclaimed wood on the wall can bring a rustic vibe that makes you feel more relaxed and calm when you are in your bedroom.

    To match the color of the reclaimed wood with other items in your bedroom, you can add some decorative items in the same colors with the wood. For instance, put two wood-color baskets on your open shelves in your bedroom.

    Reclaimed Wood for Rustic Bedroom Walls
    Image: digsdigs.com

    3. Brick for Another Trick

    For some homeowner, putting reclaimed woods on the bedroom wall can be the go-to solution to create rustic bedroom. Another option is to wooden the bedroom’s ceiling beams to infuse the rustic vibe to their bedroom. Good news is that you don’t need to do them all and you do have another option to have rustic atmosphere in your bedroom.

    Here is another trick to create rustic inspired space coming from New York City bedroom located in an apartment of Greenwich Village. The interior designers of this bedroom left behind all the reclaimed wood and plywood. Instead, they occupy natural timber and old brick walls to infuse the rustic touch to the 6-sqft bedroom.

    Although the bedroom is pretty small, it doesn’t mean that the room cannot play with rustic style well. The bricks that can be seen on almost all sides of the wall successfully give the small space a great rustic vibe. To even infuse more rustic touch, the designers hang some old style photo frames on the wall.

    To prevent the vibe from being too overwhelmed by rustic designs, the designers insert white colors through bed, bedding, pillow cushions, wall paint, curtain, console, and window paint.

    Reclaimed wood brick wall for rustic bedroom decor ideas

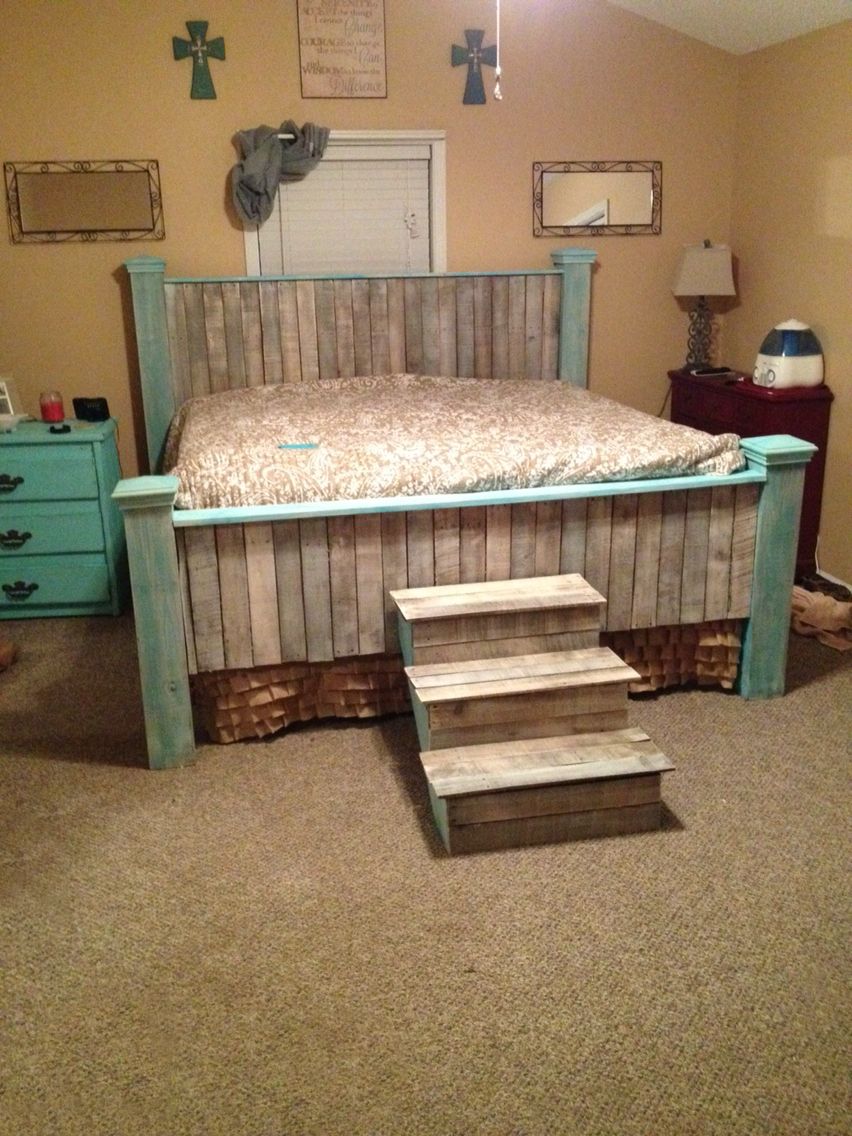
    4. Rustic Pallet Bed Frame

    You can surely purchase any rustic furniture from the stores. If not, you can always purchase plywood or reclaimed wood to be used in your bedroom’s interior design. But, that is just too common. You can use another idea of giving your bedroom more rustic touch.

    Here comes a great idea from Homepolish. The unique rustic furniture from Homepolish is a solution of homey storage that can serve you more than just one function. It is a handy shoe storage that is made of old wood pallets.

    Although you can simply buy one from the store, you can always make one by yourself. Go get yourself lots of wood pallets and create bed frame that comes with plenty of shoe storage. This new addition to your bedroom will infuse a rustic feeling to your bedroom and also will give you additional storage in the room.

    To match the color of the shoe storage to the rest of the furniture, build one side of your bedroom walls with bricks. Give reddish brown as the finishing of the bricks. Meanwhile, for the other sides of the bedroom walls, simply paint them white.

    Rustic Pallet Bed Frame for rustic bedroom furniture ideas

    5. A Campy Headboard

    There is another idea of creating rustic vibe in a bedroom that comes from a hotel bedroom designed by Locati Architects. This bedroom occupies a campy headboard as one of the main rustic furniture pieces. The headboard was painted orange with “LODGE” writing in white and bold font type.

    Meanwhile, for the wall of the bedroom, the designers opted orange colors to match the walls with the sign headboard. The orange color for the wall paint is a little bit darker than the one used for the headboard. Choosing orange paint for the walls is also meant to enhance the cozy appeal of the room. Still infusing orange color to the room, the designer also chose sofa with some touches of orange.

    To add more rustic touch, the designers installed raw wood instead of molding with conventional crown. In addition to that, there are also bear lampshade and old books place on the kitsch’s left bring.

    Infusing rustic vibe to your bedroom can come with plenty of ideas. It is not merely about reclaimed woods to decorate the wall. The decoration can occupy other elements that can create the vibe feeling we’ve always wanted like explained above.

    Rustic bunk bed for bedroom design ideas

    Originally posted 2020-11-03 13:56:15.