Tag: Furniture

  • What Type of Cabinets Door Knobs Do You Prefer?

    What Type of Cabinets Door Knobs Do You Prefer?

    For the sake of a good-looking kitchen, there are many people who are willing to focus on every detail of their kitchen.

    One of the small details that you cannot skip in maintaining your kitchen is the doorknobs of your kitchen cabinet.

    From so many types of knob that already existed, here are some lists that you may apply to your kitchen cabinet.

    See also: Most Popular kitchen cabinet door design.

    CABINET DOOR KNOBS TYPES

    1. Steel Knobs and Bin Pulls

    This kind of knob is well-known for its cleanliness and simplicity. You will see so many of them are paired with unadorned and simple cabinet hardware.

    Do not worry about your kitchen style because this type of door knob is so versatile. It will match either with modern or vintage kitchen style.

    This steel knob and bin pulls is often seen being finished with a vintage kitchen style. Normally, knobs are applied on doors and bin pulls are applied on drawers.

    Steel knobs and bin pulls will work well with inset cabinetry with industrial lighting style, stainless steel, and exposed hinges, honed and white marble black countertops.

    Red door knobs for kitchen cabinets

    2. Vintage Glass or Ceramic Knobs

    It will be nice to make some contrast look with the cabinet hardware by using a white glass knob. A vintage style glass sometimes is used as another classic choice for cabinet.

    Although pulls are friendlier for users in everyday use, it may become a great vintage touch if you put knobs on drawers.

    Usually this kind of knob is available with or without a face screw. It also has any variant colors; opaque, transparent and clear as well.

    Vintage glass or ceramic knobs will be suitable with stained wood cabinet, scullery or butler’s pantry cabinet, glass font hutch cabinet, subway tile, until white and black kitchen.

    Glass kitchen cabinet door knobs

    3. Turbular Bar Pulls

    If you have a traditional kitchen style with shaker cabinet, use stainless steel or nickel turbular bar pulls to give a modern touch to your kitchen.

    Turbular bar pulls work equally well on shaker door style, it is even often seen on flat panel or slab doors. This type of hardware can be shaped as short and classic or long and dramatic.

    It is also usually referred as barrel pulls and also offered by most of Hardware Company. Turbural bar pulls have any variants of size and finish which will make them a recommended choice if you need to add a modern touch to your kitchen cabinet.

    This kind of hardware will be matched with rectangular and oversize tiles, skinny and long mosaic tiles, espresso or ebony cabinet and also modern pendant lighting.

    Read also: Most Helpful Kitchen Cabinet Door Stopper.

    Choosing right and proper kitchen cabinet door knobs will not only make your interior look good, but also help you with your daily activities in your kitchen. With many variantions explained above, you can choose which type of knobs that will really suit with your kitchen cabinet. Make sure that the type of knobs you will choose can work well with the kitchen cabinet.

    Kitchen cabinet door knob and pulls picture gallery:

    Originally posted 2019-09-23 15:51:31.

  • Applying the Most Helpful Kitchen Cabinets Door Stopper

    Applying the Most Helpful Kitchen Cabinets Door Stopper

    Since the kitchen cabinets door has important roles, you need to take care of it as well as possible.

    Choosing the design and the type of the door sometimes does not really help the job of the door.

    To maximize its job, you will need to complete the door components, including the stopper.

    Look at some recommendations below:

    MOST HELPFUL KITCHEN CABINET DOOR STOPPER

    1. Satin Nickel Hinge Pin Door Stop

    This door stopper will fit with most of standard door hinges that are usually applied. Using an improved self-adjusting pad, this door stop will help you in preventing any damages to your cabinet doors.

    There will be no fasteners needed and no more holes on your cabinet doors if you want to apply this door stopper. Satin Nickel Hinge Pin Door Stopper is available in six variant of colors.

    Satin Nickel Hinge Pin Door Stop

    2. Satin Nickel Spring Door Stopper

    This next door stopper is really easy to be installed and it will directly give protection on your wall just in a minute. Designed with spring and rubber tip, this door stopper will make sure that your cabinet door is safe from any damages.

    To match it with your cabinet hardware, Satin Nickel Spring Door Stopper is also designed in multiple finishes. It is also available in six colors.

    Satin Nickel Spring Door Stopper

    3. Satin Nickel Solid Door Stopper

    Satin Nickel Solid Door Stopper is really helpful in keeping your door from any damages to wall whenever you open the door. Either your cabinet doors or any other parts of your cabinet will be safe from getting damaged since it has rubber bumper tip to protect the door stopper.

    Made of steel, this door stopper is easy to install and available in seven colors. You do not need any fasteners if you want to use this door stopper.

    Satin Nickel Solid Door Stopper

    4. Satin Nickel Light Duty Hinge Pin Door Stopper

    This pin door stopper is held in places with hinge pin. It will also make a full contact with the opening point of the door because of its self-adjusting pad. This pin door stopper will protect your door from any trims with its oversized mounted bumper that is placed on the adjusting screw.

    With an easy installation, this pin door stopper does not need any fasteners because it is made of zinc. There are three colors available for this pin door stopper.

    Satin Nickel Light Duty Hinge Pin Door Stopper

    5. Satin Nickel Entry Door Stopper

    Constructed and made of aluminum, this door stopper comes in finished brass. In a locked position, this door stopper will protect your cabinet doors by preventing any lock picking and lock bumping.

    It also has a safety child design and will fit with any size of cabinet doors. This entry door stopper is available in only two colors.

    Satin Nickel Entry Door Stopper

    Besides thinking about the look of your cabinets, you also need to think about its condition. You can start by choosing the most proper door stopper to your kitchen cabinet doors. Proper door stopper will keep your cabinet doors from any kinds of damage.

    Originally posted 2019-09-23 02:11:38.

  • Pick Your Most Popular Kitchen Cabinet Doors Design

    Pick Your Most Popular Kitchen Cabinet Doors Design

    As a part of a kitchen cabinet, a door takes an important role in maintaining either the look or the function of your cabinet.

    There are so many factors you need to consider in deciding the cabinet door type. One of the factors is its design.

    Look at these recommendations before you decide your type.

    Read also: Kitchen Cabinet Refinishing Cost.

    MOST POPULAR KITCHEN CABINET DOOR DESIGN

    1. Shaker

    As the most common door style that is used in the kitchen nowadays, shaker style has five-piece flat-panel. This style has a frame that is made of a single and four pieces flat center panels for the fifth piece.

    With a simple style which is applicable from contemporary to traditional design, shaker style offers you any variations in stains, species, wood, hardware and paint colors.

    This classic style also offers you variation budgets, depending on the wood used. With a more effective cost material, you will also able to replace the center door panel. Save your purchase by using a natural finished material rather than the painted one.

    2. Louvered

    Louvered applies horizontal slats, which is usually used for windows, interior doors and furniture pieces, but still offer architectural style for kitchen design.

    That is why you need to be aware with the price tag of this style. This type of style usually has many spaces between each slat that makes them look good for cabinet with ventilation.

    3. Flat

    Although it looks simple, flat style looks stylish with flat-panel cabinet door with a less expensive price. The minimalist form and hard lines make this style great for modern and contemporary interiors.

    There are many flat doors that come in decorative wood or laminate. Laminate offers you a more variety of sheens and colors with friendlier budget.

    4. Inset

    This style has a classic look that will last for generations, even though its price tends to be the most expensive one in the market.

    It is named inset door because it is applied inside the cabinet frame. The door is constructed and designed with highly appropriate measurements.

    So the door will nest inside the frame then open and close properly, even the wood contacts and expands. Inset style usually requires exposed hinges which are included in the cabinet box cost.

    5. Distressed

    If you plan to have an antique-style kitchen, then this distressed-looking cabinet will match for you. You can choose any door style and decide whether you are going to have rubbed off corners or have other techniques distressed for an old feeling.

    With that kind of choices, it is acceptable if this style will cost you a little bit expensive price tag. Sometimes, there are some charges for a trades person to do that kind of job.

    Read also: Kitchen Cabinet Refacing Before and After and the cost.

    Proper design and well-chosen style of door will complete the look of your kitchen cabinet. With each price and factors, you can freely choose which style and design you are going to apply in your kitchen cabinet. Make sure you choose the style which is match with your kitchen interior.

    Most Popular Kitchen Cabinet Doors Design

    Originally posted 2019-09-22 09:01:50.

  • Which Kitchen Cabinet Glaze Colors You Will Choose?

    Which Kitchen Cabinet Glaze Colors You Will Choose?

    There are so many ways to treat our kitchen. Some people like to have a very unique kitchen with detail design, while other people like to have a simple kitchen with simple design too.

    How about adding glaze colors to a kitchen cabinet? Basically, glaze colors will have no problem for any kind of kitchen design.

    So, here some glaze colors you can consider for your kitchen cabinet.

    Read also: How to Finish Unfinished Kitchen Cabinets.

    BEST IDEAS KITCHEN CABINET GLAZE COLORS

    1. Flow Pen Glaze

    Applying glaze to some detailed areas only, this method is included as a flow pen instrument. Since you do not have to apply glaze to sheet stock or re-facing the stock and moldings which does not have an area to rest the glaze, this method will provide you minimum costs for the finishing.

    If you apply your kitchen cabinet with rustic style, flow pen glaze cannot help you with a distressing or any natural type of defects on your rustic style. This method can only help you if the defects occur in crevices or lip area.

    2. Solvent Wiped Glaze

    For this method, you are going to need spray or rag gun and a brush to apply the glaze to the entire profiled and face areas of your cabinet. Wipe away the glaze using dry cotton cloth to let the glaze building foundation at an intense level.

    After that, wipe your kitchen cabinet again using a rag soaked and mineral spirits. If you have done this step, the original color of the glaze will obviously vary between the front and the back of your cabinet.

    Therefore, it will be necessary to add glaze colors to all accent components, sheet stock, moldings, and also re-facing stock.

    Paint kitchen cabinet glaze colors
    Image: homeanddecor.org

    3. Dry Wiped Glaze

    This method actually requires almost the same step and needs like the previous one. You need to use a brush and a spray or rag gun to add the glaze color to the entire surface and profiled areas of the cabinet. The glaze is going to be wiped with a dry cotton cloth, and then it will leave a build up intense level on the surface.

    The appearance of the original color at the front and the back side of the cabinet will be altered as you finish doing the step. It will also allow you to reface stock, glazing all sheet and accent components.

    4. Dusted Gaze

    You have two options in applying this method. The first one is to use a spray gun in applying glaze to the entire surface of your cabinet and to focus on the profiled areas. Wait for a short time before you wipe it using a dry cotton cloth. The second method is actually almost same. The difference is you can wipe the glaze with a solvent soaked rag.

    Those examples are only some of a lot of choices of glaze colors that you can apply. Basically, all glaze colors will match with any type of kitchen cabinet. The point is to do the steps correctly to prevent any revision.

    White kitchen cabinet glaze colors design traditional with flower decoration
    Image: houzz.com

    Kitchen cabinet design ideas gallery:

    Originally posted 2019-09-20 20:57:39.

  • Important Factors of Kitchen Cabinets Refinishing Cost

    Important Factors of Kitchen Cabinets Refinishing Cost

    Believe it or not, refinishing your old kitchen cabinets will less expensive compared with refinishing other parts of your house.

    In refinishing your old cabinets, you will be dealing with some activities like sanding the surface, removing the old paint or stain, and making minor repairs then finally adding the new stain or paint.

    Here are some factors you should consider before refinishing your old kitchen cabinets.

    Read also: How to Choose Kitchen Cabinet Toe Kick.

    SIMPLE TIPS ABOUT KITCHEN CABINETS REFINISHING COST

    1. Cost

    The first and the main factor is surely the cost. Refinishing your old kitchen cabinets will cost approximately $2,400. Most of homeowners usually spend between $1,800 and $2,800. Those numbers and costs come for some factors, and here are the factors.

    2. Number of Cabinets

    The biggest part that might decide the final cost is the number of cabinets you want to refinish. Of course, more cabinets will make the cost higher and higher.

    There will be higher cost when you have more cabinets to refinish. The cost does not only depend on the number, but also the size. Bigger cabinets will surely need more cost.

    3. Choice of Refinish

    The way you choose how you refinish your old cabinets will affect the final cost. Some people like to refinish wood cabinets while they are still in good shape.

    Some people like to refinish the cabinets in a whole new shade. Other people just want to refresh the kitchen cabinets with the exact same color.

    As we know, changing shades or colors will also cost more. One thing you should note is you will need higher grade of stain when your cabinets get a lot of sunlight.

    Kitchen cabinet refinishing before and after
    Image: starlilydesignstudio.com

    4. Cabinet Design

    Some homeowners like smooth-touched cabinet, while others like attractive trim, carving and detailing for an upscale look.

    Actually, it will be tougher and take much time when you refinish custom or non-smooth cabinets. More complicated design will automatically raise the price.

    5. Hire a Pro or DIY

    Some homeowners like to refinish their own bathroom or kitchen cabinets. It will need process, but it is not that complicated.

    If you brave and dare enough to try something new and have basic DIY skills, do not take much time. Just start to refinish your old kitchen cabinets.

    You might save up to $2,000 for doing all jobs by yourself, but still it all depends on the complicity of your refinishing.

    Otherwise, you can go find and hire professional workers to refinish your old kitchen cabinets if you want to make sure that everything will be under control. You do not have to worry about time issue or the quality job once you hire the right workers.

    As it is stated at the beginning, refinishing all parts of your house will surely need cost, including refinishing cabinets. Especially when you decide to hire professional workers, you will need to spend money not only for the refinishing but also for their services.

    However, a DIY refinishing will not also guarantee you to spend less money. It all depends on the complicity of the project.

    DIY kitchen cabinets refinishing
    Image: corvus-construction.com

    Originally posted 2019-09-19 17:38:32.

  • Which Kitchen Cabinet Trim Ideas Do You Choose?

    Which Kitchen Cabinet Trim Ideas Do You Choose?

    A kitchen cabinet will look perfectly complete when you really go to small details. One of the details is its trim.

    Some people are too busy in considering what color or style that they are going to apply to their cabinet. They forget another important part which is trim.

    Here are some ideas about kitchen cabinet trim.

    Read also: What is a 10 x 10 Kitchen Cabinets?

    HOW TO CHOOSE KITCHEN CABINET TRIM

    1. Crown Molding

    Crown molding is the most common type of trim that people usually use. Not only in the kitchen, people also like to use crown molding in other parts of their house.

    This molding is usually applied to cover the gap up to ceiling at the top of the cabinets. Crown molding will also bring a rustic furniture look to your kitchen. You can also add a piece of crown molding to each side for covering the entire perimeter

    2. Dentil Molding

    As you can see from its name, this kind of molding will look like teeth. It comes with a lot of square block repeated in many times and it is also applied as decorative trim. This dentil molding will make your exterior of cabinets looks different and unique.

    Plastic and wood are the best material if you plan to make dentil molding by yourself. For cabinet installation, wood tends to be the most used material. Use wood glue and nails to attach the dentil molding around the perimeter or onto the doors.

    Adding molding to kitchen cabinet trim ideas

    3. Rope Molding

    If you want to bring the nautical look in your kitchen cabinets, there is no other choice than rope molding. You can use real pieces of rope as the cabinets trim or you can also fine rope molding which is made of wood. This rope molding will look great when you add this to your kitchen cabinet doors.

    However, you can also use this molding around the perimeter of the kitchen cabinet. One thing you should know about this molding is that the rope molding is made of dowel cut in half.

    4. Flexible Molding

    Just its name, flexible molding is a molding that you can apply to any kind of cabinet. This molding will look better if you apply it on straight or rounded lines, especially on the doors of the cabinet. If you want a finished look, there are many sizes available which will fit with any type of cabinet.

    5. Side and Door Trim

    Side and door trim are actually simple pieces of wood which are applied to a side of an existed cabinets. Combined with finish nails, try to attach this trim on the side of the cabinets. Paint or stain the trim if you want it to look match with your cabinets.

    Trim is basically a small part of the kitchen cabinet that most of people forget. In fact, a proper and good execution of trim will give significant difference on the look of your kitchen cabinets. Hence, try to maximize and elaborate this small part to make your kitchen cabinet looks gorgeous.

    Kitchen cabinet molding and trim ideas

    Kitchen cabinet design ideas:

    Originally posted 2019-09-19 07:59:58.

  • Choose Your Kitchen Cabinet Toe Kick Ideas

    Choose Your Kitchen Cabinet Toe Kick Ideas

    As a part of cabinet, you just cannot ignore the toe kick of your cabinet.

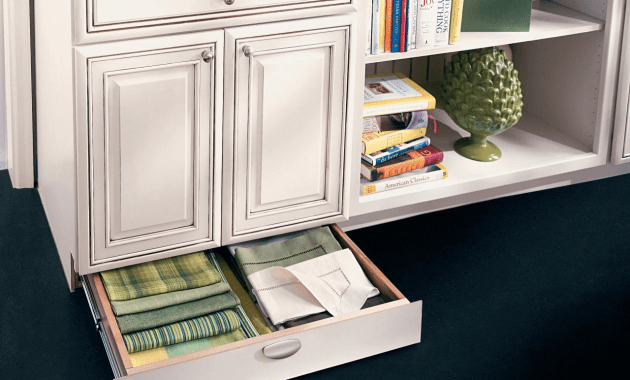
    Even it is placed down there and not really noticeable as the cabinet surface, the toe kick of your cabinet takes some important part in keeping your stuffs.

    When your cabinet is already full, you can move all things to the toe kick.

    Here are some toe kick designs that you can choose.

    Read also: How to Match Kitchen Cabinet Countertops and Flooring Combinations.

    BEST IDEAS TO CHOOSE KITCHEN CABINET TOE KICK

    1. Colorful Toe Kick

    To start the list, you can try to apply a colorful toe kick. Paint your cabinet toe kick with bright and shining color to cheer your kitchen. Yellow or blue can be the right color if you want to apply colorful toe kick.

    One thing you should note if you want to try this style is this style might only match with kitchen on dominant plain colors. It means that you cannot freely apply this style to all kitchens. It is better not to use this style if you already have specific theme about your kitchen.

    2. Black Toe Kick

    Going more specific about color, you can simply apply total black toe kick. Bring the dark island nuance with the strong black stripe at the bottom of your cabinet.

    Add more height to bring stronger nuance. More than bringing dark island nuance, the black stripe will also create nice proportion of a very tall room.

    3. Black and White Toe Kick

    Still discussing about color, this time you can bring the combination of black and white in your kitchen. It will be great when you wrap it up from the floor.

    So, it will be black and white checkered tile. Paint your color as well as your toe kick to create a chess atmosphere inside your kitchen.

    White kitchen cabinet toe kick ideas design

    4. Wood Toe Kick

    This kind of toe kick is probably can match with any kind of kitchen design, but it will be better if it is applied in a rustic theme kitchen. The wood itself will bring a warm touch to your kitchen.

    To add more prominence, you can increase the height of the wood toe kick, but you might lose some inches of your lower cabinet.

    5. Mirrored Toe Kick

    If you want to add some luxury touch, you can try to apply mirrored toe kick. This kind of toe kick will match well with any kind of kitchen design. A luxury look is guaranteed.

    6. Coffee Toe Kick

    For the last one, you can try to combine white and brown color, as it will look like a coffee shop. This style is more suitable to be applied when you use wood as your main material of the cabinet. This doesn’t only look warm, it looks stylish and young at the same time too.

    Brown kitchen cabinets toe kick

    Read also: Most Popular Kitchen Cabinet Door Design.

    Some people usually do not give enough attention to their cabinet toe kick as they can put all things inside the cabinet. Once the cabinet is full, toe kick can be very useful in keeping some small kitchen staffs. Therefore, it is not too late to design your toe kick as good as possible.

    Other kitchen cabinet design ideas:

    Originally posted 2019-09-19 02:47:31.

  • Designing Your Kitchen Cabinet Liner Ideas

    Designing Your Kitchen Cabinet Liner Ideas

    For the sake of look, people usually like to apply liner to their kitchen cabinet. Applying kitchen cabinet liner also prevents you from spending much money for designing expensive cabinet stuffs.

    More than that, cabinet liner is also safer since it also prevents you from direct contact with your cabinet material.

    If you are about to use cabinet liner, here are some choices of kitchen cabinet liner you should consider.

    MOST POPULAR KITCHEN CABINET LINER DESIGN IDEAS

    1. Laminate Squares

    Local dollar stores usually provide an economical liner which is durable for your kitchen cabinets. It is also supported by adhesive-backed to stick the liner to your cabinet. The good thing is this liner can also be applied to floor.

    The material of laminate squares are very easy to cut with cutter or scissor and it requires simple application. This liner also easily cleans with wet rag whenever you need it.

    It will be very easy to match with your kitchen décor since this liner comes in so many choices of color. The best part is even though this liner can be removed easily, it will last for years.

    2. Plastic Canvas

    When the first time you hear that plastic canvas can be used for liner, you will find it hard to believe it. The fact is some people already use it as their kitchen cabinet liner and everything is going well. Plastic canvas will give you all convenient that you might not predict before.

    The first one is you will find yourself convenient in measuring and cutting this plastic canvas. It is really simple to execute it.

    Plastic canvas is also available in several colors, which will look good for your kitchen cabinets. It will keep everything off when all crumbs fall through spaces.

    The second one is plastic canvas and it is really easy to wash. Even though it will last forever, it does not cost too much since plastic canvas is cheap. It is available at any craft store and you can buy it for packs or one sheet only.

    Kitchen cabinet gallery

    3. Linoleum

    Another material that is easy to clean up is linoleum. Lining your sink base cabinet with linoleum will give you advantage in cleaning it.

    You will no longer have to deal with any complicated installation since it can be removed and cleaned up easily. Some people even prefer to apply linoleum inside their cabinets instead of shelf paper because of its simplicity.

    4. Non Adhesive-Backed

    For some cases, people also prefer to apply non adhesive-backed liner, especially when you use your cabinet for keeping medicine. Your cabinet needs to keep sterile, so non adhesive-backed liner is more recommended.

    This kind of liner will also match well with wooden cabinet. You can freely remove and clean the liner whenever it needs to be cleaned up.

    Read also: How to Remove Mold from Kitchen Cabinet.

    Using a cabinet liner is not only about making it looks good, but also about its cleanness. Liner will also keep all things inside the cabinet from dust. Start applying liner to make your cabinet cleaner.

    Kitchen cabinet liners ideas

    Originally posted 2019-09-18 04:34:32.

  • DIY Kitchen Cabinets Drawers Replacement

    DIY Kitchen Cabinets Drawers Replacement

    Kitchen cabinets and its drawers need to be in good condition all the time since we use it to keep all kitchen equipment.

    When there is something wrong happen to your cabinet drawers, it is time for you to replace it.

    For those who still have no idea about how to do it, you may follow the instructions below.

    Read also: Kitchen Cabinets Refacing Before and After.

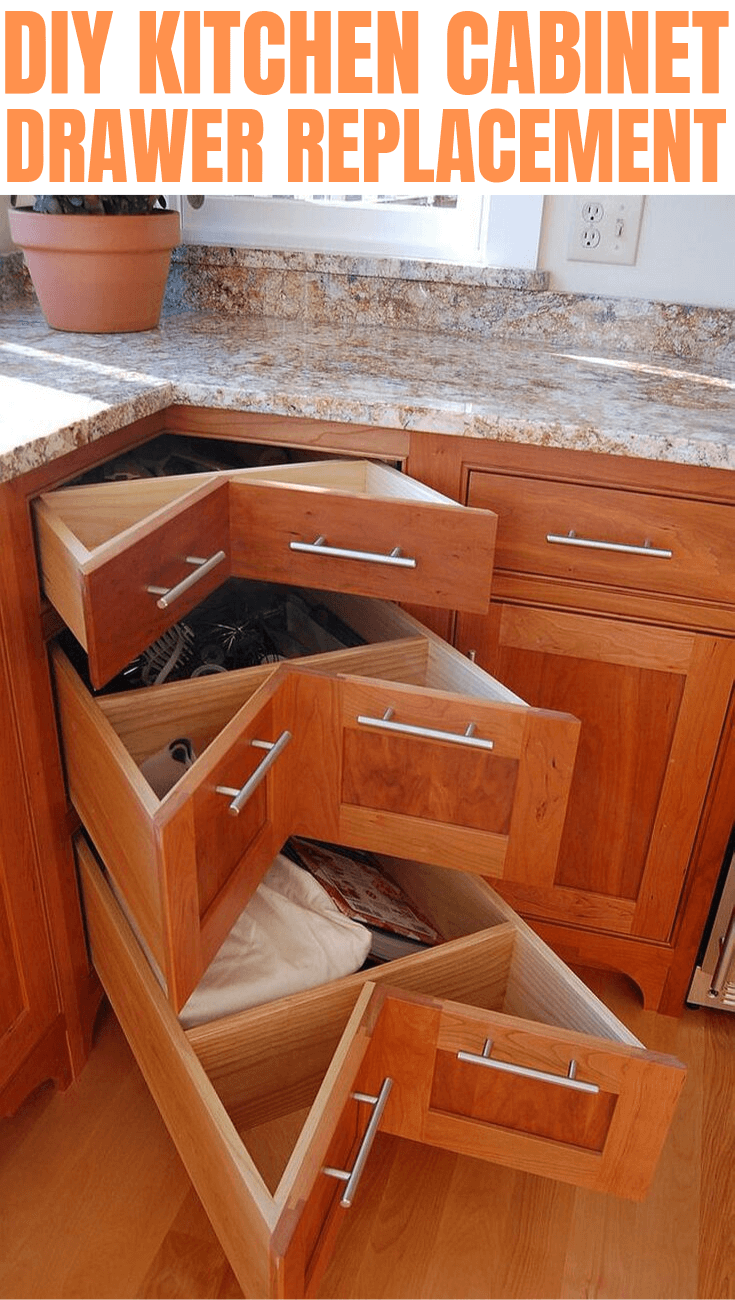
    DIY KITCHEN CABINET DRAWER REPLACEMENT
    Image: Decoist.com

    1. Remove All Things Inside Drawers

    First of all, surely you need to remove all contents inside your drawers. Pull it out until the maximum limit. Lift the front drawer then pull it free out of the cabinets. Put the drawer on the countertop above the opened drawer.

    2. Remove the Drawer Slides

    After removing all things inside the drawer, now you have to remove the drawer slides. Unscrew the mounting screw on each slide of the drawer.

    With the same manner, remove each glide from the inside of the cabinet. You also need to remove all old drawer slide hardware from the cabinet.

    3. Separate Left and Right Drawer Slides

    The next step is you need to separate your both slides of drawer then put each half on the surface by following the proper drawer sides.

    Using your pencil, make a mark on both rear edges and front side of the drawer halfway up in one side. Use a straight-edge to guide you in drawing a line between the two marks. Do the same steps and process on the opposite side of the drawer.

    4. Drill the Drawer

    After separating the left and right slides, it is time to center the left drawer. To make it accurate, use the reference line as a guide.

    Using a pencil, mark places where you mean to be the locations for the holes to support the mounting screws. Drill the drawer with a proper sized diameter to make a hole for each screw.

    Supply wood screw onto the left-side drawer side using drill with a screw bit. Do the same process to the right-side drawer slide.

    5. Make It Center

    Make a mark on the center point by measuring the height of left-side opened drawer with a tape measure. Center on the mark and place the left cabinet slide into the cabinet. Remove the slide level and mark the holes locations using pencil.

    6. Mount the Cabinet Slide

    The next step is mounting the left cabinet slide with mounting screws. Do the same mounting to the right-side drawer slide.

    7. Lower the Drawer

    Place the drawer right in front of opened angle, so the rollers on the rear drawer slides can slip cleanly into cabinet slides. Put the front drawer into lower position and mitigate the drawer into cabinet slides.

    8. Put All Back in Position

    Try to open and close the drawer to test the sliding. It should open and close easily. Prevent it from being pulled out of the cabinet too.

    Read also: Kitchen Cabinets Long Island for Wonderful Display.

    Replacing cabinets drawers needs to be done sometime, especially when the old drawers are broken or do not work well. You can easily practice the steps above without spending any cost and surely it takes less energy and time.

    Kitchen cabinet drawer design ideas:

    Originally posted 2019-09-17 10:09:20.