Category: Home tips

  • Creative and Simple Tips How to Decorate Bookshelves without Fuss

    Creative and Simple Tips How to Decorate Bookshelves without Fuss

    You really love your book collections and yet you start thinking that your bookshelves look boring and unappealing.

    You probably don’t know this but there are ways for homeowners like you to decorate your book collections and add life to the bookshelves appearance.

    But where should you start? What kind of decoration work should you do for the bookshelves?

    HOW TO DECORATE BOOKSHELVES WITHOUT FUSS

    1. Some of the Drastic Changes

    If you are ready for some transformations and changes, there are some things to do with the bookshelves.

    • Changing the old-school bookshelves with the open and steel hardware will create a modern and contemporary look without you having to spend a fortune.
    • If your bookshelves have turned dull and boring, consider repainting it again. Use a refreshing color with contrast effect. For instance, you can paint the shelves in white, but choose a bright orange for the inside area. In this way, you create a visual appealing element in your bookshelves and you can refresh the overall appearance.
    • Classic arrangement – like the one found in libraries – is always appealing. But if you don’t want the shelves to be all books, you can include some of your favorite items as the accessories placed by  the end of the lines.
    Modern white bookshelves with glass
    Image: houzz.com

    Creating blocks and surfaces can also make your bookshelves look different. Some people may arrange the books by order and then placed an accessory by the end of the book arrangement – like a book stopper. But, you can also consider changing the display of the shelves.

    You can create a barrier between the area for the books and the area for the accessories. By doing this, you can create a visually appealing element without completely changing the function of the bookshelves.

    You can also try another different approach by using the bookshelves as a place to accommodate the books and also for a display shelves. Arrange the books on the top areas while the bottom areas are for displays where you can put your accessories, knicks and knacks, and even storage boxes and containers.

    Read also: How to Decorate Small Living Room?

    2. Other Alternatives

    Of course, there are still tons of different approaches that you can do to improve the look and stylish aspect of the bookshelves.

    • Color smart. You know how colorful your books can be? Well, if you want to try something different, why not putting the different colors of books into different areas? Color coding can be fun too, you know?
    • Small accessories. So, how do you differentiate your book collections from your kids’? You can add a simple accessory that represents you. For the kids’ book collections, add a doll or a cute accessory by the end of the books to create a statement – a stuffed giraffe or a monkey will do. For you, you can simply add a favorite black and white photo or a unique candle.

    Don’t forget about symmetry and shape. You can always arrange the book in horizontal or vertical – consider combining both – so your bookshelves won’t be too boring. If you want to add the accessories in your bookshelves, consider the matching symmetry within the similar shape so the final outcome won’t be odd.

    Unique bookshelves for small rooms
    Image: creativebedroomvanity.com

    Originally posted 2021-06-23 05:37:00.

  • How to Clean Instant Pot the Thorough Way

    How to Clean Instant Pot the Thorough Way

    Instant pot can bring a lot of use for everyone especially during the holiday.

    However, after using a lot of time, it is time for your pot to get a little cleaning touch.

    Here, you will find out how to keep it clean for everyday use. You will also learn how to deep clean it too. Check out here.

    Read also: How to Clean Oven Quickly and Easily?

    HOW TO CLEAN INSTANT POT THE THOROUGH WAY

    A. How to Clean Instant Pot Every Day

    The following steps are the way to clean the instant pot after you use it every time.

    1. Wash the Inner Pot First

    This is the first part of the pot that you need to clean. Simply remove the inner pot from the hardware and toss it into your sink. If it has burnt food on the bottom, make sure to soak it in water first. It helps in removing the sticking.

    When it is ready, wash the pot as usual. Use the dishwashing liquid to clean the entire surface of the inner pot, both inside and outside part. Then, rinse with water to clean the detergent. Put it on the rack to dry.

    2. Wipe the Inner Pot Clean

    When it is dry, take a clean cloth and wipe the inner pot. Make sure to use soft cloth so you don’t scratch the inner pot surface. Scratched surface of the pot can be dangerous for your health if you use it for cooking. Wipe the inside and outside of the inner pot before storing or setting it up again.

    3. Wash the Sealing Ring

    In addition to the function, the sealing ring tends to absorb your food color and odor through time. The only way to preventing from happen, you need to remove and wash it as well. It can be a little tricky to remove the sealing ring, but it is possible. Simply use your finger to take it out.

    Then, wash the silicon ring as usual. Use the liquid dishwashing soap, and wash it. Rub a little so it shows back its original color, which is a little transparent. Put it on the rack to dry and make sure not to lose it because it is pretty small.

    4. Wipe the Inside Lid Too

    The inner pot has a lid attach to your instant pot cover.  You can remove it and wash it as you wash the inner pot. Do the same procedure and make sure you get to remove the entire food remaining on it.

    It can be surprising for you, but the lid can be the part that gets the dirtiest. It is also recommended to soak it in water first if the remaining food stick and it is too dry.

    Related article: How to Clean a Burnt Pressure Cooker Pot Without Scrubbing?

    B. How to Clean Instant Pot Deeply

    If you like cooking and you use your instant pot pretty frequently, it is suggested to deep clean it every month at least. It prevents the pot from clogging. It also prevents smelling and stubborn food residue as well.

    1. Don’t Forget to Unplug First

    It is extremely important to do. You need to make sure your instant pot has been unplugged before. If you just used it for cooking, it is also important to let it cool for awhile. The inner pot is hot when you are just done cooking. You can harm your skin if you insist cleaning it right away. Unplug the entire cable so it doesn’t have a tail anymore when you wash it.

    In some cases, there are instant pots that are completed with permanent cable for power. You can’t remove it without ruining it. In this case, don’t unplug the tip that sticks to the pan. Just unplug the one that gets into the socket.

    2. Start with the Housing

    When cleaning the housing unit, we don’t need the dishwashing liquid or other products. We only need a clean cloth and some clean water to keep the cloth damp. When you are ready, wipe the entire unit slowly. If you get sticky residue somewhere on the unit, wipe and wipe again. The moisture will helps solving the sticking.

    It is important to keep the cloth damp, not wet. Several part of the house is connected to electrical panel, which can be ruined by water. Reach tricky corner and nook to make sure all surface is clean.

    You also need to clean the bottom part. This time, use a brush. A brush allows you to reach sneaky nooks and corners. If you get sticky food residue on it, use the damp cloth to help.

    3. Let’s Wash the Inner Pot Lid

    The inner pot lid is often the first part to get the dirtiest, as mentioned before. Therefore, it is important to wash it. It prevents sticky food residue from sticking there permanently, and bed smell when you cook

    Simply wash the lid with warm soap water and sponge. Wipe with sponge when washing and you are basically done. Leave it on the rack to dry.

    4. Clean the Smaller Parts

    You commonly have extra of small parts when you buy the instant pot. It includes the quick and release handle, the shield, and condensation collection cup on the side. They tend to get the food residue and create bad smell.

    Remove them from the place and wash them with warm soap water and rinse clean. If you still have the extras, replace these with the extras.

    5. Wash the Silicon Ring

    This silicon ring is a part of the sealing. It often gets the food residue and odor as well. In this case, remove the silicon ring from its position and wash it in regular way. IF you get stubborn residue, try steam cleaning. This method should help in removing possible odors remained as well. If there is crack, replace with a new one you can buy online or at local store.

    6. Don’t Forget the Inner Pot and Its Accessories

    Gather your inner pot as well as the entire accessories you often use for cooking. Then wash them as usual. Most products make inner pots and accessories that are safe for dishwasher, but manual washing is easy too. Rinse and let it dry.

    For extra touch, wiping them with clean cloth and vinegar will remove remaining detergent and it keeps them shine.

    7. Assemble!

    Finally, you are done washing your instant pot. Now, assemble the entire part as it is originally. Make sure to wipe it clean and dry first.

    How to Clean Instant Pot the Thorough Way

    Originally posted 2021-06-12 04:06:00.

  • Know How To Decorate Birthday Party Room with Balloons

    Know How To Decorate Birthday Party Room with Balloons

    Who hates balloons? People love it, especially in a special occasion like birthday party.

    Many balloons are sold in the store. You can also choose to put regular air or helium gas into the balloons.

    Either method creates different pleasure and vibe. For an excellent birthday party, you need to upgrade your balloon skills.

    HOW TO DECORATE BIRTHDAY PARTY ROOM WITH BALLOONS

    1. Confetti Balloon

    This one is the simplest trick you could apply. Cut the colorful or glittery paper towel into similar shape. Be creative with the shape: butterfly, stars, wavy.

    Put it into transparent balloon and make it float. The papers will spread at the bottom part. Put it near the light source to create abstract shadows.

    You can also introduce the unique power of static electricity. Rub gently the balloon with plastic, and you will see the paper slowly moves to the friction direction.

    Confetti balloon kit for decorate a birthday party room
    Image: bubblegumballoons.co.uk

    2. Hot Air Balloon

    For this trick, you need additional craft to be attached to the balloon. Prepare some balloons of any color you like. Put helium gas inside so you can let it float to the ceiling.

    The craft template could be downloaded from the internet for free. It consists of the basket and sturdy sticks.

    Make sure you pick the light materials to built the miniature basket. If the basket is too heavy, the balloon will touch the ground. Glue some strings diagonally and tie the hanging string to the basket stick.

    Read also: HOW TO DECORATE LIVING ROOM FOR BIRTHDAY PARTY ON BUDGET?

    BIRTHDAY PARTY DECORATION WITH BALLOONS

    3. Daisy Balloons

    Who says balloon could not be as pretty as flowers? You will need five white balloons and to yellow balloons for the daisy.

    Blow the entire balloon with hand pump. Tie two white balloons, two yellow and three white balloons. Place the two and three tied white balloons together, putting the knot against each other.

    Twist the balloons to secure the position. Repeat the process with the yellow one. The final product should have the yellow balloons on the front and back side, facing the person. The white balloons are pointing wind direction.

    Daisy balloons, flower
    Image: balloonanimalspalmbeach.com

    4. Doughnut Shape

    These will look as delicious as the real one. Purchase a doughnut shape balloons at the store. They usually come in white color. It would be great if you could find the light brown one.

    Blow these flat items with helium gas. Pick some pastel paint and pour two spoons of it on a bowl. Dip a soft brush to the bowl and grease the balloon surface with the paint.

    Apply it only to the front and back. Leave the sides and inner circle white. Put some rectangle crepe papers on the balloons.

    Read also: HOW TO DECORATE WALL FOR BIRTHDAY PARTY?

    5. Dreamland Lollipop

    Have you seen the movie about fantasy chocolate factory? You are about to make one of the lollipop shown in the film. Pick vivid colored balloons.

    These lollipop does not require helium gas, hand pump is enough. Take a sturdy straw (approximately 60 cm) and attach wash tape to create spiral illusion. Tie the balloon to the straw. Cover the balloon with transparent plastic.

    Finish the decoration with a ribbon on the bottom. This decoration fits for outdoor decoration. For extra surprise, hide candies inside the balloon.

    Balloons are the core item for birthday decoration. With this single item, people will know that certain celebration is hold. From one item only, you can create a lot of pretty decorations. Apply the tips above at your birthday party.  Next time, you can upgrade the decoration into something incredible.

    Birthday party balloon decoration ideas
    Image: birthdayplanner.co.in

    Originally posted 2021-05-08 01:00:00.

  • 3 Tips on How to Get Rid of Mold on Clothes in Closet

    3 Tips on How to Get Rid of Mold on Clothes in Closet

    Cloth is the best place for mold growth. When mold stays on your clothes, it can cause some problems for you, such as an unpleasant smell from your clothes, rot your clothes, and even make you itch.

    Don’t worry, here are several easy ways you can follow to prevent and remove mold which is growing on your clothes.

    Read also: How to get rid of smell in fridge?

    HOW TO GET RID OF MOLD ON CLOTHES IN CLOSET

    1. Vinegar

    Vinegar is easy to find and it is also effective for removing mold on your clothes. You only need to pour ¾ cup of white vinegar to the washing clothes water.

    The vinegar will remove the mold effectively. You can repeat this process several times until the mold is totally gone. After that, use detergent to rinse your clothes.

    Remove mold with vinegar

    2. Old fashion cleaning

    There are several steps to remove mold using the old fashion cleaning. Check this out.

    • Brush off loose mold growth

    This way is also simple, you only need to prepare a brush, and then choose your clothes which are infected with mold. After that, brush off the all mold growth on your clothes. Do this process several times to make sure that the mold is already gone.

    It is also effective for preventing mold spores which can spread inside your home. Remember, you have to use a mask and gloves when doing this process to keep your body safe from mold contamination.

    • Set out in the sun to dry

    Direct sunlight is very useful and effective for removing mold on your clothes. It can help you to kill the mold and mold spore, so they will not infect your clothes anymore. You’d better hang your clothes outside after brushing process to get the best result.

    • Presoak in cold water

    It is better to soak your clothes in cold water before you wash them in hot water and use detergent. This process can help you to kill the mold and mold spore.

    • Launder, rinse, and dry

    The last step in this process is launder, rinse, and dry. This is the traditional way of washing clothes. You only need to put detergent and rinse for several times, then you have to dry those clothes outside to get the direct sunlight.

    White mold on clothes in closet

    3. Use of ‘Mildicides’

    Mildicide is a product which is used for dealing with the contamination of mold or mildew. Remember, you need to read the label first if you decide to use Mildicide to remove the mold on your clothes because it is a chemical and maybe harmful for your body.

    The first thing you do is choose the clothes which are infected with mold and making sure that nobody is inside the room.

    Then, spray that product on your clothes and leave them for 10 minutes. After that, dry the infected area with a fan or just hanging them outside. Then, wash your clothes as usual.

    Those are the tips that you need to consider when you have to remove mold on your clothes. Let’s try those tips to keep your clothes stay beautiful!.

    How to remove mold on clothes in closet

    Originally posted 2021-04-19 03:16:00.

  • Tips on How to Remove Mold and Mildew from Carpet

    Tips on How to Remove Mold and Mildew from Carpet

    Many people are asking about how to remove mold and mildew from carpet?.

    It is very annoying because they can cause wheezing in asthma sufferers, produce unpleasant odor, and harm your carpet.

    To prevent those effects, you’d better check your carpet regularly. If mold and mildew have reached your carpet, you have to follow these tips to keep your carpet comfortable.

    Read also: How to Get Slime Out of Carpet

    How to Remove Mold and Mildew from Carpet Step by Step

    1. Inspect the carpet

    You have to inspect your carpet regularly to prevent mold and mildew infect your carpet. If the mold and mildew have reached the base of your favorite carpet, you have to do some actions to remove those molds and mildew.

    You may hire the professional carpet cleaner or clean by yourself. If the mold and mildew already infected almost the whole of your carpet, you need to buy the new one.

    2. Ventilate the room

    Good ventilation is really important to keep your room stay healthy and to reduce humidity inside your room. If your room is a bit moist, it can invite mold and mildew to infect your carpet.

    To prevent that case, you have to open all windows and doors in the room where you keep your moldy carpet. If you decide to use chemical cleaning products, good ventilation will help you reduce the irritation of your eyes and even lungs.

    Read also: How to remove stubborn carpet stains with homemade cleaners?

    3. Sun the carpet

    To keep your carpet free from mold and mildew, you need to hang your carpet outside to get the direct sunlight.

    Hanging your carpet outside for 1-2 days can help to kill the mold and mildew spores and it can remove the moist as well.

    If your carpet has been infected by the mold and mildew, you need to hang your carpet longer and it may take several days.

    4. Remove moisture with baking soda

    Carpet cleaning with baking soda

    Baking soda is also helpful for removing mold and mildew because it can reduce the unpleasant odor and absorb the moist.

    You need to spread the baking soda in the affected area, leave that carpet for a night, and vacuum it. Besides baking soda, you may use baby powder also for removing the mold and mildew.

    5. Scrub with white vinegar

    Vinegar can be used for removing several types of molds and mildews. This step is cheap and effective for you who are very busy. You only put vinegar in a bottle, then spread it in the infected area.

    Next, you need to blow dry the carpet or hang that carpet to get the direct sunlight.

    Carpet cleaning with vinegar and water

    6. Use an anti-mold treatment

    You can get anti-mold sprays in drugstores and supermarkets. Remember that you need to check the label provided for the instructions. Ensure that the substances are safe for your carpet. Don’t choose the product that can discolor or damage your carpet.

    Those are the tips that you need to consider when you have to remove mold and mildew on your carpet. Let’s try those tips to keep your carpet comfortable and stay longer!

    Flor carpet tiles design ideas for kids room with large size window
    Clean carpet for make good health and perfect decoration for your room. Image by: artdecorationsdesign.com

    Originally posted 2021-04-12 10:07:00.
  • 6 Tips on How to Remove Mold from Hardwood Floors

    6 Tips on How to Remove Mold from Hardwood Floors

    Mold on hardwood floors are annoying. It’s caused by moist and even food that you eat.

    This mold can spread on the below surface and causes the worse the effect.

    To prevent the problem, you need to remove those molds. Here are the tips:

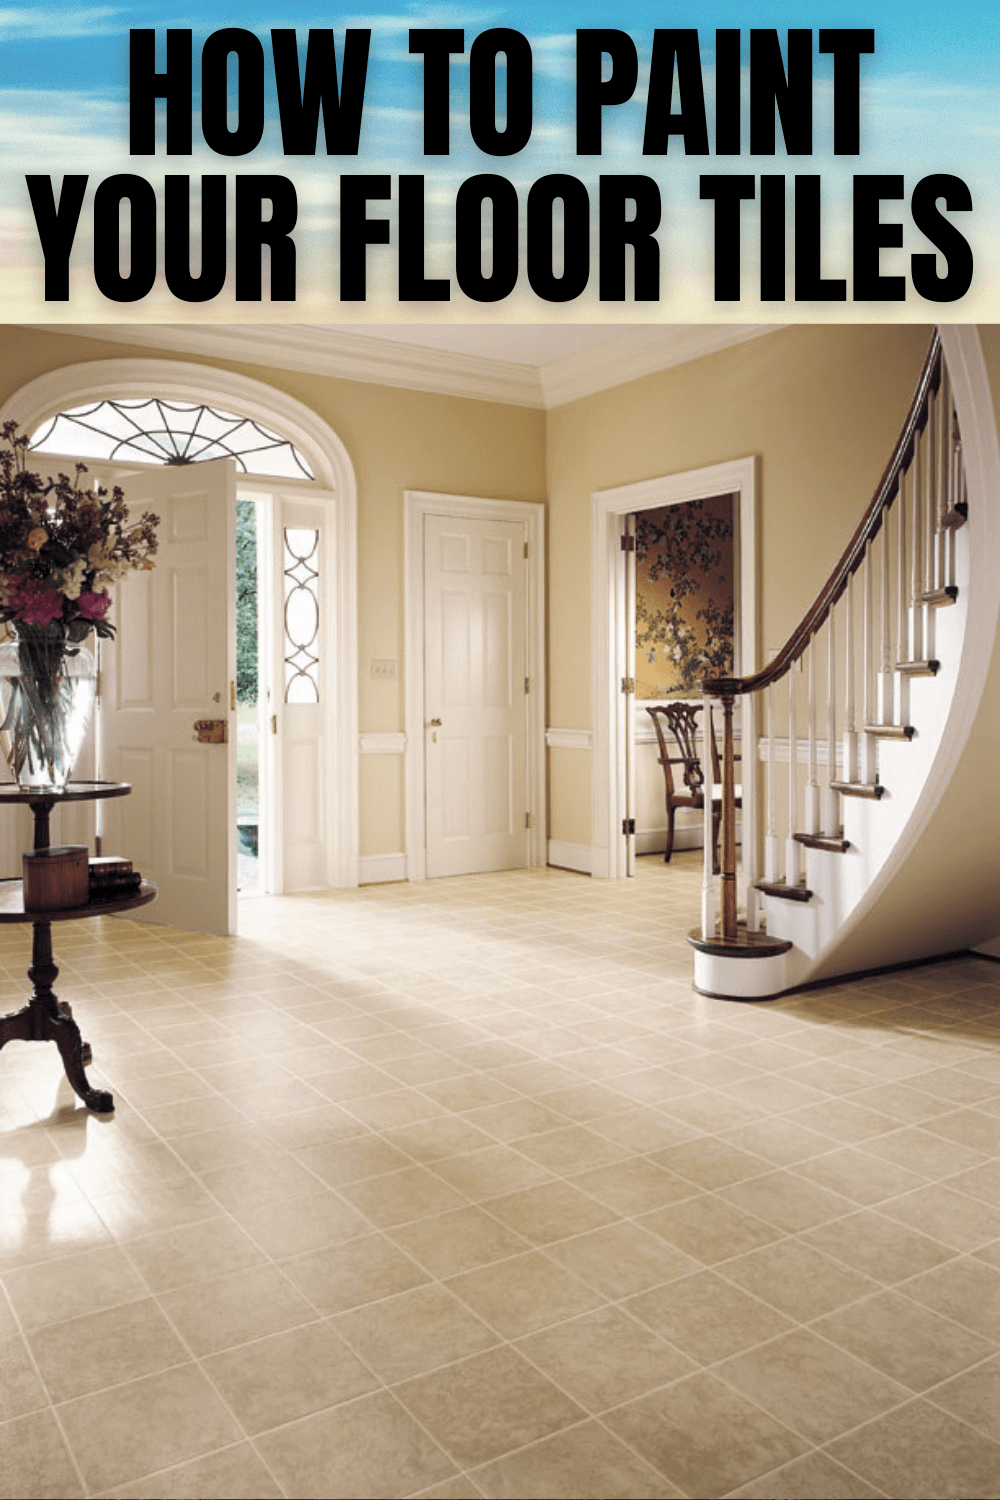
    Read also: Want to Get Rid of Your Ugly Floor Tiles? Paint It!

    1. Find mold on floors

    There are several ways to know whether your hardwood floors are infected with mold or not.

    The first thing you need to do is pay attention on the symptoms you may have, for example, you have a headache, breathing problem, or itchy eyes. Those kinds of symptoms are maybe affected by molds on your hardwood floors.

    Second, do you smell any unpleasant outdoor on your room? That smell, maybe comes from the molds on your floor. Check your floor carefully then.

    The last is warping of your hardwood floor. If you find a sign of warping on your hardwood, your mold problem is pretty serious. You need to start working on it soon.

    HOW TO REMOVE MOLD FROM HARDWOOD FLOORS STEP BY STEP

    2. Dispose of ingrained mold

    You need a special tool which can be used for cleaning some ingrained molds. It is more difficult than removing surface mold and you need to ensure that you take the necessary precautions when doing this.

    Read also: How to remove mold and mildew from carpet?

    3. Pressing with screwdriver

    Besides using screwdriver, you may use sharpened tool for pressing the hardwood floor. There are several things that you need to pay attention when doing this step.

    First, if the spots are soft you can remove the molds, but if the spots are quite hard you need to try another way.

    Second, if the woods are spongy or if they crumble, this wood maybe rotten and you cannot safe your wood.

    The last, you need to call a professional if you find any ingrained molds that cannot be repaired. You need an expert to fix this problem.

    Removing mold from hardwood floors

    4. Dry out the floors using heaters or fans

    You need to dry out your room for several hours to prevent the molds getting worse because ingrained molds need to be dried before you fix it.

    Besides, you need to keep your room well-ventilated so that you will not inhale any mold particles which are harmful for your body.

    Related: How to remove mold from kitchen cabinets?

    5. Remove the top layers of the mold

    You can use appropriate grit of sandpaper so you do not damage any other side of woods. You need 100 grits of sandpaper to remove molds on normal amount.

    However, if your woods are infected by the large size of molds, you need to use 220 grits of sandpaper.

    6. Finish the wood

    Find a wood finish that will cover your hardwood floors. Hopefully, it can make your wood floors back to normal.

    Remember that you need to apply a wood finish which matches the original finish. You may also add some protections like polyurethane to against moisture in the future.

    Those are the tips that you need to consider when you have to remove mold from hardwood floors. Let’s try those tips to keep your woods stay longer!

    Dark hardwood floors in bedroom
    Dark hardwood floors in bedroom, image: homedit.com

    Originally posted 2021-04-10 07:41:00.

  • How to remove mold from vinyl siding in a right way

    How to remove mold from vinyl siding in a right way

    The invisible and unnoticed growth of mold on a vinyl siding can be caused by many possibilities.

    Malfunctioning gutters, running water problems, and malfunctioning or misplaced sprinklers are three of many more examples.

    After dealing with those three causes, here we offer some steps to make your vinyl siding clean again.

    Read also: How to Remove Stubborn Carpet Stains with Homemade Cleaners

    HOW TO REMOVE MOLD FROM VINYL SIDING IN A RIGHT WAY

    1. Electricity Awareness

    If there are electricity devices near the vinyl siding, make sure you turn it off and cover them with plastic sheeting, and secure the sheeting to the wall with duct tape to prevent electrocution and electrical malfunction.

    This is why the process of cleaning is recommended to be done during the daylight.

    2. Receipt of the Formula

    You can choose the cleaning formula by yourself, but we highly recommend mixing of three parts distilled white vinegar with seven parts water in a bucket.

    In other way, you can also mix one part bleach with four parts water. Mixing both formulas as another alternative is necessary.

    3. Gently Scrubbing

    After the cleaning formula is decided, dip a long-handed soft-bristle brush into the cleaning solution then scrub any visible mold gently, start from top to bottom.

    4. Controlling the Pressure of Your Power Washer

    Now it is time to do the rough job. Having a power washer would really help you after you have scrubbed manually with the cleaning solution.

    Pour the cleaning solution into the power washer. If you are sure that your vinyl is strong enough to be sprayed with a high pressure, it will be good. But using lower pressure is a wise choice to prevent you from damaging your vinyl.

    Pressure washer vinyl siding cleaner

    Different with the scrubbing process, start spraying from the ground to the top. Keep the solution from seeping under the siding by not angling the sprayer upward during the cleaning process.

    Always aim the sprayer at the right angle so that the solution is sprayed from above. Spend the solution in the power washer until finally you rinse the sprayer with clean water.

    5. Finishing Touch

    Use the clean water to rinse the solution off from the vinyl, start from the top so the water will flow down. This is the last step of the cleaning process. If you think you still find the mold on your vinyl, keep doing it from the scrubbing step until you think your vinyl is clean and bright.

    It is suggested that you use two power washers to keep the one filled with the cleaning solution and with clean water at the other one. Those are the steps that we can offer to you. We believe that removing the mold from vinyl siding is not as hard as it seems. Good Luck!

    How to remove mold from vinyl siding in a right way

    Originally posted 2021-04-07 01:41:00.

  • The Best Natural Swimming Pool Designs: How to Have it in Your Own Home

    The Best Natural Swimming Pool Designs: How to Have it in Your Own Home

    The Natural Swimming Pool is getting more popular nowadays.

    Since the natural swimming pool will give more natural ambience and will blend with your home landscape.

    Here is the information about the natural swimming pool and how to build it in your own home.

    Read also: Best Tiny Houses You Can Buy on Amazon

    1. The Characteristic of Natural Swimming Pool

    The Natural Swimming Pool will contain less of chemical additives and manufactured materials which could be found in the common swimming pool. The natural swimming pool will also use clay and gravel stones as well as the aquatic plants which will give the oxygen to the pool.

    Since the natural swimming pool has the aquatic plants, it will have a self-cleaning mini-ecosystem which means you don’t need any chemicals such as chlorine to maintain the crystal-clear water when it is managed properly.

    The natural swimming pool will be more suitable to be installed in the house instead of public pools. The proper design of a natural pool has very little risk of dangerous contamination and with the self-cleaning mini ecosystem and no chemicals in the pool, it will create a better sustainable environment.

    The natural swimming pool could be divided into separated areas such as a zone with planted aquatic vegetation which will be the biological filter of the pool and having a small waterfall will also a good option to add the ambience and to keep the water fresh. Some of the pool company also offer UV sterilizer to kill the germs in the pool.

    The best natural swimming pool design ideas
    Image: proudhomedecor.com

    2. Many Natural Swimming Pools Could be Found in Europe

    Even though the idea of natural swimming pools come recently in the United States, apparently it is already quite common in Europe. In Munich, Germany for example, the natural swimming pool has been used in a large public pool and Europeans have the experience of this natural swimming pools already for decades.

    3. The Best Natural Swimming Pool Designs

    There are several designs of the natural swimming pools that you could do as a reference. For example, Green Pool design which could be applied by converting a conventional swimming pool to the natural swimming pool by adding a shallow plant area around the pool.

    This will help as the natural purification of the pool. You also could divide it into two areas, so you still have the original swimming area. Another design that you could use is the Asian-theme green pool with the water feature and the plants surrounding the area.

    Natural swimming green pool design ideas

    Another option that you could use is the rustic looks with some rocks and plants that will add the ambience of the natural swimming pool.

    The designs of the natural swimming pool designs will depend on your preference as well as your house design. If you contact the natural swimming pool contractors, they will have plenty of images of the natural swimming pools that you can choose.

    Natural swimming pool with stones around it
    Image: passionpoolandpond.com

    Before choosing the design of the pool, make sure that you check first with the space of the pool that you will have and consult with your constructor if it will be suitable with your home design. Remember, the more complicated design will be more expensive than the simple one, therefore consider your budget when choosing the design for the natural pool.

    Other factors that you need to keep in mind when choosing the design is the depth of the pool, make sure to have it 1.8 or less since it will need less of reinforcement. You also need to consider the good drainage plan since the good drainage channels surround your pool will give you the best result of natural pools maintenance.

    HOW TO BUILD YOUR NATURAL SWIMMING POOL

    4. How to Build it in Your Own Home

    If you are going to create a natural swimming pool in your own home, you will need to dig the hole and make sure the sides slope. You will also need to make sure to reserve a half area of the pool surface for the shallow plants.

    You will also need to have separate areas for the swimming, filtration and plant zone. In the plant zone, you will need to have it deeper and reach around 18 inches depth near the swimming area.

    One of the most important parts of the natural swimming pool is the filtration of the pool. Please note that you will need to have the water to be able to circulate continuously and have adequate oxygen. The water treatment is the most important part of the natural pool.

    You will need to have water quality properly and to have a proper filter system installation. Since this is quite a complicated procedure, it is advisable for you to use the pool company to install the filtration or water treatment to get the right system for your pool.

    To seal the pool after you dig the hole, you could choose from several options depending on the condition of the soil. You can use Bentonite, or Ethylene propylene diene monomer for the liner, or you could use cement or rastra block if you consider for the concrete option.

    Read also: Easy Tips on How to Clean Pool Walls

    5. How to Select the Plants

    When coming on selecting the plants for the pool, make sure that you check with a native-plant company in order to get the information about the plants that are suitable for the climate in your region. In order to keep the water quality and to give the right amount of oxygen in the pool, you can choose the rooted plants and the floating plants.

    The other plants will help to make the pool looks greener and to maintain the complex living ecosystem. Choose the aquatic plants such as rushes, sedges, cattails, arrowhead or water primroses.

    If you are having an algae problem in your natural swimming pool, make sure that your pool is free from the factors that could make the algae grow such as the fertilizers and urine. Avoid putting any chemical additives that claimed able to kill algae since it could ruin the balanced ecosystem of your natural swimming pool.

    Therefore, either you will go with the Asian theme, simple or more advanced designs with the waterfall, make sure that you consult first with the constructor and to find if it’s suitable with the landscape and your budget. The natural swimming pool will not only make your backyard look greener and beautiful but it also friendlier with the environment.

    How to Select the Plants for natural swimming pools

    Originally posted 2021-03-13 04:58:00.
  • Want to Get Rid of Your Ugly Floor Tiles? Paint It!

    Want to Get Rid of Your Ugly Floor Tiles? Paint It!

    When you are buying a house, there must be some parts of the house that you want to change or redesign.

    For example, the floor tiles in the living room look so ugly and you want to hide it from your guests.

    Well, instead of spending lots of money on changing the tile floors, you can just paint it! here are some simple tips for painted floor tiles which cover from how to have it until how to take care of it.

    Read also: How to Remove Mold from Basement Walls

    HOW TO PAINT YOUR FLOOR TILES

    1. Sanding the Floor Tiles

    The first step that you will need to do is to sand the tile. This step will make it easier for the primer adhere. Instead of using the sandpaper and do it manually, you could use the hand-held electric sander (180-220 grit) such as aluminum oxide or silicon carbide which will be so much easier for you. the electric sander will also be able to get into the corners of the tiles easily because of the angled head.

    2. Do Deep Cleaning of Your Floor

    Once you have done on sanding the floor tiles, you will need to vacuum the debris as well all the dust from the first step. Once the floor is clean from all of the dust and debris, you will need to do a deep cleaning of the floors. Use the heavy-duty cleaner like TSP with a mop through all the floor then let it for about 15 minutes before you start to scrub it.

    Next step is to clean it with warm water and if you feel that the floor is not clean yet, you could repeat the process. When you find any visible cracks or grout on the floor, you need to repair it first with caulk. Make sure that you let it sit for 48 hours before you move to the next step.

    3. Use the Painter’s Tape

    Before you start to apply the primer in the floor tiles, you will need to use the painter’s tape in order to protect the area that you don’t want it to get painted. Put the tape on the floor trim, and if you paint the bathroom floor tiles, tape off the border of the toilet, vanity, tub and others that you feel that you need to protect from the paint. If you feel that you want to keep the original colour of the grout lines, you also can cover it using the acrylic masking tape.

    Bathroom painted floor tile ideas
    Image: remingtonavenue.com

    4. Apply the Primer

    Before you apply the primer, please note that you don’t need to use a primer if you use the chalk paint for your floor tiles. Choose the high-quality primer because it is one of the main factors to get the success result for painting the tiles.

    Use a brush to apply the primer for the grout lines, tile edges and vanity, toilet, bathtub etc if it’s the bathroom floor that you need to paint. Use the roller for the rest area that needs to be primed.

    Let the primer dry before you do the next step or if you want to apply the second coat of the primer. Primer usually will dry for about 3 hours depending on the temperature and humidity.

    5. Choose the Right Paint

    There are three kinds of paint that you could consider using for the floor tiles. First, you can use the chalk paint which is water-paint and will give you a matte white finish. This type of paint will be perfect if you want to have it as a base coat before you put a pattern on the floor tiles. Second, you can choose the latex paint which is the most common type.

    The latex paint will be fast drying and have several options such as semi-gloss or high-gloss for a finished look. The third option is the oil-based paint which will be more resistant to be damaged than the latex paint. But there are several disadvantages of the oil-based paint including take longer to dry, very expensive and the worst part it could harm the environment.

    6. Paint the Floor Tiles

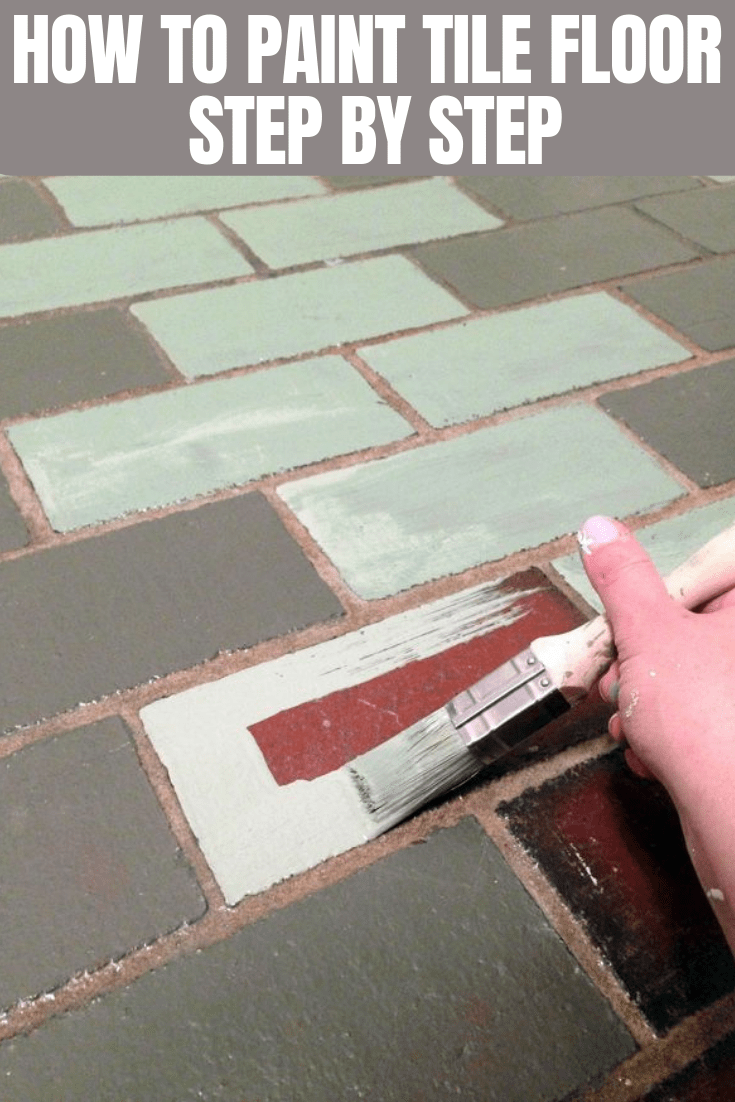
    Once you have decided which paint that you want to use, you could start to paint the floor tiles with a similar method when you apply the primer. Start first with the edges and grout lines with the paintbrush and then do the rest of the area with the roller brush.

    Let it dry first and if you are not sure you could check first the instruction on how long it will dry and apply another coat. Repeat this step until you get the colour that you want. After you finish, make sure to let it dry until 2 or three days before you step on the floor or put any furniture.

    How to paint tile floor with roller brush
    Image: drivenbydecor.com

    7. Adding the Pattern

    This is an optional step if you want to have a pattern on the tiles you could use a stencil. Use the painter’s tape to tape the stencil to one tile that you want to put a pattern and use a roller to paint the stencil. Remember to not put excessive paint in the roller since you don’t want to have a too thick and runny mess.

    8. Apply the Water-Based Polyurethane

    Use the water-based polyurethane to seal the paint. Apply a thin coat and let it dry for six hours before you apply the next coat. Use around two up to three coats for the best result.

    9. How to Maintain the Painted Floor Tiles

    Once you have done the entire process, it is important to not put the wet object such as the damp rug for a long period that could ruin the paint. The floor tiles in the dry area such as laundry room, living room or kitchen will last longer than in the bathroom. If you want to clean the floors, do not use any harsh chemicals and use the mild cleaners instead.

    So, painting the floor tiles is not impossible and it is cheaper rather than changing the whole tiles. You also could do it by yourself and follow all the instructions above. Have fun on giving the new look of your floor tiles!

    HOW TO PAINT TILE FLOOR STEP BY STEP

    Originally posted 2021-03-10 23:14:00.