Tag: Decor and design

  • Unlock the Secret to a Dreamy Luxury Baby Nursery Interior Design

    Unlock the Secret to a Dreamy Luxury Baby Nursery Interior Design

    Creating a luxury baby nursery is more than just assembling a collection of high-end furniture and accessories. It’s about crafting a serene, stimulating, and safe environment for your little one. In this detailed guide, we’ll dive into the world of luxury baby nursery interior design, exploring key aspects that make a nursery not only luxurious but also a nurturing haven for your baby.

    Dreamy Luxury Baby Nursery Interior Design

    🌟 Setting the Scene: The Foundation of Luxury

    The foundation of a luxury baby nursery interior design lies in choosing the right color palette and theme. Soft, calming colors like pastels or neutral tones are often the go-to choice. They create a tranquil atmosphere conducive to sleep and relaxation. However, don’t shy away from incorporating bolder hues or patterns, as they can stimulate your baby’s developing senses.

    🎨 Color Palette: More Than Just Pastels

    While pastels are a traditional choice, modern luxury nurseries often feature sophisticated color schemes with deep blues, greens, or even monochromatic shades. The key is to balance these colors with lighter accents and textures to maintain a soothing environment.

    πŸ–ΌοΈ Themes and Motifs: A World of Imagination

    From classic fairy tales to modern geometric designs, the theme of your nursery can set the tone for your baby’s early experiences. Whether it’s a whimsical forest, a nautical adventure, or an elegant floral garden, the theme should be an extension of your taste and the kind of atmosphere you want to create.

    ✨ Furnishing with Elegance and Comfort

    A luxury nursery is incomplete without the right furniture. This doesn’t just mean expensive items, but pieces that offer a blend of style, functionality, and safety.

    πŸ›οΈ The Crib: Your Baby’s Personal Haven

    The crib is the centerpiece of any nursery. Opt for a crib that not only complements your design theme but also adheres to safety standards. Convertible cribs that grow with your child are a popular choice in luxury nurseries.

    πŸͺ‘ Seating: Comfort for You and Your Baby

    Consider a comfortable yet stylish rocking chair or glider. It’s not just a place for feeding or soothing your baby, but also a spot where many precious moments and bonds are formed.

    πŸŽ‡ Lighting and Ambiance: Setting the Mood

    Lighting plays a crucial role in a nursery, influencing both the room’s aesthetics and the baby’s circadian rhythm.

    πŸŒ™ Soft Lighting: A Key to Serene Evenings

    Soft, warm lights are essential for creating a calming atmosphere. Dimmer switches and nightlights are practical additions, allowing you to adjust the lighting for different activities and times of the day.

    β˜€οΈ Natural Light: A Touch of Sunshine

    Maximizing natural light during the day is beneficial for your baby’s development and helps establish a healthy sleep-wake cycle. Use light window treatments that allow daylight to filter in while still providing privacy.

    🧸 Storage Solutions: Marrying Functionality and Style

    Good storage solutions are key to keeping a luxury nursery tidy and organized. It’s not just about having enough space, but also about how storage elements contribute to the room’s overall design.

    πŸ—ƒοΈ Innovative Storage Ideas

    Think beyond traditional dressers and wardrobes. Consider wall-mounted shelves, under-crib drawers, and bespoke built-ins. These not only save space but can also be tailored to match the nursery’s theme.

    🏷️ Organizational Systems: Everything in Its Place

    Labeling and categorizing items in the nursery will help you stay organized and make it easier to find things, especially during late-night feedings or diaper changes.

    πŸ–ΌοΈ Art and Accessories: Personal Touches

    Art and accessories are what truly personalize a nursery, transforming it into a unique space for your baby.

    🎨 Choosing Artwork: Stimulating Senses and Imagination

    Select artwork that complements the nursery’s theme and color scheme. Consider pieces that are visually stimulating for a baby, such as high-contrast images or gentle, calming scenes.

    🧸 Accessories: The Finishing Touches

    From plush rugs that add texture and warmth to decorative pillows and throws for a cozy feel, accessories play a crucial role in enhancing the luxury appeal of the nursery.

    πŸ“ A Perfect Layout: Maximizing Space and Functionality

    Designing a functional layout is crucial in a luxury baby nursery. It’s about creating a space that is both aesthetically pleasing and practical for daily use.

    πŸ›‹οΈ Zoning the Nursery

    Divide the nursery into distinct zones for sleeping, playing, changing, and feeding. This not only helps in organizing the space but also creates a more structured environment for your baby.

    πŸ”„ Accessibility and Safety

    Ensure that all essential items are within easy reach and that the layout promotes safety, with no sharp corners or loose cords.

    🌱 Embracing Eco-Friendly and Sustainable Practices

    Incorporating eco-friendly and sustainable elements in your luxury baby nursery is not just a trend but a responsible choice for your baby’s future.

    ♻️ Sustainable Materials: A Healthy Start

    Opt for furniture and decor made from sustainable, non-toxic materials. This not only reduces environmental impact but also ensures a safer space for your baby.

    🌿 Natural Elements: Bringing the Outside In

    Incorporate natural elements like plants or wooden accents to create a more organic and calming space.

    πŸ“ Important Note: Always prioritize safety in every aspect of nursery design. Ensure that all furniture and decor comply with the latest safety standards.

    πŸ“ The Essential Design Table: A Quick Reference Guide

    AspectDetailsImportance
    Color PaletteSoft, calming colors; option for bold accentsSets the mood and atmosphere
    FurnitureSafe, functional, and stylish piecesCentral to the room’s functionality and aesthetics
    LightingSoft and natural light sourcesCrucial for creating ambiance and supporting healthy sleep patterns
    StorageInnovative and aesthetic solutionsKeeps the nursery organized and tidy
    Art and AccessoriesPersonalized choices to complement the themeAdds character and personalization
    LayoutFunctional zoning; safe and accessible designEnsures practical use and safety
    Eco-Friendly ElementsSustainable materials; natural decorPromotes a healthier and more sustainable environment

    By understanding these key aspects and integrating them thoughtfully into your design, you can create a luxury baby nursery that is not only stylish and sophisticated but also a nurturing and safe haven for your little one.

    Originally posted 2023-12-12 04:13:50.

  • Elevate Your Festive Spirit: Transform Your Console Table with Dazzling Christmas Decor Ideas

    Elevate Your Festive Spirit: Transform Your Console Table with Dazzling Christmas Decor Ideas

    The holiday season is upon us, and what better way to embrace the festive spirit than by sprucing up your home with delightful Christmas console table decor? The console table, often overlooked, can become a focal point of your Christmas decorations, offering a unique space to display your holiday cheer. In this comprehensive guide, we’ll explore various creative ideas to transform your console table into a stunning display of holiday joy.

    christmas console table decor ideas

    🌟 Understanding the Importance of Christmas Console Table Decor

    Your console table is more than just a piece of furniture; it’s a canvas for your creativity, especially during the festive season. Decorating this space can set the tone for the rest of your home, providing a warm welcome to guests and a centerpiece for your holiday celebrations.

    Why Focus on the Console Table?

    • Aesthetic Appeal: A well-decorated console table enhances the beauty of your living space.
    • Welcoming Atmosphere: It creates an inviting atmosphere for guests and family members.
    • Personal Expression: This space allows you to express your personal style and holiday spirit.

    πŸŽ„ Choosing a Theme: The First Step to Magical Decor

    Deciding on a theme is crucial as it guides your decoration choices, ensuring a cohesive and harmonious look.

    Popular Christmas Themes

    • Traditional Red and Green: Embrace the classic Christmas colors with ornaments, ribbons, and garlands.
    • Winter Wonderland: Create a snowy scene with white, silver, and blue decorations, adding faux snow and crystal elements.
    • Rustic Charm: Opt for natural materials like wood, burlap, and pinecones for a cozy, rustic feel.

    πŸ•―οΈ Creating a Focal Point: The Key to Captivating Decor

    Every console table needs a striking focal point. This could be a large decorative element that draws attention and sets the theme for your display.

    Ideas for Focal Points

    • Statement Piece: A large vase with seasonal flowers or a dramatic holiday sculpture.
    • Mirror or Artwork: Enhance the space with a festive-themed mirror or artwork that reflects the season’s joy.
    • Lighting: Fairy lights, candles, or a small Christmas tree can add a warm glow to your display.

    🎁 Layering Decorations: A Technique for Depth and Interest

    Layering various elements adds depth and interest to your Christmas console table decor.

    How to Layer Effectively

    • Vary Heights: Use items of different heights to create a dynamic look.
    • Mix Textures: Combine different materials like glass, metal, and fabric for a rich, tactile experience.
    • Balance and Symmetry: Ensure your display is balanced, with visual weight distributed evenly across the table.

    🌿 Incorporating Natural Elements: A Touch of Nature

    Natural elements bring a fresh and organic feel to your decor.

    Natural Decor Ideas

    • Pinecones and Greenery: Scatter pinecones or drape greenery along the table.
    • Fresh Flowers: Seasonal flowers in a beautiful vase can add color and fragrance.
    • Fruit Displays: Arrangements of oranges, apples, or nuts can create a rustic and edible display.

    🎨 Adding Personal Touches: Make It Uniquely Yours

    Personal touches make your Christmas console table decor truly special.

    Ideas for Personalization

    • Family Heirlooms: Display cherished family ornaments or heirlooms.
    • DIY Decorations: Handmade crafts or children’s artwork add a personal and sentimental value.
    • Themed Collections: Showcase your collection of snow globes, Santas, or angels, reflecting your personal interests.

    πŸ“ The Practical Side: Considering Size and Proportion

    Important Note: Always consider the size and proportions of your console table. Overcrowding can make it look cluttered, while too few decorations can appear sparse. Aim for a balanced and aesthetically pleasing arrangement.

    Tips for Size and Proportion

    • Scale: Choose decorations that match the scale of your table. Larger tables can handle bigger items, while smaller tables benefit from more delicate pieces.
    • Spacing: Allow some space between items to prevent a cluttered look.
    • Layering Heights: Utilize varying heights to maximize space and create visual interest.

    🌟 The Finishing Touch: Lighting and Reflection

    Lighting plays a crucial role in creating the right ambiance.

    Lighting Tips

    • Soft Glow: Use candles or fairy lights for a soft, warm glow.
    • Reflective Surfaces: Mirrors or metallic decorations can reflect light and enhance the overall effect.

    πŸ“Έ Showcasing Your Christmas Console Table Decor

    Once your console table is beautifully decorated, don’t forget to capture the moment. Take photos and share them with friends and family, or use them as inspiration for next year’s decor.

    Photography Tips

    • Natural Light: Take photos in natural light for the best effect.
    • Different Angles: Capture your table from various angles to show off all the elements.

    πŸŽ‰ Embracing the Holiday Spirit

    Your Christmas console table decor is more than just an aesthetic addition to your home; it’s a reflection of the holiday spirit and your personal style. By following these tips and ideas, you can create a space that is both beautiful and welcoming, truly embodying the essence of Christmas.

    As you gather around your festively adorned console table, remember that the joy of the season lies in the love and warmth shared with family and friends. Here’s to a merry and bright holiday season, filled with the magic of Christmas decor! πŸŽ…πŸŽ„βœ¨

    Originally posted 2023-12-10 08:51:34.

  • Best 4 Makeup Vanity Mirror Set Ideas You Must Adopt

    Best 4 Makeup Vanity Mirror Set Ideas You Must Adopt

    Mirror is a crucial part of a makeup vanity. Considering how it plays important part on the function, several sets are made to deliver the best help to users.

    There are more than enough set available to buy today, and several of them are great ideas to actually adopt.

    If you look for enriching your room look and function, these ideas will amuse you.

    BEST 4 MAKEUP VANITY MIRROR SET IDEAS YOU MUST ADOPT

    1. Three-Pages Horizontal Mirror Vanity

    This is an elaborated version of the traditional horizontal mirror. It still provides you with enough angle on the sides, which is beneficial when it comes to self makeup session.

    The difference lies on its design. Instead of made of a single mirror, it is made of three mirrors, one large in the center and two small at the sides.

    You can narrow the side mirrors, so it displays the side of your face closer. It helps a lot while checking if your makeup is fine on those sides in ease. Vintage styles have a lot of this version but modern styles follow now.

    Three page horizontal vanity mirror ideas

    Read also: Different types bathroom vanity with makeup area.

    2. Playing Matching Sets

    This kind of set doesn’t necessarily mean it is made as a single item. The fun fact is its mirror is actually separated from the vanity.

    It looks like separately added to the set, but it’s not. Usually, it presents the same style and similar finish to show consistency. Being matching, it makes a wonderful set.

    The benefit of buying this kind of set lies on the possibility to replace the mirror one day without any hustle. We only need to get a new mirror with resemblance in concept or finish, and we are good already.

    Read also: Nice Tips How to Decorate a Wall with Mirror.

    Playing Matching Sets Makeup Vanity mirror

    3. Stand-Alone Vanity Mirror Set

    It was first introduced by vintage sets but it becomes something that is commonly offered by modern style as well.

    Basically it features three different parts that stand alone while completing each other. The main part is the mirror. It stands alone and it commonly has huge size, enormous maybe.

    To complete the set, owner will be provided with a nice looking stool to stand and a small table for your makeup kits. It is often featured in photography projects.

    It looks stunning and stylish while being functional at the same time. All items in the set are made of the same materials, designs, and details. You don’t buy them separately.

    Large mirror vanity makeup ideas

    4. Standard Set with LED Bulbs

    This is popularly referred to makeup artist vanity sets. They have standard vanity design and sizes, and a big mirror is attached on top at the center of the vanity. We are allowed with a single seat in front of the mirror, and we get several bulbs framing the mirror.

    It is commonly used for professional makeup session as it provides the best display of the makeup. Instead of standard bulbs, people now prefer on LED for it. It gives brighter lighting while it is energy saving and economical as well.

    Makeup vanity mirror decoration ideas with led bulb lighting

    So, instead of using plain vanity mirror set, you should consider using these sets. They offer full functionality while they are gorgeous as interior item. It improves the room as well as helping you with the makeup session. Happy choosing!

    Originally posted 2020-03-09 01:31:31.

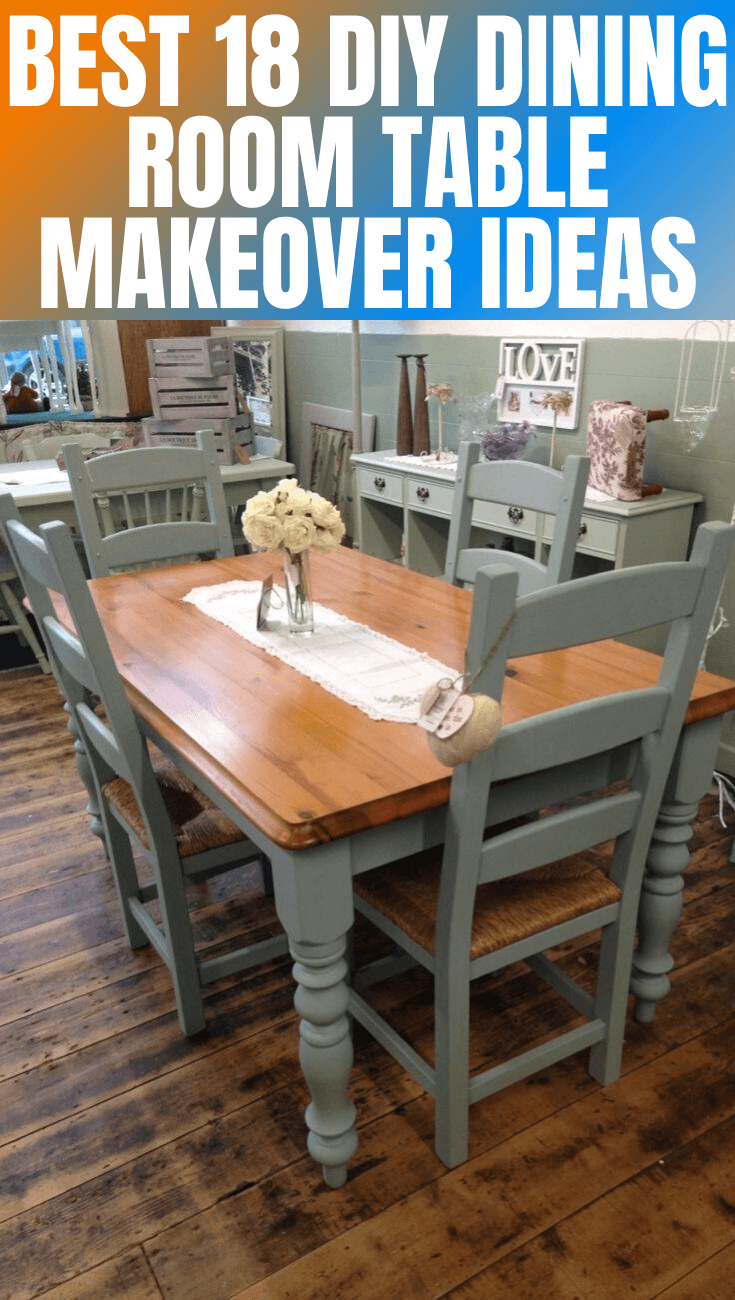
  • Best 18 DIY Dining Room Table Makeover Ideas

    Best 18 DIY Dining Room Table Makeover Ideas

    Dining Room play big roll to alter the atmosphere in the house. Moreover, dining room is the perfect place for gathering family while enjoying delicious meal. Aside from the food served, dining room also play big role in entertaining guest who visit the house.

    Simply saying, with all those function and benefit that dining room have, it is important to make your dining room look attractive, bright the mood up, and also bring the appetite of the family or guest.

    Many people believe that in order to decorate dining room to be very luxury and classy needs high budget. Even so, there are some simple, easy and cheap way for you to realize DIY Dining Room Table Makeover Ideas.

    And also, here is the best choice to DIY dining table makeover ideas that I’ve collected for you. Hope it’s help you.

    BEST 18 DIY DINING ROOM TABLE MAKEOVER IDEAS

    1. Dining table makeover ideas for small family

    Most often, family which had few member which consist of father, mother and two children, prefer to decorate their house in simple. Even so, it is not a sin to try something different to the house, especially in dining room area.

    You do not need to throw all your dining equipment and change with the new one. What you need to do is upgrading those what you had into finer look. Therefore, it is called as Easy and Cheap DIY Dining Room Table Makeover Ideas.

    Dining room table makeover wood ideas rustic natural impression
    Image: homedit.com

    Repainting old dining table

    First step, you can begin with re-painting your old dining table, in order to change the atmosphere. You can also re-painting your dining room wall with the brighter color, if your previous dining room have dark colored wall.

    Then, for your dining table, paint it adjusting to the room color. White dining table is currently very fancy, as make the table looks clean and large. You can also draw something on the table, like by making spoon and fork drawing, or other drawing which will match with dining room concept. Do not forget to apply driftwood finish, after painting the table.

    Recover dining seat

    Second step, recover your dining seat. Chose the best fabric which you will use for the seat cover. You can use recycle t-shirt or curtain fabric, and then cut it into seat size, then glue and staple in the bottom part of the seat. Let it dry for a day, and then put it back on the chair.

    Decorate dining table

    Third step, in order to make new atmosphere in your dining room, one of Easy and Cheap DIY Dining Room Table Makeover Ideas, is by decorating items on the dining table. If the previous dining table you hadn’t any vases or decoration on it, then try to put a small fake flower vase on it, or other kind of plants. Enough with placing one with the simple look, and make sure that the decoration will not cover your family and guest’s face, when you have a talk with them.

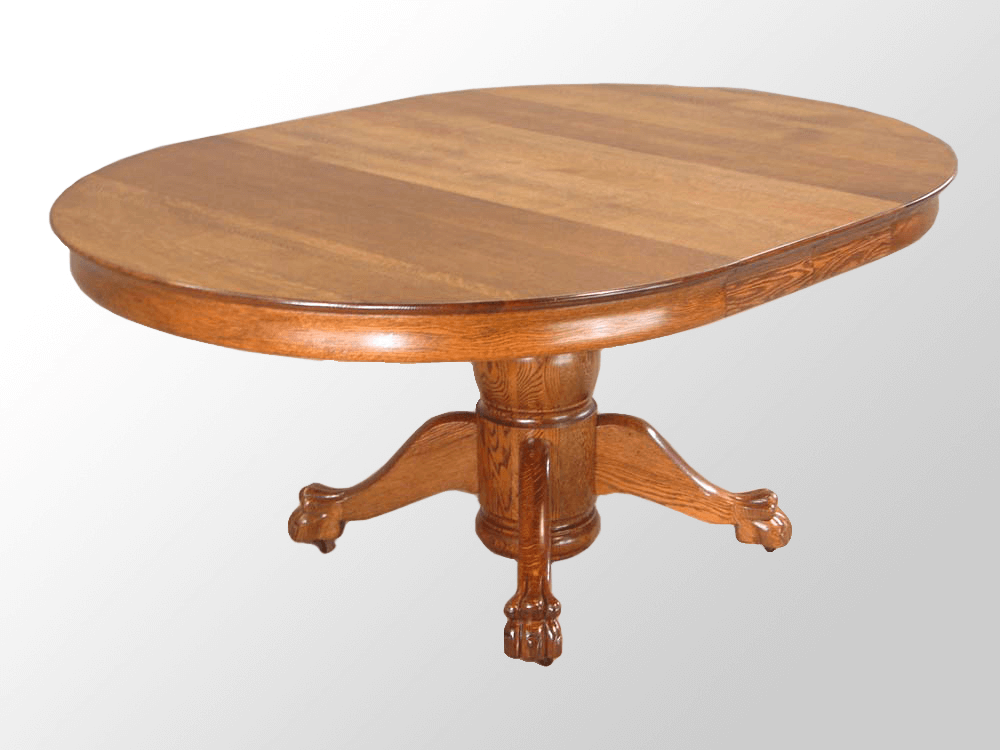
    Oak wood round dining table and chairs makeover ideas

    2. Round Wooden Dining Room Table makeover

    Wooden dining table with round shape usually have single oak dark color, which make it look classic but also old. If you had this type of dining table, you can follow this simple DIY Dining Room Table Makeover Ideas in order to redecorate the dining table, and make the dining room atmosphere finer and also bring up the appetite.

    First, sand the tiny layer on the surface of the table. Do not sand it too hard, as it will make the wooden patter break and become thinner. Then, apply weathered oak stain on the table surface, in order to enhance the natural wooden pattern on it. You can choose the dark stain to make the natural pattern look more stand out.

    If the natural color of your table isn’t that dark, you can also adjust the stain to its basic color, as long as it can show off the natural pattern on it. In the way painting it, you need to make tiny layer first and then continue layer by layer until it look glassy. Then leave it for 24 hours until it really dry.

    Afterward, then paint the table feet with different color. White color is better to create the clean and bright look on the dining table. White also color which can adjust to any color, without making the table look odd or unbalance. Then, leave it until dry. Afterward, do not forget to apply polycrylic protective finish, to make the paint last longer and look glossy. This DIY Dining Room Table Makeover Ideas can adjust to classic, vintage, and even modern concept of dining room.

    After the repainting of dining table settled, then you can decorate your dining table by placing item on it, like vase for example. In choosing on-table decoration, make sure the item is adjusted well with the concept of your dining room. In example, if you want to create unusual concept, you can put small plant pot inside squared glass jars. You can also search some decorations which will fit to your DIY Dining Room Table Makeover Ideas in some online stores.

    3. Repainting to stronger color

    This is well exemplified by Emmie, at her blog blue 11 interiors. By buying a set of dining tables and chairs used, she had a very beautiful makeover as she wished. This is the look of dining room table and chairs makeover before and after.

    DIY dining room table and chairs makeover ideas before and after
    Chairs dining room makeover ideas before and after

    4. Repaint with combination colors

    If you get bored with one color, you can makeover the color of the dining table with two or more coordinated colors. Jennifer  has done well. Inside her site, celebratingeverydaylife.com, she explained that it could be an exemplary option.

    One color dining table dark before makeover
    DIY white dining room table makeover after

    5. Add a stencil layer

    Not only stenciled, you can do chalk painted to diy dining table makeover as ideas. Brittany, at the prettyhandygirl.com will show you step by step to do that. Than finally, you will see the ending, dining table makeover before and after like this:

    Before:

    Wooden old dining table before makeover

    After:

    Nice DIY dining table makeover ideas after using stencil layer

    6. White base and stain top

    Making the top of the dining table look artistic and old, it was charming. Stain the top of table, the lightly whitewash to get more beautifully aged look. White base and old top. This paintmewhite.com will show you step by step to do this.

    DIY dining table and chairs makeover ideas aged look

    7. Create look like zinc covered top table

    This makeover ideas DIY for dining room table. Michelle in her blog, thatmommyblog, will tell you for the way, step by step. I think it’s incredible. That’s not really zinc, but the paint formula make it happen.

    Dining table makeover before and after painting look like zinc covered top

    8. Cover top table with real zinc

    And now, it’s using real zinc. You also can using others material as cover table, like stainless steel, copper, or others sheet metal. You must be careful to do it. Angela at unexpectedelegance.com has shown you how. Than, it is the result to give you some big ideas to doing yours.

    DIY dining table makeover ideas using zink cover top

    9. Repaint from black or dark to brighter

    The color black or dark is nice, it’s just sometimes look less fun. So you can make a makeover. You can choose a lighter color. The project on this site, Everyday Lovely, seems an interesting example. See the result below.

    Round dining table makeover repainting ideas black to blue

    10. Weathered look dining table makeover ideas

    You can re-stain the table, all of part and strip it. The clear step by steps have been shown in this site, simpledetailsblog. Finally, I show you the point for get ideas for you to do makeover.

    Before:

    Round dining table before makeover

    After:

    Round dining table after makeover with Weathered look

    11. Replace the dining table top with glass

    In addition to using glass, you can also using nailhead trim, etc. This way DIY dining table makeover ideas to make unique design of room. It’s also suitable for small family. Bethany at her site, dwellingsbydevore.com, will show you how. This is very interesting.

    DIY dining table makeover ideas before using glass top

    After:

    DIY dining table makeover ideas after using glass top

    12. Replace wooden top with concrete

    Especially if you have wooden damaged or outdated top dining table top. How to do it? Kara on her site, karapaslaydesigns.com, shows you well.

    Replace wood with concrete for dining table makeover ideas before and after

    13. Repainted, white

    Buying used furniture, often get the color that has faded. Sometimes, the color is not as you wish. Dark colors are not fun for some people. In this case, white can be an option. This is a simple way to makeover your dining table. Hemmm… and cheap also. 11magnolialane.com will show you some result and reason why you can choose this way. The simple step also you can do.

    Repainting with white for DIY dining table makeover ideas before and after

    14. Get back rustic design

    The rustic look is reminiscent of the past. You can use this as an idea for your table makeover.

    Rustic dining table makeover ideas before after
    Image: thebudgetdecorator.com

    15. Farmhouse dining table and chairs makeover ideas

    It accentuates the wood so it gives a natural impression. Not because previously not good, but a makeover to show a stronger impression. Thanks for TARYN WHITEAKER, you show us well.

    Farmhouse dining table and chairs makeover ideas before and after

    16. Creative painting art

    It is good example as makeover ideas. Creative painting eliminates the boring impression on your dining table appearance. Thanks allthingsthrifty.com for this ideas.

    Creative paint diy dining table makeover ideas before
    Creative paint diy dining table makeover ideas after

    17. Different color of chairs

    Family with lots of funny little kids is fun. The look of the dining room will be very emotional. Giving different colors to the dining room chairs is a great idea. How do you do it? mcdonaldfam very well shows you.

    Colorfull chairs for dining room makeover ideas

    18. Simple, Change your chairs

    Sometimes, a chair that does not fit the dining table makes the display less good. This idea I got from Brandi at brandisawyer.com. Simple things that are very easy to do for makeover dining room.

    Simple dining table makeover with change the chairs before and after

    But, if you totally get your own design like you want, you can do this… Make your own dining table.

    Make your own Dining Table

    The best way to realize DIY Dining Room Table Makeover Ideas is by making dining table by yourself. You can get help from your father, husband, or men in the family, to cut the wood in size.

    First thing is, make the concept of your dining table. If you want dining table for vintage and classic dining room, then make wooden cut which had ornament curvature on the backrest of chair, and on the table and chair feet.

    Make your simple dining table and chairs
    Image: wikimedia.org

    If you want to have simple concept, then you can cut the table surface and the feet in regular cut to fit the concept. Measure the size of the table surface, and the similar feet size, and do not forget to sand the outer wooden layer.

    In this DIY Dining Room Table Makeover Ideas, you can use different material for table surface and for the feet. In example, for table surface using oak wood, which had natural dark patter and color. While for the feet, you can use other wooden material which can be painted in any color. Then, paint the surface of the table and the feet with different color.

    Apply oak stain on the table surface, in order to make the natural table pattern stand out. Then, leave it dry and continue with painting protective finish on it, to make the table last longer. Your own table creation is now ready to place in the dining room. Place some decoration on it like vases, to make the dining table look more attractive.

    In decorating dining room, besides doing makeover for the dining table, you can also redecorate in other way. It is like repainting dining room wall, to create new atmosphere there, or installing chandelier above the dining table to show off the classic concept. After redecorating your dining room, do not forget to keep the cleanliness of it, in order to make the room looks more attractive, and all the decoration last for long time.

    Originally posted 2020-03-08 01:21:39.

  • Transform Your Christmas Front Porch into a Winter Wonderland – Discover How!

    Transform Your Christmas Front Porch into a Winter Wonderland – Discover How!

    The festive season is upon us, and what better way to spread cheer than by transforming your Christmas front porch into a mesmerizing winter wonderland? It’s not just about hanging a wreath on the door; it’s about creating a welcoming, festive, and joyful space that captures the essence of Christmas. Let’s embark on a journey to turn your front porch into a holiday masterpiece that everyone will admire!

    Christmas Front Porch Decor Ideas

    πŸŽ„ Setting the Scene: Choosing a Theme

    Before you begin decorating, it’s crucial to decide on a theme. Your theme sets the tone for your entire porch and helps you select decorations that create a cohesive look. Popular themes include traditional red and green, winter wonderland, rustic charm, and modern chic. Each theme has its unique elements that bring your Christmas front porch to life.

    Traditional Red and Green

    Embrace the classic Christmas colors with red and green. Think red poinsettias, green garlands, and a wreath with red berries. Add a touch of gold for a bit of sparkle.

    Winter Wonderland

    Transform your porch into a snowy retreat with white and silver decorations. Use white lights, silver ornaments, and perhaps even a faux snow blanket.

    Rustic Charm

    Incorporate natural elements like pinecones, burlap, and wood. Rustic lanterns and a wreath made of twigs and berries can add a cozy, country feel.

    Modern Chic

    Opt for a sleek, minimalist look with monochrome colors or metallics. Think simple, clean lines and uncluttered spaces.

    🎁 Welcoming Guests: The Door and Entryway

    Your front door is the centerpiece of your Christmas front porch. A beautiful wreath is a must-have, but don’t stop there. Consider adding a festive doormat, a Christmas-themed sign, or even a small, decorated tree beside the door.

    Wreaths and Door Decor

    Choose a wreath that complements your theme. For an extra festive touch, add a garland around the door frame.

    Entryway Essentials

    Place a seasonal doormat to welcome guests. You might also add a bench with festive cushions or a basket filled with Christmas-themed throws.

    🌟 Lighting the Way: Festive Illumination

    Lighting is key to creating a magical atmosphere. Use string lights, lanterns, and candles to add warmth and sparkle to your Christmas front porch.

    String Lights

    Drape them around your porch railing, door frame, or overhead for a twinkling effect.

    Lanterns and Candles

    Place lanterns with LED candles along the walkway or on steps for a soft, welcoming glow.

    ❄️ Adding the Finishing Touches: Decorations and Accents

    Now it’s time to add those extra decorations that tie everything together. Consider elements like outdoor-safe ornaments, ribbons, and festive figurines.

    Ornaments and Ribbons

    Hang shatterproof ornaments from your porch ceiling or weave ribbons through your garland.

    Festive Figurines

    Place a Santa, snowman, or reindeer statue as a playful accent.

    πŸ“‹ Important Note: Safety First!

    “Always ensure that your decorations are suitable for outdoor use and securely fastened to withstand winter weather.”

    🌲 Bringing Nature to Your Porch: Natural Elements

    Incorporating natural elements not only adds beauty but also brings a sense of the outdoors to your Christmas front porch.

    Potted Plants and Trees

    Add potted evergreens or poinsettias for a touch of nature.

    Natural Wreaths and Garlands

    Use wreaths and garlands made from real or faux natural materials for an authentic look.

    πŸŽ‰ Engaging the Senses: Aromas and Sounds

    Engage all the senses by including elements that smell and sound like Christmas.

    Scented Decorations

    Consider adding cinnamon sticks or scented pinecones.

    Seasonal Sounds

    Play soft Christmas music or use a wind chime with a gentle, festive jingle.

    πŸ“Š Festive Color Scheme: Choosing the Right Palette

    Your color scheme is crucial in tying your theme together. Here’s a table to help you choose:

    ThemePrimary ColorsAccent Colors
    TraditionalRed and GreenGold, Silver
    Winter WonderlandWhite, SilverBlue, Icy Tones
    Rustic CharmBrowns, GreensRed, Orange
    Modern ChicMonochrome, MetallicsVaries

    🀝 Inviting Interaction: Interactive Elements

    Add elements that invite your guests to interact with your space.

    Photo Spot

    Create a spot where guests can take photos – think a chair with a cozy blanket and a festive backdrop.

    Interactive Decor

    Include a small mailbox for Santa letters or a chalkboard for guests to write holiday messages.

    In conclusion, transforming your Christmas front porch is not only about decorating; it’s about creating a welcoming space that embodies the joy and spirit of the season. With these tips and ideas, you’re well-equipped to create a holiday haven that will be the envy of the neighborhood. Happy decorating! πŸŽ…πŸΌπŸŽ‰πŸŒŸ

    Originally posted 2023-12-05 04:48:39.

  • Transform Your Home into a Winter Wonderland: Unleash the Magic of Indoor Christmas Decorations

    Transform Your Home into a Winter Wonderland: Unleash the Magic of Indoor Christmas Decorations

    The festive season is upon us, and what better way to embrace the joy and spirit of Christmas than by transforming your home into a breathtaking winter wonderland? Indoor Christmas decorations are not just ornaments; they are a reflection of our joy, a way to express our festive spirit, and a method to create lasting memories with our loved ones. In this comprehensive guide, we’ll explore the myriad of ways you can bring the magic of Christmas into your home, one decoration at a time.

    Indoor Christmas Decorations

    🌟 Setting the Scene: Choosing a Theme

    Why a Theme Matters

    When it comes to indoor Christmas decorations, having a cohesive theme can significantly elevate the aesthetic appeal of your home. A theme gives you a roadmap for selecting decorations, ensuring that each piece complements the others, thereby creating a harmonious and enchanting environment.

    Popular Themes to Consider

    1. Winter Wonderland: Think white, silver, and icy blue hues, snowflakes, and shimmering lights.
    2. Traditional Red and Green: Embrace the classic Christmas colors with rich reds, deep greens, and gold accents.
    3. Rustic Charm: Incorporate natural elements like wood, burlap, and pinecones for a cozy, country feel.

    πŸŽ„ The Heart of Christmas: The Christmas Tree

    Selecting the Perfect Tree

    The Christmas tree is arguably the centerpiece of indoor Christmas decorations. Whether you opt for a real pine tree or an artificial one, choosing the right tree is crucial. Consider the height, fullness, and type of tree that best fits your space and theme.

    Decorating Your Tree

    Once you have your tree, it’s time to decorate. Here’s a step-by-step guide:

    1. Lights: Start by wrapping your tree with lights. Choose from classic warm white, multi-colored, or themed lights.
    2. Garland: Add garland, starting from the top and working your way down in a spiral.
    3. Ornaments: Hang your ornaments, balancing the sizes and colors evenly around the tree.
    4. Tree Topper: Finish with a statement tree topper that complements your theme.

    πŸ“ Important Note

    Always check your Christmas lights for any damage before using them to avoid any fire hazards.

    Adding Sparkle: Lighting and Candles

    The Power of Lighting

    Proper lighting can instantly elevate the mood of your indoor Christmas decorations. From fairy lights to candlelit centerpieces, lighting plays a key role in creating a festive atmosphere.

    Ideas for Magical Lighting

    • String fairy lights along windows and door frames.
    • Place battery-operated candles on mantels and shelves for a warm glow.
    • Use lighted garlands to add sparkle to staircases.

    Festive Touches: Wreaths, Garlands, and More

    Wreaths: A Welcoming Gesture

    Wreaths aren’t just for front doors; they can add a touch of Christmas to any room. Hang them over mantels, on interior doors, or even as wall dΓ©cor.

    Garlands: Versatility at Its Best

    Garlands are incredibly versatile and can be draped over mantels, wound around stair railings, or used as table centerpieces.

    Accent Pieces

    Don’t forget smaller accent pieces like festive throw pillows, Christmas figurines, and tabletop trees.

    Crafting Memories: DIY Decorations

    The Joy of Homemade

    DIY decorations offer a personal touch and can be a fun family activity. Create paper snowflakes, homemade ornaments, or a unique advent calendar.

    Easy DIY Ideas

    • Handmade Ornaments: Use materials like felt, beads, or even bake salt dough ornaments.
    • Festive Bunting: Craft a festive bunting with fabric or paper in your theme colors.

    Setting the Table: Christmas Dining Decor

    Creating a Festive Tablescape

    Your dining table is a focal point for holiday gatherings. Dress it up with a beautiful tablecloth, a stunning centerpiece, and themed tableware.

    Table Decoration Ideas

    • Centerpiece: Choose a centerpiece that reflects your theme, such as a floral arrangement, a candle display, or a mini Christmas tree.
    • Place Settings: Make each place setting special with themed plates, napkins, and place cards.
    ItemDescription
    TableclothChoose a color and pattern that matches your theme
    CenterpieceFloral arrangement, candle display, or miniature tree
    TablewareThemed plates, glasses, and cutlery
    NapkinsFabric napkins with festive rings
    Place CardsPersonalized for each guest

    The Finishing Touch: Personalizing Your Decor

    Adding Personal Touches

    Personalizing your indoor Christmas decorations makes them truly unique. Incorporate family heirlooms, use photos as part of the decor, or create a special memory corner.

    Ideas for Personalization

    • Display family heirloom ornaments.
    • Create a photo wall with pictures from past Christmases.
    • Set up a special corner dedicated to Christmas books or a family activity like puzzle building.

    Wrapping Up the Magic: Storage and Care

    Post-Holiday Storage

    Taking proper care of your decorations ensures their longevity. Invest in good quality storage solutions and take the time to pack each item carefully.

    Storage Tips

    • Use plastic bins for ornaments and label them by type or color.
    • Wrap lights around cardboard to prevent tangling.
    • Store delicate items in bubble wrap or tissue paper.

    As we wrap up this comprehensive guide on indoor Christmas decorations, remember that the true essence of these decorations lies in the joy and love they represent. Each ornament, each string of lights, and every handmade craft is a testament to the spirit of Christmas. So, go ahead, unleash your creativity, and transform your home into a festive paradise that echoes with the laughter and love of the season. Happy decorating! πŸŽ…πŸŽπŸŒ²

    Originally posted 2023-12-01 05:36:10.

  • Ultimate Guide to Christmas Mantle Decor: Transform Your Space for the Festive Season

    Ultimate Guide to Christmas Mantle Decor: Transform Your Space for the Festive Season

    The holiday season is upon us, and what better way to embrace the festive spirit than by adorning your home with beautiful Christmas mantle decor? This ultimate guide will provide you with innovative and heartwarming ideas to transform your mantle into a magical centerpiece of your holiday celebrations.

    Ultimate Guide to Christmas Mantle Decor

    Understanding the Importance of Christmas Mantle Decor

    The mantle, often the focal point of a living room, holds significant importance during the holidays. It’s not just a platform for stockings; it’s a canvas for your creativity and festive spirit. Decorating your mantle for Christmas not only adds to the overall holiday ambiance but also creates a gathering spot for family and friends to enjoy.

    Historical Significance

    πŸŽ„ Tradition and Evolution: Historically, the mantle has been a central part in celebrating Christmas, dating back to when families would gather around the fireplace for warmth. Over time, its role has evolved from a functional space to a decorative one, embodying the spirit of Christmas.

    Emotional Connection

    ❀️ Creating Memories: The act of decorating the mantle can become a cherished family tradition, involving everyone in the process. It’s a way to create lasting memories and infuse your home with personal touches that reflect your family’s unique holiday spirit.

    Choosing a Theme: The First Step in Christmas Mantle Decor

    Selecting a theme is crucial as it sets the tone for your decorations. It should resonate with your personal style and complement your home’s existing decor.

    Classic Elegance

    🌟 Timeless Charm: Opt for traditional colors like red, green, and gold. Incorporate classic elements like pinecones, candles, and garlands.

    Modern Chic

    ⚑ Contemporary Twist: Embrace minimalistic designs with a modern color palette of whites, silvers, and blues. Geometric shapes and sleek decorations fit this theme perfectly.

    Rustic Warmth

    🏑 Cozy Vibes: Emphasize natural textures and earthy tones. Use materials like burlap, wood, and greenery to create a cozy, rustic feel.

    Key Elements of Christmas Mantle Decor

    There are certain elements that are quintessential to Christmas mantle decor. Combining these with your personal touch can create a stunning display.

    Stockings

    🧦 Symbol of Christmas: Hang stockings with care! They’re not just for gifts but also add a festive touch. Personalize them for each family member for added charm.

    Garland

    🌿 Nature’s Touch: Garlands, whether real or artificial, bring a natural element to your mantle. You can embellish them with lights, ornaments, or ribbons.

    Lighting

    πŸ’‘ Warmth and Twinkle: The right lighting can make all the difference. Use string lights, lanterns, or candles to create a warm, inviting glow.

    Festive Accents

    πŸŽ… Personal Touches: Add unique elements like holiday figurines, bells, or even a Christmas village setup to reflect your personality.

    Creating Harmony: Balancing Your Christmas Mantle Decor

    Balancing the elements on your mantle is key to creating a cohesive look.

    Symmetry vs. Asymmetry

    πŸ” Design Principles: You can either go for a symmetrical look, which exudes elegance and order, or an asymmetrical arrangement for a more relaxed and modern vibe.

    Color Coordination

    🎨 Palette Perfection: Stick to a color scheme that complements your theme. Consistency in color brings harmony and visual appeal.

    Layering and Depth

    πŸ–ΌοΈ Visual Interest: Layer different elements and play with depth. Place taller items towards the back and smaller ones in the front for a dynamic look.

    DIY Christmas Mantle Decor Ideas

    Embrace your creativity with DIY projects. They add a personal and often budget-friendly touch to your mantle decor.

    Handmade Stockings

    🧡 Craft Your Own: Sew or knit stockings for a homemade touch. Choose fabrics that match your theme.

    Upcycled Decorations

    ♻️ Eco-Friendly Creativity: Transform everyday items into festive decor. Old jars can become candle holders, and pinecones can be painted or glittered.

    Personalized Ornaments

    πŸ–ŒοΈ Family Fun: Create ornaments with family photos or personalized messages. They make for meaningful additions to your garland or wreath.

    Incorporating Technology in Christmas Mantle Decor

    Incorporate modern technology to add a unique flair to your mantle decor.

    Digital Photo Frames

    πŸ–ΌοΈ Memories on Display: Use digital frames to showcase cherished holiday memories in a slideshow format.

    Smart Lighting

    πŸ’‘ Mood Setting: Smart bulbs or LED strips can add a spectrum of colors and effects, controlled right from your phone.

    Soundscapes

    🎡 Festive Tunes: Hidden Bluetooth speakers can play holiday music, adding an auditory dimension to your decor.

    Important Note on Safety

    πŸ”₯ Safety First: Always ensure your Christmas mantle decor is safe. Keep flammable items away from open flames and ensure electrical decorations are properly installed.

    Table of Christmas Mantle Decor Items and Their Symbolism

    ItemSymbolism
    StockingsGenerosity and family bonding
    GarlandGrowth and everlasting life
    CandlesLight and warmth
    BellsJoy and celebration
    Angels/FairiesProtection and good tidings
    PineconesResilience and renewal

    In conclusion, Christmas mantle decor is more than just an aesthetic choice; it’s a way to bring warmth, joy, and festive spirit into your home. By following this guide and adding your personal touches, you can create a mantle display that not only dazzles but also resonates with the heartwarming essence of Christmas. Remember, the best Christmas mantle is one that reflects your family’s personality and traditions, making your holiday season truly unforgettable. πŸŽ„πŸ‘βœ¨

    Originally posted 2023-11-30 10:21:41.

  • Elevate Your Thanksgiving with Charming Chalkboard Art Designs

    Elevate Your Thanksgiving with Charming Chalkboard Art Designs

    Thanksgiving is a time of warmth, gratitude, and family gatherings. One way to add an extra touch of charm and personalization to your Thanksgiving celebration is through creative and festive chalkboard art. Not only does it enhance the holiday ambiance, but it also offers a fun and interactive way to engage your guests. In this post, we’ll dive deep into the world of Thanksgiving chalkboard art, exploring various styles, techniques, and ideas to make your holiday decor truly stand out.

    thanksgiving chalkboard art design ideas

    🎨 The Basics of Chalkboard Art

    Chalkboard art has gained popularity due to its rustic charm and versatility. It’s a wonderful way to add a personal touch to any celebration, especially Thanksgiving. The key to successful chalkboard art lies in choosing the right materials and understanding basic techniques.

    Choosing Your Chalkboard and Chalk

    The first step is to select a chalkboard. You can opt for traditional blackboards or modern, colored ones. The size should be appropriate for the space where you intend to display it. As for chalk, there are two main types: traditional chalk and chalk markers. Traditional chalk gives a classic, dusty look, while chalk markers provide brighter colors and smoother lines.

    Basic Techniques for Beginners

    If you’re new to chalkboard art, start with simple designs. Practice basic lettering styles, like cursive or block letters, and simple illustrations like leaves or pumpkins. The beauty of chalk art is its impermanence, allowing you to erase and redo as often as needed. Remember, practice makes perfect!

    πŸ‚ Thanksgiving Themes and Inspiration

    When it comes to Thanksgiving chalkboard art, the themes are endless. From autumn leaves and pumpkins to turkeys and heartfelt messages, you can really let your creativity shine.

    Expressing Gratitude with Words

    Thanksgiving is all about gratitude. Consider writing a beautiful quote about thankfulness or a simple β€œHappy Thanksgiving” greeting. You can also invite guests to write what they are thankful for directly on the chalkboard, making it an interactive piece of art.

    Seasonal Imagery and Icons

    Incorporate traditional Thanksgiving icons like turkeys, cornucopias, and autumn leaves into your design. These elements can frame your text or stand alone as decorative pieces. Don’t forget to play with different sizes and placements to create a visually appealing layout.

    πŸ–ŒοΈ Advanced Techniques for Stunning Effects

    Once you’re comfortable with the basics, you can explore more advanced techniques to make your chalkboard art stand out.

    Creating Depth and Dimension

    To add depth to your art, use shading techniques. Apply a lighter touch in some areas and press harder in others. You can also use white chalk to highlight certain elements, giving them a 3D effect.

    Combining Text and Imagery

    Blend your lettering with imagery for a cohesive and intricate design. For example, you can weave vines or leaves through your lettering or have a turkey’s tail fan out behind a message. This integration creates a more dynamic and interesting piece.

    πŸ“Œ Important Note

    β€œAlways test your chalk or chalk markers on a small corner of your chalkboard to ensure they erase properly. This will prevent any permanent marks or ghosting on your board.”

    Incorporating Color in Your Designs

    Adding color to your chalkboard art can bring a whole new dimension to your Thanksgiving decorations. Chalk markers are particularly useful for this.

    Choosing the Right Colors

    For Thanksgiving, think warm, earthy tones like orange, red, yellow, and brown. These colors reflect the autumn season and add a cozy feel to your designs.

    Balancing Colors and Themes

    When using colors, balance is key. Too many colors can make your design look chaotic. Stick to a few complementary colors and use them strategically to highlight key elements of your design.

    🏑 Displaying Your Chalkboard Art

    The placement of your chalkboard art can significantly impact its effectiveness in your Thanksgiving decor.

    Selecting the Perfect Spot

    Consider high-traffic areas where your art can be easily seen and appreciated, like the entryway, near the dining area, or in the living room. Make sure the spot you choose complements the overall theme and style of your Thanksgiving setup.

    Complementing Your Thanksgiving Decor

    Your chalkboard art should blend seamlessly with your existing Thanksgiving decorations. If you have a rustic theme, a classic black chalkboard with white and yellow chalk might work best. For a more modern look, try a colored chalkboard with vibrant chalk markers.

    πŸ“ Table: Comparing Chalkboard Art Techniques

    TechniqueBest ForTips
    Basic LetteringBeginnersStart with simple fonts like block or cursive
    ShadingDepth & DimensionUse a lighter touch for highlights and press harder for shadows
    Color IntegrationEye-catching DesignsStick to a complementary color palette
    Interactive ElementsGuest EngagementInvite guests to write

    their messages of thanks |

    Wrapping Up: Making Thanksgiving Memorable with Chalkboard Art

    Thanksgiving chalkboard art is more than just a decorative element; it’s a reflection of the warmth and gratitude that the holiday represents. Whether you’re a beginner or an experienced artist, there’s always room to experiment and create something beautiful and meaningful for your Thanksgiving celebration. So grab your chalk, unleash your creativity, and make this Thanksgiving one to remember with stunning chalkboard art.

    Originally posted 2023-11-29 13:21:33.

  • Transform Your Space into a Fitness Oasis: The Ultimate Guide to Creating Your Mini Home Gym

    Transform Your Space into a Fitness Oasis: The Ultimate Guide to Creating Your Mini Home Gym

    Are you tired of crowded gyms and long commutes? It’s time to bring the fitness center to your home! In this comprehensive guide, we’ll explore how to transform your space into a mini home gym. Get ready to embark on a journey towards convenience, personalization, and fitness success, all from the comfort of your own home! πŸ‹οΈβ€β™€οΈπŸ 

    The Ultimate Guide to Creating Your Mini Home Gym

    Understanding the Basics of a Mini Home Gym

    What is a Mini Home Gym?

    A mini home gym is a compact, efficient space in your home dedicated to exercise and fitness. Unlike commercial gyms, a mini home gym is tailored to your personal needs, space, and budget. It’s a private sanctuary where you can workout anytime, free from the constraints of gym hours or equipment availability.

    The Benefits of a Mini Home Gym

    Convenience and Time-Saving

    With a gym right in your home, you bid farewell to time spent commuting and waiting for equipment. It’s all about stepping into your fitness zone whenever you want.

    Personalization

    Your mini home gym can be customized to suit your fitness goals and preferences. Whether you’re into weightlifting, cardio, yoga, or a mix of everything, you can set up your space accordingly.

    Privacy and Comfort

    Working out in the privacy of your home means you can focus solely on your fitness without feeling self-conscious or distracted.

    Planning Your Mini Home Gym

    Assessing Your Space

    Choosing the Right Location

    Identify a space in your home that can be dedicated to your workouts. It could be a spare room, garage, basement, or a corner in a larger room.

    Understanding Space Limitations

    Measure the dimensions of your chosen area to know exactly how much space you have. This will guide your equipment choices and layout.

    Setting Your Fitness Goals

    Identifying Your Workout Preferences

    Are you looking to build muscle, improve cardiovascular health, or enhance flexibility? Your goals will influence the type of equipment you need.

    Creating a Balanced Workout Plan

    Ensure your mini home gym caters to a range of exercises – strength training, cardio, and flexibility workouts.

    Budget Considerations

    Establishing a Budget

    Decide how much you’re willing to spend. Mini home gyms can range from a few hundred to several thousand dollars based on equipment quality and variety.

    Looking for Cost-effective Solutions

    Consider second-hand equipment, multipurpose tools, or starting small and gradually expanding your gym.

    Essential Equipment for Your Mini Home Gym

    Must-Have Equipment

    1. Weights: Dumbbells, kettlebells, or a barbell set.
    2. Cardio Machines: A treadmill, stationary bike, or elliptical.
    3. Resistance Bands: Versatile for strength training and flexibility exercises.
    4. Yoga Mat: For yoga, pilates, or any floor exercises.

    Space-Saving Equipment Ideas

    Adjustable Dumbbells

    These are a great space-saving alternative to a full rack of weights.

    Foldable Cardio Machines

    Some treadmills and bikes can be folded and stored away when not in use.

    Wall-Mounted Equipment

    Consider installing a pull-up bar or wall-mounted cable machine.

    πŸ’‘ Important Note: Always prioritize safety. Ensure your equipment is stable and use protective flooring to prevent damage to your home.

    Designing Your Workout Space

    Creating the Right Environment

    Lighting

    Good lighting is essential. Natural light is ideal, but if not possible, bright, artificial lights will do.

    Ventilation

    Ensure your space is well-ventilated to keep it fresh and comfortable.

    Personal Touches

    Add mirrors, motivational posters, or a sound system to create an inspiring workout environment.

    Organizing Your Space

    Efficient Layout

    Arrange your equipment in a way that allows easy movement and access during workouts.

    Storage Solutions

    Use shelves, hooks, or storage bins to keep your space tidy and organized.

    Maintaining Your Mini Home Gym

    Regular Cleaning

    Keep your gym clean and hygienic. Wipe down equipment after each use and vacuum regularly.

    Equipment Maintenance

    Regularly check and maintain your equipment to ensure safety and longevity.

    Updating Your Gym

    As your fitness goals evolve, consider updating or adding new equipment to keep your workouts challenging and enjoyable.

    Conclusion

    Creating a mini home gym is an investment in your health and well-being. With the right planning, equipment, and design, you can build a fitness haven that is convenient, personalized, and effective. Start your journey today and transform your home into a hub of health and fitness!

    Remember, the key to success is consistency. With your mini home gym, there are no more excuses. It’s time to sweat, achieve, and thrive, all from the comfort of your home! 🌟πŸ’ͺ🏑

    Originally posted 2023-11-27 11:24:55.