Author: Taufiqul Hasan

  • Transform Your Space into a Wonderland: Small Kids Playroom Ideas for Big Fun

    Transform Your Space into a Wonderland: Small Kids Playroom Ideas for Big Fun

    Creating a fun and engaging playroom for your kids doesn’t require a lot of space. With the right small kids playroom ideas, you can transform even the tiniest corner into a world of adventure and creativity. In this comprehensive guide, we’ll explore various tips and tricks to make the most of your available space, ensuring your little ones have a room that sparks their imagination and joy.

    Small Kids Playroom Ideas

    🎨 Embracing Color and Theme

    Choosing a Playful Palette

    Color plays a pivotal role in setting the mood of a playroom. Bright, vibrant colors stimulate the senses and inspire creativity. Consider using a combination of primary colors or go for a pastel palette for a softer touch. Wall decals and removable wallpapers are great for adding splashes of color without permanent changes.

    Selecting a Theme

    Picking a theme can make the playroom more engaging. Whether it’s a jungle adventure, outer space exploration, or a fairy-tale kingdom, a themed room can be a source of endless fun. Use themed decorations, bedding, and toys that align with the chosen theme to create a cohesive look.

    🧩 Smart Storage Solutions

    Creative Use of Space

    Storage is key in a small playroom. Utilize vertical space with tall shelves and wall-mounted storage units. Under-bed storage boxes are perfect for hiding away toys and clutter. Look for multi-functional furniture like benches with built-in storage or tables with drawers.

    Organizing Toys and Books

    Keeping toys and books organized is crucial. Use labeled bins, baskets, or clear containers to sort toys by type. This not only keeps the room tidy but also makes it easier for kids to find and put away their playthings.

    Table: Organizing Toys by Category

    Type of ToyStorage Solution
    Stuffed AnimalsHanging Nets
    Art SuppliesSmall Bins
    BooksLow Bookshelves
    Building BlocksClear Containers

    🎭 Creative Play Areas

    Designating Zones

    Divide the playroom into different zones for various activities. Have a cozy corner for reading, a table for arts and crafts, and an open area for active play. This not only maximizes the use of space but also helps in organizing the playroom more effectively.

    Interactive Elements

    Incorporate interactive elements like a chalkboard wall, a small climbing wall, or a magnetic board. These features encourage creative play and can be easily adapted as your child grows.

    🌟 Lighting and Comfort

    Bright and Inviting Lighting

    Good lighting is essential in a playroom. Natural light is ideal, but if that’s limited, ensure the room is well-lit with overhead lights and lamps. Choose warm, soft lighting to create a welcoming atmosphere.

    Cozy and Safe Furnishings

    Choose furnishings that are child-friendly and comfortable. Soft rugs, bean bags, and child-sized furniture make the space inviting and safe for kids. Ensure that all furniture is securely anchored to prevent tipping.

    🌱 Incorporating Nature and Learning

    Bringing the Outdoors In

    Add elements of nature to the playroom to create a calming environment. Indoor plants, nature-themed decor, or a small aquarium can bring a sense of tranquility to the space.

    Educational Toys and Games

    Stock the playroom with educational toys and games that promote learning. Puzzles, counting games, and alphabet blocks are great for younger children, while science kits and construction sets can be added as they grow.

    🛠️ DIY Projects

    Handmade Decorations

    Engage your kids in creating DIY decorations for their playroom. This not only personalizes the space but also provides a fun activity to do together. Simple projects like hand-painted canvases or homemade mobiles can add a unique touch.

    Customizing Furniture

    Give old furniture a new life with a coat of paint or new knobs. Customizing furniture can be a cost-effective way to match the playroom’s theme and color scheme.

    Important Note: Safety first! Ensure that all materials and furnishings used in the playroom are non-toxic and child-safe.

    📚 Incorporating Reading Nooks

    Creating a Cozy Corner

    Dedicate a corner of the playroom for reading. A small bookshelf, comfortable cushions, and a soft rug can create an inviting space for children to explore books.

    Building a Mini-Library

    Stock the reading nook with a variety of books suitable for your child’s age. Include a mix of picture books, early readers, and educational books to spark their interest in reading.

    🎉 Celebrating Milestones

    Displaying Art and Achievements

    Create a space in the playroom where your child’s artwork and achievements can be displayed. This not only decorates the room but also boosts your child’s self-esteem.

    Updating the Playroom

    As your child grows, their interests will change. Be ready to update the playroom to reflect their evolving needs and preferences. This keeps the space exciting and relevant.

    Conclusion

    Designing a small kids playroom is all about maximizing space, fostering creativity, and ensuring safety. With these ideas, you can create a magical and functional playroom that will be cherished for years to come. Remember, the goal is to create a space where your child can play, learn, and grow in a safe and stimulating environment. Happy decorating!

    Originally posted 2024-01-06 03:54:48.

  • How to Shine Dull Cutlery

    How to Shine Dull Cutlery

    In a dinner, the quality of the dishes is not only determined by the taste of culinary, but also the appearance of your cutlery.

    The whole table of excellent dishes could fall into the lowest base when you set shabby or grubby spoon, knife and fork. When this happens, you can’t console it even with perfect jazz music.

    To shine dull cutlery, you should to know what the materials of that tools. Here are tips for you. Check it out.

    Read also:

    How to Shine Dull Cutlery on the dining table

    Stainless Steel Cutlery

    Even though stainless steel rarely has stain, you might have observed that fingerprint is easily sticking to the surface. That is why you have to apply special tricks while preparing the cutlery before the dinner.

    First, instead of using cold water, you have to rinse the cutlery in hot water after wiping them with commercial liquid cleaning.

    Don’t be too lazy to remove the leftover food before cleaning. Remember that salt and acidic materials could damage the steel.

    Second, using the non-abrasive cloth you have prepared before, hand dry the wet cutlery. This step is especially important to prevent any water spots.

    Do the drying immediately. Seconds to minutes matters, as the drying mark might be formed.

    Third, When the stain cannot be cleaned with washing liquid, try to apply natural cleaning compound. Some of the most popular products are vinegar, cider, lemon, soda water and olive oil.

    Fourth, choosing vinegar or cider would save you more money, as both could be utilized as the polisher later after drying. To get a perfect polished cutlery, dip a cloth into the cider or diluted vinegar and apply circular motion.

    Fifth, Soda water could make a great polisher, too. Rinse the items with soda water and dry at instance using non-abrasive cloth.

    Running out of these solutions? Then grab lemon and squeeze it for the juice. Take soft dry cloth and pour several drops of lemon juice on it. Rub the cutlery with the cloth gently.

    Stainless steel cutlery set

    Silver Cutlery

    Usually in gala dinner, the host will prefer to set his collection of silver cutlery instead of the stainless steel ones. Not only they give off royalty atmosphere, but also a sign of formal dinner.

    Silver compound is more fragile thus it  requires extra protection. Make sure you do the proper ways.

    First, the first rule is to object the use of dishwasher. It helps with some regular dirty plates, but certainly not for the silver materials. With this said, you have to hand-clean the cutlery.

    Second, some guests might be considerate about the effect of leftover food to the silver cutlery. Any grime or remaining food could destroy the silver layers, thus it should be removed immediately.

    Make sure you hunt the leftover food down to the tiniest particle by soaking them in warm soapy water.

    Third, absorb the water after rinsing with non-abrasive cloth. For polishing purpose, you cannot apply natural compound. It is a must to use commercial silver polisher liquid or anti tarnish product.

    Fourth, keep the silver cutlery inside cotton bag or wraps. This step would prevent any scratch and dust sticking on the surface.

    Silver Cutlery Set

    A perfect host knows that shining cutlery is as important as serving the delicious delicacies. Thus, cleaning is the most important part of preparation.

    Apply special treatment for the stainless steels to bring back the shine. Put non-abrasive cloth within your hand reach, because you will need it immediately after you rinse the cutlery. Dishwasher is not your friend for this purpose!.

    HOW TO SHINE DULL CUTLERY

    Originally posted 2020-05-12 00:01:58.

  • Choosing Best Grill Design for Glass Windows

    Choosing Best Grill Design for Glass Windows

    The glass window has humble and elegant vibe at the same time. As a house frame, it could be one of the most fragile area.

    At the same time, you have more options to decorate the plain material. One available choice is to install metallic grill.

    It provides both protection from burglars and moderate aesthetic side.

    Read also: Front Window Decor Ideas. 

    HOW TO CHOOSE BEST GRILL DESIGN FOR GLASS WINDOWS

    The Architectural Side

    Each house has its own style. Your first job before stepping further in designing the grill is to consider the overall shape of the house. When the previous owner or you build the house, there must be certain picture in their mind.

    Some examples call for contemporary and traditional style. No matter how big your love is for traditional decorations, you can’t just stick it to the contemporary house.

    Family room traditional window grill design
    Image: beeyoutifullife.com

    It would be too risky and tricky. In the end, you might get dull house view from the outside.

    However, this kind of combination might be possible, only when you discuss the details with the experts. Be careful, so you are not ruining the whole project.

    The Function of Window Grilles

    Common window plays its role as the path for sun lights to enter the house. But then, glass also serves as a great sliding door, the doorway, or even an entrance door! Putting the function into consideration would help you to decide which grill to install; the ornamental or the plain one.

    Take a look at the scenery outside the frame. When it doesn’t display great view to look at, cover the glass window with a grill that has complicated pattern.

    Avoid using this decoration for dark space, particularly the area near the closet or pantry. A simple grill would be better, as these spots require more lights.

    Window grill patterns and styles
    Image: beckerwindows.ca

    The Pattern of Window Grilles

    The basic norm of designing the grill is matching bars and squares. The more complicated the pattern you draw, the more money you will spend. There are some common models that might inspire you.

    1. Diamond

    It is the combination of diagonal lines. The advantage of this pattern is its strong hold. However, it requires a lot of materials to build.

    2. Concentric Circles

    This style fits well for a contemporary house concept.

    3. Simple Horizontal Bars

    If you want something simple for the limited glass window area, this is the best bet. Don’t be surprised with its formal look.

    4. Morroco Pattern

    Unless you have calculated and prepared the space well, this design won’t just fit. It has tight curves and woven pattern.

    5. Floral

    Many people install the floral design in the living room. The guest could admire the intriguing design while waiting for the host. Make sure to avoid this pattern in limited-space living room; the space would seem even smaller.

    It would be easy to leave the glass stands on its own, and give a layer of curtain as a cover. However, using grill as the connector of outdoor view and the rooms inside your house is mush better thought.

    As long as the design of the grill suits the architectural shape, has the right color and style, and won’t suffocate the guests, you are good to go.

    Outside Grill Window and other Different types window grill design and pattern

    Originally posted 2020-05-11 04:51:44.

  • Indoor Fish Pond Tips and Ideas

    Indoor Fish Pond Tips and Ideas

    There are many ways to bring nature to your home. One of them is by building fish ponds in certain corner of the house.

    Many people claim that having the pond brings another joy for the family. They could spend hours standing near the pond and observe the fish swims here and there.

    Learn the tips to make this happiness last for a long time.

    Read also: Small Living Room Decor. 

    INDOOR FISH POND TIPS AND IDEAS

    1. Build Twice Size

    If there is any regret the pond builders have ever shared, it must be about the pond size. Their initial plan turns to be a lot smaller than expected.

    Since many of them build the solid pond, there is no way they can rebuild the fish pond, unless they start from scratch. Thus, the first rule is to double the size of the pond in your blue print.

    Another way to solve the size problem is by building the pond using rubber liner. If you ever heard that this tool takes a lot of efforts, it is not true.

    The plastic material gives you flexibility for the depth and width. No matter how deep or wide you prepare the area, rubber liner could fit in.

    Indoor fish pond ideas for koi with pot plants
    Image: pondpictures.org

    2. Dig Deep Enough

    In the beginning, you might say that you don’t want any fish inside the pond. Days later, you might change your mind.

    This should not be a problem if you have provided the proper depth for the fish you are going to raise.

    Any pond shallower than 24 inches doesn’t fit for any fish. In summer, the water will evaporate, and winter will turn it into an ice pond.

    The ideal depth for raising goldfish is 36 inches at the minimum. Bigger fish like Koi certainly need deeper pond; 48 inches at the minimum.

    If you are not planning to throw in any fish, then make it into 24 inches depth. This measurement ensures a nice pond in any season.

    Indoor mini fish pond

    3. Install Filtration System

    Even for an empty pond, filtration is crucial. It prevents stagnant water by making waves. Otherwise, your pond would be the home of mosquito larvae. The filter is even more important when you have fish inside.

    Make sure you install proper size of filtration system. The safest step is to purchase the biggest filter you can afford. It could ensure the healthy water flow and the habitats inside.

    Indoor fish pond with fountain and waterfall
    Imae: homedit.com

    4. Build Level Shelves

    A great pond is surrounded by natural plants. In order to get this impression, you need shelves for plants. In general, you have to make two levels.

    The first level goes 24 inches deep in the pond. It is a perfect place to grow submerged plants and water lilies. The second level has to be 12 inches deep. It would be a fertile land for marginal plants.

    While building the fish ponds, considering about the construction is not enough. You have to think about the beauty and the practicality. Double the size of your original pond size, as long as the area is available.

    Dig the earth deep enough, so your fish could get enough oxygen supply. Also, don’t omit the filtration and plants around the pond. Enjoy!

    Indoor fish pond waterfall

    Originally posted 2020-05-10 02:32:22.

  • Home Office Design Tips

    Home Office Design Tips

    For a few days in a month, you have no choice but to bring your work to home.

    Since it will happen anyway, why don’t you dedicate a small corner in the house to be a home office?

    Having this area ready is nice, but you have to learn the tips to make clear line between comfort and working pace.

    Read also:

    HOME OFFICE DESIGN TIPS

    1. Setting The Equipment

    Remember, you are going to design a home office. It doesn’t have to have a complete office supplies.

    Before you spend your money on color laser printer, think about how important it is for your job. If walking to the neighborhood copier could solve the problem, why should you give up the space for an equipment you will rarely use?

    Since you might move around the house, make sure the laptop connection is wireless. Cables will limit your movement and might make you trip over.

    Once you install the wireless connection, do a simple test. Try to access a website from your desk and the area around it. A great connection should be stable.

    2. Getting The Light

    The perfect place for you to put the office table is close to the window. Through this ventilation, natural daylight could give proper and costless lighting. Nothing could beat the white balance of the daylight.

    Even though season and geographical season affect the white color a sunlight reflection produce, including the daylight as the main light would be great.

    Some office can’t afford above-the-ground space and go in the basement instead. In this case, you want to combine general and task lighting.

    It is better to grab high-quality bulb, so you don’t have to change it in rainy days or late night. Try to find the bulb that could replicate white daylight in the closest spectrum.

    Home office design layout ideas
    Image: designtrends.com

    3. Finding The Privacy

    To work on your papers and projects, quiet environment is required. Thus, you can’t compromise with any disturbance from your surrounding. Take the first step by eliminating eye distraction.

    Move the screen projector to limit the view of neighbor activities. You could also move a bookshelf or divider walls. Placing a bookshelf would be more practical, as it could turn into a helpful storage.

    Next, set the air purifier or fan to quiet mode. It’s a big NO to paint the wall with colorful tones. Pastel or white colors work best for maximum concentration. Don’t forget to warn your family members that you are in working time. Hang a “don’t disturb” or “busy” sign on the door.

    Home office design and color ideas

    4. Organizing The Office Supplies

    A messy working table could stretch your working hour. It is simply because you cannot work efficiently. Every time you need a highlighter, it is hidden under the pile of papers.

    Mixing finished and unfinished paper will make you confused. Therefore, office supply organization is important. Gather stationary in one box and don’t forget to put it back in the box after use.

    Working in a home is another form of blessing comfort. You can stay away from office riot, particularly at the last seconds to deadline.

    However, being too comfortable could create another problem; slower working pace. In the end, you might miss another deadline. Make sure you set the balance of a relaxing and conducive office.

    Home office design contemporary
    Image: dandsfurniture.net

    Originally posted 2020-05-09 12:43:52.

  • How to Match Kitchen Cabinet Countertops and Flooring Combinations

    How to Match Kitchen Cabinet Countertops and Flooring Combinations

    Countertop, cabinet, and floor are three dominating components in a kitchen.

    Coordinating the colors of these elements is basically toning the kitchen itself.

    That is why making a plan is essential. Gambling has a bigger chance to fail. Moreover, there are a bunch of choices you can pick from.

    Instead of rushing to the store, consider the following suggestions first.

    See also:

    HOW TO MATCH KITCHEN CABINET COUNTERTOPS AND FLOORING COMBINATIONS

    1. Plan the Palette Colors

    First of all, picture the overall frame in your head. Imagine how you like the colors to be. Find three colors at the maximum for your kitchen: two dominant or main colors and one accent color. You can add your favorite colors to the list.

    Remember both should be the pillars of the whole concept. If you are not too sure, then utilize the color chart or chips. The accent color could be provided by the utensils. You could also simply skip the last step. Paint would come handy to give the final touch.

    2. Pick Countertops First

    When purchasing the products, the wisest choice is to pick the countertop first. It matches with your eye level and placed in the middle.

    Therefore, the countertops, being the focal point, take the top place. Moreover, this item is the most expensive among the other items.

    Various materials are available: granite, marble, tile, Silestone, etc. Each of them comes with different texture and finishing.

    After choosing the suitable countertop, it will be easier to coordinate the cabinet and the floor tile. Don’t forget to bring the sample of your countertop color when purchasing the other elements.

    Kitchen cabinets and countertops combination

    3. Balance the Color

    There are two options to balance the dominant colors. The first one is bounding the cabinet and flooring in one tone, while the countertops will be a perfect ribbon of different stain.

    The second one is to match the cabinet and the countertops. The flooring then should provide contrasting color.

    Take an example of choosing brownish granite with beige and rust touch. The perfect pair would be beige or rust floor tile. Blue marble countertops with a sheer of marble and gold would look great with cream or gold toned tiles.

    4. Pick Cabinet Style

    Following the theme you have set in the beginning, it is time to choose the last decorative point: the cabinet. Without this element, you only play with color and pattern.

    Accentuate your kitchen with suitable cabinet. If you are after simple concept, pick flat panel type with minimalist line.

    Distressed cabinet, in the other side, will fit perfectly to vintage concept. If your countertops and floor are infusing cream and beige, beadboard style cabinet is certainly better than the other. The center has eye-catching pattern, while the rest has plain color.

    Coordination of colors for interior design usually only involves 3 colors at the maximum. Infusing more than three would ruin the balance in your kitchen and might create “”messy” impression.

    Don’t forget about the kitchen utensils. These small decorations are also splashing colors. Play with your imagination within the above rules border and get the maximum kitchen beauty.

    New kitchen cabinets and countertops granite

    Originally posted 2020-05-08 10:33:03.

  • How to Choose Best Dining Room Lighting Design Tips

    How to Choose Best Dining Room Lighting Design Tips

    If you have to mention one entertaining room in the house, you might choose dining room over the living room.

    Why is it so? The reason is simple; the dining room allows many people to gather, dine and chat at the same time.

    With these functions in mind, the lighting setting should be set to fit either ambiance with a single switch click.

    For that, these simple tips to choose best dining room lighting. Hope you get some ideas. Check it out.

    See also: Dining Room Table Decor. 

    SIMPLE TIPS HOW TO CHOOSE BEST DINING ROOM LIGHTING DESIGN

    1. Pick the Right Size and Shape

    The rule of perfect dining room lamp starts from your dining table. When it comes to kitchen, the main purpose is to shine the light upon the table and all the utensils set for the diners.

    To fit this purpose, you will need to pair round table with a round pendant or chandelier.

    They complement each other and gives leveling effect. If you have rectangular shape table, then hang a linear pendant. It makes the lines go bolder than usual.

    Another tips for the installation is about the distance of the lighting from the side of the table. The suitable distance to maximize lamp illumination is 30 cm or twelve inches from all table directions.

    Take an example of 120 cm wide and 180 cm long dining table. The best lighting fixture pair for this furniture is a 120 cm x 60 cm lamp.

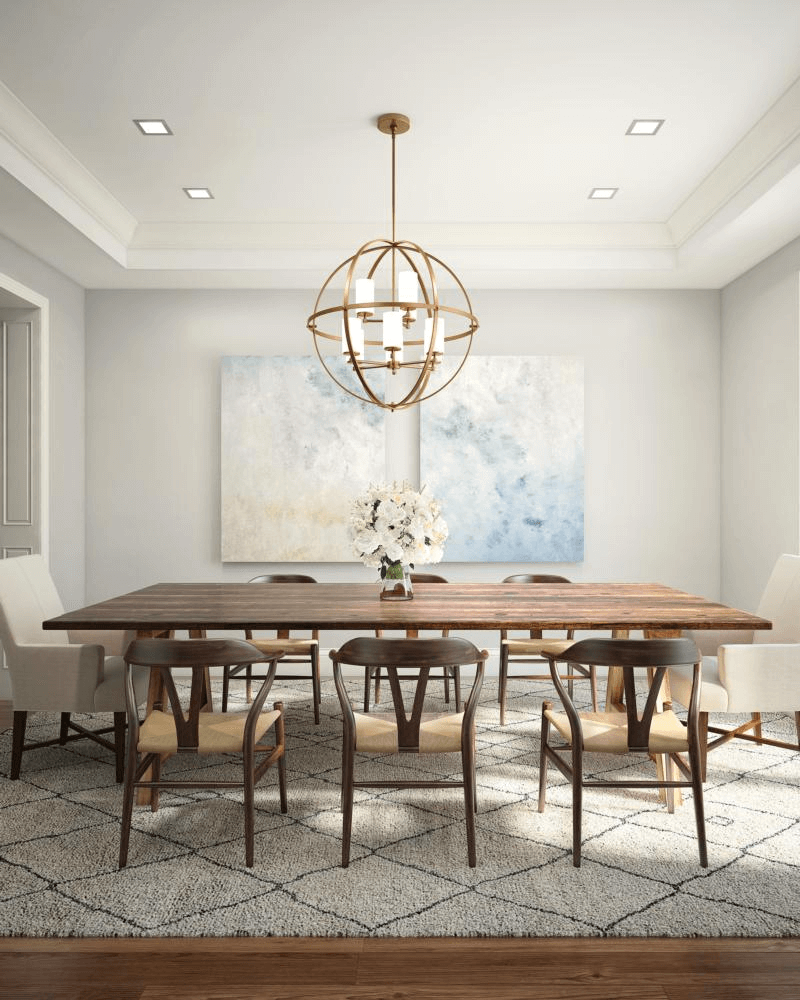
    Dining room chandeliers for low ceilings
    Image: lalila.net

    2. Set the Right Height

    After purchasing the right lamp fixture for your dining room, the next question would be: how high should you hang the pendant or chandelier?

    Hanging it too low will cramp your space, while setting it too high won’t make a great balance for the room.

    The general height used for house installation would be 75 to 90 cm or around 36 inches. This refers to the distance between the top of your table and the bottom of the lamp.

    If you happen to live in a house with double height ceiling, pull up the lamp to 102 cm or 40 inches distance. It would still fit the frame well.

    Rustic farmhouse style dining room pendant lighting
    Image: homebunch.com

    3.Set the Right Amount of Light

    It will never be enough to have only one candle in the dining room. Most people neglect this fact, and you don’t have a single reason to follow this step.

    If you do, there will be very limited option for you to play with the ambiance. Do you really want to rely on the dimmer only?

    Look at the beautiful painting hanging on the wall. Why don’t you install recess or track lighting for the piece of art? Aside of painting, most dining room has cupboard. It sticks close to the wall without any decoration on.

    You could make use of it as the surprising effect by putting two table lamps on both sides. For tall board, a line of LED lighting on the top would be pretty. Its glow and sparkle are something your guests could admire.

    When all relatives and friends gather, having small talk while munching some confectionery will be the main activity in the kitchen. Don’t let the fun ends when there’s only the two of you at home!

    Control the room purpose for either warm family gathering or romantic dinner for two by setting the lighting with dimmer.

    Dining room lighting brushed nickel

    Originally posted 2020-05-07 03:14:05.

  • How to Choose Best Bedroom Lighting Design Tips

    How to Choose Best Bedroom Lighting Design Tips

    Who said that choosing bedroom lights are easy to do? In contrast of its simple image, pointing the perfect illumination to create a perfect ambiance has challenging yet fun factor at the same time.

    Its abundant variant of shapes and colors sometimes affect our subconscious level.  Is it really good to follow the hypnotizing persuasion?

    HOW TO CHOOSE BEST BEDROOM LIGHTING DESIGN

    1. Size Up or Down?

    Your first consideration falls on the size of your bedroom and how you will use it daily. The basic rule about lighting is providing enough illumination for every corner.

    This is where most people fall into the classic tricks, thinking that installing a lot of lamps will help accentuating the carving of the room. In fact, this effort will result in a cave room: too bright in one side and too dim in another side.

    To help you decide the size, also think about the activities you are going to have in the room. If the bedroom has sole function as a sleeping chamber, then dim pendant lighting is enough.

    However, when you still bring books or your works to the bed, the best options is to have several small lamps.

    Vintage classic bedroom lighting
    Image: electricsandlighting.co.uk

    2. Fancy or Simple?

    Another factor you have to consider is the conformity of the room. Think again about it. For this bedroom, you might spend more than enough to incorporate particular color, pattern and furniture.

    Now, it is time to find a way to go along with the flow. For a classic room, the best pair would be two side lamps. They balance the lines of the room. You can also pick sconces lamps for comparison.

    Looking for soft setting? Then you might like the idea of ceiling light with a dimmer. In the corner of the room or next to your bed, install another standing lamp. They add main lighting for the important area.

    For those who live the artistic sides, abstract shaped lamp would be more tempting. In this case, pick spider legged lamps or even a standing lamp.

    Fancy bedroom lighting picture ideas

    3. One or Multiple?

    There are three kinds of lighting for layering purpose: ambient, accent and task lighting. Each lamp has its own function in the layer.

    Ambient lighting for example, plays an important role in determining the mood of the room. It is usually the pendant or another type of lamp installed on the ceiling.

    The accent lighting, in the other hand, helps to shoot the focal point of the room. It could be a painting, statue, wall decoration, etc. If you don’t keep anything like that, don’t set the lighting and go with two layers only.

    Task lighting is the minimum single layer you must have in the room. Its role is to shine on particular area. Set your layers and aim for the best ambiance you want!.

    Read also: Five Tips to Decorate a Small Bedroom

    While you set your own bedroom, it is not just like any other room. This particular space has to be as cozy as possible, displaying the owners’ personal taste and style.

    Pay attention to the size of your lighting, which affect coverage area of the sparkle. Never skip the option to shout your personal fashion. If you need a luxurious touch, then layer your lighting.

    How to Choose Best Bedroom Lighting Design Tips

    Originally posted 2020-05-06 03:49:44.

  • How to Choose Best Living Room Lighting Design Tips

    How to Choose Best Living Room Lighting Design Tips

    Householder has spend much money and time to decorate their home. They choose the comfort sofa, or paint color wall on the living room, but they forget to decorate the appropriate lighting for their living room.

    In your spare time, you play with your pets, read book, or receive guests, lighting has a great role in lighting the room. Then, we provide How to choose best Living room lighting design tips.

    Old proverb says,”Lighting creates intimacy where ever it is”. Thus, having good lighting in living room will increase intimacy in your house.

    House owner needs to consider on different kind of lights, control the light on several levels to create the warmness and attractiveness.

    See also: Rustic Bathroom Lighting Ideas. 

    SIMPLE TIPS HOW TO CHOOSE BEST LIVING ROOM LIGHTING

    1. Set the scale right

    Good overhead lighting will offer a great fantastic touch if you do it properly. Pay attention on the size and purpose when you use overhead fixture in a living room. You should consider how the space is used and where the space you most spend in a day.

    Then, you should pay attention on how wide area is and how height the ceiling is. If you have low ceiling living room, we suggest you to use a semi-flush light like schoolhouse lamp. If you have high ceiling living room, make sure that you choose the lamp with a specific focal point.

    White living room lighting low ceiling
    Image: decoist.com

    2. Do not hesitate to mix and match colors

    Actually, there are no fix rules for matching lighting and color in your living room. Suggestions are still the best method to give you other preferences, but it depends on how you perceive, what it works on your personal tastes and how it applies with your lifestyle.

    Rooms will look interesting and attractive only with a few mismatched things, not much. You do not need to use one color in your room. You may vary the color for your table, floor lamp and others.

    In here, we suggest you to use different bed lamp beside your bed. Try to explore new innovation on color.

    Modern living room lighting high ceiling with hanging chandelier and large window
    Image: hgtv.com

    3. Determine the correct bulb

    There are many different types of bulb, each of them has different function and light level. You should choose the proper bulb for your living room. Bulb will show you how elegant your design is in your home.

    It is a public secret that living room is a place where you use mainly in the evening/night. LED Bulbs will have a great role in here. If you are wonder about the best type to use, we suggest you to use a decorative bulb.

    Elegant and trendy are the reason why decorative bulb is always the best option to live up your living room. You can search the type of the bulbs on the Internet. Search on the google and you will obtain many options.

    Read also: DIY Contemporary Bathroom Lighting Ideas

    Living room lighting is important part to live up your home. Choose the best decorative labs may give you huge effects. Do not worry to mix your ideas and apply it.

    If you follow How to choose best Living room lighting design tips above, you will get references how to live up your living room.

    Best tips to Choose Living Room Lighting Design

    Originally posted 2020-05-05 03:49:12.