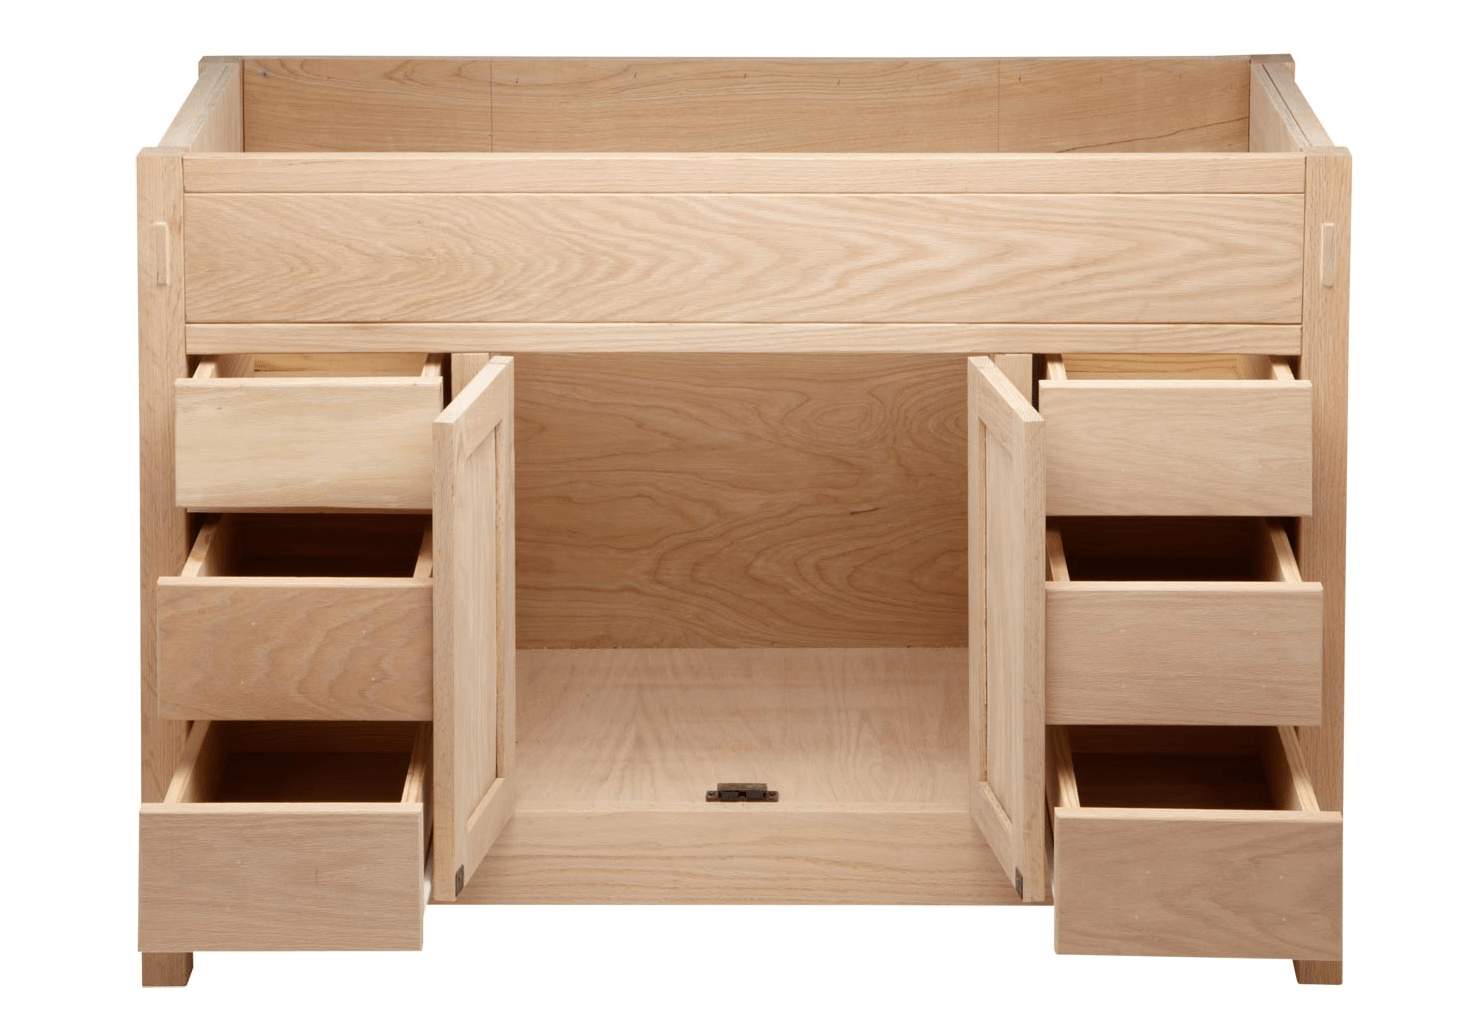
Rustic trend is hot right now, and the idea of adding unfinished cabinets with drawers is brilliant. It has the rustic pure look while it is actually fully functional.
Depending on the size and design, we can use this furniture item in several ways.
Check out the following list to really use it well.
1. Night Stand
If you get the small one, you can actually use it as a night stand. Its small size makes it a perfect fit beside your bed.
You can get a couple of it for the same look on both sides of the bed, but using different night stand on each side is on trend today.
Add needed decor from night lamp to alarm on it.
You will need the right height and you will need good finishing so its surface is safe for your skin. If it is too high or too big, this item will be a great a tea table on your porch.
If the cabinet is big enough and long enough, it can be a perfect dressing table. You will need some space so you can sit comfortably. However, don’t stick with the mainstream set up. Explore the possibilities and use it in the right way.
It needs to be on the right height as well to serve as a dressing table, and you are going to need a mirror to complete it. In addition to the mirror, fitting stool or chair will be needed to provide you with seating space. The rustic look will give the room an original yet elegant look.
If your unfinished cabinet is on the right height to be a bathroom vanity, you should consider using it this way. You are going to need to make several adjustments in order to add sink and set up the plumbing right. It isn’t going to take too much effort to make the alteration.
In addition to the alteration, you may also need to add a little decoration touch on it. Unfinished cabinet will work with white color, or even contrasting marble sink to make it pops out. Don’t forget to add earth element like small plant with green color on it. It makes it even more interesting.
In alternative to the bathroom vanity, you should also consider using it as your cloth drawers. Being a cabinet, you actually have several spaces to store your clothes and perhaps more items as well in it. However, if you use it this way, you will need to have several more additions too.
A mirror hanging above it is essential. It makes it a complete set. A small area rug should complete the set and create a special space for the dressing area. Being a drawer, you don’t need to add stool or chair. However, a little decoration will complement the whole set up.
This unfinished cabinet is a perfect item according to today’s trend, thanks to its rustic finish. Completed with several drawers, it makes it even better for a a lot of purposes. Which one are you gonna go?
Replacing your cabinet doors and preferring to unfinished cabinets doors is actually very smart.
Unfinished cabinet doors are gorgeous as it is especially with rustic style is on trend today.
Even if you want to finish it later, you have the entire freedom for customized look. However, how to choose the right one?
1. Choose Your Material
There are several options for the door.
Maple wood is elegant and strong with light color and fewer patterns and textures. It is a great option for modern cabinets.
Image: halfpricekitchen.com
Oak is great too. It has warm color while it offers strength and durability with pure elegance as well. It has very minimal patterns and it explain why it is high on demand for furniture.
And than, it is next choice. Cherry wood.
Cherry wood is special with strong color and it is the perfect option for raised panel.
Image: advancedcabinetscorp.com
Hickory is great too and it has many textures and patterns. This adds vibrant look in the kitchen.
Image: thecabinetsplus.com
2. Choose the Panel
There are several options for the door panels as well.
Raised panel is the most common option for the cabinet door. It offers classic look and it is often used for bathroom to kitchen cabinet doors.
Flat panels look similar to the raised one but it is simpler. It offers classic style as well.
The other option is frame panel that offers more elaborated look than the previous two. You can add more accents on it more than with the two.
At last, you have panel with mullions which is the most complicated and it often combines wood and glass.
3. Select Your Supplier Carefully
Basically, there are two options for your supplier.
First, you can opt for established factory for the doors. The benefits are they have approved quality and look, and considering it comes to standard size, you won’t have difficulty to find the right one.
Second, you should also consider ordering from local handyman. When it comes to customized look with perfect fitting, this is your answer. However depending on the design and demand, its price can be a little higher than the factory made.
It is always important to measure your need. Sometimes, there are extra gaps and other flaws on the cabinet that needs to be addressed. Of course, standard size is always standard but doing something to the flaws will make it great. Therefore, measure again and do it the right way.
Bring your measurement to your supplier and please make sure to deliver your special condition if there is any. You may want to pay attention to small details, and measure the details in the right way. This will affect how it fits with your cabinet.
Many suppliers let you have size trial just in case things don’t go well. Even though cabinet doors come as standard, several customized cabinet has its own flaws that need to be adjusted or matched. This allows you to make sure your choice is a fitting one.
In alternative to size trial, you should also consider checking on warranty. Several doors are completed with warranty. So in case it doesn’t fit in any way, you can return it and get a replacement or a refund. Especially when you are in budget, this is highly essential.
Now you know everything you need to know before hunting for your new unfinished cabinet doors. Apply the tips and get the best one.
Some people may prefer to buy the all-finished and well polished vanity cabinet. They simply seek for one that matches their interior. Sometimes, it can be a little tough.
This is when unfinished vanity cabinet actually comes in to fill in the gaps between needs and flexibility. Wondering why we should prefer on this one?
These benefits will tell you better.
1. Ultimate Flexibility
The best thing about unfinished vanity cabinet is on its flexibility for almost everything. You can actually finish it later just as you want it.
You can use veneer for original look and you can use paint with colors you want to use. It provides freedom to choose your preferred finish.
You can also modify the design a little if it doesn’t completely fit your preference. For example, you can add shelves or you can remove the rack and enjoy the space below.
It allows you to get exactly the right design you want to have. The unfinished thing gives you freedom to customize it.
The unfinished look is actually on trend right now. Rustic look becomes more and more popular today including for interior decor.
This vanity will work best on your rustic interior. You don’t need to coat the surface with paint or anything else. You can actually use this original look and get the best rustic item in the room.
The original look of vanity makes the high value of it. However, you still need to apply the right finishing for the vanity. Make sure the surface is safe for your activity, and it is sturdy enough to use.
3. Deep Quality Assurance
The perk of choosing unfinished vanity lies on our ability to really check on the quality of the vanity. This is an important step while buying furniture and the unfinished look actually reveals the entire details. Are the screws right and tight? Are the entire feet well fitted?
This is a chance for you to see the real look of the material and if it fits well to your likeness. Many times, it shows you the flaw of the vanity cabinet and prevents you from wrong choices. You can give it a finish by yourself later. It cuts your expense.
Being unfinished, the vanity cabinet will be offered in more affordable rate. This kind of vanity cabinet is actually common since years ago where customers like to order a new furniture right to the workshop. They will find options that are unfinished. Now, it becomes style.
Finishing the vanity cabinet is actually very affordable and it is very simple to do. You don’t even need expert hands to finish this.
Meanwhile, the difference puts a huge gaps between the original price and the later price. Really. If you want to save more, buy the unfinished.
In sum, the unfinished vanity cabinet is actually very preferable. It allows you to have several privileges you don’t have on other style. Hunting for a vanity cabinet? This is your best option.
There are two splits opinion about any unfinished product. Some say that the natural wood and carve are its distinctive charm, but several others take it to cut their furniture budget.
Either side you are on, the unfinished vanity cabinet should be coated before. Otherwise, it will be very fragile and totally vulnerable.
Learn more about the unique product and how to handle it.
1. Recognize The Material
The term “unfinished” means that the product has not received any treatment, giving you the highest flexibility for the finishing. Most of the samples are usually dominated with wood based material.
Some popular woods are ivory, cherry, and red wood. Each of them delivers different vibe to the room. Product from medium quality wood shouts casual instead of elegant.
Any great contractors would suggest you to go with classic style if your unfinished item is made from high quality wood. Expose the wood fiber in the surface.
For the coming years, you could awe your guests. Also, you will spend less than coating the whole thing and cover the natural wood pattern.
If you happen to buy the cheaper one, then there is only one way to upgrade: stain it. The type of pattern or colors is for you to decide. There is endless possibility, but the most popular ones are plain color and granite pattern.
Who wants any smudge on the vanity surface? No one. As you getting the preparation done, always check for the holes. While doing this, make sure you give enough lighting.
If needed, you should turn over the vanity and point the light to it. Small holes are often hidden and only shown when stained.
Done with the marking, you have to fill the holes with putty. It is available in any store that provides building material. Let it dry for several minutes. Lastly, sand the surface using the sand paper for smooth finishing result.
You have these two options for the cabinet. There is no real winner if you compare these two, because the decision goes back to you as the owner. Veneer is usually applied on top quality natural wood.
It gives shine as well as covering the fragile surface from moisture and dust. However, you cannot do experiments with this product. It has limited color option.
Those creative minds usually prefer to stain the plain product. With its wide range of color variety, you could literally create anything. Going for unique pattern? You only need to make the base color and draw the pattern using pencil.
Be extra careful on the edges and sides. Take small brush and slowly strokes the color. Don’t forget to give color to the inner walls.
Coating unfinished material is not an easy job, after all. There are a lot of things to consider and a bunch of style to choose. Determine what kind of wood you are working with, and make your mind about the final goal. Pay a close attention to the edge when you paint it.
Mirror is a crucial part of a makeup vanity. Considering how it plays important part on the function, several sets are made to deliver the best help to users.
There are more than enough set available to buy today, and several of them are great ideas to actually adopt.
If you look for enriching your room look and function, these ideas will amuse you.
1. Three-Pages Horizontal Mirror Vanity
This is an elaborated version of the traditional horizontal mirror. It still provides you with enough angle on the sides, which is beneficial when it comes to self makeup session.
The difference lies on its design. Instead of made of a single mirror, it is made of three mirrors, one large in the center and two small at the sides.
You can narrow the side mirrors, so it displays the side of your face closer. It helps a lot while checking if your makeup is fine on those sides in ease. Vintage styles have a lot of this version but modern styles follow now.
This kind of set doesn’t necessarily mean it is made as a single item. The fun fact is its mirror is actually separated from the vanity.
It looks like separately added to the set, but it’s not. Usually, it presents the same style and similar finish to show consistency. Being matching, it makes a wonderful set.
The benefit of buying this kind of set lies on the possibility to replace the mirror one day without any hustle. We only need to get a new mirror with resemblance in concept or finish, and we are good already.
It was first introduced by vintage sets but it becomes something that is commonly offered by modern style as well.
Basically it features three different parts that stand alone while completing each other. The main part is the mirror. It stands alone and it commonly has huge size, enormous maybe.
To complete the set, owner will be provided with a nice looking stool to stand and a small table for your makeup kits. It is often featured in photography projects.
It looks stunning and stylish while being functional at the same time. All items in the set are made of the same materials, designs, and details. You don’t buy them separately.
4. Standard Set with LED Bulbs
This is popularly referred to makeup artist vanity sets. They have standard vanity design and sizes, and a big mirror is attached on top at the center of the vanity. We are allowed with a single seat in front of the mirror, and we get several bulbs framing the mirror.
It is commonly used for professional makeup session as it provides the best display of the makeup. Instead of standard bulbs, people now prefer on LED for it. It gives brighter lighting while it is energy saving and economical as well.
So, instead of using plain vanity mirror set, you should consider using these sets. They offer full functionality while they are gorgeous as interior item. It improves the room as well as helping you with the makeup session. Happy choosing!
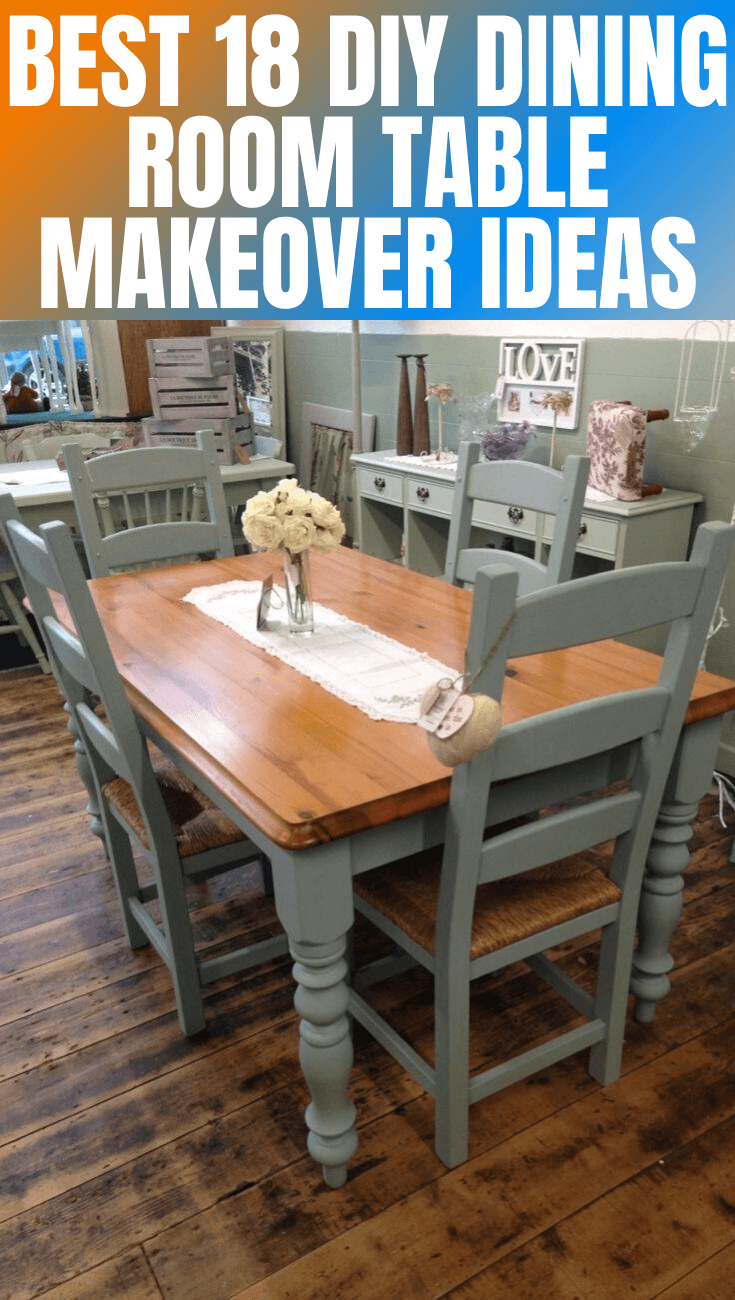
Dining Room play big roll to alter the atmosphere in the house. Moreover, dining room is the perfect place for gathering family while enjoying delicious meal. Aside from the food served, dining room also play big role in entertaining guest who visit the house.
Simply saying, with all those function and benefit that dining room have, it is important to make your dining room look attractive, bright the mood up, and also bring the appetite of the family or guest.
Many people believe that in order to decorate dining room to be very luxury and classy needs high budget. Even so, there are some simple, easy and cheap way for you to realize DIY Dining Room Table Makeover Ideas.
And also, here is the best choice to DIY dining table makeover ideas that I’ve collected for you. Hope it’s help you.
1. Dining table makeover ideas for small family
Most often, family which had few member which consist of father, mother and two children, prefer to decorate their house in simple. Even so, it is not a sin to try something different to the house, especially in dining room area.
You do not need to throw all your dining equipment and change with the new one. What you need to do is upgrading those what you had into finer look. Therefore, it is called as Easy and Cheap DIY Dining Room Table Makeover Ideas.
Image: homedit.com
Repainting old dining table
First step, you can begin with re-painting your old dining table, in order to change the atmosphere. You can also re-painting your dining room wall with the brighter color, if your previous dining room have dark colored wall.
Then, for your dining table, paint it adjusting to the room color. White dining table is currently very fancy, as make the table looks clean and large. You can also draw something on the table, like by making spoon and fork drawing, or other drawing which will match with dining room concept. Do not forget to apply driftwood finish, after painting the table.
Recover dining seat
Second step, recover your dining seat. Chose the best fabric which you will use for the seat cover. You can use recycle t-shirt or curtain fabric, and then cut it into seat size, then glue and staple in the bottom part of the seat. Let it dry for a day, and then put it back on the chair.
Decorate dining table
Third step, in order to make new atmosphere in your dining room, one of Easy and Cheap DIY Dining Room Table Makeover Ideas, is by decorating items on the dining table. If the previous dining table you hadn’t any vases or decoration on it, then try to put a small fake flower vase on it, or other kind of plants. Enough with placing one with the simple look, and make sure that the decoration will not cover your family and guest’s face, when you have a talk with them.
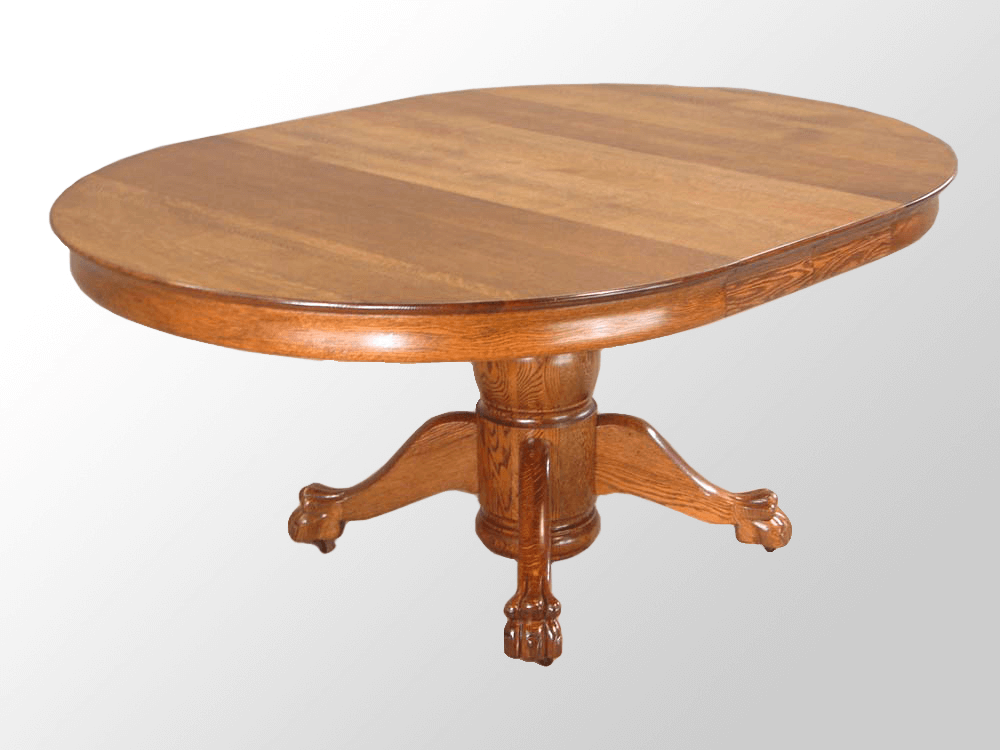
2. Round Wooden Dining Room Table makeover
Wooden dining table with round shape usually have single oak dark color, which make it look classic but also old. If you had this type of dining table, you can follow this simple DIY Dining Room Table Makeover Ideas in order to redecorate the dining table, and make the dining room atmosphere finer and also bring up the appetite.
First, sand the tiny layer on the surface of the table. Do not sand it too hard, as it will make the wooden patter break and become thinner. Then, apply weathered oak stain on the table surface, in order to enhance the natural wooden pattern on it. You can choose the dark stain to make the natural pattern look more stand out.
If the natural color of your table isn’t that dark, you can also adjust the stain to its basic color, as long as it can show off the natural pattern on it. In the way painting it, you need to make tiny layer first and then continue layer by layer until it look glassy. Then leave it for 24 hours until it really dry.
Afterward, then paint the table feet with different color. White color is better to create the clean and bright look on the dining table. White also color which can adjust to any color, without making the table look odd or unbalance. Then, leave it until dry. Afterward, do not forget to apply polycrylic protective finish, to make the paint last longer and look glossy. This DIY Dining Room Table Makeover Ideas can adjust to classic, vintage, and even modern concept of dining room.
After the repainting of dining table settled, then you can decorate your dining table by placing item on it, like vase for example. In choosing on-table decoration, make sure the item is adjusted well with the concept of your dining room. In example, if you want to create unusual concept, you can put small plant pot inside squared glass jars. You can also search some decorations which will fit to your DIY Dining Room Table Makeover Ideas in some online stores.
3. Repainting to stronger color
This is well exemplified by Emmie, at her blog blue 11 interiors. By buying a set of dining tables and chairs used, she had a very beautiful makeover as she wished. This is the look of dining room table and chairs makeover before and after.
4. Repaint with combination colors
If you get bored with one color, you can makeover the color of the dining table with two or more coordinated colors. Jennifer has done well. Inside her site, celebratingeverydaylife.com, she explained that it could be an exemplary option.
5. Add a stencil layer
Not only stenciled, you can do chalk painted to diy dining table makeover as ideas. Brittany, at the prettyhandygirl.com will show you step by step to do that. Than finally, you will see the ending, dining table makeover before and after like this:
Before:
After:
6. White base and stain top
Making the top of the dining table look artistic and old, it was charming. Stain the top of table, the lightly whitewash to get more beautifully aged look. White base and old top. This paintmewhite.com will show you step by step to do this.
7. Create look like zinc covered top table
This makeover ideas DIY for dining room table. Michelle in her blog, thatmommyblog, will tell you for the way, step by step. I think it’s incredible. That’s not really zinc, but the paint formula make it happen.
8. Cover top table with real zinc
And now, it’s using real zinc. You also can using others material as cover table, like stainless steel, copper, or others sheet metal. You must be careful to do it. Angela at unexpectedelegance.com has shown you how. Than, it is the result to give you some big ideas to doing yours.
9. Repaint from black or dark to brighter
The color black or dark is nice, it’s just sometimes look less fun. So you can make a makeover. You can choose a lighter color. The project on this site, Everyday Lovely, seems an interesting example. See the result below.
10. Weathered look dining table makeover ideas
You can re-stain the table, all of part and strip it. The clear step by steps have been shown in this site, simpledetailsblog. Finally, I show you the point for get ideas for you to do makeover.
Before:
After:
11. Replace the dining table top with glass
In addition to using glass, you can also using nailhead trim, etc. This way DIY dining table makeover ideas to make unique design of room. It’s also suitable for small family. Bethany at her site, dwellingsbydevore.com, will show you how. This is very interesting.
After:
12. Replace wooden top with concrete
Especially if you have wooden damaged or outdated top dining table top. How to do it? Kara on her site, karapaslaydesigns.com, shows you well.
13. Repainted, white
Buying used furniture, often get the color that has faded. Sometimes, the color is not as you wish. Dark colors are not fun for some people. In this case, white can be an option. This is a simple way to makeover your dining table. Hemmm… and cheap also. 11magnolialane.com will show you some result and reason why you can choose this way. The simple step also you can do.
14. Get back rustic design
The rustic look is reminiscent of the past. You can use this as an idea for your table makeover.
Image: thebudgetdecorator.com
15. Farmhouse dining table and chairs makeover ideas
It accentuates the wood so it gives a natural impression. Not because previously not good, but a makeover to show a stronger impression. Thanks for TARYN WHITEAKER, you show us well.
16. Creative painting art
It is good example as makeover ideas. Creative painting eliminates the boring impression on your dining table appearance. Thanks allthingsthrifty.com for this ideas.
17. Different color of chairs
Family with lots of funny little kids is fun. The look of the dining room will be very emotional. Giving different colors to the dining room chairs is a great idea. How do you do it? mcdonaldfam very well shows you.
18. Simple, Change your chairs
Sometimes, a chair that does not fit the dining table makes the display less good. This idea I got from Brandi at brandisawyer.com. Simple things that are very easy to do for makeover dining room.
But, if you totally get your own design like you want, you can do this… Make your own dining table.
Make your own Dining Table
The best way to realize DIY Dining Room Table Makeover Ideas is by making dining table by yourself. You can get help from your father, husband, or men in the family, to cut the wood in size.
First thing is, make the concept of your dining table. If you want dining table for vintage and classic dining room, then make wooden cut which had ornament curvature on the backrest of chair, and on the table and chair feet.
Image: wikimedia.org
If you want to have simple concept, then you can cut the table surface and the feet in regular cut to fit the concept. Measure the size of the table surface, and the similar feet size, and do not forget to sand the outer wooden layer.
In this DIY Dining Room Table Makeover Ideas, you can use different material for table surface and for the feet. In example, for table surface using oak wood, which had natural dark patter and color. While for the feet, you can use other wooden material which can be painted in any color. Then, paint the surface of the table and the feet with different color.
Apply oak stain on the table surface, in order to make the natural table pattern stand out. Then, leave it dry and continue with painting protective finish on it, to make the table last longer. Your own table creation is now ready to place in the dining room. Place some decoration on it like vases, to make the dining table look more attractive.
In decorating dining room, besides doing makeover for the dining table, you can also redecorate in other way. It is like repainting dining room wall, to create new atmosphere there, or installing chandelier above the dining table to show off the classic concept. After redecorating your dining room, do not forget to keep the cleanliness of it, in order to make the room looks more attractive, and all the decoration last for long time.
Faux marble is one of the many favorites exterior that loved by many people, especially for the homeowner who love to design their house with some loveable stones.
Furthermore, faux marble also provides the best superiority and even benefits; such as make the look of the house more beautiful and glorious.
Another benefit that you can get when you are applying faux marble is that faux marble has lower cost compare to the real marble, but still be able to beautify the outlook of your house or even to make your house looks clean and calm.
However, not a few homeowners tend to confuse related to clean their faux marble, especially since there are no many ways to clean it up or even stuffs that best to clean it all.
Consequently, it becomes a great responsibility for you to keep it clean and looks well because you are able to take care of.
In helping you with that case, this article provides you with some best ways that you can do easily without ever found any difficulties. Here they are!
Faux marble top coffee table set
Part 1: Things that You Will Need to clean faux marble table top
There are some items that you will need to support your cleaning section becomes work well.
You have to prepare some items, such as: a cleaner, sponge, white vinegar that we know it contains acids that help you to remove the bacteria and even fungi in your lovely stuffs or kinds such as faux marble.
Moreover, you also have to find the spray bottle that later is used as the container or a place for your water.
Besides, you also can use rag that later is used to clean the stains from the faux marble. The last items that are optional for you are fiberglass polish and soft cloths.
Note:
The items that you will need to clean faux marble table top:
a cleaner
sponge
white vinegar
spray bottle
rag
fiberglass polish, and
soft cloths.
White faux marble top dining table
Part 2: Let us Clean Table Top of Stains
After all of the items that will be needed in the cleaning process, you have to do the next step.
First step:
The first thing that’s easy to do with you is to prepare the water that later should be put on the spray bottle. Make sure that you combine the white vinegar and water in the spray bottle, because it will help you to clean the stains that is located on the table top of your faux marble.
Second step:
Furthermore, if it is done, you can spray the water that already mixed with white vinegar into the part of the faux marble table top that has stains.
Third step:
Wipe. You can use the towel or rag to wipe it. Make sure that you can do it slowly. After you wipe it, spray again to the location that has stains.
Fourth step:
Just wait for a few seconds and then you can start to wipe it again, but you have to use the soft cloth. Soft cloth is known as the one that is better than a rag, because it will moist and remove the residue from the cleaner that you already sprayed.
If you already finished with all of those steps, you can repeat again based on your needed. However, make sure that in the last step you should clean it with plain water.
Fifth step:
Last but not the least, you have to remember that diligence and attention for all of the stuffs or even exterior and interior designs in your house make perfect. So, do not forget too clean your faux marble table top, especially to avoid from stains. In addition, do not wait and leave the water in your faux marble because it will leave the spots, so make sure that it is already dry completely.
You usually find two options for faucet styles: the double handle and single handle. Both can pour warm and cold water to the spout, with difference in the swift control only.
The single handle requires pull and swipe, but the double handle will allow you to choose the temperature separately.
The cross handle usually comes in double handle style. No brand that offers cross handle make a single handle faucet.
2. What Types Are There?
One important question before you think further about which faucet to choose: have you bought the sink yet? If you did, then you already limit your options. The faucet you are going to buy should fit to the available hole.
There are four common types: single hole, center hole, widespread mount, and wall mount.
Lucky for you, different manufacturers make cross handle faucet available in all types. Are you looking for the most popular one? Then it will be the wide spread type. The sink should have three holes, with the center size varying from eight to sixteen inches.
If you are keen on widespread type but want things a little more packed, you could take the center hole. Two cross handles and one spout stick together in one plate.
Usually, this type is installed on the sink desk. For those who loves boundless idea, look at the wall mounted faucet. Instead of the sink, the faucet will be drilled to the wall, saving some room on the sink.
Last but not least, the single hole. This type is the least popular one. You can also say that the design is quite eccentric: one spout with two protruding cross handle on both wings.
3. What Are the Good and Bad Things?
House with cross handle faucet will have classical shine on the sink area. Most buyers pick polished chrome finishing, which suits best to “all white” theme bathroom.
The other theme could turn into reality, since more than three finishing are available for each brand. You can even have the black or green colored faucet.
A great bathroom should be able to accommodate everyone in the house. This is where the turn down kicks in. Cross handle faucet does not fit for children.
You need to turn the head and the other way around to stop the water flow. Thus, children under five years old will need close assistance to use the sink.
People come to a store with different need and budget. So you are better prepared to wide array of options in the store: the brands, the color, the style and the material.
The manufacturers offer different features that will accommodate different users and costumers. Now ask yourself once more: are the bathroom faucets cross handles good enough for your house?
The first and most common material that is used for sink is porcelain. Porcelain is also well known as Vitrouse China or the more familiar is Ceramic. Here are the pros and the cons if you choose to use porcelain.
Pros
Porcelain is a kind of material that offers you the lowest level of maintenance, compared with other materials. It’s fair to say that maintaining porcelain is easier than maintaining other kind of materials. More than that, porcelain also has the largest selection compared with other materials.
Cons
The only problem you may find in choosing porcelain as your bathroom sink material is most of it has simple design. Talking about the available designs, porcelain can be the material that has only few designs that can be used.
2. Stainless Steel
As we all know, stainless steel comes after porcelain as the bathroom sink materials that is commonly used. Not only for bathroom sink, stainless steel material is also commonly used for other part of house interior like in the living room, porch, and mostly used in kitchen. A good stainless steel contains chromium and resistant to tarnishing and rust.
Pros
The main advantage of choosing stainless steel is that this material has the lowest cost than other materials. For a modern look in your bathroom, stainless steel offers you low cost that are worth trying.
Cons
The low cost surely gives impact in other aspect, which in this case is the physical look. Although stainless steel can offer you some modern look, this material can scratch or dent. Some types of stainless steel can be scratched easily.
3. Bamboo
Although we often find bamboo as main material for some constructional work, it’s rarely found that bamboo is used for bathroom sink material. In fact, some people like to have bamboo sink in their bathroom. Of course there are some pros and cons of using it in the bathroom.
Pros
One thing that is sure of using bamboo is that this material will give your bathroom the touch of eco-friendly theme. Bamboo will also make your bathroom looks rustic and give you the feel of greening.
Cons
Of course the pros will lead you to something that you will always need to do with the bamboo; which is high maintenance. Maintaining bamboo doesn’t cost you anything but a little bit complication, since you need to make sure that it’s always clean and dry after use.
Each bathroom sink material surely has its strength and weakness, depends on how you treat it. As long as you treat the sink with the proper ways, you can always overcome all the pros and cons of the material.
Bathroom sink materials gallery:
Originally posted 2020-01-25 00:49:23.
Manage Cookie Consent
To provide the best experiences, we use technologies like cookies to store and/or access device information. Consenting to these technologies will allow us to process data such as browsing behavior or unique IDs on this site. Not consenting or withdrawing consent, may adversely affect certain features and functions.
Functional
Always active
The technical storage or access is strictly necessary for the legitimate purpose of enabling the use of a specific service explicitly requested by the subscriber or user, or for the sole purpose of carrying out the transmission of a communication over an electronic communications network.
Preferences
The technical storage or access is necessary for the legitimate purpose of storing preferences that are not requested by the subscriber or user.
Statistics
The technical storage or access that is used exclusively for statistical purposes.The technical storage or access that is used exclusively for anonymous statistical purposes. Without a subpoena, voluntary compliance on the part of your Internet Service Provider, or additional records from a third party, information stored or retrieved for this purpose alone cannot usually be used to identify you.
Marketing
The technical storage or access is required to create user profiles to send advertising, or to track the user on a website or across several websites for similar marketing purposes.