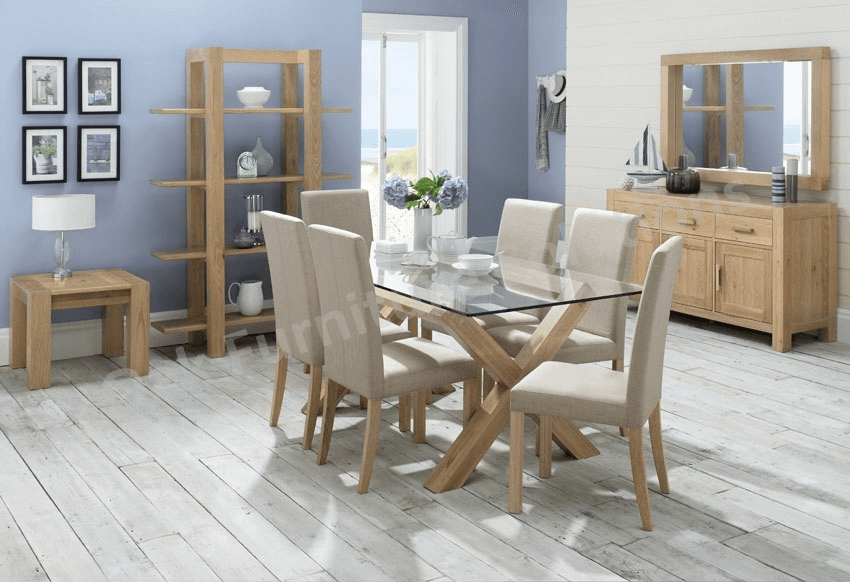
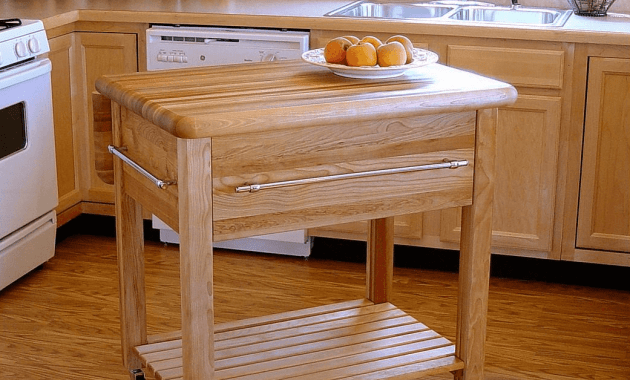
For you who own the contemporary and modern design, the style of this kitchen island table is perfect. Choose the countertop that is made of marble material.
Use consistent material and finish for the island like a black wooden for both the island and kitchen table. For the chairs, use white color with the same height as the island countertop.
White and black finish can never go wrong while aluminum or stainless steel touch makes it contemporary. Add some metal ornament, such as pendant lighting and stainless steel kitchen tools to make it real.
Image: irastar.com
2. Transitional Island Table
This kind of kitchen island table is suggested to use if you have a small kitchen. It gives the kitchen open feeling. Use wooden material to show warm atmosphere.
Make sure your island has this finish for an elegant touch. For the chairs, you may use the small ones so it can be moved and rearrange easier.
It will be combined with the other wooden furniture in the kitchen and a metallic ornament for the lighting. Foldable chairs will be perfect while the light material is convenient.
If you want to add beach house atmosphere in your kitchen, think about tropical feeling on the island and a chair. While marble countertop in bright finish can be an alternative, rattan finish top is a lot better to use.
You can use chairs made of bamboo, rattan, or rustic wood to complete the space. To strengthen the beach feeling, use white color for the chairs and add ornaments that support the design, such as white fabric to be tied in the chairs.
Make it perfect with sky blue color floor for an easy-care “rug”. It soon feels like you are on a vacation in a beach. Combine with stainless steel kitchen tools and beach ornaments on the kitchen island.
This style is always a delightful thing while it remains effective at the same time. Adjust the island table with a selection of marble countertop. The sky blue wooden is perfect for the legs.
Complete this detail with unique chairs. Wooden chairs finished in the same shade are totally brilliant to add. Don’t go too much on the island. Instead, keep it simple and humble for the country touch.
Choose the same simple chairs to complete the island and finish it in a more rustic touch.
Image: qsmallkitchen.com
A perfect kitchen island table set can make the whole of the kitchen looks impressive. It is important to match the design of it with the concept of the kitchen interior. Make sure to consider how you place the chair. It doesn’t have to be at the opposite side of the cook. You can explore more on the sides of the island as an alternative. Happy designing!
Despite of the fierce competition between furniture materials, wood still keeps its charm. For this reason, many people still look for wood furniture. Many house owners treasure their wood items and try hard to make it last as long as possible. How to make wooden furniture more durable?
How to make wooden furniture more durable
DUSTING
Even though you rarely use the wood furniture, there is good chance for it to get dusty. The air that circulates inside the house might bring fine dust particle, which then drops on the wood surface. After some times, these dusts will pile up and pull blind on the wood shine.
Make sure to dust the wood surface at least three times per week. Also, pay attention to the cleaning item. Some of you might choose feather duster or soft cloth to prevent any scratch on the surface. While they serve this purpose, they merely move the dust to the air. Pick lamb-wool duster or terry cloth instead.
CLEANING SPILL IMMEDIATELY
Just because your wood furniture has been polished, it doesn’t mean that the furniture cannot be stained! Wood finish will improve the resistance of stain. However, letting the spill sits on the furniture for a long time is not recommended either. To keep the shine, it is suggested to clean the spill as soon as it drops on the surface.
What should you use to clean this spill? Wiping with bare hands still leave some tiny drops of water. Safest option would be a soft cloth dipped in warm and soapy water. Gently wipe the surface with spilled water. Repeat the process twice to make sure the water is cleaned properly.
If this simple solution is not enough, you could apply cleaning product. Be careful while reading the purpose of the product. Don’t play safe with all-purpose cleaning product. Spend some time to read the labels meticulously.
Put back any cleaning products containing ammonia or silicone. They will ruin the polish faster. Find products that are created specifically for wood and certain finishing. Even after applying this cleaning product, you still have to dab soapy water on the wood surface. Otherwise, the residue might pile up and call for another cleaning time.
SHIELDING FROM CHANGING WEATHER
One thing you will learn as the owner of wood furniture is the respond to weather. This is part of science, taught to you in middle school. When the weather gets too hot, the wood will expand. On the other hand, it goes smaller during cold season. With this constant change, wood would easily crack without any protection.
It is important to be able to control humidity. Inside the house, the ideal temperature should be around 60 to 80 degree while the humidity hangs between 30 to 45 percent. You should also think hard about the furniture placement. Avoid direct sun, as it will alter the chemical compound in finishing layer.
HOW TO MAKE WOODEN FURNITURE MORE DURABLE
REPAIRING QUICKLY
Unlike the other alternative materials, you could repair broken wood furniture many times before enlisting it for sale. Those who own sofa made from wood and fabric combination could replace the fabric three to five times before asking for new wood frame. It is possible as long as you don’t forget one important rule: repair any damage immediately!
RINGS
Do you ever find the culprit for several white rings on the wood surface? It is easy. Remember the last time you put hot or cold beverage on it? Both heat and cold could seep into the finishing layer. This is the source of your rings.
Thankfully, there are plenty remedies. You might try to heat the area with hair dryer. Still not working? Then apply car wax or toothpaste on the affected surface. Rub in circular motion while applying light pressure. Then, wipe with damp cloth.
INK STAIN
So, someone accidentally spill ink on your wood area. Easy, you could remove this trouble stain. For furniture without finishing layer, make a mix of water and baking soda. Rub the paste on the ink stained area only. For furniture with finishing layer, mix water and dish washing liquid. This solution works better.
CHEWING GUM
You need to look under the table or hidden corner to spot the chewed gum. It is sticky, dirty and definitely could ruin your wood furniture. Surely, the gum had stuck in that particular spot for a while before you notice. Remove as many gums as you can. For the residue, apply cold compress for ten minutes. Then, scrape with blunt object such as butter knife.
SCRATCH
Define your scratch first. Is it big or small? For small scratch, the best available option is marker or drawing pen. Bigger scratch could be covered with shoe polish or coffee ground. Pick either one and start working. Don’t forget to find the closest colour to the wood surface. Also, follow the scratch’s direction while applying the remedy.
PROVIDING COVER
From the previous explanation, you could conclude that wood furniture is the most vulnerable to stains. Thus, prevention steps are important. One thing you could do is providing covers. Wood table should have tablecloth, dining table should be covered in plastic layer, etc.
This step is particularly important during holiday season or gathering occasion. You never know what, when and who could spill something on the wood surface. The cover will prevent the spill to touch the wood surface directly, acting as barrier.
Not all of you buy new wood furniture. In many cases, second hand store has pretty items for cheap price. Who cloud resist such offer? If you belong to this group, then make sure to apply extra protection. Wood furniture sold in second hand store must have marks or scratch. Displaying them won’t be good.
You have two options; paint them or apply another finishing layer. Neither is hard work. Before you start the project, lightly sand the surface. It helps the wood furniture to absorb solution better. After applying paint or finishing layer, dry your furniture thoroughly. Now look at the result; isn’t is worth all the time and work?
How to make wood furniture more durable with extra protection. Image
Before knowing how to stain wood furniture darker, maybe you need to know some tips about how to stain wood furniture here. To make wood furniture darker, you need to know some tricks to make sure the result will be satisfying.
Even those who do not take part in DIY wood projects could tell that staining is not a simple task. Before you start the process, you need to determine which stain to take. Then you need to prepare the wood and paint the surface. One mistake in either step might leave a clear stain. Are you ready for some tips?
How to stain wood furniture darker
Best Tips On How to Stain Wood Furniture
1. Choose the Paint
When you go to the paint store, the staff might ask which product you want to buy. If you cannot answer right away, then the question will go to water based or oil-based paint. Each of them has advantages and disadvantages. With oil based, you will need more time to finish the project. It offers a glossy finish and better coverage than a water-based product. This paint could also cover the previous paint.
On the other hand, water-based paint is better in terms of odor. It has a neutral scent and you can work in an indoor setting. Be careful when painting with this product, as it dries quickly. Calculate your brushstroke carefully. Also, you might need a second or third coating to get the intended color.
2. Sanding Wood
One tip before you start painting; wood pores need to be opened before applying any stain. If you work with a finished surface, then you need to sand it. You could grab the sand-grid paper or turn on the grid machine. The point is getting the outer layer peeled so you could see the wood grain. If you do it by hand, then start with 120 options then to 220.
Another tip for the sanding process; it is better to sand according to the grain direction. If you go against the grain, the result won’t be great. You might also have spindles on chairs. Instead of regular grid sand, you could use a foam sanding block.
3. Applying Wood Conditioner
Have you heard of wood conditioners? This item helps the paints to stick better. It also decreases the chance of getting blotches. Before applying the wood conditioner, the previously sanded wood should be cleaned up properly. Double check for any debris or fine dust on the surface.
Later in the process, you will need to alternate brush types depending on the surface you are working with. For wood conditioner, you can use any paintbrush. There is no need to buy a special brush for the job. Leave the wood for approximately 15 minutes. If the conditioner is not absorbed yet, then wait a little longer.
4. Applying First Layer
Think you are ready for the staining process? Do small preparations before doing the job. Grab your chosen paint and the brush. You could use a bristled paintbrush but be prepared for thorough cleaning later. Stain is not the easiest to clean. If you want something more functional, then pick the foam brush. It could be thrown away after use.
Previously you have to choose between oil-based or water-based paint. For oil-based paint, you need to stir well before dipping the brush. This type of paint is made from mineral spirit, pigment, and dyes. When the paint sits still for some time, the pigment is often buried at the bottom. Some professional workers even bring a new basket to pour the paint and stir it again.
How to Stain Wood Furniture Darker
Wood furniture can be stained to achieve different colors, depending on the type of wood and the desired effect. How to stain wood furniture darker? To stain wood furniture darker, you will need a dark wood stain, a cloth, and a piece of sandpaper.
First, identify the type of wood you are working with. Different types of wood take different types of stains differently. If you are not sure what type of wood your furniture is made from, you can test a small area by applying a light coat of stain to it. If the wood is light colored, the stain will be absorbed; if the wood is dark colored, the stain will be less visible.
Once you have identified the type of wood, select a dark wood stain that matches or contrasts with the color of the wood. Apply the stain to a cloth and rub it into the surface of the wood using circular motions. Be sure to apply the stain evenly and to get into all the cracks and crevices.
Let the stain dry completely before moving on to the next step. If there are any areas where the stain has not been absorbed or if there are any streaks or blotches, use a piece of sandpaper to lightly sand them down until they are even with the rest of the surface. Be careful not to sand too much or you may damage the surface of the furniture.
Different types of wood might require different painting techniques. Here are some tips to handle popular wood types.
1. Oak
This wood is probably the favorite among all woods. It has big pores, so the stain will be absorbed well without any blotches. For an even better result, you are suggested to apply the stain in a circular motion, following the grain.
2. Alder and Alphen
Those who complain about blotches are more likely to use either wood type. Despite their light wood, easy affordability, and handling, you need to be extra careful while staining. It is a must to apply wood conditioner beforehand. If you forget, then the stain absorption won’t be even.
3. Ash And Chestnut
These two are loved for their hardwood nature. It is guaranteed to serve for a long time before breaking down. As for the characteristic, it possesses a similar quality to oak. You also need to apply the stain in a circular motion.
4. Birch
People often use this to compensate for the expensive hardwood layer. It could be found on the kitchen counter and furniture surfaces. One warning for you; birch wood doesn’t match with a dark stain. It also has a problem absorbing stains. The best way to handle it is by applying a wood conditioner and choosing a light tone.
5. Cherry And Mahogany
It is rare for people to stain these woods. The cherry type has a distinct color that inspires its name. Also, cherry wood has very tiny pores. You would spend a lot of time and effort for nothing. Mahogany wood is known for its dark tone and needs no more staining. Even carpenter only applies to finish layer on them.
6. Hard Maple
The characteristic of this wood is similar to cherry wood. It has tiny pores that cannot absorb stains well. As expected, this variant is doing great with stain. To make things worse, you will see how the grain is not balanced. If you insist to stain it, then you have to apply wood conditioner then pick neutral to medium light only.
Just like sanding, you should go with the wood grain direction. Aim to have an even coat rather than a pretty layer. You could fix that on the next layer. To work on a vertical surface, there is one product called gel stain. It won’t drip and stick nicely on a wooden surface. Allow the stain to dry for about three hours for water-based paint and 24 hours for oil based before adding another layer.
Have you thought about the shade and wood color you want? Depending on the wood type and dark tone, you will re-coat the wood surface again. For your information, normal shade could be seen after one or two layers only. It applies to both oil-based and water-based paint. If you are not sure, try double coating before adding another layer.
Keep in mind that the stain is not finished. You still have another job to apply sealant on the furniture surface. It is important to apply this layer after the stain completely dries. Popular options for the finishing touch are wax, polyurethane, and oil. Each of them has different look once applied. Ask some experts for their opinion or you could ask the staff in the paint shop.
You do not need to spend a thousand dollars to decor the dining room. The first step that you have to do is look around and find what’ve you got.
You can use book shelves to displays book. The eye-catchy collection will be the great conversation topic in the mealtime.
If you are not a big fan of books, you can put kitchen staff in the shelves. Make the shelves floating and arrange the extra dishes, jar, plates or cake stands in order. It will become the wonderful farm-house theme for your family.
You just need to re-arrange your old shelves and put it there. If you have an old table cloths, just sew it artistically and cover the table with your own work.
2. Find your taste
Whether you like modern or traditional style, you have to design the room as you need.
The second step is avoided to waste things. Did you have warehouse? There must be a lot of old stuff there; you can change that abandon object into something wonderful.
Make your guest impress with the way you design the table. It is better to take advantage from the power of monochrome colors.
If you have black or white table cloth, which is easy to find around your house, put it there and mix it with the arrangement of a tea set. Choose the white tea set for black table cloth and another way around.
You will find the vintage atmosphere by applying this approach. In other hand, if you like traditional taste, find a picture or painting which represent the past. You can put a Puppet as the Wall Sign; spread the antiqueness across the room.
The last step is combining it with the nature. All you have to do is go back to the Earth. There are a lot of things that you can use to magnify the look of your dining room.
You no need to buy it; it is all free because nature provides it. Apply your ideas and combine it with something organic.
If you like Vintage design, just find your old vase and put a flowers with specific meanings. Remember that flowers have their own meaning.
If you want to express your gratitude towards your family, use pink Carnation. Cosmos flowers can make a peaceful aura while the white rose show the feeling of unity.
Get creative and impress your family and friend. You can deliver your massage in the decoration of your dining room. Make the dining room as a beautiful place to share your feeling with family. Grasp the unity and find your home sweet home instead.
Image: diningdecorate.com
Decorating your dining room table on a budget doesn’t have to be difficult. You can make your table look elegant and stylish without spending a lot of money. Here are some tips for decorating your dining room table on a budget:
1. Use simple decorations. Don’t try to over-decorate your table. A few simple decorations will suffice.
2. Use candles. Candles can add a touch of elegance to your table without breaking the bank.
3. Use flowers. Fresh flowers are always a nice addition to any table.
4. Use placemats and napkins. Placemats and napkins can add color and style to your table without costing a lot of money.
5. Go for simple designs. Simple, geometric patterns are an easy way to make your table look elegant without spending a lot of money.
6. Shop around for deals and sales. There are always great deals on decorations available, so be sure to shop around before making any purchases.
By following these tips, you can decorate your dining room table on a budget in no time.
In some occasions, your house will be filled with numerous visitors. Of course, they come because of the invitation: birthday, Easter, Thanksgiving, Christmas or hospitality dinner.
One thing in common for these events: banquet.
For this reason, the dining room should be decorated as you will need space to put the delicacies and also an area for conversation after dinner.
No doubt, the best place to gather is the garden. Borrowing the idea of outdoor barbeque party, you could add the touch of garden beauty to the dining room. If you have ring pendant light, tie up some leaves wrath on it. Slip some white daisies to bring the garden feel.
On top of the table, place a fresh flower arrangement. The main theme should be greenish plant, and colorful flowers of course. You don’t like lush decoration? Take a candle holder and decorate the lower plate instead.
Image: decor4all.com
2. Display the Beauty of a Jewel
If you enjoy being luxurious, bring the feel to the dining room. Remember this formulation: plain and pattern. Divide the section: walls and curtain.
The first option would be plain walls and patterned curtains. Paint the walls with bold color, for example: dark magenta.
Pair them with patterned curtain. For the dark magenta you could hang the curtain with purple floral pattern for purple dots.
The second options is patterned walls and plain curtain. You could attach leaves or diamond patterned wallpaper and swing the plain curtain of similar spectrum.
Image: hobbylesson.com
3. Go Closer To the Ocean
What is the most recommended place to hang out? It is the beach. Bring the nautical vibe to your dining room. Paint the walls with fresh light blue colors that resembles the ocean water.
Install rustic blind on the window. Set it to cover half of the window: the light will be perfect and the shadow on the floor will add the sea breeze.
Pick wooden table and chairs. Lay blue patterned table cover on the table, under the blue glasses as the centerpiece.
In this concept, you basically displaying personal collections and put them into the room. Arrange them in a manner that allows the visitors to admire each art. If you are fond of traveling, souvenirs from different parts of the world could also make good display.
Put patterned rug under the table. Hang paintings collection on the wall, next to oversized mirror. A table lamp on the corner will provide soft illumination for the paintings. For the chairs, pick the one with plain cushion.
This concept resembles the setting of a castle’s dinner: long table, pendant lamps, huge cupboards, and tall glasses. The long table is either half-covered with a table runner or fully covered with table cloth. A royal concept takes gold or white for the color.
The pendant lamp should have glorious flair: hanging crystal like strand or candle shaped bulbs. The huge cupboards in the middle should have similar tone to the table. It display limited or unique cutlery. The tall glasses are arranged carefully in front of each guest for wine toast.
Believe it or not, the ornaments in the dining room could affect the mood of the visitors. Set your dining room into a cozy space, great for food arrangement and perfect for conversation area. Take one of the samples above as your model. Show your guests how prepared you are to welcome them.
Image: homemadeelectronica.com
Additional Tips
If you want to add a touch of elegance to your dining room table, follow these simple tips:
1. Start by clearing the surface of any debris or objects. This will give you a clean slate to work with.
2. Choose a centerpiece that is both elegant and unique. Try something like a vase filled with flowers or a candelabra.
3. Use placemats and napkins in a coordinating color or pattern. This will help to unify the look of the table.
4. Consider using different textures and materials in your décor. This can add visual interest to the table.
5. Don’t be afraid to get creative! There are many different ways to decorate a dining room table. Be bold and experiment with different ideas.
By following these simple tips, you can create a beautiful and elegant dining room table that will wow your guests. Happy decorating!
It may seem just right to you when the price of unfinished kitchen island is far cheaper than the painted one. Automatically, your common sense told you that this type of furniture is not worth buying. Bare wood shows low quality.
This opinion is wrong! Stain or paint is often applied to cover any crack or holes on the wood before handed to the costumers. This, and some other reasons, set people’s eyes to this item.
First of all, you need to recognize the definition of “unfinished kitchen island”. This term is not signaling for its quality. Instead of its rate, unfinished refers to the absence of last stage of the production.
This product has not been painted or stained. Instead of being defected, this type of product is in its best condition to buy.
You, as the buyer, will notice if there is any crooked or broken part. Also, the manufacturers cannot hide the wood and its quality.
For these reasons, many customers choose this product. Particularly for creative brains, the unfinished kitchen island is just like an empty canvas waiting to be sketched.
Types of Unfinished Wooden Kitchen Island
If you compare the design, there are two types of kitchen island: the face frame and the frameless one. The first one has drawers to store kitchen tools such as knifes, spatula, etc.
It faces to the front, within the arm reach of the cook. Having these drawers installed will be a huge help.
However, it will leave no space for you to keep things under the island. The second type has no drawers, leaving a spacious interior space under. The frameless design will perfectly fit to the modern kitchen.
Besides the attractive model, some portable drawers might need to be installed, if you like things to be practical. The image below give you example of unfinished kitchen island with drawers.
Unfinished Kitchen Island Buying Tips
The first suggestion is to know better about the material. Wooden unfinished kitchen island is usually made from mahogany, pine, cherry and oak.
Keep in mind that each of these materials has different stain absorption level. Once it gets dark stain, there is almost no way to make it as light as the new one.
The only option is to stain the island with even darker paint. If you prefer less maintenance type, then you have plywood materials.
Wooden kitchen island only use hardwood, with all the consequences. Plywood offers longer durability and better resistance to stain. In the other words, you will perform minimum maintenance.
Purchasing a new island also means that you are throwing out the old one. If that is the case, then do not forget to visualize the type of kitchen island design you wish to have.
Consider about the installation, efficiency, and the number of kitchen tools you are going to tuck in. The fastest way to deal with this matter is by choosing similar design to the old one. If “one design, brand new item” could satisfy you, why bother to look for the better?
What could be better than an unfinished wood, so clear that you could observe the detail in every corner? Apart from saving some money from your pocket, there are several benefits lines up, only if you could be detailed enough to consider the things above. Happy shopping!.
Unfinished Kitchen Island Image Gallery:
Image: everythingkitchens.com
Unfinished Island Base Only
Sometimes, we need to buy unfinished kitchen island base only. Why? if you want to modified the top island. you can choose nice material top kitchen island that you want. Marble top, ceramics, wooden, concrete, or other material for kitchen top.
Here to sample of unfinished kitchen island without top. Interesting, right!
Awesome here is about daily coffee table with double lift-top. Nowadays, homeowners use living room as a place of chilling, relaxing, and even enjoying their breakfast while surfing on the internet.
With those various activities that can be done in a living room, homeowners need to have a perfect coffee table that can serve various functions.
The coffee tables listed below are some examples of what perfect coffee table are.
1. Darby Home Co’s Wilhoite Double Lift Top Coffee Table
If you are looking for an idea for a coffee table, you can get a superb idea from Darby Home Co. This Darby Home Co has a new variation of coffee table called Wilhoite Double Lift Top Coffee Table. What makes this coffee table special is the design that is based on versatility as the first priority. Besides, the design of this coffee table is also based on how to make the table multifunctional so that it can help homeowners tidy up their living room.
This daily coffee table with double lift-top is designed in such a way it can help homeowners declutter unnecessary stuff in the living room without sacrificing the table’s style. The design of lift-top is a perfect feature to ease your snacking
time or working time with your laptop. Meanwhile, this table also comes with a couple of compartments designed as hidden storage. Those compartments are located underneath and can be functioned as a place to store kids’ toys or magazines.
On top of those features, there are still a couple of special features from this coffee table. This coffee table is crafted using a blend of poplar, ash, solid wood, and also rubber wood. Solid wood is used to construct the top material and rubber wood is used to build the top wood construction details. Meanwhile, the base material of this coffee table is constructed using solid wood. All of the woods that are used to construct this coffee table are reclaimed.
The finishing of this table is from neutral brown shade that makes the overall look so chic and contemporary. The wood finish that is used is poplar. Adding to the feature is the caster wheels that are attached to the down below the table to make any movement easy, especially when it comes to switching up the space layout. This product from Darby Home Co is guaranteed to last for a lifetime.
2. Loon Peak’s Newdale Daily Coffee Table with Double Lift-Top
The product from Darby Home is not your cup of tea? Well, let’s take a look at what Look Peak has to offer. What is so special about this product is the rectangular silhouette of the table that is so striking. That piece of the table features molding that is so chunky. Also, that piece of table also features simple paneling, tapered square legs, and also riveted metal details.
As what the name suggests, this coffee table comes with a lift top. The lift top is hinged to create a work surface that is spacious enough to do your job. Besides, there are also hidden storage for coasters and remotes. Meanwhile, the lower shelf of the table is partitioned that will be perfect for displaying your favorite books or toys collection.
Another feature of this coffee table is the table’s top materials. The top material of the coffee table is manufactured wood. Meanwhile, the top material detail of the coffee table and the top wood construction detail are particle board that’s complemented with a paper laminated finishing. Moving to the base materials of the table, the same material detail is also used for base material details and also for base wood construction details.
If you wish to buy this coffee table online, you may consider the overall weight of this table. The tabletop of this coffee table will take 50 pounds of the overall weight. Meanwhile, the hidden storage weighs 25 pounds and the bottom shelves weigh 40 pounds. If you buy this coffee table, you need to assemble the elements and you may need to prepare some additional tools for the assembly such as adjustable wrench, screw driver, and hammer.
This coffee table is perfect for homeowners that favor rustic looks on furniture. Besides, this coffee table also suits those who loves lived-in and cozy look. This kind of look will be easily noticed from the distressed wood that is used to construct the table.
3. Beachrest Home’s Pinellas Lift Top Coffee Table
Here comes another option of coffee table for your living room. This coffee table is produced by Beachrest Home and is named Pinellas Lift Top Coffee Table. This coffee table is perfect for you who love to relax and sit back to chill in your living room. This coffee table is also perfect for those who loves versatility from their furniture.
The top of the table can lift up and also lift forward to provide you with surface for versatile works. By having such surface, you can do various activities on the table such as having dinner, surfing the web while chilling, and relaxing after the work on a couch.
In addition to those features, there are other details of the table that are also interesting. This coffee table has that hidden storage that is built beneath the top of the table. This storage is also built with open shelves that can be used to store your favorite board games, blankets, picture frames, or to display knick-knack.
For the finishing of the table, you don’t need to worry about the overall look as this coffee table is finished on all of its sides to make it versatile fit for any space and room inside your house.
The top material and base material of the coffee table are from manufactured wood. If you happen to wonder the weight of the table, here are the details: the top weighs 50 pounds, the storage compartment weighs 25 pounds, and the bottom shelf weighs 40 pounds. When buying this coffee table, you need to be ready to assemble the table by yourselves.
So, which coffee table gets your attention the most? Make sure that your coffee table can really meet your need and can serve various functions as you need to have in your living room. Choose your coffee table carefully so that you can have better moment in your living room.
Bluestone table is probably one of the most durable tables you can have.
However being made of bluestones, this table has porous surface which requires immediate stain removal and careful care to keep the color and to prevent damage to the table.
If you are still novice in this thing, you are reading the right guide.
There are several ways you can apply in order to clean the table. You can follow the direction below in the same order.
#1 First
To clean debris, dust, and dirt, use a soft and dry cloth and wipe the table surface. Make sure you do it slowly to prevent scratch, and thoroughly so it is perfectly clean later.
This dry step is necessary to do at least once every day to prevent debris and dust from piling up.
#2 Second
To remove fresh stains and spills, you are going to need to use a dampen cloth. Use a clean and soft cloth and damp it into the water. Use the wet cloth to wipe your table surface.
It is recommended to do this as soon as you get the stains or spills. It prevents them from being absorbed into the stones and leave permanent marks.
#3 Third
For weekly care, you are going to need to use additional help. Mix four drops of mild dishwashing solution with one gallon of clean water. Take a soft and clean cloth and damp it into the mixture.
Wring the excessive moisture and use the cloth to wipe out your table. It is effective to remove staying debris and the odors sticks on your bluestone table.
#4 Fourth
To remove moisture from your table surface, take a soft and clean cloth and damp it in water. Use the cloth to wipe the table then immediately wipe the table with dry and soft clean cloth. This will prevent lingering moisture that can damage the coloring.
In addition to those care steps above, you also need to pay attention on the following factors. It helps in preventing further damage and discoloring on your bluestone table.
Immediately clean stains and spills so it doesn’t leave permanent stains or cause discoloring.
Never use detergent or soaps with harsh formula. Use the mild one if you want to or prefer for a solution specially formulated to maintain bluestone surface.
Never put things with excessive heat on your bluestone table surface. This will damage the smooth surface not to mention change on the color and patterns over time.
Never drag the table. Instead, lift the table from both ends to move it around.
Don’t use too heavy and sharp objects on the bluestone surface. If it is get chipped, keep the pieces and give it to professional for some fixing.
In short, it isn’t very complicated to maintain and care the bluestone table. If you are a new owner, the guide above will help you out. Read carefully and apply as instructed to clean and maintain it without causing additional issues. Good luck.
So, it is really important for you to notice that designing a kitchen island with seating should pay attention to these guidelines and tips.
Check out these following explanations for further information.
1. Add More Counter Space
This is the first thing you should consider, which is increasing the amount of counter space in the kitchen.
Adding or increasing counter space in your kitchen, especially for you who have large-sized kitchen are very beneficial, such as there is more space for meal preparation, there could be multiple chefs or cooks, and the unused counter spaces can be used as an eating area.
Four seating on the island should eat enough space and making sure there is enough space for the counter is wise.
If you are planning to design a kitchen island that contains four seating, then it can be done in your large-sized kitchen island.
However, this is also possible on smaller kitchen as long as you mind the position. Considering that people will eat while sitting on these seats, provide some space for the elbow. The front part of the island is always wise spot to choose.
However, both front and sides of the island are always wise as well for rectangular island. One thing to note, you need to consider your island free space as well if you use the sides of it for seating space.
One of the ways to spread the workflow throughout your kitchen island is to install appliances, such as stovetops or sinks into the surface of the island.
However, you should be careful in installing these appliances because it can be tricky. So, you may want to pay attention to details, such as plumbing and ventilation.
Installing these appliances also take extra space to in-cabinet pipes if you plan to install stovetops and mostly, it will be so pricey.
The most important aspect is people safety while sitting on those seats. Don’t forget to deliver safety for the seating areas.
It is recommended as well to add or create more storage to avoid kitchen clutter by using cupboards, shelves, and drawers. This is a really good idea if the appliances you have taken up a lot of cabinet room, so that the counter space will not look to plain.
If you are looking for a unique way to show off certain items, you can use open shelving to display cookbooks or other items. It also prevents people seating on the seats to see the clutters while eating.
5. Make It Multi-Level
Don’t just stick to appliances, but you can also consider creating variation in the height of the island. It can be done in many ways, such as adding an appliance to one level like a stovetop or sink and create an eating area on the higher tier.
It will make an efficiency of using the kitchen island while it delivers perfect environments for the four seats to dine and drink.
Designing or remodeling large-sized kitchen island can be overwhelming sometimes, but you can actually use up the provided space to place kitchen’s furniture with your own creativity. These tips will hopefully help you to design your kitchen island to look better and even more beautiful.
Other ideas for kitchen island:
Originally posted 2021-09-08 05:16:00.
Manage Cookie Consent
To provide the best experiences, we use technologies like cookies to store and/or access device information. Consenting to these technologies will allow us to process data such as browsing behavior or unique IDs on this site. Not consenting or withdrawing consent, may adversely affect certain features and functions.
Functional
Always active
The technical storage or access is strictly necessary for the legitimate purpose of enabling the use of a specific service explicitly requested by the subscriber or user, or for the sole purpose of carrying out the transmission of a communication over an electronic communications network.
Preferences
The technical storage or access is necessary for the legitimate purpose of storing preferences that are not requested by the subscriber or user.
Statistics
The technical storage or access that is used exclusively for statistical purposes.The technical storage or access that is used exclusively for anonymous statistical purposes. Without a subpoena, voluntary compliance on the part of your Internet Service Provider, or additional records from a third party, information stored or retrieved for this purpose alone cannot usually be used to identify you.
Marketing
The technical storage or access is required to create user profiles to send advertising, or to track the user on a website or across several websites for similar marketing purposes.