Blog

  • Keep It Unforgettable: How to Decorate for 80th Birthday Party

    Keep It Unforgettable: How to Decorate for 80th Birthday Party

    Anyone that reaches the age of 80 have been through a lot of things. This person surely deserves a special celebration, 80th birthday party.

    It should be different from the regular birthday party. Instead of highlighting the festive atmosphere, go with something decent and sophisticated.

    How to decorate for 80th birthday party? These decorations might help you to go with the lifetime theme.

    HOW TO DECORATE FOR 80TH BIRTHDAY PARTY

    1. Black and White Color with Popping in Red for 80th Party Decoration

    Color is the first thing that comes to your mind. You cannot put rainbow all over the room; it will not please the guests. Remember that the honoree has passed its teenage days. Go with the timeless color: black and white.

    Infuse the passion with red flowers or small decorations. Coordinate all the items in the table with the dominant colors only: cutlery, glasses, napkin, and table cloth. For the table cover, you can pick either checkered or stripe pattern.

    Read also: How to Decorate for Birthday Party at Home

    2. How to Decorate 80th Party with Picture Centerpiece?

    In the center of the table, put a piece of honoree memorable pictures. There are several themes you can choose: the wedding day, graduation day, or any other happy day. The bright smile on the picture will enhance the atmosphere.

    Print the photos in monochromatic color. Put in into a mason jar. To make it prettier, you can add three pinwheels made from old newspaper. Vary the height and size of the pinwheel. If you hold the celebration at night, replace the pinwheel with candle.

    3. Wine Glass and Candle for 80th Party Decoration Ideas

    This item has meaningful resemblance with the honoree: wine. As a bottle of wine grows older, the quality becomes more valuable. This aspect is similar to the honoree. Set the wine glass upside down on the table as decoration.

    Let some lavender or purple colored flower trapped inside. Place a short candle on the top to create dim light. This setting is easy, but sophisticated and elegant. If you plan to pour the drink into the wine glass, then take out the candle.

    80th birthday party decorations
    Image: birthdayowner.com

    4. Lifetime Garland Decoration Ideas

    When stepping into the room and having conversations, your guests will briefly scan the decorations in the room. Let them stop on the garland wall.

    They could see the shortened lifetime story of the honoree. Careful arrangement could bring the guests to the sea of memories, allowing them to feel warmth and sadness within the pictures.

    You may start from the day the honoree was born, childhood, teenage, and go further until the last grandchildren birth. Should there be any funeral, it is your decision whether to put it in.

    5. Milestone of 80 Years Old

    The big family must have adored and cared for the honoree for a long time. Express the love through words and songs.

    Pick one song that describes the honoree best. Put together some videos and old photos until it becomes a milestone of honoree’s life. Insert some loving opinion and wishes inside.

    It would be perfect if the family could make a short video. Play this video on loop as the main event. Without doubt, it will be the best present ever!

    Reaching 80 could also mean being the eldest in the family. Create an unforgettable occasion where everybody could rewind the time to the past. Since excessive colors hurts, pick the soft dim instead. Bring back good old memories in celebration. Deliver the memorable moments through every piece of the decoration in the room.

    80th bday party ideas

    Originally posted 2021-11-09 01:14:00.

  • Awesome Yellow Bathroom Tile Ideas

    Awesome Yellow Bathroom Tile Ideas

    Bathroom with yellow tile was a hit back then. Somehow, it makes its own way to today’s taste.

    Not only for vintage looking bathroom, a modern-looking bathroom is possible to achieve as well with yellow tiles.

    If you want something different in your bathroom and you need ideas to use yellow tiles, you will like the following ideas.

    Read also: Bathroom Tile Ideas in Grey

    1. Honeycomb Art Yellow Bathroom Tile 

    What is nicer than presenting a honeycomb design with yellow color? It looks just right. To make more creative look, wear honeycomb shaped tiles in yellow on the tub area wall.

    Add a little accent by applying the same tiles in black for the tub wall. The combination of yellow and black never fails.

    However for consistent look, you should use white grouts on the tiles for more defined style. It is completely fine too to wear the same honeycomb black tiles for the entire floor. It makes the yellow color pops more and makes the entire concept works well.

    Honeycomb Art For Yellow bathroom tiles
    Image: mydomaine.com

    2. Bathroom with Yellow Tile and White Mix

    If your bathroom has four walls, wear two of the walls with yellow ceramic tiles. You can arrange the setting like the subway tiles do.

    Then, add white grout for them. It makes a perfect and cheerful combination already. The other two walls should be finished with white tiles in the same arrangement and setting. Instead of white grout as well, they should be enriched with yellow grout.

    Extend the combination with white bathroom amenities and yellow finished fixtures. It gives you enough yellow for summer feeling, yet it keeps thing in balance.

    Yellow and white combination for bathroom wall tiles
    Bathroom with yellow tile

    3. Yellow on Black and White Background Bathroom Tile

    You don’t have to cover the entire bathroom with yellow tiles. Instead, you can focus more in making the yellow focal.

    Let’s start with white tiles with small black squares on it. It should make a perfect floor for the bathroom. Continue to finish the bathroom with these tiles up to half down of the wall.

    Make borders with black slim tiles for strong finish. The yellow tiles should go from the half wall to top.

    Combine the entire concept with white cabinet and black countertop and you find yourself a very creative bathroom with elegant concept.

    Yellow and black bathroom tiles

    4. Yellow and Gray Bathroom Tile Ideas, Yay!

    Let’s get a little more creative in combining. Instead of using black or white or both with yellow, let’s try gray.

    Choose medium squares gray for half of the wall to the floor and then finish it with soft gray border. It makes sure darker shade is on the below part.

    Using the same gray tiles, cover the floor in diagonal setting or other possible patterns you can make.

    Finish the rest of the wall bathroom with yellow tile. To pop the yellow up more, use white and yellow bath rug for décor.

    Black, yellow, and gray bathroom tile ideas
    Image: modwalls.com

    Basically, yellow is still an interesting color for a bathroom. It doesn’t have to be hot if you can select the right combination for it. Be creative in setting up the entire tiles. Yellow is the perfect color for summer and fun feeling. Which idea you will pick?

    Read also: Yellow Bedroom Color Ideas

    Combination color ideas for yellow bathroom tile

    Originally posted 2021-10-03 01:39:00.

  • HOW TO INSTALL BATHROOM SINK PLUMBING STEP BY STEP

    HOW TO INSTALL BATHROOM SINK PLUMBING STEP BY STEP

    Here is about bathroom sink plumbing: the parts, how it’s working, the diagram of assembly, and how to install the plumbing of bathroom sink drain. I hope this information help you. Check it out. 

    Read also: Bathroom Sink Drain Pipe Size

    IMPORTANT PARTS OF BATHROOM SINK PLUMBING

    1. Shutoff Valves

    Shutoff valves is metal or plastic. The size is small. It is located between the supply hoses or tubes (this part is connected with the tailpieces on the sink faucet) and the incoming water supply pipes.

    The shape of the handle shutoff valves in oval or sometimes spherical. The handle is work for open or close the valves. So, this shutoff valves are often called Stop Valves.

    With this part, you no need to shutting off supply the water to the whole house. Because you only need use this shutoff valves to turn off the water supply at the sink only.

    The shutoff valves are pairs. One for hot waters, and one for cold water. The installation is easy, because use compression fittings, so you install onto the water pipes without soldering. But, if you want to replace shutoff valve, you need to turn off the water to the house.

    SHUTOFF VALVES BATHROOM SINK PLUMBING

    2. Supply Tubes

    Usually, supply tubes made of chromed copper, solid plastic (gray), plastic mesh (usually white), or braided wire mesh. For supply tubes position, you can see from the sink faucet tailpieces then down to stop valves.

    Supply tubes connected to shutoff valves and tailpieces with attached nuts. Sometimes, supply tubes fail. If that happen, you need replace it.

    3. Drain Tailpiece

    Drain tailpiece also called sink tailpiece is the straight part of pipe, and it’s connects to the sink drain fitting bottom. If you have pop-up drain sink, you can find on the back tailpiece to check the drain assembly.

    Drain tailpiece using a slip nut to attached with drain fitting. It’s easy to controls. Under the nut you can find a tapered plastic washer that make a watertight seal.

    If you drop item into the drain sink, you can open these slip-nut joints. Then you can take the item.

    DRAIN TAILPIECE BATHROOM SINK PLUMBING


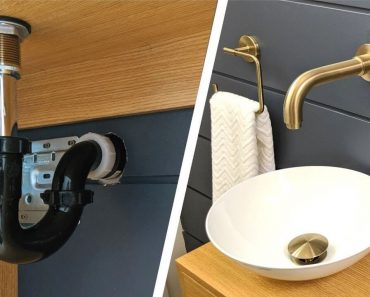
    4. P-Trap

    P-Trap have 2 parts, U-bend and trap arm. These parts make your sink connected to the sewer line. The curved trap allows your sink safety from holds standing water, also prevents the sewer gasses rising up and out to the sink.

    The U-bend bottom always filled with water, so the gasses can not back to sink. If you run water to the drain, you always change the water in the U-bend with new water.

    The P-trap easy to replace because using slip-nut joints to assemble it. But old design using solvent-glued, so better for you to change with trap with slip-nut joint.

    5. Drain Pipe

    This part is connected with the household plumbing system. Drain pipe connects to trap arm with slip-nut joint. So, the sink drain pipe easy to repairs.

    The size of drain pipe is 1½ inch in diameter, but it can be larger or sometimes smaller.

    Related post: Best Tips on How to Decorate a Small Bathroom Sink

    HOW BATHROOM SINK PLUMBING WORKS

    Usually, bathroom sink has 3 fixture holes: 4, 6, or 8 Inch centers. The larger size used to receive a split set faucet that faucet handles and the spout separated. 4 or 6 Inch for a center set faucet or a single lever faucet. The water flow from supply tubes to shutoff valves then to tailpieces on base of faucet.

    Besides that, Pop-up stopper at the drain pipe bathroom sink plumbing that raises and lowers if you pull up or down on knob/handle that located behind the faucet body. The knob is head of lift rod that tied to a clevis (connecting bar).

    Clevis connects to pivot rod and ball assembly, that consist of rod through rubber pivot ball. This part is slightly up to the tailpiece of stopper.

    If you push the knob, the lift rod will down, and it cause pivot rod push the stopper will up. And the opposite will happen, if you pull the knob, you make the stopper down.

    Because some reason, if you want to remove or replace assembly, you can pull it right out. Or, you maybe should to twist it to remove it from the clevis.

    Bathroom sink drain has a flange. With plumber’s putty, the flange was sealed to the sink hole and screwed into drain body. And with a lock nut, it’s tightened to under the sink bowl.

    And then how to P-Trap works, I explained above. Including how water is trapped and hinders the return of gases to the top.

    Then, by observing the following bathroom sink plumbing diagram, it may be easier for you to understand how it works as a whole.

    DIAGRAM OF PLUMBING BATHROOM SINK DRAIN ASSEMBLY

    DIAGRAM OF PLUMBING BATHROOM SINK DRAIN ASSEMBLY
    Image: hometips.com

    HOW TO INSTALL BATHROOM SINK PLUMBING

    Generally, Installing bathroom sink plumbing is need two phases: rough-in and finishing phase. The rough-in is more difficult phase. It depends on the system’s configuration overall.

    Bathroom sink no need high water volumes. So, we must be able to branch the ½ inch supply lines from the tub or shower.

    After that, we can tie the 2-inch drain line into an existing one. Remember too about sink vent. If not, maybe it will not drain properly. We have to raise the 1 ½ or 2-inch vent from the drain within 5 feet of the sink trap. And don’t forget to tie into an existing vent or to the roof.

    1. Installing the Bathroom Sink Plumbing Pipes

    Important to know is the position of the supply tubes and drain pipes. Drain pipes and sink drain should be lined up, and straight between the supply stub outs.

    Uncover the wall to pass the pipe out. The water must be off when the tees soldered onto the pipes.

    The drain slope is ¼ inch per foot toward the sewer, and so does the vent in its incline toward its tie-in point.

    After that, allow the stub-outs lengthwise a few inches from the wall, then close it after you install the sink.

    2. The Stub-Outs Prepare

    Install shutoff valves on the supply stub-outs before hook up the sink. Solder slip-joint valves to pipes or with a wrench, tighten on compression valves.

    Gluing on the valves is the options if you using CPVC plastic pipes instead of copper ones. But, if you don’t glue the P-Trap to the waste pipe, you can glue on a P-Trap adapter.

    3. Connecting the Sink

    Install the faucet and the drain onto the sink before install the sink. It’s will be easier for you. Install tailpiece with same lever as the top of the drain. It’s makes the trap connects easily.

    Connect the faucet supply hoses to the shutoff valves and faucet inlets. Then tighten with adjustable pliers. The connectors must be right at size to fit, so better you check before you buy it. If the pop-up stopper was connected, the sink ready to use.

    Finally, its all of information for you about bathroom sink plumbing. If you want us to discuss further, please write in the comments column below.

    Originally posted 2021-09-24 06:24:00.

  • Bathroom Sink Drain Pipe Size: Guide on Size and Units Connected

    Bathroom Sink Drain Pipe Size: Guide on Size and Units Connected

    Working on your bathroom sink drain pipe is actually a lot simpler than working with ones in the kitchen.

    However, to make sure it is going to be fully functional, you need to understand the entire drain pipe sizes and count the number of pipe units to be connected with it. Check out the following guide for bathroom sink plumbing details.

    Read also: Bathroom Sink Materials Pros and Cons.

    BATHROOM SINK DRAIN PIPE SIZE

    The Standard Bathroom Sink Drain Pipe Size and Setting

    Every state may have different code on plumbing and it may affect the required size of the bathroom sink pipe. However, most of the bathroom sinks use 1 ¼ inch drain pipe. This bathroom sink drain size is precisely the diameter of the pipe instead of the length. For installing the plumbing, You can read in this related article, How to Install Bathroom Sink Plumbing.

    When you visit a real hardware store or plumbing section, the shop assistant will mostly recommend you to use the same size. This size is actually half as big as one on your kitchen sink drain. It is actually an appropriate size for bathroom sink considering that the duty is smaller as well.

    Your plumbing bathroom sink drain will throw away water mostly, or toothpaste and tiny stuffs sometimes. Therefore, bigger diameter of the pipe is actually unnecessary.

    Related post: Best Tips on How to Decorate a Small Bathroom Sink

    Unlike drain pipe on the shower or tub that will be connected to two units, this sink drain pipe will be connected to only one unit on the drain line. Kitchen sink is commonly connected up to two units or three units for one with disposer.

    However with vertical drain stack, this drain pipe size can handle up to two units connection well too. So if you plan to have more than one unit to be connected, stack it vertically.

    Standart bathroom sink waste pipe size

    The Other Bathroom Drain Pipe Size

    Even though the above size is the recommended standard bathroom sink drain size, you are allowed to use other sizes too. There are actually several others alternatives available.

    The first size to consider is 1 ½ inch drain pipe. This is slightly bigger than the standard yet it offers more connections as well. In horizontal stack, this drain pipe serves up to three units connected.

    See also: Cheap Bathroom Cabinet Organizer under Sink Ideas

    Meanwhile in vertical stack, it can work with up to four units connected. It is a custom size on private and public restroom for being practical for two or more sinks.

    The third size is 2 inch drain pipe. This drain pipe can be connected to up to six units in horizontal stack and up to 10 units in vertical stack. This drain pipe is recommended for all models and types of washing machine. So yes, it is perfect for your laundry.

    Related post: How to Unclog Toilet Naturally

    The fourth size is 3 inch drain pipe that can be connected to 20 units in horizontal stack and 30 units in vertical stack. This is the minimum size to use for building sewer or drain pipe that is connected to the toilet.

    The last size is 4 inch drain pipe that can be connected to 160 units in horizontal stack and 240 units in vertical stack. This pipe size is commonly used for sanitary drainage.

    Read also: Bathroom vanity with cooper sink.

    So there are many sizes available. Each offers different ability too. However for bathroom sink, you only need 1 ¼ inch drain pipe or the next size if you insist. Bigger pipe costs your more and it offers abilities you don’t actually need for a bathroom sink.

    Chrome bathroom sink drain smell pipe

    Originally posted 2021-09-24 02:05:00.

  • Awesome Unfinished Kitchen Island Buying Tips

    Awesome Unfinished Kitchen Island Buying Tips

    It may seem just right to you when the price of unfinished kitchen island is far cheaper than the painted one. Automatically, your common sense told you that this type of furniture is not worth buying. Bare wood shows low quality.

    This opinion is wrong! Stain or paint is often applied to cover any crack or holes on the wood before handed to the costumers. This, and some other reasons, set people’s eyes to this item.

    Read also: Rustic Kitchen Island on Wheels.

    Why Buying One Unfinished Kitchen Island?

    First of all, you need to recognize the definition of “unfinished kitchen island”. This term is not signaling for its quality. Instead of its rate, unfinished refers to the absence of last stage of the production.

    This product has not been painted or stained. Instead of being defected, this type of product is in its best condition to buy.

    You, as the buyer, will notice if there is any crooked or broken part. Also, the manufacturers cannot hide the wood and its quality.

    For these reasons, many customers choose this product. Particularly for creative brains, the unfinished kitchen island is just like an empty canvas waiting to be sketched.

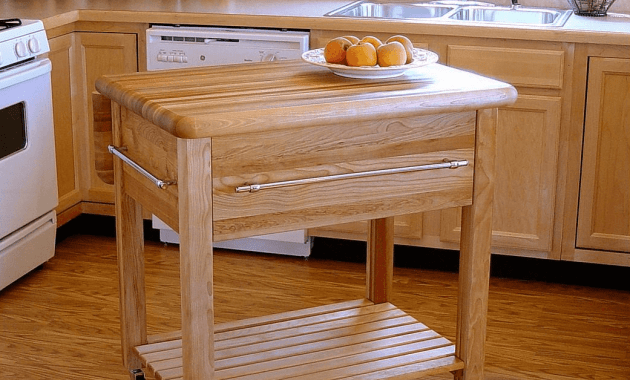
    Unfinished Kitchen Island with seating

    Types of Unfinished Wooden Kitchen Island

    If you compare the design, there are two types of kitchen island: the face frame and the frameless one. The first one has drawers to store kitchen tools such as knifes, spatula, etc.

    It faces to the front, within the arm reach of the cook. Having these drawers installed will be a huge help.

    However, it will leave no space for you to keep things under the island. The second type has no drawers, leaving a spacious interior space under. The frameless design will perfectly fit to the modern kitchen.

    Besides the attractive model, some portable drawers might need to be installed, if you like things to be practical. The image below give you example of unfinished kitchen island with drawers. 

    Unfinished Kitchen Island bases cabinet

    Unfinished Kitchen Island Buying Tips

    The first suggestion is to know better about the material. Wooden unfinished kitchen island is usually made from mahogany, pine, cherry and oak.

    Keep in mind that each of these materials has different stain absorption level. Once it gets dark stain, there is almost no way to make it as light as the new one.

    The only option is to stain the island with even darker paint. If you prefer less maintenance type, then you have plywood materials.

    Wooden kitchen island only use hardwood, with all the consequences. Plywood offers longer durability and better resistance to stain. In the other words, you will perform minimum maintenance.

    Purchasing a new island also means that you are throwing out the old one. If that is the case, then do not forget to visualize the type of kitchen island design you wish to have.

    Consider about the installation, efficiency, and the number of kitchen tools you are going to tuck in. The fastest way to deal with this matter is by choosing similar design to the old one. If “one design, brand new item” could satisfy you, why bother to look for the better?

    Read also: Kitchen Island Breakfast Bar: What Factors to Consider.

    What could be better than an unfinished wood, so clear that you could observe the detail in every corner? Apart from saving some money from your pocket, there are several benefits lines up, only if you could be detailed enough to consider the things above. Happy shopping!.

    Unfinished Kitchen Island Image Gallery:

    SIMPLE TIPS BEFORE BUYING UNFINISHED KITCHEN ISLAND

    Unfinished Island Base Only

    Sometimes, we need to buy unfinished kitchen island base only. Why? if you want to modified the top island. you can choose nice material top kitchen island that you want. Marble top, ceramics, wooden, concrete, or other material for kitchen top.

    Here to sample of unfinished kitchen island without top. Interesting, right!

    Unfinished Kitchen Island Base Only

    Originally posted 2021-09-21 10:31:00.

  • Things about Porch Blinds For Wind And Rain

    Things about Porch Blinds For Wind And Rain

    Why you need porch blinds for wind and rain? Do you just leave your front porch seat to move inside? If it is because of windy weather or dripping rain, why don’t you do something so you could stay longer?

    You could purchase a blinds for your porch and tackle the wind and pouring rain. It is a simple, yet elegant addition for your house exterior.

    HOW TO COVER PORCH FROM THE WIND AND RAIN

    Why Porch Blinds for Wind and Rain Works Better?

    When you do immediate research to find the best blind, you might read this term: shade. It is one similar product like blind, but may not perform well outdoor.

    The first obstacle is the fabric material. It could filter lights, but will shake crazily upon breezing wind.

    As for blinds, its structure has leveled thin layers, allowing the wind to pass easily. You could control the angle and coverage area, too.

    Shades will surely get soaked after rain and without proper drying, the smell will cause another problem. Blinds, on the other hand, only calls for wipe and it will be completely dried.

    Those who love colors and pattern will tend to set their eyes on shades. It has warm tones and plenty of drawings to choose.

    However, this time you should remember what you are dealing with: wind and rain. Thing such as outdoor shades work mainly for blocking the light.

    What Are The Best Porch Blinds for Wind and Rain Options?

    There are three popular blinds that works best against wind and rain. They are the cafe curtains, verandah blinds, and retractable blinds. Each of them has weakness, which should be considered before the actual purchase.

    Cafe Curtain/ Cafe Blind

    Being the first one in the list, this item offers the best protection from water, sun light, and excessive wind. It is made from PVC and available in tinted or clear material.

    Installing the cafe blind will automatically set the barrier between you and the area outside the porch. In addition, cafe blind is the best among the others for durability.

    Verandah Blinds

    Owning an open porch grant you and the passerby access to enjoy what is in store. Keep a little privacy with verandah bliss.

    It covers the area from the ceiling to the floor, but let you see outside through the small gaps. You could dodge the heat, wind and rain while enjoying the vain beauty of surrounding nature.

    Retractable Blind

    This one may not be the most favorite for those who still love to observe the view. It blocks the view as well as 80% of UV rays.

    However, it comes in vibrant colors and water resistant materials. You will get locking brackets in the set, setting the fix place for the blind when the wind comes.

    Porch blinds for wind and rain

    See also: Outside mount blinds with window trim

    Is There Any Porch Blinds for Wind and Rain Installation Tips?

    Awning

    You could extend the protected area by installing awning near the area of screened porch perimeter. Moreover, it will be the sloping side, letting the water falls effortlessly.  Some devices could be retracted.

    Hook

    The lower part of the blind might hang loosely after installation. To prevent to much swaying, attach hook and pull it to the ground. If your blind can’t extend, then tie rope to the hook.

    Porch is a place to admire the nature beauty. Things like wind and rain should not change the whole plan. To fix this problem, you might want to install porch blinds for wind and rain that could block not only overwhelming lights, but also blowing air and dropping water. For its practical use, you pay for fair to low price.

    Front porch blinds outdoor for wind and rain

    Originally posted 2021-09-19 07:30:00.

  • Daily Coffee Table with Double Lift-Top Ideas

    Daily Coffee Table with Double Lift-Top Ideas

    Awesome here is about daily coffee table with double lift-top. Nowadays, homeowners use living room as a place of chilling, relaxing, and even enjoying their breakfast while surfing on the internet.

    With those various activities that can be done in a living room, homeowners need to have a perfect coffee table that can serve various functions.

    The coffee tables listed below are some examples of what perfect coffee table are.

    Related:

    1. Darby Home Co’s Wilhoite Double Lift Top Coffee Table

    If you are looking for an idea for a coffee table, you can get a superb idea from Darby Home Co. This Darby Home Co has a new variation of coffee table called Wilhoite Double Lift Top Coffee Table. What makes this coffee table special is the design that is based on versatility as the first priority. Besides, the design of this coffee table is also based on how to make the table multifunctional so that it can help homeowners tidy up their living room.

    This daily coffee table with double lift-top is designed in such a way it can help homeowners declutter unnecessary stuff in the living room without sacrificing the table’s style. The design of lift-top is a perfect feature to ease your snacking

    Darby Home Co’s Wilhoite Double Lift Top Coffee Table

    time or working time with your laptop. Meanwhile, this table also comes with a couple of compartments designed as hidden storage. Those compartments are located underneath and can be functioned as a place to store kids’ toys or magazines.

    On top of those features, there are still a couple of special features from this coffee table. This coffee table is crafted using a blend of poplar, ash, solid wood, and also rubber wood. Solid wood is used to construct the top material and rubber wood is used to build the top wood construction details. Meanwhile, the base material of this coffee table is constructed using solid wood. All of the woods that are used to construct this coffee table are reclaimed.

    The finishing of this table is from neutral brown shade that makes the overall look so chic and contemporary. The wood finish that is used is poplar. Adding to the feature is the caster wheels that are attached to the down below the table to make any movement easy, especially when it comes to switching up the space layout.  This product from Darby Home Co is guaranteed to last for a lifetime.

    2. Loon Peak’s Newdale Daily Coffee Table with Double Lift-Top

    The product from Darby Home is not your cup of tea? Well, let’s take a look at what Look Peak has to offer. What is so special about this product is the rectangular silhouette of the table that is so striking. That piece of the table features molding that is so chunky. Also, that piece of table also features simple paneling, tapered square legs, and also riveted metal details.

    As what the name suggests, this coffee table comes with a lift top. The lift top is hinged to create a work surface that is spacious enough to do your job. Besides, there are also hidden storage for coasters and remotes. Meanwhile, the lower shelf of the table is partitioned that will be perfect for displaying your favorite books or toys collection.

    Another feature of this coffee table is the table’s top materials. The top material of the coffee table is manufactured wood. Meanwhile, the top material detail of the coffee table and the top wood construction detail are particle board that’s complemented with a paper laminated finishing. Moving to the base materials of the table, the same material detail is also used for base material details and also for base wood construction details.

    Loon Peak’s Newdale Lift Top Coffee Table

    If you wish to buy this coffee table online, you may consider the overall weight of this table. The tabletop of this coffee table will take 50 pounds of the overall weight. Meanwhile, the hidden storage weighs 25 pounds and the bottom shelves weigh 40 pounds. If you buy this coffee table, you need to assemble the elements and you may need to prepare some additional tools for the assembly such as adjustable wrench, screw driver, and hammer.

    This coffee table is perfect for homeowners that favor rustic looks on furniture. Besides, this coffee table also suits those who loves lived-in and cozy look. This kind of look will be easily noticed from the distressed wood that is used to construct the table.

    3. Beachrest Home’s Pinellas Lift Top Coffee Table

    Here comes another option of coffee table for your living room. This coffee table is produced by Beachrest Home and is named Pinellas Lift Top Coffee Table. This coffee table is perfect for you who love to relax and sit back to chill in your living room. This coffee table is also perfect for those who loves versatility from their furniture.

    The top of the table can lift up and also lift forward to provide you with surface for versatile works. By having such surface, you can do various activities on the table such as having dinner, surfing the web while chilling, and relaxing after the work on a couch.

    Beachrest Home’s Pinellas Lift Top Coffee Table

    In addition to those features, there are other details of the table that are also interesting. This coffee table has that hidden storage that is built beneath the top of the table. This storage is also built with open shelves that can be used to store your favorite board games, blankets, picture frames, or to display knick-knack.

    For the finishing of the table, you don’t need to worry about the overall look as this coffee table is finished on all of its sides to make it versatile fit for any space and room inside your house.

    The top material and base material of the coffee table are from manufactured wood. If you happen to wonder the weight of the table, here are the details: the top weighs 50 pounds, the storage compartment weighs 25 pounds, and the bottom shelf weighs 40 pounds. When buying this coffee table, you need to be ready to assemble the table by yourselves.

    So, which coffee table gets your attention the most? Make sure that your coffee table can really meet your need and can serve various functions as you need to have in your living room. Choose your coffee table carefully so that you can have better moment in your living room.

    DAILY COFFEE TABLE WITH DOUBLE LIFT-TOP IDEAS

    Originally posted 2021-09-19 07:01:00.

  • The Best Zep Grout Cleaner Reviews

    The Best Zep Grout Cleaner Reviews

    Why you need Zep Grout Cleaner? Grout somehow can be very irritating when it comes to the thinking of cleaning it. However, it is true that grout plays an important role in our house.

    Its main function to fill up the spaces among the tiles in countertops, showers, floors, and many other surfaces cannot take into granted.

    THE BEST ZEP GROUT CLEANER REVIEWS
    Zep Grout Cleaner

    1. The Grout Cleaning

    Although it has an essential role in your house, grout can be very painful to clean and to keep them clean all the time. You may know it very well that this little ridges and grooves can be the perfect place for mildew, grime, or dirt to be trapped and make your grout looking very grungy.

    We all agree that the grout stains can be very gross to see. They can also become the places for mold, mildew, dirt, germs that you don’t want to be staying there and you definitely don’t want to spend your whole weekend just to clean the grout.

    The good news is that there are grout cleaners out there which are able to remove the stains away from your grouts. These cleaners are even able to prevent the forming of dirt, mold and germs from your grouts from the beginning.

    These grout cleaners are vary and one of them which is very famous among the grout cleaning products is Zep Grout cleaner and whitener.

    Read also: How to clean floor grout without scrubbing?

    2. The review for Zep Grout Cleaner

    As mentioned previously, Zep grout cleaner and whitener is one brand of grout cleaners that is very famous and almost being popped up everywhere. What is it actually? Let’s find out!

    Product Information Zep Grout Cleaner

    The name of the product is Zep Grout Cleaner and Whitener. It is considered as manufacturing strength-old invention. It is liquid. The manufacturer is Zep Inc located at 1420 Seaboard Industrial Boulevard, Atlanta. You can get the more detailed information on this product from its official company website.

    As mentioned previously, Zep grout cleaner and whitener is an acid based liquid. It is a detergent. The acids which are contained in the product are hydrogen chloride and hydrochloric acid. The product comes with 32 ounce or 1 quart per bottle. Each bottle is designed with the applicator nozzle located on the top.

    Pros

    This Zep grout cleaner and whitener is basically a cleaner made of acid. The main function of this product is that you can use it to clean the grout effectively by using minimal scrubbing. This product is very powerful if you want to clean the tile floors in your showers or bathrooms especially if you want to get rid of any stubborn grout that require some serious care.

    You can use this product if you want to make your white grout to become brighter. This cleaner consists of a formula for both cleaning and whitening the grout. You can get your grout as white as you can just in a couple minutes.

    The good news is you don’t need to scrub the grout. This product is bleach-free meaning that you can use the cleaner to all colored grout as it will not cause any discoloration on the colored grout.

    Many customers say that this product is able to work much better than their expectation. It doesn’t create any overpowering aroma or scent. Furthermore, the price is quite reasonable if being compared to other grout cleaning products.

    Cons

    Despite its pros, Zep grout cleaner and whitener is somehow is not suitable for any metal, marble, stone, or Corian tiles. If you happen to have granite or marble tiles, it is better to find some specialized grout cleaners.

    In any case, if you happen to get some of the cleaners on metal accidently and any location besides the grout that you clean, you can rinse the cleaner directly using clean and fresh water as soon as possible to avoid any unexpected impacts.

    Directions of Usage Zep Grout Cleaner

    Before applying the product to clean your grout, it is best if you read the directions of usage first. It is very important and you need to pay attention to it. However, the general instructions on how to use this product are as follows:

    • It is recommended to wear any rubber gloves and also safety goggles. As this product contains acidic formula, you need to protect your eyes, skins and also clothes.
    • You need to apply the cleaner only on the grout. As the bottle is completed with a nozzle on top, you can easily direct it onto the grout. You need to remember to do it steadily and slowly as the bottle is considered to be quite heavy and large. You can also transfer the content of the bottle into some other small bottles to use it easily.
    • Start applying the liquid on small area such as 2×2 square and the move to 5×5 tile or 10×10 one after you feel confident in using this product.
    • Leave the liquid to set on the grout for some time, like 2 or 3 minutes.
    • The acidic liquid will consume the grout’s tiny surface and make the mold, grime and dirt loosen up.
    • You can scrub the grout surface lightly to get rid of such stubborn stains by using the grout brushes.
    • Then, wipe off the cleaner from the grout using any grout sponge or damp cloth.
    • After that, you can mop all area using the fresh water to get rid any of remaining product.

    Product Analysis Zep Grout Cleaner

    This product contains acid so that it can’t be used for bleaching. It means that this product is very safe if you want to use it for any colored grout. It also doesn’t contain any overpowering aroma so that it is quite pleasant to use.

    Zep grout cleaner and whitener is also considered as a strong cleaning product just like any other chemical product, you need to handle it with extra care. If you want to apply the product, make sure that you have enough ventilation and keep in mind to have some breaks so that you will not exert yourself.

    People who have used this product mostly give positive comments or reviews. They simply like this product because it is easy to use. You just need to pour the product and then wipe it off. The cleaning result is also satisfying. So, do you want to try it?

    The Best Zep Grout Cleaner Reviews

    Originally posted 2021-09-18 03:07:00.

  • Different Types of Porch Railings

    Different Types of Porch Railings

    Before you buy railing for your house, you may want to know different materials of the railings.

    Here are some details of them, including the advantages and disadvantages.

    In addition, you may also need to know a few simple tips to choose the design front porch, here.

    DIFFERENT TYPES OF PORCH RAILINGS

    1. Wood Railing

    The first choice for you is wood railing. It is the classical option for many years. The advantage of this wood railing is the relatively cheap price.

    Read also: How to Choose Inexpensive Porch Railing Ideas

    Wood material could also fit any style of house and any railing style. You could also paint and craft the wood according to your taste.

    Even you could bring your favorite scenery to your house. However, choosing this railing means constant maintenance.

    Wood has the potential to break-down because of the temperature differences. If you stay in an area with high rain and blazing hot sun, then this wood railing is not recommended.

    The extreme temperature difference will make the breaking down process goes faster. It is good to get cheaper price, but you may also want to consider the reparation cost after three to five years of installation.

    If after careful calculation you spend more money, you may want to take a look at the other options.

    Wood railing for porch
    Wood porch railing designs, Image: westernspindle.com

    2. Aluminum Railing

    The second option available is aluminum railing. This railing is slowly raising as it gives the future vibes.

    Aluminum material is the most durable one among the others. It also has the lowest maintenance cost.

    Unlike wood railing, the aluminum is not vulnerable under different seasons, even the extreme one.  Once you have installed the railing, you may not need to replace or reinstall it.

    Related post: Great Tips on How to Decorate a Small Front Porch

    When you go to the store, choose the aluminum that does not rust easily. You may also find various colors, as it is painted beforehand. The price of the aluminum is competitive, but surely higher than a wood railing.

    You can also design a lot of styles by using the aluminum materials. The disadvantage of choosing this durable material is its size. It is quite big, resulting in several limitation for customized style.

    Aluminum front porch railing
    Image: coolanz.com

    3. Vinyl Railing

    This is another option for low maintenance railing. Constructed from high quality PVC, you will have less worries about UV discoloration. Vinyl railing is protected by the high impact stabilizer. There are four available colors to choose.

    Read also: Simple Front Porch Designs Tips

    When purchasing the railing, be careful of low-quality product. The best quality product should have thick walls. It will allow you to add no iron as the supporting materials.

    You may also do not want to have the recycled product. It does not work well under certain circumstances and may be harmful to the environment.

    Vinyl porch railing designs
    Image: eprivacylink.com

    4. Steel or Iron Railing

    This railing is the easiest to decorate. There is no limit to your imagination and creativity if you work with steel or iron railing.

    However, you cannot forget that steel is closely related to rust. Make sure you add extra protection to the steel to prevent rust. The houses near the sea or with high rain season may want to skip this railing option.

    Front porch iron railing ideas
    Front porch iron railing ideas

    There are so many options for your house’s railings. Before you choose the materials, the above information may put into your consideration. Perfect railing will be the beautiful ornament for your house.

    Read also: Best Porch Ceiling Material Options

    Most popular different types of porch railings

    Originally posted 2021-09-18 02:19:00.