Blog

  • The Best Zep Grout Cleaner Reviews

    The Best Zep Grout Cleaner Reviews

    Why you need Zep Grout Cleaner? Grout somehow can be very irritating when it comes to the thinking of cleaning it. However, it is true that grout plays an important role in our house.

    Its main function to fill up the spaces among the tiles in countertops, showers, floors, and many other surfaces cannot take into granted.

    THE BEST ZEP GROUT CLEANER REVIEWS
    Zep Grout Cleaner

    1. The Grout Cleaning

    Although it has an essential role in your house, grout can be very painful to clean and to keep them clean all the time. You may know it very well that this little ridges and grooves can be the perfect place for mildew, grime, or dirt to be trapped and make your grout looking very grungy.

    We all agree that the grout stains can be very gross to see. They can also become the places for mold, mildew, dirt, germs that you don’t want to be staying there and you definitely don’t want to spend your whole weekend just to clean the grout.

    The good news is that there are grout cleaners out there which are able to remove the stains away from your grouts. These cleaners are even able to prevent the forming of dirt, mold and germs from your grouts from the beginning.

    These grout cleaners are vary and one of them which is very famous among the grout cleaning products is Zep Grout cleaner and whitener.

    Read also: How to clean floor grout without scrubbing?

    2. The review for Zep Grout Cleaner

    As mentioned previously, Zep grout cleaner and whitener is one brand of grout cleaners that is very famous and almost being popped up everywhere. What is it actually? Let’s find out!

    Product Information Zep Grout Cleaner

    The name of the product is Zep Grout Cleaner and Whitener. It is considered as manufacturing strength-old invention. It is liquid. The manufacturer is Zep Inc located at 1420 Seaboard Industrial Boulevard, Atlanta. You can get the more detailed information on this product from its official company website.

    As mentioned previously, Zep grout cleaner and whitener is an acid based liquid. It is a detergent. The acids which are contained in the product are hydrogen chloride and hydrochloric acid. The product comes with 32 ounce or 1 quart per bottle. Each bottle is designed with the applicator nozzle located on the top.

    Pros

    This Zep grout cleaner and whitener is basically a cleaner made of acid. The main function of this product is that you can use it to clean the grout effectively by using minimal scrubbing. This product is very powerful if you want to clean the tile floors in your showers or bathrooms especially if you want to get rid of any stubborn grout that require some serious care.

    You can use this product if you want to make your white grout to become brighter. This cleaner consists of a formula for both cleaning and whitening the grout. You can get your grout as white as you can just in a couple minutes.

    The good news is you don’t need to scrub the grout. This product is bleach-free meaning that you can use the cleaner to all colored grout as it will not cause any discoloration on the colored grout.

    Many customers say that this product is able to work much better than their expectation. It doesn’t create any overpowering aroma or scent. Furthermore, the price is quite reasonable if being compared to other grout cleaning products.

    Cons

    Despite its pros, Zep grout cleaner and whitener is somehow is not suitable for any metal, marble, stone, or Corian tiles. If you happen to have granite or marble tiles, it is better to find some specialized grout cleaners.

    In any case, if you happen to get some of the cleaners on metal accidently and any location besides the grout that you clean, you can rinse the cleaner directly using clean and fresh water as soon as possible to avoid any unexpected impacts.

    Directions of Usage Zep Grout Cleaner

    Before applying the product to clean your grout, it is best if you read the directions of usage first. It is very important and you need to pay attention to it. However, the general instructions on how to use this product are as follows:

    • It is recommended to wear any rubber gloves and also safety goggles. As this product contains acidic formula, you need to protect your eyes, skins and also clothes.
    • You need to apply the cleaner only on the grout. As the bottle is completed with a nozzle on top, you can easily direct it onto the grout. You need to remember to do it steadily and slowly as the bottle is considered to be quite heavy and large. You can also transfer the content of the bottle into some other small bottles to use it easily.
    • Start applying the liquid on small area such as 2×2 square and the move to 5×5 tile or 10×10 one after you feel confident in using this product.
    • Leave the liquid to set on the grout for some time, like 2 or 3 minutes.
    • The acidic liquid will consume the grout’s tiny surface and make the mold, grime and dirt loosen up.
    • You can scrub the grout surface lightly to get rid of such stubborn stains by using the grout brushes.
    • Then, wipe off the cleaner from the grout using any grout sponge or damp cloth.
    • After that, you can mop all area using the fresh water to get rid any of remaining product.

    Product Analysis Zep Grout Cleaner

    This product contains acid so that it can’t be used for bleaching. It means that this product is very safe if you want to use it for any colored grout. It also doesn’t contain any overpowering aroma so that it is quite pleasant to use.

    Zep grout cleaner and whitener is also considered as a strong cleaning product just like any other chemical product, you need to handle it with extra care. If you want to apply the product, make sure that you have enough ventilation and keep in mind to have some breaks so that you will not exert yourself.

    People who have used this product mostly give positive comments or reviews. They simply like this product because it is easy to use. You just need to pour the product and then wipe it off. The cleaning result is also satisfying. So, do you want to try it?

    The Best Zep Grout Cleaner Reviews

    Originally posted 2021-09-18 03:07:00.

  • Different Types of Porch Railings

    Different Types of Porch Railings

    Before you buy railing for your house, you may want to know different materials of the railings.

    Here are some details of them, including the advantages and disadvantages.

    In addition, you may also need to know a few simple tips to choose the design front porch, here.

    DIFFERENT TYPES OF PORCH RAILINGS

    1. Wood Railing

    The first choice for you is wood railing. It is the classical option for many years. The advantage of this wood railing is the relatively cheap price.

    Read also: How to Choose Inexpensive Porch Railing Ideas

    Wood material could also fit any style of house and any railing style. You could also paint and craft the wood according to your taste.

    Even you could bring your favorite scenery to your house. However, choosing this railing means constant maintenance.

    Wood has the potential to break-down because of the temperature differences. If you stay in an area with high rain and blazing hot sun, then this wood railing is not recommended.

    The extreme temperature difference will make the breaking down process goes faster. It is good to get cheaper price, but you may also want to consider the reparation cost after three to five years of installation.

    If after careful calculation you spend more money, you may want to take a look at the other options.

    Wood railing for porch
    Wood porch railing designs, Image: westernspindle.com

    2. Aluminum Railing

    The second option available is aluminum railing. This railing is slowly raising as it gives the future vibes.

    Aluminum material is the most durable one among the others. It also has the lowest maintenance cost.

    Unlike wood railing, the aluminum is not vulnerable under different seasons, even the extreme one.  Once you have installed the railing, you may not need to replace or reinstall it.

    Related post: Great Tips on How to Decorate a Small Front Porch

    When you go to the store, choose the aluminum that does not rust easily. You may also find various colors, as it is painted beforehand. The price of the aluminum is competitive, but surely higher than a wood railing.

    You can also design a lot of styles by using the aluminum materials. The disadvantage of choosing this durable material is its size. It is quite big, resulting in several limitation for customized style.

    Aluminum front porch railing
    Image: coolanz.com

    3. Vinyl Railing

    This is another option for low maintenance railing. Constructed from high quality PVC, you will have less worries about UV discoloration. Vinyl railing is protected by the high impact stabilizer. There are four available colors to choose.

    Read also: Simple Front Porch Designs Tips

    When purchasing the railing, be careful of low-quality product. The best quality product should have thick walls. It will allow you to add no iron as the supporting materials.

    You may also do not want to have the recycled product. It does not work well under certain circumstances and may be harmful to the environment.

    Vinyl porch railing designs
    Image: eprivacylink.com

    4. Steel or Iron Railing

    This railing is the easiest to decorate. There is no limit to your imagination and creativity if you work with steel or iron railing.

    However, you cannot forget that steel is closely related to rust. Make sure you add extra protection to the steel to prevent rust. The houses near the sea or with high rain season may want to skip this railing option.

    Front porch iron railing ideas
    Front porch iron railing ideas

    There are so many options for your house’s railings. Before you choose the materials, the above information may put into your consideration. Perfect railing will be the beautiful ornament for your house.

    Read also: Best Porch Ceiling Material Options

    Most popular different types of porch railings

    Originally posted 2021-09-18 02:19:00.

  • Bluestone Table Care, Cleaning, and other Tips

    Bluestone Table Care, Cleaning, and other Tips

    Bluestone table is probably one of the most durable tables you can have.

    However being made of bluestones, this table has porous surface which requires immediate stain removal and careful care to keep the color and to prevent damage to the table.

    If you are still novice in this thing, you are reading the right guide.

    Read also:

    How to Protect Wood Table Surface from Hot Materials. 

    BLUESTONE TABLE CARE, CLEANING, AND OTHER TIPS

    How to Clean the Bluestone Table

    There are several ways you can apply in order to clean the table. You can follow the direction below in the same order.

    #1 First

    To clean debris, dust, and dirt, use a soft and dry cloth and wipe the table surface. Make sure you do it slowly to prevent scratch, and thoroughly so it is perfectly clean later.

    This dry step is necessary to do at least once every day to prevent debris and dust from piling up.

    #2 Second

    To remove fresh stains and spills, you are going to need to use a dampen cloth. Use a clean and soft cloth and damp it into the water. Use the wet cloth to wipe your table surface.

    Read also: How To Protect Wood Table Surface From Hot Materials

    It is recommended to do this as soon as you get the stains or spills. It prevents them from being absorbed into the stones and leave permanent marks.

    #3 Third

    For weekly care, you are going to need to use additional help. Mix four drops of mild dishwashing solution with one gallon of clean water. Take a soft and clean cloth and damp it into the mixture.

    Wring the excessive moisture and use the cloth to wipe out your table. It is effective to remove staying debris and the odors sticks on your bluestone table.

    #4 Fourth

    To remove moisture from your table surface, take a soft and clean cloth and damp it in water. Use the cloth to wipe the table then immediately wipe the table with dry and soft clean cloth. This will prevent lingering moisture that can damage the coloring.

    Read also: How to Clean Bluestone Table in One Touch Only

    Dining bluestone table and chairs set
    Image: furnituredealer.net

    Additional BlueStone Table Care and Tips

    In addition to those care steps above, you also need to pay attention on the following factors. It helps in preventing further damage and discoloring on your bluestone table.

    1. Immediately clean stains and spills so it doesn’t leave permanent stains or cause discoloring.
    2. Never use detergent or soaps with harsh formula. Use the mild one if you want to or prefer for a solution specially formulated to maintain bluestone surface.
    3. Never put things with excessive heat on your bluestone table surface. This will damage the smooth surface not to mention change on the color and patterns over time.
    4. Never drag the table. Instead, lift the table from both ends to move it around.
    5. Don’t use too heavy and sharp objects on the bluestone surface. If it is get chipped, keep the pieces and give it to professional for some fixing.

    In short, it isn’t very complicated to maintain and care the bluestone table. If you are a new owner, the guide above will help you out. Read carefully and apply as instructed to clean and maintain it without causing additional issues. Good luck.

    Related Post: How to Clean Concrete Table Top that Easy to Follow

    Bluestone Table Care, Cleaning, and other Tips

    Originally posted 2021-09-09 01:27:00.

  • How to Design Large Kitchen Island with Seating for 4

    How to Design Large Kitchen Island with Seating for 4

    Having a large-sized kitchen must be everyone’s dream.

    However, for those who don’t know how to design or remodel their kitchen island, it will mostly leave them to confusion.

    So, it is really important for you to notice that designing a kitchen island with seating should pay attention to these guidelines and tips.

    Check out these following explanations for further information.

    HOW TO DESIGN LARGE KITCHEN ISLAND WITH SEATING FOR 4

    1. Add More Counter Space

    This is the first thing you should consider, which is increasing the amount of counter space in the kitchen.

    Adding or increasing counter space in your kitchen, especially for you who have large-sized kitchen are very beneficial, such as there is more space for meal preparation, there could be multiple chefs or cooks, and the unused counter spaces can be used as an eating area.

    Four seating on the island should eat enough space and making sure there is enough space for the counter is wise.

    Read also, our article about Small Kitchen Island with Sink and Dishwasher.

    Large Kitchen Island with Seating for 4 Design Ideas
    Image: bhg.com

    2. Mind Your Seating Position

    If you are planning to design a kitchen island that contains four seating, then it can be done in your large-sized kitchen island.

    However, this is also possible on smaller kitchen as long as you mind the position. Considering that people will eat while sitting on these seats, provide some space for the elbow. The front part of the island is always wise spot to choose.

    However, both front and sides of the island are always wise as well for rectangular island. One thing to note, you need to consider your island free space as well if you use the sides of it for seating space.

    Read also: Guidelines for Small Kitchen Island with Sink and Dishwasher

    3. Add Appliances

    One of the ways to spread the workflow throughout your kitchen island is to install appliances, such as stovetops or sinks into the surface of the island.

    However, you should be careful in installing these appliances because it can be tricky. So, you may want to pay attention to details, such as plumbing and ventilation.

    Installing these appliances also take extra space to in-cabinet pipes if you plan to install stovetops and mostly, it will be so pricey.

    The most important aspect is people safety while sitting on those seats. Don’t forget to deliver safety for the seating areas.

    Related article: How to Decorate A Large Dining Room Table

    4. Get More Storage

    It is recommended as well to add or create more storage to avoid kitchen clutter by using cupboards, shelves, and drawers. This is a really good idea if the appliances you have taken up a lot of cabinet room, so that the counter space will not look to plain.

    See also: Kitchen Island with Wine Storage

    If you are looking for a unique way to show off certain items, you can use open shelving to display cookbooks or other items. It also prevents people seating on the seats to see the clutters while eating.

    Brown large kitchen island with storage and seating

    5. Make It Multi-Level

    Don’t just stick to appliances, but you can also consider creating variation in the height of the island. It can be done in many ways, such as adding an appliance to one level like a stovetop or sink and create an eating area on the higher tier.

    It will make an efficiency of using the kitchen island while it delivers perfect environments for the four seats to dine and drink.

    Read also: Kitchen Island Design Ideas For Small Spaces

    Designing or remodeling large-sized kitchen island can be overwhelming sometimes, but you can actually use up the provided space to place kitchen’s furniture with your own creativity. These tips will hopefully help you to design your kitchen island to look better and even more beautiful.

    Other ideas for kitchen island:

    Originally posted 2021-09-08 05:16:00.

  • Flush Mount Fluorescent Kitchen Lighting Design Ideas

    Flush Mount Fluorescent Kitchen Lighting Design Ideas

    Flush mount lighting is one of the most common lighting that is used in the kitchen, especially low ceilings kitchen. It is fitted closely to the ceiling so it makes the ceilings look higher than the origin.

    There are many kinds of flush mount lighting because it is made from various materials. It has many styles and designs.

    Want to know more about flush mount lighting designs? Here are some variations of flush mount lighting.

    Read also: Kitchen Fluorescent Lighting Covers.

    MOST POPULAR FLUSH MOUNT LIGHTING DESIGN IDEAS

    1. Livingston Flush Mount Lighting

    It is an elegant flush mount lightning that can be installed in the kitchen, particularly above the dining table. It is made of steel so that it is durable.

    This lightning feature has a clear crystal inside that sparks when it is switched on. In order to install this lighting, you should prepare the screwdriver, wire stripper, and a knife. Livingston flush mount lighting is easily taken care of by wiping it with a dry cloth.

    Livingston Flush Mount Lighting

    2. Evergreen Light Flush Mount

    Evergreen light flush mount is categorized as industrial lamp. It is designed with a wire cage and exposed light bulbs. This light uses incandescent or LED bulb.

    However, if you want to have a modern kitchen, this light flush mount is not quite appropriate.

    Evergreen Light Flush Mount

    3. Lincoln Light Flush Mount

    It has a luxurious design. It needs two incandescent bulbs to produce warm lighting. The Lincoln light flush mount is designed with crystal tiled shade which makes it elegant.

    Therefore, it is very suitable for modern kitchen. It is made by using high-quality glass and metal. Besides, it is also durable.

    Read also: How to Make Contemporary Kitchen Design Here.

    This lightning is fitted on the center of the kitchen. Lincoln light flush mount does not need high maintenance because you can clean it by wiping it with dry cloth.

    Lincoln Light Flush Mount

    4. Ebsworth Flush Mount

    It is designed with gold finish and delicate frame which makes the light looks gorgeous. Ebsworth flush mount is made of metal.

    It requires the use of incandescent bulb. Different with other flush mount, this lighting needs a damp cloth to wipe it.

    Ebsworth Flush Mount

    5. Ingo Light Flush Mount

    It is another good choice for modern kitchen, Ingo light flush mount. It is made of cylindrical fabric and metal so that it is durable and sturdy.

    This lightning gives a beauty and elegance touches for the kitchen. It is well-placed in the center of the kitchen ceiling. It needs incandescent bulbs.

    Ingo light flush mount is dimmable which means that you can adjust the brightness of the room. It has downward light direction so it is very suitable for the ceiling.

    Related Post: Kitchen Cleaning Checklist.

    Ingo Light Flush Mount

    6. Cartwright Light Flush Mount

    This lightning is made of glass. The glass shade makes this lighting as an ideal choice for having comfortable room. The incandescent bulb is required for this lighting. It can be installed in some space of kitchen ceilings as well.

    Cartwright Light Flush Mount

    There are still many kinds of flush mount lighting. It depends on the material and the shape of the lamp. However, the function is all the same although each is suitable in different kitchen. After all, the use of light flush mount still depends on the kitchen itself and the need of the user.

    Originally posted 2021-08-30 12:41:00.

  • What are the Best Bedroom Furniture Brands (Top List)

    What are the Best Bedroom Furniture Brands (Top List)

    Finding the best bedroom furniture can be a tough job for homeowners. There are lots of brands that have their own signature furniture.

    When talking about which furniture brand is the best, then the answer is it depends since the best here can be very different from one how owner to another.

    However, you do not need to be worried and you can choose these 10 top brands when choosing the bedroom furniture.

    See also: Bedroom furniture ideas for small and large room

    1. Hooker Furniture

    Hooker furniture is one of the best brands when it comes to bedroom furniture. Hooker furniture has been established for nearly 100 years and it has become the leading brand in the country.

    This brand has been trusted by lots of homeowners since it gives a range of designs based on the nowadays trend. Not only do they give lots of designs, they also give the best quality of products at different prices.

    Hooker Bedroom Furniture Sets
    Hooker Bedroom Furniture Sets

    2. Bernhardt

    Bernhardt furniture is one of the popular brands that offers a soft and luxurious design. It has been established for more than 100 years and survive through a tough time by maintaining its high-quality products.

    Related post: Best Bedroom Furniture Ideas for Small or Large Space.

    This brand offers you with many elegant designs that are really focused on the little details, but with affordable price. By choosing this brand, you will have a different range of furniture with feminine and masculine touch for your bedroom that is different from the common design you found on the market.

    Bernhardt Bedroom Furniture Sets
    Bernhardt Bedroom Furniture Sets

    3. Liberty Furniture

    Liberty Furniture is a brand for homeowners who try to cut come budget in buying their bedroom furniture. Although this brand is relatively new, it is very popular since it offers you with a very affordable price as well as a range of designs.

    Talking about price, here the tips: How to Choose Cheap Bedroom Furniture.

    The designs by this brand are always up to date and come up with newer styles that suit the youngsters’ taste. When it comes to quality, of course, it will be very different from the previous brands, but you can customize your own style easily within this brand.

    Liberty Bedroom Furniture Sets
    Liberty Bedroom Furniture Sets

    4. Stanley Furniture

    For the homeowners who like the vintage style for their furniture, Stanley furniture is the best answer. Despite the fast changing design of furniture, Stanley furniture still maintains its traditional touch in creating every piece of their furniture.

    See also: Most Popular Rustic Bedroom Furniture Ideas.

    It does not mean that the furniture by Stanley furniture will look old and dull, but you can expect a modern furniture based on the current trends with a traditional touch. No wonder, this brand becomes the best brand among other brands for nearly 100 years since it offers you high-quality products that will last for a very long time.

    Stanley Bedroom Furniture Sets
    Stanley Bedroom Furniture Sets

    5. Craftique

    Craftique furniture is one of the well-known brands in America. This brand sells many furniture with the vintage style using mahogany. This brand is very popular among the high-class Americans since the quality of the furniture is the best.

    The unique design and the touch of the past can be felt clearly. Unfortunately, due to economy recess, this furniture brand closed in 2012. However, you can still buy some of its furniture through online stores.

    Craftique Bedroom Furniture Sets
    Craftique Bedroom Furniture Sets

    6. Copeland Furniture

    Copeland furniture is a furniture brand based in Vermont. It offers you many collections for your bedroom. Its signature is that all furniture in Copeland furniture is made from natural hardwoods. The hardwoods make it different from other furniture brands since the furniture from this brand will change its color in some years ahead.

    The color changing is not the bad one, but the color of the woods will deepen and it will give a warmer atmosphere to your bedroom.

    Read also: Most Popular Bedroom Wall Color Ideas.

    Copeland Bedroom Furniture Sets
    Copeland Bedroom Furniture Sets

    7. Broyhill Furniture

    Another old furniture brand that is also trusted by lots of homeowners is Broyhill furniture. This brand is committed to making elegant and high-quality products using solid wood that characterized American style.

    If you are choosing Broyhill furniture, you can easily match the theme of the furniture since it has many collections, not only for the bedroom but for the kitchen and other rooms as well. The products of this Broyhill furniture can be easily found in both local stores and online stores.

    Broyhill Bedroom Furniture Sets
    Broyhill Bedroom Furniture Sets

    8. Aspen Home

    Aspen home furniture is a brand with the age of 27 years and it is based in Phoenix. Aspen home furniture offers you many kinds of unique styles for your bedroom furniture with solid colors and solid construction made by high-quality mahogany.

    Related article: Purple Bedroom Ideas. 

    The designs of Aspen Home furniture is simple, yet very classic and everlasting. Having the bedroom furniture by Aspen Home furniture will give the room an elegant atmosphere, but at the same time, you will be relaxed by the choice of colors of the furniture itself.

    Aspen Bedroom Furniture Sets
    Aspen Bedroom Furniture Sets

    9. Baker Furniture

    If you are looking for the furniture with a handmade quality, Baker furniture is the best answer. Baker furniture has been established for more than 100 years and still preserving its original roots.

    This furniture brand offers you with the lots of unique furniture collections and many designs to choose that are originally made by artisans and master crafters from all around the world.

    Baker furniture has been trusted by lots of homeowners since the furniture has timeless designs and can survive for a long time. It is because Baker furniture is using high-quality materials as well as finest woods.

    Baker Bedroom Furniture Sets
    Baker Bedroom Furniture Sets

    10. Bassett

    The last best furniture brand that is affordable for all range of customers is Basset furniture. This brand has been established for more than 100 years and has created lots of designs that are suitable for a lifetime.

    The designs of Bassett furniture are very unique and you are given the privilege to customize the furniture based on your taste. Not only does the furniture give a statement to your bedroom, but you will also have a chance to own a rare piece of product here.

    Bassett Bedroom Furniture Sets
    Bassett Bedroom Furniture Sets

    Finding the best bedroom furniture brand means that you need to concern about the quality as well as the price. Or, you can go with the brands that give you more designs to explore.

    NICE IDEAS HOW TO CHOOSE BEST BEDROOM FURNITURE

    Originally posted 2021-08-30 09:57:00.

  • Amazing Tips on How to Clean a Bathroom Exhaust Fan in 10 Minutes

    Amazing Tips on How to Clean a Bathroom Exhaust Fan in 10 Minutes

    How can you notice whether your bathroom fan is working properly or not? When you finish taking a bath, do you notice that the mirror in your bathroom is foggy?

    When it happens, it indicates that your exhaust fan is not in a good condition. Don’t worry, there are some excellent tips that you can do to clean your bathroom fan.

    An exhaust fan installed in every bathroom is being vented out to the outside and it will be automatically running when you take a bath or shower.

    HOW TO CLEAN A BATHROOM EXHAUST FAN IN 10 MINUTES

    During the time, it is designed to get rid of excess humidity or moisture which can form mildew and mold in your bathroom. That’s why it is very significant to always keep your vent fan clean every day.

    Read also: How to Remove Mold from Bathroom Walls.

    If you left your vent fan to be neglected for so long, it will be resulted to your health issues. It is better to always check and clean your bathroom fan every six months. The dirt is going to accumulate on the cover and its motor as the air is being sucked up through the fan every day. Therefore, you have to clean the fan. By doing so, you can do a great job by removing the accumulated dirt before it becomes a serious problem.

    Related Post: Quick Simple Tips to Speed Clean Home in Few Minutes.

    Before cleaning your fan, prepare some tools and materials needed in the fan cleaning. The tools that you need to prepare are vacuum cleaner, screw driver, scrub brush and ladder. Choose a vacuum cleaner with a hose handle to clean the dust so that it won’t bring you hard time to clean. Then, the materials needed for cleaning your fan are soap and water.

    If you have already got all tools and materials with you, let’s start cleaning your bathroom vent fan. Here are some amazing tips that you can do:

    How to clean a bathroom exhaust fan just in 10 minutes

    1. Make Sure to Turn Off the Vent Fan Power

    Before doing anything else, turn off the fan power to make it stop working until you finish the cleaning process. Generally, most fan models have the power switch installed behind the cover. You just need to open the cover and turn off the switch. Nonetheless, you can also temporarily turn off the bathroom breaker, just to be safe.

    2. Clean the Visible Dirt

    To prevent dirt falling onto the floor inside your bathroom when you try to get rid of the cover of the fan, you can first vacuum the visible dirt accumulated in the cover. By doing so, you will save more time.

    Related Post: Bathroom Vanity Ideas.

    3. Remove the Cover of the Fan 

    There are two types of the cover. One which has screw on it and one which has tiny metal wires. Check the cover on your bathroom fan. Gently pull the cover down on you. This cover is generally being held by some screws or tiny metal wires which make it to be away for about 2 inches but it won’t be completely off.

    If it is attached by two tiny metal wires, usually in two opposite directions, you just need to squeeze them in order to make them off of the ceiling completely. On the other hands, if the cover is attached by some screws, you then need to unscrew them.

    4. Remove the Fan  

    Unscrew the fan from its assembly and remove it gently. Don’t drop your fan or hit it to the fan pipes. The broken fan blades will result to lauder and less effective fan. So, be careful!

    5. Clean the Cover and the Fan 

    First of all, you can vacuum all parts of the fan and the cover thoroughly. Then, you can wipe them with a thin cloth which has been soaked into soapy water. You can just put the cover in your bathroom sink soaked with soapy water for a while. But, wipe the fan by yourself with a thin clothe soaked in soapy water. Do it repeatedly two or three times to make sure that all the dirt have been wiped off.

    6. Clean the Vent Pipe 

    You can use a brush attached on the vacuum to clean the dirt covering the fan pipe. For the part that can’t be reached by the vacuum, you can clean it manually with the scrub brush.

    7. Clean the External Vent Port 

    You can clean the external port of your bathroom fan later on after you finish cleaning the internal part. But, you need to remember that it is also necessary to find the external vent port and clean it. Use the vacuum and the damped cloth to clean it.

    8. Clean the Motor Housing 

    If your fan housing has some kind of plug, make sure not to expose it with water as it will cause an electrocution or shock on the fan when you reinstall it. Just vacuum it and use dry cloth to help you wipe off of the excessive dust.

    9. Reinstall the Fan

    After the fan is completely dry and clean, you can reinstall in on to the fan motor. Don’t forget not to bump it into the pipe. Tighten the fan with the screws. Then, try to spin the fan for a few times to make sure that is doesn’t stroke against anything.

    10. Turn On the Fan Power

    After the fan is safely installed in place, turn on the fan power or bathroom breaker back. When the power is already on, remember that the fan is now back to become dangerous. So, don’t try to clean or wipe anything on it.

    11. Reinstall the Cover of the Fan

    Before reinstalling its cover, check if it is already dry and clean. Plug in the cover into the ceiling by screwing it back or put the metal wires in position. Gently push the cover to the ceiling. Turn on the fan. It should be quieter and flowing more air than before.

    Read also: How to Clean Bathroom Faucets Gold?

    So, it’s an easy task to do, right? You also don’t need lots of time in doing the work. All tips can be finished within 10 minutes. When your vent fan is clean, you can minimize the bathroom odors and also prevent mildew and mold to form. You can also maintain your health by doing so.

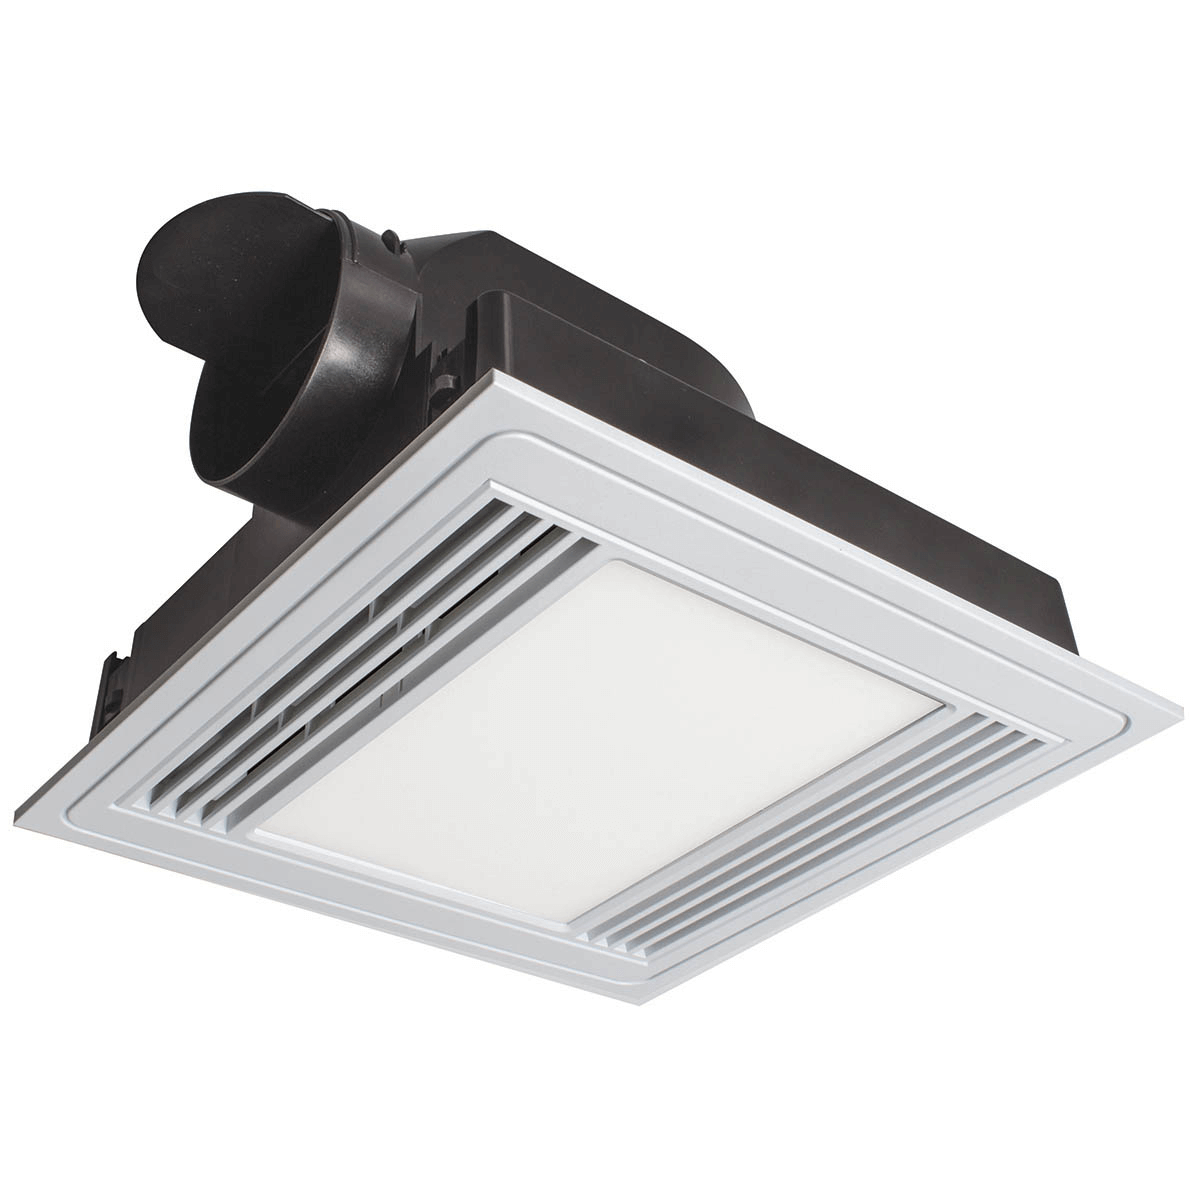
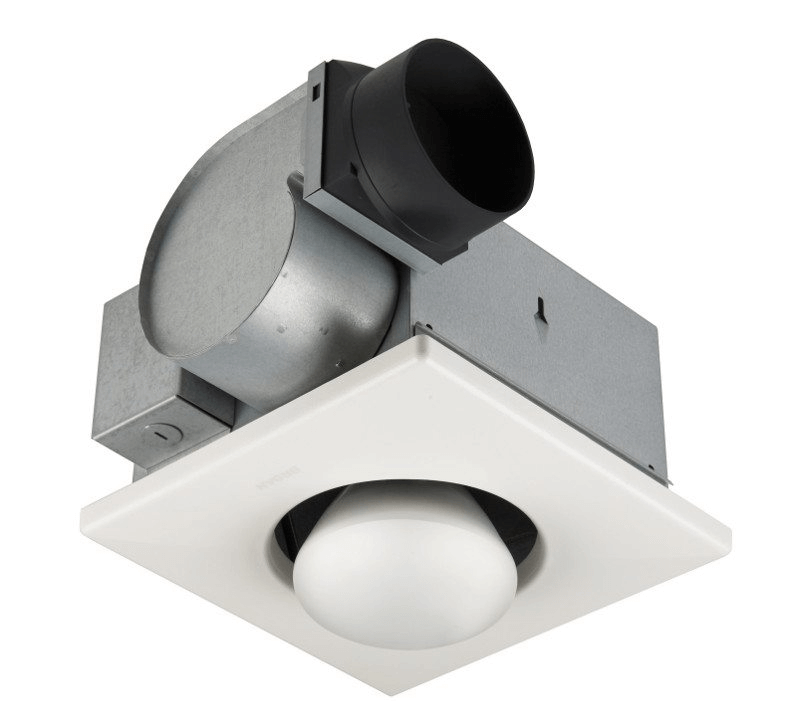
    Most popular bathroom exhaust fan types:

    Originally posted 2021-08-28 04:12:00.

  • Best Porch Ceiling Material Options

    Best Porch Ceiling Material Options

    When it comes to installing porch ceiling, then you should have been thinking what the best of porch ceiling materials.

    There are indeed so many materials used to be the materials of porch ceiling.

    Therefore, if you find difficulty and even hard time to decide what the best for you, here are some famous porch ceiling materials you can choose.

    Read also: Screened In Porch Design Ideas

    BEST PORCH CEILING MATERIAL OPTIONS

    1. Tongue and Groove

    The first choice falls to Tongue and Groove. This material perhaps becomes the most beautiful of all ceiling materials.

    The reason is because Tongue and Groove is made of a variety of woods, and the material can be custom made according to your preference, besides it looks so awesome and fantastic. Normally, this material is already stained or painted.

    Related post: How to Install Porch Ceiling Panels

    2. Plywood

    The next porch ceiling material is Plywood. This material is also well-known choice for porch ceiling because Plywood is the most typical ceiling covering.

    To cover outdoor porch ceiling, then it is recommended to install a quality exterior grade plywood because it is durable or susceptible to moisture. Normally, Plywood material can be painted, so you can choose your color preference.

    See also: How to Install Outdoor Porch Ceiling Fans

    3. Composite

    Composite material is the next material for your porch ceiling. If you prefer non-wooden material, then Composite is the perfect choice for you. This material is made to be durable to mold.

    Read also: 6 Tips on How to Remove Mold from Hardwood Floors

    So, any mold that grows in the corners of the porch ceiling using this material cannot penetrate easily and you can wash it off effortlessly. Moreover, this material is smooth and designed for soffits and ceilings.

    4. Plastic Bead Board

    From its appearance, Plastic Bead Board looks like wood and also composite. However, it isn’t both of them. Because of its similarity to both wood and composite, people often be fooled if they are not selective.

    However, fear not because you can count on this material. This material is virtually maintenance-free, meaning you don’t have to periodically maintain this material.

    Read also: How to Install Your Own Porch Ceiling Lights

    5. Bead Board

    Bead Board is another type of porch ceiling material that is common to homeowners. This material can be easily installed over plywood.

    You can apply this material directly to exposed joists. Besides, this material is easy to be stained or painted as well as giving warmth to your porch.

    Related post: Porch Floor Paint Color Ideas

    6. PVC

    The last porch ceiling material is PVC. This material is solid core can withstand to the most sever weather conditions and this is a perfect material for coastal or beach porch.

    Moreover, this material is incredibly stable to minimize expansion. PVC material comes in a variety of colors, besides it has reversible edges where you can have v-groove or bead designs.

    Read also: Simple Front Porch Designs Tips

    There are several products available on the market that are well-known, such as Variform and Azek.

    There are many choices in stores if you want to install porch ceiling. The recommended porch ceilings above are the well-known materials the homeowners usually use for their porch ceiling.

    So, don’t hesitate to choice among those materials because they are quality and of course have awesome look.

    Best Porch Ceiling Material Options:

    Originally posted 2021-08-15 00:47:00.

  • How to Decorate Living Room for Birthday Party on Budget

    How to Decorate Living Room for Birthday Party on Budget

    You wake up in the morning and the marked date on your calendar. It is your family member’s birthday!

    Are you going to be busy the next days? Do not give up and call a party planner yet.

    Many things could be done by yourself and they are cheap, too.

    Take a look at the simple and inspirational ideas below.

    Read also: How to Decorate Birthday Party Room with Balloons?

    1. Cake Bunting

    This is a must have item in a birthday. In the blink of an eye, regular dessert table could be a spectacular one.

    Many website provides free for download bunting template with a bunch of options: chalkboard, polka-dot, stripes, etc. Download the template that suits the birthday theme.

    Print and cut them following the lines or the instruction. Attach the bunting on the twine or string. Take the string with similar tone for more cohesive arrangement. If you want to set the theme as lovely and bright, pick vivid color for the string.

    HOW TO DECORATE BIRTHDAY PARTY ON BUDGET

    2. Colorful Backdrop

    A birthday is not complete without a wise saying or a sincere wish. Write down your personal messages on a piece of paper. Stuck? Grab one from the internet. You will need to buy some colorful toilet paper. Make a circle shape from the papers.

    Choose an empty wall in the room and do quick estimation for the size of your letters. Scatter the colorful circles to form your birthday wishes. If you want more accent, try to cut the paper into star or heart shapes.

    See also: Know How To Decorate Birthday Party Room with Balloons

    Living Room for Birthday Party
    Image: younghouselove.com

    3. Popsicle Runner

    A gorgeous cake deserves a radiant runner on the table. Instead of buying a new table cloth, arrange some popsicles in zigzag form so the final product will resemble thorns. Smudge bright red, yellow, green and blue with a sponge to the runner.

    Your hand print will do, too. If you do not want the dirty hands, splash the colors using the brush. Another way to color it is by letting the paint drops and creates its own art. This popsicle runner will be a great base for the cake or treats.

    Read also: 7 Simple Tips to Decorate a Small Living Room

    4. A-door-able Streamers

    Ding dong! The door bell rings. Welcome the guests from the moment they step into the house with festive streamers. You can buy one in the store. They are available in many colors. Put one of each color into your shopping bag. If the price is quite high, you can also use toilet paper.

    Just pick either one that fits to your budget. Streamers will form fringes at the bottom. Thus, it will look like a fringe curtain. Apply painter’s tape or double tape to glue the curtain to the wall. This method also works with the toilet paper.

    Read also: Screened In Porch Decorating Ideas on a Budget

    5. Party Garland

    Your living room will be lovelier with a garland. Since it is a birthday party, do not forget to give a party feel to the garland. The old Christmas decoration could lend you a big hand with this. Go a little bit creative with wrap paper.

    Take one and divide them into two pieces. Glue one on the string and make tiny fringes using a scissor.  Alternating the wrap paper pattern will make better garland. Hang the finished product on the wall.

    A birthday party is one of the memorable celebration for the person. You want to make an unforgettable party for your loved one. Never think that unforgettable is equal to expensive party. A humble anniversary in a marvelous living room could be an option, too. Make the decorations above and you will have your amazing party.

    Birthday party theme for girl with purple

    Originally posted 2021-08-14 04:52:00.